The most fashionable request on the topic of lighting in an apartment is “How to install LED strips for ceiling lighting.” Every year, the demand for LED lighting is growing steadily. What is this, fashion trends or common sense?
LEDs have a number of advantages over other lighting sources:
- Optimal spectrum (as close as possible to daylight);
- ability to choose colors;
- possibility of zone lighting;
- reduces energy costs;
- high service life.
Ceiling lighting can be used as primary, additional (night) and decorative lighting.
If LEDs serve as the main lighting, it is necessary to comply with sanitary standards so as not to harm your health.
The required illumination of a room depends on its purpose. The optimal parameters according to SNiP are shown in the table below.
Required room illumination, depending on its purpose
Knowing the required lighting, you need to select the LED strip and power driver.
The most popular are LED strips based on SMD 3528 and SMD 5050 modules. Detailed technical characteristics of these LEDs can be found here.
Both options suit us. SMD 5050 will require a shorter length (but is more expensive) due to its increased brightness. Let's look at the calculation using an example.
What it is?
A modern strip with LEDs is a functional lighting device consisting of many diode lamps. The basis of this design has an adhesive surface, which is initially protected by a film. It contains diodes, additional elements, and a contact pad. In order to ensure uniform illumination, the LEDs are placed at an equal distance from one another. Some types of such devices are attached to the ceiling with plastic brackets.
LED strip is quite flexible and is usually sold in reels, which eliminates the formation of creases. It is considered an auxiliary lighting, but the power of such a device (up to 25 W per 1 meter) often allows it to replace the main central lighting.
Important! The uniqueness of the LED strip lies in its high efficiency: the energy consumption of a ten-meter section is less than that of an ordinary incandescent light bulb.
To ensure uniform lighting in a room, light sources are placed at the same distance from each other Source prosvetodiod.ru
Options for creating backlight
To make ceilings with LED strip beautiful, you can use one of the following methods:
- Spot
. When using this option for creating lighting, the devices are placed in a special way so that they emit light directly downwards. The most popular and frequently encountered example of spot lighting is the “starry sky” design. - Directed
. In this case, the tape must be installed in a special way on slopes. As a result of using this method of placing devices, they emit light along the ceiling surface. - Absent-minded
. This option is also called contour. To implement this, LEDs must form a continuous light strip on the ceiling. - Figured
. In this case, the devices are placed in special lampshades that are small in size. This solution allows you to create different lighting configurations.
Main varieties
These types of lamps are used in the production of strip lighting devices.
Tricolor
Another name is RGB strips. In these products, all diodes consist of different LEDs (green, blue, red). And the stripes themselves have four outputs: a common one and one for each shade. From all possible combinations of these colors, a rich range of colors is obtained.
Using a special controller, you can control three-color diode strips: set the required frequency of color changes, select one fixed shade.
Helpful information! High-tech diode strips are equipped with built-in Wi-fi. This allows you to configure them using the appropriate applications on your smartphone.
Strips with RGB lamps can withstand voltages of 12 and 24 V: this is important to consider when choosing a power supply Source dekoriko.ru
Sealed
Protected tapes with diodes are extremely popular because they are characterized by high wear resistance and long service life. These products are also called waterproof or moisture-proof. The tightness of such devices is achieved by a silicone shell that completely frames the elements.
Sealed LED strips function perfectly outdoors, as well as in water. They are used for lighting aquariums and swimming pools.
The sealed tape is protected from external mechanical influences, dust and moisture Source mbright.com.ua
Tools and consumables for installation
When installing an LED strip with your own hands, you need a certain set of tools and consumables:
- To cut and assemble the tape into a full-fledged lamp:
- Scissors or wire cutters for cable products.
Cable cutters
- Tape measure for measuring the required length of the cut.
Roulette
- Permanent marker for marking cutting.
Permanent marker
- Construction knife with a retractable blade for stripping contacts from silicone braiding.
Construction knife
- Electrical tape for reliable protection of the free end of the tape after cutting.
Insulating tape
- A section of cable with a plug, a step-down transformer and a removable contact for connecting the tape to the electrical network.
- To install the tape to the ceiling structure:
- When installing an element without the use of mechanical fasteners, use double-sided adhesive tape. To ensure that the product stays in place for a long time, you should choose only high-quality products from well-known brands, for example, 3M.
Double sided tape 3M
- With a mechanical fastening method, you will need special mounting loops made of plastic or metal with a landing groove dimension such that the entire tape fits into it.
- A set of self-tapping screws for secure fastening.
- Dowel nails for fixing fastening elements to the wall.
Dowel-nails
- A hammer drill for making holes in reinforced concrete structures or brickwork, depending on the location of installation of the product.
Hammer
- A screwdriver for tightening screws in LED strip holders.
Screwdriver
- A stepladder with dielectric inserts, or mounting scaffolding for easy work under the ceiling.
Ladder
- To connect electricity:
- Power cable of the required cross-section.
- Wire cutters and electrical tape mentioned above, or PVC heat shrink tubing to ensure a reliable seal on exposed cable sections.
Heat-shrink tubing
- Terminal boxes with crimp sockets for contact areas of cable cores.
Terminal box
- A circuit breaker in the panel, selected based on the total current in the connected circuit.
Automatic RCD
- Multimeter for determining the voltage and maximum short-circuit current, as well as the response time of the RCD.
Multimeter
All tools used must be in good working order and consumables must be of high quality to ensure long-term uninterrupted operation of the product.
Advantages
The considerable popularity of LED strips is easily explained by their extremely attractive appearance and many positive characteristics. Among the most important advantages of such devices are the following:
- allow you to update any room interior;
- create a unique, pleasant atmosphere in the room;
- characterized by a soft, directional glow with no flickering;
- attached directly to the ceiling;
- save energy consumption;
- serve for a long time - about 10 years;
- Numerous color varieties available;
- due to flexibility, they can easily take the desired shape;
- fireproof;
- do not emit harmful substances into the environment.
It is advisable to use LED strip to decorate any functional room, especially since its price is affordable. It is also important to note the simple installation of such lighting, which allows you to do it yourself, without the help of expensive specialists.
LED strips are very flexible and easily take the required shape Source 5watt.ua
Briefly about the main thing
Illuminating the ceiling with LED strip is an important step in creating a design solution when decorating a room. For correct installation, you must purchase the right products in accordance with the required protection class, luminous shade, and length. Installation must be carried out using special tools and consumables. LED strip can be installed in cornices, niches and on the back side of ceiling plinths. Fastening is done using double-sided adhesive tape or using mechanical clamps.
Criterias of choice
Before purchasing LED strip lighting, it is important to design the future lighting in the room. If such a device will serve as the main source of light, then all lamps are removed from the ceiling. Then high-power tapes are fixed to the ceiling area. To highlight the contours, an LED strip is attached along the entire perimeter of the niches. As a result, diffused light is created and the room visually enlarges.
In order to select a tape with diodes properly, and not get lost in the huge assortment, you should decide in advance on the desired shade of light, the power of the device, as well as the type of its fastening. In addition, it is worth taking into account all the nuances of the design idea.
Additionally, you need to focus on the color of the substrate. The latter should be unnoticeable. Usually it is bought for a ceiling background. Alternatively, the base can be brown, grayish, transparent, but not always white.
LED lighting can be used both as the main lighting in the room and additional Source stroy-podskazka.ru
Shade of glow
All LED ceiling strips are divided into two groups:
- monochrome;
- colored.
The first ones shine in only one color. In addition, they emit infrared and ultraviolet light. The latter have built-in diodes that can alternately or simultaneously glow in different colors. Additional capabilities of devices affect the cost of the device: options that allow you to switch the glow will cost much more.
The most common and affordable are plain ribbons with white crystals; for blue, green and red colors you will have to pay more Source prosvetodiod.ru
Footage
The required length of the LED strip depends on the perimeter of the ceiling area that you plan to cover. You cannot buy it at random, since LEDs are characterized by a significant glow intensity. If the room is small, the light will be too strong. Typically, a total value of 11 W replaces a regular incandescent light bulb (about 100 W).
To select the illumination level, the footage of the illuminated area is measured using a tape measure. Then the resulting number is multiplied by the power of 1 meter of strip. This value will help you choose the right power supply or controller if you plan to purchase a multi-color strip for finishing the ceiling.
Density and power
When a very bright backlight is required, it is worth buying products with a small distance between the diodes. As a result, electricity consumption will be significantly greater than that of strips with bulbs more distant from one another.
Sometimes it is planned in advance to use the LED strip only as a decorative element. Then, to decorate the ceiling space, you should buy a strip, 1 m of which contains 40-60 pieces of LEDs. For the main lighting you will need a product that contains about 120-230 LEDs per meter.
Attention! For spacious rooms, it is important to buy wide ribbons, since a narrow option is often lost on a huge ceiling.
To calculate the power for a specific tape, the indicator from the far right column must be multiplied by the entire footage Source electricvdele.ru
Studying the board
The abbreviation SMD, present on a strip lighting device, means: the device is mounted on a surface. Four numbers next to the letters are the length and width of the diode, for example, 5050 (5 x 5 mm). As the size of the LEDs increases, as well as the density of their arrangement, the brightness of the glow increases.
Protection class
LED products are also divided by protection class. This parameter determines the resistance of lamps to the influence of moisture, dust, and other undesirable external factors. It is usually indicated on the product, designated IP.
IP20 – light bulbs are intended for indoor installation; they do not have additional sealing.
IP65 – diode strips can be used to illuminate areas in contact with water (kitchen apron or sink, aquarium). Such devices are allowed to be installed in buildings and on the street.
IP68 – lighting fixtures are completely insulated and can be placed under water.
Characteristics of LED strips
For ease of calculation, we have compiled comparative tables of several popular types of SMD tapes.
| Characteristics of LED strips | ||||
| Tape type | Diodes per meter | Power P, W/m | Voltage U, V | Brightness, Lm/m |
| SMD 3528 | 60 | 4,8 | 12 | 240 |
| 120 | 9,6 | 12 | 440 | |
| 240 | 19,2 | 12 | 880 | |
| SMD 5050 | 60 | 12 | 12 | 800 |
| 120 | 24 | 12 | 1600 | |
Be sure to pay attention to the country of manufacture. Brightness values may vary significantly among different manufacturers.
Let's take the popular SMD 3528 (neutral white) 60 pcs/m as an example.
| China | Taiwan | Europe | |
| Brightness, lm/m.p | 240 | 380-420 | Up to 500 |
| Power, W | 4,8 | 4,8 | 4,8 |
Chinese diodes are 1.5 times dimmer than Taiwanese ones and 2 times weaker than European products. Many will argue that they cost 4-5 times less than the “European” ones. You can’t argue with this, but the price of a normal driver for a strip will handle 10 meters of super-budget LEDs.
To make a table lamp, this is a completely decent option, but for lighting an apartment, buying a child from heaven is simply not profitable.
Design
Decorating the ceiling space with LED strip is done differently in each case. Much depends on the design of the ceiling, the presence of projections, the type of lamps purchased, as well as personal wishes. Such lighting can be placed around the perimeter, made into a decorative element of multi-level systems, and used to accentuate the design.
An LED strip hidden in a niche in the suspended ceiling favorably emphasizes the required area. Therefore, it is permissible to use it for the purpose of zoning a room. For example, in a similar way it is easy to highlight the dining area in the hall if it is combined with the dining room.
An LED strip hidden inside the ceiling structure allows you to create accents in the room Source roomester.ru
The LED illumination of curly lines on the ceiling looks attractive. In this way, plain coatings and stretch ceiling structures with patterns are decorated. The use of a diode strip along the edges of the image gives it volume. Successful lighting of prints improves their appearance and adds the necessary mood to the interior. LED lighting makes the ceiling visually wider and a little lighter.
When installing lighting strips with diodes, it is important to take into account the texture of the ceiling fabric. As a rule, the light emanating from LED strips is reflected in gloss, making the room visually more spacious. This is important for rooms with small windows or when they face north. When the LEDs are directed upwards, a soft light is created; in the case of side-mounted strips, a directed light flux is observed.
The use of LED strip improves the appearance of a plain ceiling and helps create comfort indoors Source roomester.ru
Useful tips
Before you start installing the LED strip on the ceiling on your own, it is recommended that you familiarize yourself with the valuable recommendations of specialists:
- It is very important to draw up a plan in advance, which takes into account the slightest nuances of the upcoming work.
- It is worth purchasing a PVC corner in advance for fixing in a niche. It is often used because the adhesive strip tends to peel off after a while.
- After removing the protective layer, the tape must be glued quickly: it must adhere well to the plane.
- The LED strip can only be cut along the lines specified by the manufacturer.
- Fastening more than three meters of tape together is unacceptable. Then the conductive path may be damaged (due to high voltage). If the strip is excessively long, then it must be connected to the controller with wiring.
- When connecting the power supply, polarity must be strictly observed. When connecting a connector to the circuit, recommendations for its connection should be found on the packaging material.
- Soldering should be done carefully so as not to damage the PVC base. High temperatures are not desirable for LEDs.
- It is better to hide the heads of the screws in the cornices: paint the heads with acrylic paint or putty.
- If one strip is mounted, then the connection is made directly, otherwise - in parallel. In the latter case, if a separate section breaks down, the rest will continue to function.
- Difficulties with gluing can be easily solved using double-sided tape.
- The distance between different levels of the ceiling structure should be the same. This will ensure the most even illumination.
With colored lighting it is difficult to do without a controller: it allows you to adjust the tone of the backlight Source remoo.ru
Examples of effective room lighting
The LED strip on the ceiling surface looks great. It is easy to choose for the interior in any color scheme, and the ceiling structure itself can have a different number of tiers with different shapes.
For example, flexible tape looks beautiful in a two-level system when the lower tier is made of stretched film fabric. The lines of a box of another level made of plasterboard can be made in a wavy and graceful shape. In this case, it would be appropriate to install spotlights that are built into the plasterboard base.
A beautiful decoration of the room will be LED lighting in the suspended ceiling, consisting of parts of the correct geometric shape.
Tapes attached to their bases will give them additional volume. When using this design solution, you can hang a chandelier made of chrome or shiny metal in the center of the ceiling surface. LED strips can be installed in rooms of any purpose. For example, if there is dark furniture in a light bedroom, blue lighting will look impressive against the background of a white two-level ceiling structure. A ceiling with a similar design will be in harmony with walls made in soft and pastel colors and richly colored furnishings.
Profile types for light lines
The profile is attached to the main ceiling using perforated corners.
It is not advisable to use hangers, since they are unlikely to provide sufficient structural rigidity.
If you have a fairly large drop in the canvas, then you can use wooden blocks as mortgages. The design will be more reliable.
The light line itself is assembled on a special profile, which has a harpoon fixation on both sides.
There are many options, here are the main manufacturers and varieties.
Electrical connection
To connect the backlight to electricity, you will need a power supply. It is needed to convert the alternating voltage of a stationary network of 220 V into a direct voltage of 12-24 V. To calculate how much power you need a power supply, you need to look at how much power the type of tape you choose consumes, and multiply this figure by the number of meters of required backlight. Be sure to add 30% for reliability, otherwise the unit will quickly burn out. The resulting number is the value of the required power for the power supply. The connection can be made either through special connectors, or through soldering (soldering iron temperature no more than 260 degrees and exposure no more than 10 seconds).
Self-connection of LED strip
Preparatory work
Before starting installation work, you should consider a number of circumstances:
- Exact quantity of materials.
- Type of lighting, taking into account the required brightness of light and the presence of decorative elements.
- Power unit. This element of the system must be selected taking into account the required voltage, power and humidity in the room.
Note! If you need to change lighting colors in the future, you will need a controller.
Before starting installation, it is recommended to prepare the surface. To do this, you need to degrease the coating with solvent or alcohol and remove all defects from the surface. You can start working immediately after the surface has completely dried.
To do the job you will need a set of tools:
- ladder or reliable table;
- wire cutters;
- electric soldering iron (with a power of at least 25 W) and lead-tin solder;
- tweezers;
- hacksaw;
- pencil or marker, ruler (square);
- electric drill.
Light lines in a square
When assembling luminous squares and rectangles from standard profiles from Flexi, this same square is pre-assembled on the floor.
Based on the measurements taken, cut four sections at a miter angle at 45 degrees.
Next, join them together. You can use nails bent at 90 degrees as guides.
Then firmly fix the structure at the corners with self-tapping screws.
Check the diagonals.
Next, this light square rises to the top and is fixed there at the corners.
The general principle of assembling the supporting frame is something like this. But still, let's look in detail at the simplest option in the form of one straight line from wall to wall.
Universal Profile Apply
Based on it, you can assemble four types of products:
- floating ceiling
- light lines
- floating lamp
- curtain rods
It fits easily with all other profiles. In this case, the screws in it are screwed into the technological cavity and do not end up in the visible light zone.
But most importantly, if your light line runs along the perimeter of the ceiling, you can easily adjust and set the width you need.
When assembling a floating line in the center of the room, two such universal profiles are combined into one with self-tapping screws.
And even here it is possible to adjust the width of the luminous line.
To create a floating backlight from 10cm and wider, you will already need a plastic insert.
With such a universal thing you can assemble quite complex figures.
Flexy profile
This manufacturer widely uses the PF 3645 or PF 6838 profile.
With its help, it is easy to divide the ceiling into sectors, or create rectangular structures.
You can choose a narrow or wide option for two ribbons.
The disadvantage is that it is quite problematic to create a high-quality light segment in the middle of the ceiling. Mainly used for wall-to-wall installations.
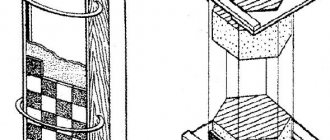
Homemade diffuser
The next thing you will need is foil. It is sold in baking rolls.
Unwind the roll and carefully crumple the foil over the entire area to get the most crumpled, rough structure possible.
To avoid accidentally making a hole with your nails, wear gloves.
After this, the foil needs to be glued onto a large piece of cardboard. Take it from under some TV box or other household appliance.
Just don't smooth out the foil when gluing it
It is very important to maintain the rough surface texture
In the end, you should end up with a square like this. The dimensions of the square must match the dimensions of the two corners prepared earlier.
Along the edges of this cardboard with foil, attach aluminum corners with tubes to bolts and nuts.
This will be a blank for the lamp body.
Power
- How to calculate LED lighting?
When selecting the total luminosity of light sources, you should be guided by the sanitary standards prescribed in SanPin 2.2.1/1278-03.
| Type of room | Recommended illumination under artificial lighting, lux |
| Living rooms, bedrooms, living rooms, kitchens, dining rooms | 150 |
| Children's room | 200 |
| Office, workshop | 300 |
| Hallway, bathroom, toilet | 50 |
The unit of measurement in the table I have given is lux, which corresponds to one lumen (unit of luminosity) per square meter of area. Luminosity in lumens is always indicated on the packaging of any LED lamp or lamp. Let's say, for a children's room with an area of 20 square meters, it is recommended to use light sources with a total luminosity of 20*200=4000 lumens.
Combined lighting for the nursery.
A caveat: the actual luminosity of light sources is often lower than declared. The reason is both the dishonesty of the manufacturer and light absorption by diffusers and lampshades (especially dusty ones). Therefore, when calculating, it is better to increase the obtained value by 20 - 30%.
Fabric stretching
It's time to stretch the canvas.
Please note that the harpoon in the wall and light profiles can go to different depths.
Start from the corners. Thread the canvas by slightly cutting off the corner of the harpoon, and stretch the ceiling.
In this case, you first insert the corner into the light profile, and then into the wall profile.
Next, the process is the same as when installing a conventional stretch ceiling.
If you only have one line of light, it will be two pieces of canvas. With two - three, etc.
After final tension, a diffuser is inserted into the light profile and voltage is applied to the tape.