Before we begin to tell you how our team and I carry out the finishing of houses from sip panels according to the “Budget Option”, I would like to remind you that the main priority in our project is the quality of the work performed, and therefore we need to make a reservation that the budget finishing of a house from Sip panels are not a flawed finish, it’s not just a job, it’s not a bad home decoration, it’s just a budget option.
In other words, we tried to select good materials at competitive prices. We also tried to minimize the work as much as possible, i.e. to make only those that are vital in houses made of sip panels, using technologies that do not require large investments in finishing and materials.
Finishing a vulture house is divided into stages:
- Drawing up a project and counting all materials;
- Preparatory work in houses made of sip panels;
- Rough finishing of a vulture house;
- Engineering communications in a house made of sip panels;
- Finishing of the vulture house;
- Carrying out special installation work;
Let's now understand in order exactly what points of work on finishing a house made of sip panels are included in each of these stages.
Stage No. 1. Drawing up a project and counting all materials
In order for us to understand what we will do, where exactly we will do it and, most importantly, what we will do it from, there is, perhaps, the most important component of the entire event for finishing a vulture house - this is drawing up a design project.
We will not call this work a full-fledged and complete design project for finishing a vulture house, since the budget finishing of a vulture house, however, like the “Standard finishing of a house from vulture panels”, is distinguished by the ease of coordination between us as performers of the work and the customer directly . There are very few agreements between us specifically on the budget option, because the customer has a very vague idea about rough materials, preparatory work, etc.
We give our customers a choice of only finishing materials: paint colors, wallpaper and their colors, ceramic tiles, laminate, finishing plumbing fixtures, etc. We give options, we offer a decent choice in the budget price range of all these materials. The customer selects them, and we calculate the total cost of the project. And draft materials, preparatory work at all stages in any of our proposals are invariably the same materials, the reliability of which we have been convinced of over the years of our work and are in no way ready to change them. Let’s say, if we work with “Giprok” plasterboard, then it doesn’t matter which of the options for working with us you choose - Budget, Standard or Individual option - in all these options we work exclusively with this material for finishing walls from sip panels, and this is not discussed, so there are no agreements. We do the same with electrical automation, heating pipes, etc.
Of course, in essence, you will have a design project for finishing a house made of sip panels with all the execution sheets, the selection of all finishing and rough materials, the location of finishing plumbing, the location of all electrical points, a kitchen design, etc., but we will consider that you will simply have a 3D visualization of the project with the selection of all materials.
As a result, according to the first stage, we can state that the following work items will be completed:
- Preparation of technical design.
- 3D visualization of finishing a house from sip panels.
- Selection of draft materials.
- Selection of finishing materials.
- Electrical project.
- Ventilation project.
- Water supply project.
- Water drainage (sewage) project.
All this work is done solely with the goal of completing the most important two points of any project for finishing a house made of sip panels:
Paragraph 1
Saving the customer's budget by calculating the entire budget initially, i.e. We first calculate how much it will cost to finish the entire house from sip panels, “dirty paper”, so to speak. If the cost of finishing the house exceeds the customer’s expectations, then we look for ways to optimize this project, modify something, go for even more budget-friendly materials, etc.
Point 2
We clearly and clearly know in advance what the contractor and the customer must ultimately do, i.e. we have the same opinion about what should happen in the end. This is a very important point in the relationship between the customer and the contractor. There are no more disagreements or situations that we imagined would happen one way but ended up being different.
I will repeat again to reinforce the material.
Any finishing of a house from sip panels by a team of craftsmen MOLODTSOOM.RF does not begin, is not calculated without an agreed project for finishing the house. As a result, you will definitely thank us for this stage of finishing.
Absolutely all work and materials will be calculated in advance, and you will not overpay a penny more than necessary.
Comprehensive interior finishing - saving you money
Comprehensive finishing work is beneficial not only to the customer, but also to our company. We create a single project, optimize transportation and overhead costs, and do all work on a single schedule.
Therefore, when combining work, we always offer a discount and additional bonuses: free installation of a shield or drain pipe.
Contact our specialist and ask him all the questions that you already have. Choose the form of communication: by email or phone. Leave your coordinates and we will contact you.
Stage No. 2. Preparatory work in houses made of sip panels
This is a very important stage before carrying out all work on finishing houses made of sip panels. Almost absolutely all finishing workers neglect this stage of work, because... they have no experience in finishing vulture houses and do not know the specifics of this technology. This stage of work directly determines how long your building will serve you. I was not mistaken, not your decoration of the house, but the house itself, as well as the comfortable and safe stay in it for you, your children and parents. Our team and I are extremely sensitive to the health and lives of our customers and therefore we always fulfill this item, no matter how much it increases the final cost of finishing the house.
“WE DO NOT PLAY WITH THE LIVES OF OUR CUSTOMERS, AND THEREFORE WE ALWAYS COMPLETE THIS STAGE AND UNDER ANY OF OUR OPTIONS”
It's no secret that a house made of sip panels is a frame house, or, more precisely, a frame-panel house. But I would now like to focus your attention on the frame. The frame is a wooden board. Size, pitch, etc. We won’t touch on it now. And we won’t touch on how correctly it was processed. We don’t know how she feels there, what humidity it is, etc. We just need to know that the board, due to its physical properties, has the ability to absorb moisture, get wet, swell and, as a result, rot, so protecting the frame from moisture is an invariable point that we carry out and be sure to record in our “Work Log” " Read how exactly this is done in our article “Protecting the frame of a house made of sip panels.” We protect not only the house itself from rotting, but also our health, because... It is extremely unsafe to breathe in a house where fungus lives.
Also, a very important point in the preparatory work in finishing a vulture house is taking care of the installation of a non-combustible layer. This item is simply necessary before carrying out installation work on rough electrical wiring. According to the PUE, all cables, even corrugated ones, must be laid only on a non-combustible base. Sip houses have a fire resistance class of -3, which means they are flammable foundations, which is why we use inexpensive, 9.5 mm thick plasterboard to protect our building from any fire. Drywall is mounted on the walls and ceiling to cover absolutely all places where electrical cables will subsequently be laid, as well as all beams and protruding wooden structures.
The second stage of work also includes soundproofing the ceiling between the first and second floors. The technology for carrying out this work is as follows. Basically, in houses made of sip panels, the floor consists of beams 200 mm high. We lay 150 mm thick mineral wool in this ceiling and leave an air gap of 50 mm for air convection, again to avoid any conditions for the appearance of fungus. Then we sew OSB-3 sheets from below, to which our non-combustible base is screwed to the ceiling.
Also, the sound insulation of the ceiling between the first and second floors is affected by laying gypsum fiber board on the floor of the second floor, but this is already in the rough work.
Also at this stage, the contours of individual rooms are closed. Sound insulation between rooms is carried out by laying mineral wool in frame walls, if any. OSB-3 is also mounted on frame walls in those places where it is planned to hang heavy equipment (for example, in a technical room, kitchen, etc.).
In addition, waterproofing of wet rooms is done: bathrooms, kitchens, technical rooms and vestibules. Those. those premises where water supply pipes may break. This is relevant for a vestibule because it is a room with a sharp change in temperature in winter.
Let's summarize the preparatory work for finishing a house made of sip panels:
- Vapor barrier of external walls at OSB joints.
- Hydro-vapor barrier of the corners of a house made of sip panels.
- Hydro-vapor barrier of the junction of the walls and floor of the house from sip panels.
- Waterproofing floors in wet areas.
- Installation of a non-combustible base on the walls.
- Installation of a non-combustible base on the ceiling.
- Soundproofing the ceiling between the first and second floors.
- Sound insulation of frame internal partitions.
- Installation of mortgages in frame internal partitions.
In addition, we nail down the assembly ladder in such a way that it is possible to carry out all the work on finishing the house from sip panels.
Wall decoration
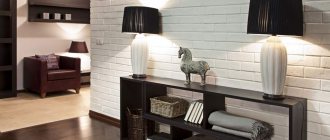
The walls inside the house are made of sip panels and finished in accordance with the purpose of the room and according to the tastes of the owners.
- The most widespread are wallpapering and painting walls. These finishing materials have a wide range of colors and are varied in texture.
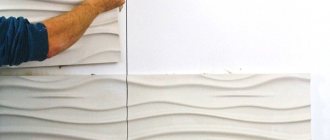
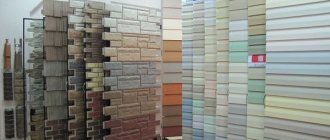
- Wall covering with panels, which can be made of artificial or natural materials, is popular.
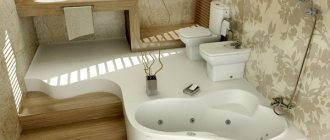
- Wet rooms are finished with ceramic tiles or plastic panels. Here the range of colors is also diverse, to suit every taste.
- Decorative plaster is also used for interior decoration in houses of this type.
- In one room it is quite acceptable to use a combination of two or more types of finishes.
To decorate walls and ceilings, you can use decorative elements such as stucco.
Stage No. 3. Rough finishing of the vulture house
This stage of finishing a vulture house is also very important. Not every master is familiar with the specifics of finishing vulture houses, so every year we ourselves are constantly improving and modifying it, so that even the budget decoration of your home will serve you for decades.
In fact, this stage comes down to just two points: installation of drywall on the walls and installation of gypsum fiber board on the floor.
But here, again, not everything is so simple; you must know the technology for installing drywall on a sip panel. Since it is not painted by any of the drywall manufacturers, everyone screws it up at random, and this is wrong. The spacing of the seams when installing drywall directly on a sip panel is just as important as on a metal frame. It is also important what kind of joints the sheets will have around the door and window openings, especially if you want to paint your trim.
In our budget version of finishing a house from sip panels, we make walls for wallpaper, which have additional reinforcement for the seams, but this does not mean that we need to neglect this difference.
One layer of 12.5 mm thick plasterboard is mounted on the walls
Naturally, this is in addition to a layer of non-combustible base. In essence, of course, there are two layers of drywall on the wall. One non-flammable layer of 9.5 mm and another one of 12.5 mm, which we call the first layer. In the same layer, a groove is made for laying the electrical cable, which at the same stage, after laying the cable, is sealed with gypsum. We use Rotbant from Knauf.
One layer of gypsum fiber board with a thickness of 10 mm is installed on the floor.
GVL installation is carried out absolutely over the entire floor area of the house, there are several reasons for this. The most important thing is that to lay ceramic tiles we need a base to which the tile adhesive will have excellent adhesion, and this also serves to protect the tiles from movements of the house itself. And for the rest of the rooms, we install gypsum fiber board on a sip panel in order to level the base with the tiles for laying the laminate, so that in the places where the tiles and laminate meet, we have the same height and do not create a step, a difference between different finishing materials, and this is also additional sound insulation floors and ceilings. Remember I mentioned this when I talked about soundproofing in preparatory work?
Rough work also includes the installation of false plasterboard walls on a frame to hide communications in bathrooms, in rooms for lifting electrical wires from the first floor to the second, as well as the installation of vertical boxes for the passage of ventilation pipes.
Ceramic tile
Previously, it was used exclusively in the bathroom, toilet, and kitchen. Now it’s easy to decorate a corridor, living room, bedroom and even a nursery with it. Factories engaged in the production of ceramics offer a huge variety of collections, each of them differs in tile sizes, performance characteristics, and design. If we talk about the latter, ceramic tiles can be stylized as:
- natural wood;
- natural stone;
- metal;
- concrete surface;
- skin;
- textile.
Monocolor is also popular in use, which can be combined with bright panels and decorative inserts, achieving an enviable aesthetics of the space. Mosaics are also in demand. It is made in variegated colors and monocolor, so it is very easy to decide on a suitable design. In kitchens, tiles that imitate brick are often used. It's modern, unusual, interesting.
The ceramics are laid using regular tile adhesive. Plastic crosses must be used to align the seams. But, there are tile collections that require the elements to be arranged end-to-end. Then the surface looks like a solid canvas, looks very colorful and sophisticated.
The good news is that specialized factories provide consumers with full-fledged collections of ceramics, including wall and floor elements. You will create a complete interior by decorating the space in the same style and harmony.
The popularity of ceramic tiles continues to increase. It performs well during operation, is easy to clean, and does not absorb dirt or foreign odors. Hygiene and environmental friendliness are key advantages. Ceramics are fireproof, do not deteriorate from water or high air temperatures, and do not fade in the sun.
When purchasing tiles, look at:
- size and shape;
- wear resistance;
- thickness;
- appointment;
- type: matte, glossy, lapped;
- design and colors.
Do not buy thick tiles for walls - they are heavy, which means installation may be difficult, and there will be excessive load on the wall. Due to the large mass, the tiles will hold worse. It’s easy to distinguish the wall-mounted type - there is a palm-shaped pictogram on the packaging.
Stage No. 4. Utilities in a house made of sip panels
Not a single house, regardless of the technology by which it is made, can do without utilities, be it a house made of sip panels, a classic frame house, made of brick, or built using any other technology. For comfortable living, we all need water, warmth, light, fresh air and all modern technologies for a comfortable stay in it.
What applies to the utilities of a vulture house?
- Well, well.
- Supplying water to the house. Water preparation.
- Distribution of water supply throughout the house. Organization of hot water supply at home.
- Installation of a septic tank. Organization of water disposal.
- Installation and distribution of sewerage throughout the house.
- Installation of ventilation.
- Heating installation.
- Electrical installation.
- Air conditioning installation.
So, let's figure out what kind of work is organized at our facilities and how.
Well, well
In fact, there are a lot of options for organizing water supply at home, so we are not considering a specific case, but simply saying that water should be in the house. This work is carried out by individual specialists. As a rule, they are found through neighbors.
In each village there is an organization or master who knows which option is most suitable for a given village. You can dig a well, drill a well, or you simply may have a centralized water supply, we will connect to any of these options, and also give advice on using the necessary equipment. But since these works can vary significantly in cost, this service is considered separately and falls into the category of special installation work.
Supplying water to the house. Water preparation
This point also applies to special installation work, since the water source can be located as far or close to the house as desired. And besides, the whole essence of the work lies precisely in unskilled work and comes down mainly to digging a trench for laying a pipe and backfilling with a sand cushion to prevent heaving of the earth and rupture of the pipe. As a rule, there are local diggers, and this work is given to them, or it is done by people who dig a well or drill a well.
Water preparation is also included in special work, since you first need to do a chemical analysis of the water, find out the content of metals, lime, etc. in it to make a proper cleaning system. Such work also varies greatly in price, and it is not included in the cost of the work.
Distribution of water supply throughout the house. Organization of hot water supply at home
Plumbing in a house is a very important component of any finishing work. And also work that requires high professionalism of the master. We distribute water in our sip panel houses exclusively with REHAU Stabil pipes. This is the most reliable metal-polymer pipe made of cross-linked polyethylene PEX-a, which will serve you for 50 years without complaints.
All pipelines are hidden behind false walls, i.e. Concealed installation of pipes is underway. The open parts of the water supply system during initial water treatment up to the collectors are made with polypropylene pipe from KALDE.
First, we install a shut-off valve so that you can shut off all the water supply to the house if such a need arises, then there is a riser with a penetration for the heating cable and the heating cable itself (it is needed to protect the water from freezing when lifting the pipe into the house, since the foundation in 95% of cases is screw and there is a negative temperature under the house in winter). Then there is protection against leaks, we always install it by default, since houses made of sip panels have a wooden frame, and if in the event of a leak, water gets to the load-bearing frame, fungus may develop. Therefore, our opinion is clear: for such protection to exist, moreover, the elimination of even minor damage from leakage will always cost more than the leakage protection system itself. We install hydrolock.
After protecting against leaks, we install a wash filter, usually a Haneywell. After this, we install a bypass and two outputs with pipes on the water treatment system, to which you will be able to connect your filters in the future. Then there is a division into a cold water comb and a branch to the water heater, after which there is a hot water comb. Our water is distributed through a collector system, in which each water outlet has its own pipe.
All pipes are laid in red and blue insulation, so that you can always distinguish hot water from cold, and also so that condensation does not form on the pipes and there is no temperature loss in the pipe. Hot water supply is organized using an electric heater with a power of 2 kW and a volume of 100 liters.
All equipment for water supply, water treatment, and heating must be located in the technical room, so when designing your house, we advise you not to neglect this room, otherwise we will have to cut off the lion's share of your bathroom for false walls, where we will hide all this equipment.
It would also not be amiss to say that we mainly organize toilets and sinks using installations, since this is the most modern method of installing rough plumbing in frame housing construction.
Installation of a septic tank. Organization of water disposal
Without this item it is impossible to imagine a modern house with amenities. Naturally, this work is also special installation work and is carried out by third parties. We will do all the sewerage wiring in your house and even organize outlets from the house, and the people who will install the septic tank will only have to connect it to our pipe outlet.
Installation and distribution of sewerage throughout the house.
This is perhaps the most responsible and difficult job in terms of the location of plumbing fixtures. Our technology for building houses from sip panels often gives us little room to maneuver sewer slopes; basically, sewerage is always installed under the ceiling of the floor below, and we do exactly the same with regard to the sewerage layout of the second floor. But the sewerage of the first floor always involves very long markings and calculation of slopes and turns; this is a very responsible job, since any mistake can lead to blockages, poor flushing of water, etc.
The material we chose for sewer pipes in houses made of sip panels is, naturally, plastic; the lightest and most durable pipe today is produced by the manufacturer Ostendorf, Germany. All sewer pipes must be covered with foamed polyethylene for sound insulation.
A sewer riser must be made, the upper outlet of which is led to the roof for air intake; drains from toilets with a diameter of 110 mm, sinks, drains of bathtubs and shower cabins of 50 mm, and drains from a washing machine of 32 mm are suitable for this riser. All condensate drains from the ventilation system are also connected to the sewer system through dry siphons.
All passages through the thermal circuit are organized through special vapor barrier membranes of penetrations.
Ventilation installation
Installation of ventilation in a house made of sip panels according to the budget option is done with plastic air ducts using forced air removal technology. In all bathrooms, toilet rooms, as well as in the kitchen exhaust area, air ducts are installed through which the exhaust air is removed. Forced motors for this in bathrooms and toilet rooms are ordinary exhaust fans, which are installed directly in the rooms, and in the kitchen this function is performed by the hood, which is located above the stove. It is mandatory to collect condensate through a dry siphon, which I mentioned above. Pipes must be thermally insulated.
Heating installation
With the installation of heating in a house made of sip panels according to the budget option, everything is simple. We install an electric convector under each window; to be more precise, we make sockets for these heaters under each window. These sockets specifically have separate groups of circuit breakers in the electrical panel; we specially make three of these groups, for each of the three phases, so that if one of the phases fails, the other two remain operational. This is very important in winter so that the house does not freeze. Naturally, no sockets from these groups are used for other needs, except for electric convectors.
Electrical installation
We approach the installation of electricity supply in houses made of sip panels with special care and diligence. We make the power supply as safe as possible for people to find.
It is no secret that houses made of sip panels belong to wooden houses and have a fire resistance class of 3. Therefore, there is a certain set of GOST and PUE rules for laying electrical wiring in wooden houses, which we have no right to neglect.
We only install automation from ABB, install only metal panels, use only GOST cables from Concord, cable cross-section for sockets is 2.5 mm, for lighting - 1.5 mm, for stoves - 4 mm. Whatever the option of your finishing - budget, standard or according to an individual project - you can always be sure that we have the same material for utilities, and it does not change; we do not allow any reduction in price in this category.
The electrics are laid along the ceiling in corrugation on a non-combustible base, and all junction boxes are located on the ceiling. Descents along the walls are laid with ordinary wire in a groove, which is selected from a sheet of drywall.
Electrical installation also includes the installation of potential equalization, in other words, the grounding of all metal objects associated with water (metal and cast iron bathtubs, water heaters, metal installation frames, etc.).
Electrical panel for a vulture house according to the budget option, see the photo below.
Air conditioning installation
Installation of air conditioners in the finishing of vulture houses according to the budget option has not yet been done in our practice precisely because of savings. Moreover, this is special installation work. And even in the standard version, not every customer performs such work in their home.
Roof laying
Roof panel fastening diagram
Building a roof in a panel house is very easy to do with your own hands. In addition to the fact that in this case there is no need to make lathing, the roofing cake itself also does not need to be assembled, because the sandwich panel is a ready-made element.
You just need to lay the sip panels on the rafters, secure them with self-tapping screws, and, leaving a small ventilation gap, cover them with a roof. Bituminous shingles and metal tiles are best suited.
In addition, if you have the means and can afford the services of a light crane, assemble the roof on the ground with your own hands, and then install it in place using a crane.
Stage No. 5. Finishing the house vulture
I would classify the work of finishing a vulture house as a responsible job rather than as an important or particularly necessary one. In most cases, before, when we were just starting our activities, many customers bought rough installation and installation of utilities from us, and left the finishing finishing for later and, upon moving into the house, did it themselves.
Let's figure out what kind of finishing work we will have to deal with when performing this stage:
- Laying tiles;
- Preparation for wallpaper, wallpapering;
- Laying laminate flooring, installing skirting boards;
- Installation of clean plumbing, sockets and switches;
- Installation of slopes on windows;
The list is small, but there is a lot of work to be done.
Laying tiles
We have done almost all the preparation for laying the tiles, but before laying the tiles, we must prime the walls and floor, and also apply waterproofing in wet areas. Usually in bathrooms it is applied to the entire floor with a rise of 300 mm on the walls and 2000 mm in areas where bathtubs and showers are located.
The tiles are the easiest to install in a technical room, but in bathrooms they are a little more expensive. For technical premises it usually costs no more than 200 rubles, for bathrooms - around 1000 rubles. The tiles are also laid on the floor in the area where the kitchen furniture is located. This finishing material in houses made of sip panels must be laid with elastic glue, since the house undergoes changes in its operation, and if this is neglected, over time the tiles will begin to swell and may even peel off.
In our work we use Ceresit CM 16 glue, which is specially designed for such complex surfaces as in our vulture houses. According to the annotation for the glue, it can even be applied directly to OSB, i.e. the sip panel itself, but we have not yet carried out such experiments and do not advise you to do so.
Preparation for wallpaper, wallpapering
We carry out preparation for wallpaper using modern ready-made polymer putties of such brands as: Shetrok, Semin, etc. We putty the walls in two layers, sand and prime. Then we paste the wallpaper.
We advise you to choose thick, non-woven options with a vertical pattern. The average cost of suitable wallpaper for rooms is up to 100 rubles per m2, for walk-through areas and kitchens – up to 150 rubles per m2. We recommend using washable wallpaper for walk-through areas and the kitchen, as these rooms will require a more durable coating.
Laying laminate. Installation of skirting boards
In principle, everything is simple with this work. We lay a backing for the laminate, usually 3 mm wide; it can be ordinary foamed polystyrene or cork. Here look at your budget, the cost of work will not change in any way. Cork is much better and more durable, but also much more expensive.
We strongly advise you to choose a laminate with a chamfer, since the usual one without it deforms over time, namely, the edges bend upward, and these deformations are immediately noticeable, but with a chamfer this effect does not occur. I will not say that deformations do not appear, but at least they are not visible.
We also attach the plinth to the doorways with the installation of end caps. In the budget decoration of houses made of vulture panels, the plinth chosen is of course plastic, its cost is usually around 70-80 rubles per 2500 mm of length. All thresholds are also installed or a silicone seam is made between the junction of the laminate and the tiles. This connection is always on the same level. There are no steps in our finishing work.
Installation of clean plumbing fixtures, sockets and switches
After carrying out the work indicated earlier, all clean plumbing fixtures are installed. Ceramic toilets and sinks are hung on the installation, faucets and drain siphons are placed on them, and faucet connection taps are screwed on. A bath or shower is installed.
An electric heated towel rail is hung; a socket for it, of course, is provided at the electrical design stage. Hoods are also installed in bathrooms, sockets and switches are installed throughout the house. Lighting fixtures are not installed, since the ceiling is not yet stretched; this work is carried out by suspended ceiling specialists.
Installation of slopes on windows
Well, the installation of slopes on windows is made from sandwich panels. Everything is simple here.
How can you decorate the ceiling?
Together with finishing the walls with plasterboard, it is possible to build a suspended ceiling from this material. The structure can be multi-level, but it will have significant weight and be difficult to install.
A simpler option for ceiling decor is to use suspended ceilings. They consist of an aluminum or plastic frame on which a vinyl film is stretched.
The choice of shades is very wide; you can use several colors or patterns. Installing the ceiling takes several hours. Vinyl film reliably protects SIP panels from moisture and steam.
Two-level plasterboard ceiling with lighting Source akson-quick.ru
Stage No. 6. Carrying out special installation work
All special installation work is paid separately. Such work includes:
- Installation of stretch ceiling;
- Door installation;
- Installation of finishing stairs.
Now in more detail about each of the stages
Installation of stretch ceiling
Why does the installation of a stretch ceiling include special installation work? The thing is that this work cannot be divided into material and work. You can’t just go to the store and buy a ceiling, and then call a specialist to install it for you. As a rule, a master who deals with stretch ceilings produces them himself in his own production, discusses the nuances of choosing the canvas and material, the number of corners and lamps, and only after that he will be able to name the total cost.
We, in turn, still advise you to opt for fabric stretch ceilings in ordinary rooms and PVC ceilings in bathrooms. Often this work is done as a last resort and they even move into the house and live without a stretch ceiling, since everyone knows that installing a stretch ceiling is a dirty and very quick job, it can be done in one day without any discomfort for those living in the house of people.
Door installation
As for the doors, they have been relegated to the category of special installation due to warranty obligations. It is considered good form to buy a door with installation, i.e. The door manufacturer or seller has its own installers and gives a full guarantee on the doors themselves and on their installation if the installation was carried out by its installers. Often, sellers immediately include the cost of installation in the price of doors; you’ve probably heard more than once that when you buy doors, installation is free, and that’s it.
Of course, we can install doors for you ourselves if you want, but there is one more nuance. We have noticed that it is best to install doors after you have loaded the standing house with furniture and things. There is also no need to be afraid of dust and dirt during installation; modern door installers arrive with a vacuum cleaner, and installation time usually takes one day.
Installation of finishing stairs
I think there’s no need to talk for a long time about the installation of stairs; it’s probably already clear that this is done exclusively by specialized organizations, both in manufacturing and installation.
Installation of interior doors
We offer our customers installation of a wide variety of interior doors. They can be solid wood, with glass inserts, in different colors and shades. Door installation occurs in several stages:
- careful measurements of the door frame and door leaf are carried out;
- selection and installation of fittings is carried out;
- the door frame is assembled and installed;
- the door leaf and various additional elements are being installed;
- Finally, the installation of platbands is carried out.
