Published: 06.20.2014 Category: Tools and accessories, Repair, Plumbing work Views: 112083
How and with what to remove old sealant and apply new one
Even if you are not renovating your bathroom, pay attention to the condition of the silicone sealant joint on the side of the sink or bathtub. Even modern sanitary silicone sealants specifically designed for use in the bathroom or kitchen can, over time, be affected by fungus and mold, and simply darken and change their previously attractive appearance.
If you decide to renew a previously applied sealant, but do not know how to properly remove the old layer of sealant and apply a new one, then this article is just for you. There is nothing complicated in replacing old sealant, and we will show you step by step how to do it correctly and easier.
In rooms with high humidity, such as a bathroom or kitchen, mold or mildew may appear on the seams between ceramic tiles, so it is best to use grout with fungicidal additives for grouting.
Mold on the side of the bathtub | Mold on the side of the shower tray |
Particularly at risk are the sides of a bathtub, sink, shower stall or shower tray where water flows down the wall or any other place where the water does not evaporate quickly enough, creating ideal conditions for mold growth. Mold in this area, as a rule, looks like small, dark (to black) spots. At first glance, such darkening can be mistaken for ordinary dirt, but this is not so.
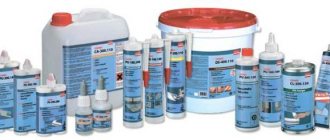
Types of sealant
The process of dismantling the sealing material will largely depend on its composition.
For bathrooms, substances with antiseptic additives are used that have increased moisture resistance. In rooms with high humidity, the following types of sealing agents are mainly used:
- silicone based;
- polyurethane;
- acrylic based;
- silicone-acrylic.
Silicone-containing
Silicone sealants are the most common type of material used in the bathroom. This coating has excellent moisture-repellent characteristics. Many silicone-based mixtures contain fungicides, which prevent the formation of fungus and mold on the surface. The material is characterized by excellent adhesion, resistance to temperature changes over a wide range and durability.
Silicone products have another name - sanitary sealant. The material received this name due to its good resistance to chemicals. Note that the cost of silicone compounds is quite high, which, in turn, does not make such material less popular.
Polyurethane based
This version of the sealant, after drying, forms a highly durable and at the same time elastic coating. The material is resistant to low temperatures. However, exposure to heat adversely affects the coating.
Polyurethane sealant can be used to finish vertical surfaces, as the mixture adheres well and does not drip during application. The one-component composition does not contain toxic substances, which makes it safe for human health. Paint and varnish mixtures can be applied to a polyurethane coating to improve the appearance of the material or its technical characteristics.
Acrylic
The acrylic-based composition is not inferior to silicone mixtures in many respects. The service life of the acrylic coating is also long and the level of adhesion is no lower. In addition, the material is cheaper than silicone-containing compounds.
The disadvantage of mixtures with acrylic components is their low plasticity, so this sealant can only be used in areas that will not deform over time. Otherwise, when the material dries, cracks may appear on the surface.
Acrylic mixtures contain no organic solvents, which indicates that the material is environmentally friendly and odorless. For bathrooms, only moisture-resistant modifications of acrylic sealants are used.
Silicone-acrylic
These mixtures combine all the best qualities of both types of sealant. The coating made from this material is highly durable, elastic and durable. The mixture can be used as an adhesive to hold various products together.
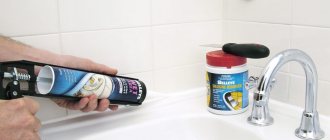
Applying a new layer of sealant
After you have removed the old compound, you need to seal the seam again. Before using fresh sealant, be sure to clean the surface to be treated from dust and dirt and dry thoroughly. It is also recommended to pre-treat the seam with alcohol or white spirit to degrease.
If you want to protect the surface around the seam from sealant, then first cover the seam around the perimeter with electrical tape or masking tape. After this, you can apply sealant to the seam. After application, smooth the sealant with a special spatula and leave it until dry.
Applying fresh sealant
Advice! To seal seams in damp rooms, use sealants with additives against fungus and mold.
When to delete
- The sealant is not applied correctly, resulting in no protection against moisture penetration. Then the carelessly applied layer is removed, and the seam is filled with sealant again.
- Over time, the sealing layer wears out and deteriorates, and it may change color due to fading or severe contamination. The seam may crack, which will significantly impair its moisture-proof characteristics. The damaged layer must be removed immediately.
- Even if the sealant contains antiseptic additives, during prolonged use in conditions of high humidity, for example, in a bathroom, microorganisms can multiply on the surface, causing mold to quickly appear. The contaminated layer must be removed as quickly as possible, since mold that multiplies in dampness can worsen the well-being of apartment residents.
- During repairs, sealant accidentally ends up on inappropriate surfaces.
Methods for removing sealant
- Mechanical (rubbing with tools);
- chemical (solvents, removers);
- combined (combination of tools and chemicals).
Mechanical method
To work you will need the following tools:
- a sharp stationery or construction knife (you can purchase a special knife for cutting silicone seams);
- blade;
- small spatula;
- tweezers;
- flat screwdriver;
- special plastic or wooden scrapers for removing sealant;
- pumice.
Some of the tools listed may not be useful, but it is better to have them at hand: in practice, you often have to try different options to find the most effective one.
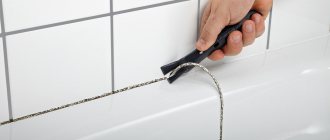
Stages of work:
- Previously, thin layers of silicone are cut off with a knife or blade. To do this, longitudinal and transverse cuts are made between the surfaces and the adjacent layer of sealant. If the silicone has not hardened too much, you can try to remove it in one motion. To do this, the longitudinal cuts are made solid and as long as possible.
- The cut edges are grabbed with tweezers or fingers and strips and pieces of old silicone are separated.
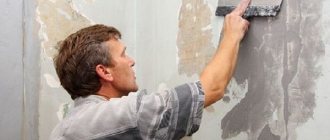
- Use a spatula or special scrapers (wooden are preferred for acrylic surfaces) to remove the residue.
Cleaning off silicone residues with a glass scraper. - If silicone gets into cracks or cracks somewhere, pry it up and pull it out with tweezers, small pliers or tongs.
- The thin layer of remaining sealant is very difficult to remove, but you can try using fine sandpaper, the hard side of a dish sponge, or a pumice stone.
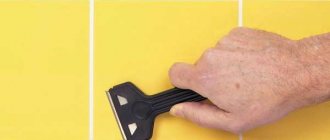
- To remove sealant from tiles, you can rub it with a paper eraser or pumice stone. An eraser is especially helpful when you need to clean embossed tiles without damaging them.
- Removing bathtubs and shower trays requires at least one assistant. Dismantling begins with trimming the outer layer of silicone around the entire perimeter. Then they pry up the bathtub or tray with a screwdriver and try to loosen it. If the product gives in, it is lifted and transferred to the prepared place. Otherwise, the seal continues to be cut with a knife or blade until the bath can be disconnected.
Chemical methods
Since it is almost impossible to completely remove old sealant in the bathroom using the previous method, mechanical cleaning is often supplemented with chemical treatment.
When choosing chemical products, it is important to consider the composition of the sealant. Household silicone sealants are either acidic or neutral. Acidic ones are the most common and have a specific vinegar smell when applied. When working with neutral silicone, there is almost no odor. To effectively remove acidic silicone, the active substance of the solvent must be acid; for neutral silicone, it must be gasoline or acetone.
Available means
First of all, you can use paint thinners that you have on hand. The effect of using these liquids may be different for each individual case, so they should be tried on specific silicone and on different surfaces. At home, the following products may be useful for removing sealant:
Galosh gasoline, white spirit
White spirit (or nefras) is a universal solvent that can be used to try to soften the old seal. Moisten a rag generously with the liquid and go over the desired areas. Leave for 5 – 10 minutes for absorption. If the product has worked, the sealant softens and resembles a gelatinous mass that can be easily removed with a spatula or scraper. You can try other solvents in a similar way.
White spirit works best on cast iron or enamel bathtubs, but may not be effective on acrylic surfaces.
Vinegar + alcohol
Acetic acid and alcohol are very weak solvents and are not very effective for silicone. But there are positive reviews about the use of a mixture of equal parts of vinegar essence (70%) and alcohol (50 ml each). Sometimes the composition is supplemented with 1 tbsp. l. soda ash. The product is applied from a spray bottle and allowed to act for about 30 minutes. After softening the sealant, it is also removed with a knife. In its pure form, vinegar can be used to treat a thin layer of silicone remaining after mechanical cleaning. In some cases, this helps remove residues faster.
Kerosene, gasoline and acetone can soften neutral sealants, but they have practically no effect on acidic ones.
Industrial silicone cleaners
Industrial products disrupt the structure of the sealant and cause its gradual destruction. Silicone solvents can be purchased at construction stores or auto care stores.
The principle of removing sealant with different professional compounds is the same:
- After preliminary mechanical cleaning, the product is applied with a sponge or simply with your finger (always wearing gloves).
- After a certain time (must be indicated on the packaging), the remaining product along with old silicone can be easily removed with a brush, plastic spatula or scraper. Often the necessary tools are included with the cleaner.
- Many industrial silicone solvents leave a greasy residue on the surface, often yellow in color. They are treated with a soap solution, kept for a while and washed. Laundry soap works well when lathering a sponge and treating oily areas. The foam is washed off, and the surface is wiped dry and finally degreased with acetone or white spirit, and then dried with a hairdryer.
Chemical products for removing silicone are available in the form of sprays, removers, gels or pastes. The following products received positive reviews and recommendations:
- Tytan (Selena, Poland). The active ingredient is phosphoric acid. Does not have a pungent odor. Dissolves even dried silicone. The operating time of the cleaner is 12 hours. The product is effective on textured surfaces, so it can be used to clean tiles with a three-dimensional pattern. Leaves greasy marks. Tytan composition for removing silicone.
- Universal car cleaner XADO Mottec Antisilicone (Ukraine) alcohol-based. Designed for degreasing and cleaning the surface from silicone and traces of adhesive tape. Suitable for acrylic and ceramics. Does not require rinsing and leaves no residue after drying. XADO Mottec universal cleaner.
- Silicone cleaner gel Soudal (Belgium) hydrocarbon based. It is easy to apply and has a moderately pungent odor. The minimum duration of action is 10 minutes. Apply only to dry surfaces. On acrylic, stone, ceramics and plastic, preliminary testing is advisable. Leaves greasy stains. Soudal hydrocarbon silicone remover.
- Car aerosol wash Body Antisil 770 (Greece) based on organic solvents is a universal product for cleaning any surfaces. Safely removes silicone and bitumen residues, but re-treatment may be necessary. Body Antisil degreaser.
- Dow Corning (Dow Sil, USA) is a fundamentally new silicone-based solvent cleaner. Activates the process of silicone depolymerization. Safe for the environment and any surfaces, does not change the color of painted products and does not leave marks. Available in aerosols (Dow Sil OS-2 series) and liquids for dissolving old sealants (Dow Sil DS-2025 series). Environmentally friendly aerosol solvent Dow Sil OS-2.
- Solvent remover Penta-840. Removes traces of silicone from tiles, metal and acrylic surfaces. Apply with a generously moistened sponge. The surface to be treated is covered with film and left for several minutes. Remains of sealant can be easily removed with a sponge or improvised means. The product is dangerous if inhaled, in contact with skin or eyes. May cause corrosion of metals with prolonged exposure. Penta-840
Best deals on silicone cleaners:
Note: Work with any solvents or industrial products only with gloves and in a well-ventilated area.
Features of using silicone sealant
Silicone sealant is a material characterized by plasticity and the ability to polymerize. When exposed to oxygen, it turns from a viscous paste into a strong but elastic mass. In addition, this material is able to firmly adhere to any surface. These properties allow silicone to be used to fill even small gaps.
After hardening, the composition reliably protects the holes from moisture penetration into them. Once cured, a secure bond is created that allows the material to function but prevents it from being removed. To choose the best method for removing a sealant, you need to consider its type: neutral or acidic.
Both have their advantages and disadvantages. Acidic varieties of the material include silicone and vinegar, so when they harden they emit a characteristic odor.
The advantages of this material include:
- fast curing speed;
- low cost;
- high adhesion.
At the same time, such compositions do not combine well with cement coatings, metals and natural stone. Due to the rapid hardening during work, stains of the substance should be immediately removed from the tile if they accidentally get on it. After they harden, this will be extremely difficult to do - only with the help of a solvent.
Neutral materials are made based on amines and alcohols. They are safer and more expensive. At the same time, the polymerization process of such compositions proceeds quite slowly, but after hardening it creates stronger adhesion.
It is almost impossible to wash it off after it hardens. Thus, mechanical action is often required to remove a layer of substance.
How not to spoil the surface
To avoid having to repair plumbing or change the finish later, all work on removing sealant is done as carefully as possible and without haste. Acrylic products require special attention: with strong friction they can be scratched even with the hard side of a dish sponge, and rough brushes are generally contraindicated for such surfaces. Therefore, when removing sealant, you should remember the following safety precautions:
- You must work with the blade and knife very carefully to avoid injury and not to scratch the walls, glass, floor or plumbing.
- A thin layer of sealant from acrylic coatings can be safely rubbed off with an eraser, damp pumice, aged sandpaper, a wood chip or a block of untreated but soft wood (such as pine).
- Sometimes the silicone is so hardened and ingrained into the surface that it cannot be removed mechanically: it cannot be cut even with the sharpest blade. In such a situation, it is necessary to first soften the sealant using folk remedies or professional compounds.
- You should not risk trying to tear off the silicone by force: it may come off along with the top layer of the bathtub or a piece of tile.
- When choosing a silicone remover for an acrylic bathtub, you need to pay special attention to the active substance of the solvent: caustic compounds can damage the surface. Ideally, the packaging should contain information about the possibility of using the product on acrylic materials. Acrylic surfaces cannot be treated with acetone.
Methods for cleaning different surfaces
To determine how to remove silicone sealant, you need to try and combine different methods. Specific recommendations depend on the type of coating being treated.
Bath
When choosing how to clean the sealant on the bathtub, you can follow the following tips:
If the silicone-containing substance has not yet hardened, there is no need to perform these manipulations. The mixture that has contaminated the surface of the bath can be easily removed with a solvent.
Tiles on the wall
To understand how to wash silicone, you need to read the following instructions:
Textured tiles on the floor
To clean such a surface from silicone, use the following recommendations:
Glass
You can clean the glass from the sealing compound in the following way:
Plastic
The problem of how to remove the sealant arises if there is a shower tray in the bathroom. Silicone is also used when installing shelves and window sills.
Fabric and leather in progress
If sealant gets on your skin or clothing, it is important to act immediately. It is important to prevent the polymerization process from being completed, which will prevent the silicone from being completely removed.
It is recommended to proceed as follows:
You can try to remove the stain with a solvent. But you need to understand that these products can ruin the fabric forever.
How to remove acrylic sealant
Acrylic sealants can be water-soluble or water-resistant. But their main function is not sealing, but gluing. Compositions for interior work are porous and, as a rule, water-soluble. Therefore, in the bathroom their use is limited to places where water does not get in (you can glue various hooks, mirrors or shelves).
Waterproof acrylic sealants are designed for exterior finishing and construction work. In general, they are universal and after complete drying they are not afraid of moisture, but constant contact with water has a bad effect on their properties. Waterproof acrylic glue is sometimes used to install borders (or baseboards) for bathtubs and washbasins, which is not entirely correct.
Removing acrylic sealant is much easier than silicone:
- excess fresh glue can be easily wiped off with a sponge or rag moistened with water;
- the old dried composition is cut out with a stationery knife or blade;
- water-soluble acrylic is moistened with water until softened;
- Waterproof acrylic sealant can be removed from the edges of an acrylic bathtub with mounting foam, acetone, nail polish remover or a solvent such as white spirit;
- the remaining composition is removed with a wooden scraper or plastic window cleaner;
- Acrylic sealants do not leave greasy marks or stains after removal, so additional treatment with solvents is not required.
What and how to wipe off the sealant
Immediately after application, the substance is difficult to see on the surface, but after a few hours it turns from transparent to white. It becomes clear which surfaces will require removal of splashes, stains or alignment of seams and joints.
Dried or hardened silicone composition can be removed mechanically by scraping with available tools.
The method is used when solvents or detergents cannot be used.
Tools
- Construction spatula. The wide handle makes it easy to use for removing even heavily dried sealant. The edge of the tool must be intact, and if there is a jagged edge, it is useless and even dangerous to use, as there is a possibility of damaging the surface.
- Construction scraper. Helps quickly remove adhesive residues without destroying tiles.
- Razor blade. For the most inaccessible places, small stains are quickly erased. Due to its small size, the blade is not always convenient to use; if handled carelessly, you can cut your hands.
- Shoe knife. Helps remove very thin layers of adhesive.
- Screwdriver. The sealant is removed in hard-to-reach areas. In order not to damage the tiles, you need to work without strong pressure.
- Forceps, tweezers, pliers. Tools can be used to grab loose parts of the sealant if this cannot be done with your fingers.
Special tool. They are a handle with interchangeable attachments of different shapes. Nozzles are selected for any angle and type of surface. It can remove both old waterproofing and seal the seams with a new mixture.
Cleaning procedure
- First, remove the top layer of silicone with a knife or blade. To do this, a longitudinal and transverse cut is made between the treated base and the adjacent seam layer. Slightly hardened waterproofing is cut off with one maximum longitudinal movement.
- If it was not possible to completely remove the silicone in one go, you need to grab the cut edge with your fingers and separate all the pieces one by one.
- Residues are removed with a spatula or scraping tool.
For acrylic surfaces, it is better to use wooden spatulas.
- Old waterproofing is removed from cracks and cracks using plucking tools.
- It is difficult to cut off a thin waterproofing layer; it is usually rubbed off with sandpaper, pumice stone or steel wool for cleaning dishes.
- To clean the embossed surface without damaging it, use a school eraser or pumice stone.
- When dismantling an acrylic bathtub or shower tray, first cut the outer seam around the entire perimeter of the bowl. Then it is pryed off with a screwdriver and slightly loosened. If it does not pry off immediately, continue to cut off the influx with a knife until the bowl is detached from the base.
Suitable means
Silicone does not only need to be removed during application.
It is removed if:
- when the old sealant has already become unusable and has lost its complete sealing;
- during work it turned out that due to violation of the rules, complete sealing did not occur;
- mold and mildew have appeared;
- if the surface was accidentally smeared.
The sealant penetrates very deeply into the material, which makes it very difficult to remove it from the surface, especially when it has already been in contact with it for a long period.
There are different ways to remove silicone. For some surfaces it is better to choose a mechanical method. This method should not be used to clean glass surfaces, tiles, acrylic or enamel bathtubs, otherwise they can easily be damaged. The mechanical method is suitable for cleaning surfaces that are not visible, since there is a possibility of damaging the surface during cleaning and scratches may remain.
In order to remove the old layer of sealant, you should take a knife and use it to pick up the seam. After the top layer of silicone is cut off, use the sharp end of a knife to remove any remaining silicone and clean the surface to be treated. You can use sandpaper or pumice for cleaning.
The surface should be cleaned carefully so as not to scratch or damage it.
Silicone is removed using special means. You can purchase sealant in the form of a paste, cream, aerosol or solution. Let's look at some of them.
Lugato Silicon Entferner is a special paste that can be used to easily remove dirt from many types of surfaces. The paste cleans well sealants on glass, plastic, tiles, and removes dirt from acrylic surfaces and enamel. Suitable for metal surfaces, concrete, stone, plaster, removes glue from wooden surfaces well. To remove the sealant, use a sharp knife to remove the silicone layer; its thickness should not be more than 2 mm. Apply the paste to the surface for 1.5 hours. Remove silicone residue with a wooden spatula. The surface is washed with detergents.
Sili-kill removes dirt from brick surfaces and concrete, ceramics, metal, glass. When using, cut off the top layer of sealant, and apply this product to the surface for half an hour. Afterwards you should wash it with soapy water.
Penta-840 is a remover for cleaning sealant from surfaces made of metal, concrete, glass, and stone. This product can be used to treat cast iron bathtubs and tiles. This product is tested on a small area. To do this, apply it to a part of the surface for a few minutes and inspect whether everything is in order. After checking, remover should be applied to the sealant. After half an hour, the silicone swells and is removed with a sponge.
Dow Corning OS-2 is used to clean silicone from glass, metal, plastic, and ceramics. The top layer of sealant is removed. This product is applied for 10 minutes. Using a damp cloth or sponge, remove the residue.
This method is used to delicately remove silicone or greasy stains from it. You should take a piece of gauze or a tampon, moisten it slightly and put salt inside. You should rub the surface with such a salt bag, but you should not rub it too hard, the movements should be circular. When the silicone is removed, a greasy residue remains on the surface, which can be removed with dishwashing detergent.
You can clean silicone from the product and any surface using chemical means. Such products help get rid of silicone quickly and easily. You can use white spirit for such purposes. It helps remove adhesive from tiles, ceramics, cast iron, and glass.
White spirit should not be used on painted surfaces. When using this product, apply it to cotton wool or gauze and clean the contaminated area. After a few minutes, when the silicone becomes soft, it is removed with the tip of a knife or blade.
You can remove dirt with acetone. Before use, apply it to a small area. If the surface remains unchanged, you can apply acetone to the entire seam. Acetone is more aggressive than white spirit and has a strong odor. The liquid is applied to the seam and wait 15-20 minutes until it softens and loses its shape. Residues should be removed with a cloth.
Do not use plastic cleaner, otherwise the acetone may dissolve the plastic surface. It is used for products made of tiles, glass, and cast iron.
After treatment, an oil stain remains on the surface, which can also be removed with acetone or white spirit, using table vinegar. It has a sharp, specific odor, so you should work with it wearing a respiratory mask and ventilate the room well.
You can also use other solvents such as kerosene and gasoline. Sometimes these products can cope with stains no worse than expensive store-bought products.
How to remove mechanically?
Carefully removing a thick layer of silicone and cleaning large areas covered with sealant is possible, provided that sharp objects are used.
Using a sharp stationery or construction knife or razor blade, cut off the layers of sealant. To do this, you need to very carefully trim the layer of silicone adjacent to the surface of the tile.
If the material is not very hardened, after cutting it can be removed with one jerk. Pieces of hardened sealant are cleaned from the surface of the tile using a narrow metal spatula, scraper and tweezers.
In hardware stores you can purchase special sets of knives for removing silicone sealant. The sets consist of a handle and attachments of various shapes with a sharp blade.
The very thin layer of silicone remaining on the surface is cleaned off with the hard side of a dishwashing sponge or an eraser.
It is not recommended to use hard sandpaper, much less a metal brush. Such tools leave very deep scratches that disfigure the surface of the tile.
Cleaning tiles
During the renovation process, tiled bathroom walls are often stained with silicone. The grout comes to the surface after processing the seams and polymerizes in a short time. Then they use special substances to scrub it off.
You need to remove silicone from tiles in the following order:
- Use a knife or blade to cut off large pieces of putty. For the glazed surface, use a scraper made of wood or plastic so as not to spoil it.
- The remaining polymer is softened with any suitable solvent. Soak a rag in the selected substance and apply it to the stained area for a short time.
- Remove the softened mass with unnecessary material.
- Fatty traces on the treated surface are washed off with a soap solution.
How to scrub with improvised means?
Minor traces of sealant will help you clean the available products without much effort:
White Spirit
A universal solvent that softens layers of silicone sealant on tiles.
Traces of sealant are thoroughly rubbed with a cloth soaked in solvent. After five to ten minutes, the silicone softens to a jelly mass, after which it is very easy to remove it with a scraper or plastic spatula.
Acetic acid and alcohol
A cleaner that gently removes traces of the sealed silicone layer from tiles.
For cleaning, you need to prepare a composition of acetic acid and alcohol (mix in equal proportions). The resulting product is sprayed through a spray bottle onto the silicone mark, left for half an hour, and then carefully scraped off with a knife.
To clean hardened particles of sealant, a mixture of alcohol and acetic acid is supplemented with soda ash (1 tbsp is enough).
Dichlorvos
Simply spray the product onto the sealant and leave for ten minutes. Thanks to the solvent in the cockroach spray, the silicone softens very quickly and can be easily removed with a rag or sponge.
The use of Dichlorvos in enclosed spaces is prohibited (the drug is toxic). When cleaning tiles, the bathroom doors should be open and the forced exhaust fan turned on.
Folk remedies
You can make your own equally effective tile cleaning products. The components of folk remedies do not act as aggressively on the treated surface as chemical industry products, so removing stains will take longer.
But such compositions do not contain substances hazardous to health and the environment, which allows them to be considered a good alternative to household chemicals for people who suffer from allergies or have small children.
The preparation of any composition requires compliance with proportions. It is more convenient to apply them using a spray bottle.
Vinegar
The most common cleaning product among housewives, which can be used for both daily and general cleaning.
Vinegar removes any dirt, incl. calcium deposits and rust, disinfects surfaces. 1 part of the essence is diluted with 10 parts of water, applied to the walls using a spray bottle and left for several minutes. Then rinse off with clean water and wipe the tiles dry with a microfiber cloth.
Table vinegar 6%, diluted in equal proportions with water, can be used daily to prevent the formation of mold fungi.
Soap
Soap is the worst enemy of glossy ceramic tiles. It forms a thin film of fat on the tile, which is not so easy to remove. The fatty base of soap can provoke the appearance of mold fungi, which will be difficult to get rid of.
Instead of soap, it is better to use dishwashing detergent, which perfectly removes grease and dirt. And then apply a composition designed to combat rust, mold or other contaminants.
Soda
Baking soda will help get rid of limescale. It should be used carefully, without using force when applying, because... solid particles may scratch the tile surface. You can soften the powder by bringing it to a paste using a liquid component.
To remove dirt and mold from the seams, use a toothbrush to rub in a paste of baking soda and water. After treatment, just rinse off the applied composition with clean water and wipe the surface dry until shiny.
You can dilute soda powder not only with water, but also with bleach or any bleach.
Lemon acid
You can restore the shine to dull tiles and eliminate mold spots using citric acid. Using a damp sponge, rub the dry powder into the contaminated areas, and after 3-5 minutes, wash off with clean water.
An alternative is to wipe the seams and dirty areas with fresh lemon juice (half a fruit).
Ammonia
Pharmacy 10% ammonia solution is ammonia. The product has a characteristic pungent odor, so when working with it you should definitely use a respirator to protect your respiratory tract.
If you dilute 1 tbsp. l. ammonia 1 liter of water, then you can get a universal household cleaner. Experienced housewives use this solution to wash mirrors, windows, and crystal. Ammonia will help and restore the original appearance of the tiles.
You can strengthen the aqueous solution of alcohol with vinegar by adding 1 tbsp. l. The mixture should be sprayed over the surface with a spray bottle, and after 5 minutes, rinse with water. Polish clean tiles with a soft cloth.
Chlorine
It has a pungent and persistent odor and is irritating to the respiratory system and eyes. But at the same time it is considered the best means for cleaning white tiles and disinfecting the room. Before cleaning mold from colored tiles and grout, the effect of even a weakly concentrated bleach solution should be tested in a place hidden from view.
Borax
Used as a component of many detergents. Effective in deodorizing and disinfecting premises. To clean tiles, borax powder is applied to contaminated areas and tile seams using a damp sponge.
Melamine sponge
The melamine sponge appeared in the arsenal of housewives only a few years ago. The sponge is universal; it can be used to clean different surfaces and stains without using detergents. A dry or moistened sponge works equally effectively, but it should not be soaked in hot water or wrung out with twisting movements.
How to clean with special compounds?
On the shelves of hardware stores there is a wide range of aerosols, pastes and solvents, using which you can quickly and accurately remove traces of sealant from bathroom tiles. The TOP 3 most popular and effective means are presented below:
Penta 840
Remover for silicone and polymer materials Penta 840 easily dissolves hardened sealant on tiles.
It is enough to cover the traces of silicone with a rag, generously moistened with Penta 840 remover. After just five to ten minutes, the hardened sealant will soften to such an extent that it can be easily removed with a rag or sponge.
The average cost is 470 rubles. (volume 900 ml).
Dow Corning R-40
Dow Corning R-40 Surface Cleaner is an alcohol solution containing surfactants that will quickly clean the silicone layer from the tiles and degrease the surfaces.
Suitable for cleaning:
- ceramic,
- metal,
- glass,
- painted surfaces.
The average cost is 1520 rubles. (volume 1 l).
Sili-Kill
Sili-Kill Silicone Cleaner will easily remove sealant from tile, enamel, glass and even porcelain. Does not contain flammable, toxic solvents.
Method of application: cut off the sealant as much as possible with a sharp knife, moisten the remaining residue on the tile surface with Sili-Kill cleaner, after twenty minutes remove the sealant with a wooden stick or a soft spatula.
The average cost is 400 rubles. (volume 100 ml).
Before using any special product, you must carefully read the manufacturer's instructions. Do not exceed the contact time of chemical compounds with the surface of the tile or use several chemicals at the same time.
Another preparation for cleaning tiles from sealant and its use is in the video:
Adviсe
Secrets of experienced craftsmen will help you remove sealant from tiles as quickly and accurately as possible:
- Before treating the silicone layer with chemical solvents, areas of the tile that are clean from sealant must be protected with masking tape.
- The easiest way to remove fresh, not yet hardened sealant. It is enough to wipe the surface with a rag or sponge soaked in soapy water. The longer the silicone comes into contact with the tile surface, the more difficult it is to remove.
- Salt will help remove minor traces of sealant on the tiles. A small amount of table salt is wrapped in a canvas bag, slightly moistened, and then rubbed onto the stain on the tiled surface.
- A thin slotted screwdriver will help to carefully clean the sealant in hard-to-reach places (for example, the junction of the floor and wall surfaces). It is enough to trim the layer of sealant and carefully pick up the edge, use a thin screwdriver, and with a sharp movement remove the silicone from the tile.
- When cleaning ceramic tiles (especially using chemicals), do not forget about personal protective equipment: rubber gloves, a respirator and goggles.
When cleaning tiles, do not rush. Carefully, step by step, separating the silicone layer, you can not only achieve an ideal cleanliness result, but also preserve the original appearance of the ceramic surface.
Find useful tips and tricks on removing silicone sealant in the bathroom here.
Replacing sealant
After cleaning the seams, you can begin replacing the sealant. First, you need to apply masking tape to the tiles to avoid getting the product on areas that do not require treatment.
If you plan to seal the joints between the sides of the bathtub and the walls covered with tiles, it is better to use compositions that include a biocide. This substance will prevent the formation of fungus.
First, the surface should be degreased and dried. You need to prepare a tube of sealant according to the instructions. The product is carefully applied to the surface, and then a seam is formed. You need to remove excess sealant with a putty knife or an old plastic card. After 12 hours, you should also remove the masking tape.
To replace the sealant, place masking tape on the tile and carefully process the seam.
Briefly about the main thing
It is quite difficult to remove hardened sealant from any surface. Therefore, it is recommended to remove traces of the mixture before completing its polymerization.
Mechanical techniques and various chemicals are used to remove silicone-containing compounds. It is recommended to initially clean the surface with a wallpaper knife or spatula. After removing large pieces of material, you can move on to final cleaning using ethanol, solvents and other substances.
There are industrial products on sale that effectively deal with stains from silicone rubbers. They are used exactly according to the instructions after preliminary testing.
Cleaning Precautions
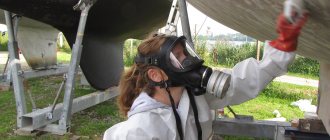
When removing old silicone, be sure to wear gloves and safety glasses. Most solvents are flammable, so you should absolutely not carry out processing near open flames or heating devices.
After using chemicals, be sure to wash your hands thoroughly. When working with sharp tools, it is important to be careful to avoid cuts.
Be sure to wear gloves when working with solvents.
Tips and tricks from professionals
When using chemicals to remove silicone caulk, test on an inconspicuous area of tiles and fixtures. This will allow you to check the reaction of the surface to the substance used. It is advisable to cover with masking tape areas where chemical compounds are undesirable.
You should not try to pull out the frozen mass with a sharp movement. This can lead to damage to the tile joints. When planning to apply a new layer of silicone, you need to thoroughly dry the surface. Even if the material sticks to a wet surface, fungus will subsequently form underneath it.
Sources
- https://stroy-podskazka.ru/germetiki/kak-ubrat-v-vannoj/
- https://KraskaGuru.ru/germetiki/stroitelnye/sposoby-udaleniya.html
- https://MasteraVannoy.ru/problemy/kak-ubrat-silikonovyj-germetik.html
- https://yborka.online/uborka/kak-ochistit-vannu/germetik/s-plitki-vv
- https://yaplitka.ru/sposoby-udaleniya-germetika-s-plitki-v-vannoy-komnate.html