To add to epoxy resin, a special additive is used - a hardener. Usually this composition comes complete with a resinous substance. But sometimes situations arise when it is necessary to dilute too thick a mixture of hardener + epoxy.
You need to know how to act correctly in this case.
Advice. To dilute a ready-made epoxy resin composition, it is better to use specialized solvents created to soften the resin solution.
Features of the material
The formation of cross-linked polymers inside an oligomeric synthetic compound is possible only under the influence of a hardener. The unique properties of the material appear only after the two components are combined. The substance that is obtained after the polymerization reaction does not have a pungent odor. One of the characteristics of products made from epoxy resin is their high strength, resistance to mechanical stress and chemicals - acids, alkalis.
EDP
In working condition, the consistency of the solution is liquid and viscous. This quality makes it possible to pour the composition into a mold for the manufacture of souvenirs and decorations, electrical parts, and furniture. After hardening, the composition becomes hard and durable, easy to process - trimming, grinding. The surface of the material after hardening is transparent, without foreign inclusions. Moreover, the resulting product is absolutely safe and non-toxic.
Consistency of the finished solution
The quality of a polymer product directly depends on maintaining the proportions when mixing the two main components. If the amount of hardener exceeds the recommended dosage, it will appear on the surface of the polymer. If there is not enough hardener, the polymerization process will not proceed correctly and the surface of the product will remain sticky.
Prices for different types of epoxy resin
Epoxy resin
Adviсe
When preparing the composition, as well as when applying it to the surface or filling molds with this glue, there are universal tips that help achieve better gluing.
When preparing the composition, it is better to use utensils and auxiliary tools that are unnecessary for further use. It is almost impossible to clean them from such a composition, so all used containers and mixing tools will be thrown away.
Pouring into the mold must be done in stages, especially if you plan to make the layer thickness more than 2 mm. After the first coating has polymerized, the next portion is poured only after the layer has cured, but with a sticky surface.
Where is it used?
The compound, popularly called “epoxy,” has a wide range of applications - from domestic needs to industry. The material is in demand in many industries, so its composition is regularly improved depending on the application. The material can be hard, soft, elastic or hard.
Using a compound to fill the countertop
Industries where the use of two-component compound is common
- Construction Epoxy waterproofing coating is widely used in basements and swimming pools.
- Mechanical engineering, shipbuilding, aviation and electrical industries - as a heavy-duty adhesive solution that guarantees long-lasting and strong adhesion.
- Furniture production - as a decorative element.
- Design – as a material for making accessories, souvenirs and jewelry.
Application of compound for making jewelry
A thin layer of polymer composition has high chemical resistance and water resistance, so the compound is popular for processing in the production of glass fabric and glass fibers. Also, hard and durable material is used in the manufacture of modern multi-chamber window systems.
Fast curing EDP glue
This product is sold in packages weighing from 45 to 250 g and consists of two ingredients - a resin with modifiers and a hardener. It is used in the following cases:
- elimination of cracks, defects, chips;
- sealing and repair of electrical appliances;
- connection of parts made of glass, ceramics, alloys, metal and others.
It is analogous to cold welding and is used in cases where rapid curing is required.
Basic properties of epoxy resin
- Wide range of uses.
- High strength and adhesive ability.
- Minimal shrinkage.
- Minimal moisture permeability after hardening.
- Excellent physical and mechanical properties.
- High adhesion to any materials.
- Elasticity.
- Dielectricity.
- Resistance to chemically aggressive substances.
- Anti-corrosion properties.
Jewelry making process
Safety
If the polyester resin is styrene-based, special safety precautions must be taken. Styrene is a highly toxic substance that has a general toxic and allergic effect; it is potentially dangerous to human health. First of all, its vapors irritate the eyes and respiratory system, so it is necessary to use glasses and a respirator to protect them, and at the same time you should work in a well-ventilated area, preferably equipped with active ventilation. Styrene also irritates the skin, so hands need to be protected with special clothing and gloves.
In case polyester resin gets on your skin, you should use a special composition to remove it. If such a composition is not provided, or the resin or individual components get into the eyes, it is necessary to wash the area of contact and around it with warm water and soap and seek help from a doctor.
If you use the latest polyester resins, which instead of styrene contain polyols (a class of polyols obtained from vegetable oils), this is not a reason to neglect traditional safety measures, since other components of the resin contain various harmful volatile substances that are also harmful to health and can cause allergies.
Work with polyester resin should not be carried out near open fire sources. Components are flammable - both the materials themselves and their vapors can ignite. Failure to follow the instructions correctly or ignore them can also lead to a fire or even an explosion due to an excessive reaction of the components mixed in the wrong proportions.
In the event of a fire, it is important to remember that burning chemicals should not be extinguished with water if they may react with it. Therefore, polyester resin should be extinguished with a fire extinguisher with special foam or powder, or covered with sand.
Methods of using epoxy compound
Common ways to use epoxy resin:
- Epoxy adhesive.
- Impregnating composition.
- Waterproofing composition.
- Material for manufacturing fiberglass by pouring or subsequent processing (cutting, grinding).
Pouring wood
Decor making kit
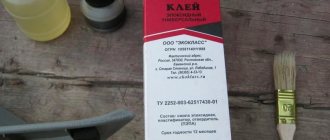
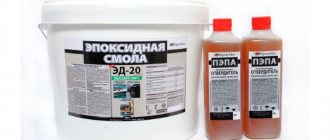
Since Soviet times, EDP, an epoxy adhesive consisting of ED-20 resin and PEPA hardener, has been widely used as an adhesive composition since Soviet times. Mix this composition in small quantities at room temperature. With a standard dosage of 1:10, deviations from the proportion are allowed, up to a ratio of 1:5.
Resin and hardener kit
If we compare ED-20 and ED-22 resins, the second has a lower viscosity. It is more convenient to use a composition of a more liquid consistency as an impregnating material, but the strength and heat resistance of such a coating will be less.
ED-20
Imported resins differ from domestic ones in their transparency and the absence of foreign inclusions. Moreover, their cost is sometimes even lower. An analogue of imported ED-22 is the German DER 330. Taiwanese resins 128 and 127, as well as Czech Epoxy 520, are distinguished by their viscosity and transparency.
How to mix at home?
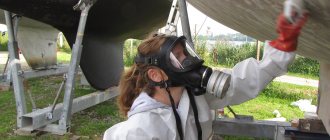
To mix glue at home, you need to prepare for the process. It is recommended to carry out work in a well-ventilated area - inhaling epoxy resin vapors is unlikely to benefit the body. It would be a good idea to wear a respirator. You should use protective gloves for work. You should put on old clothes and cover your work area with something - it will be extremely difficult to clean off any glue that gets on them.
How to cook?
It is necessary to measure the ingredients in the required quantities. At home, it is very convenient to do this in medical syringes, since they have measuring divisions. In addition, the syringe will allow you to carry out the procedure carefully and take even small amounts of substances in the required dosage. There is no need to insert the needle into the syringe. The resin and hardener should be drawn up with separate syringes and placed in separate containers. If the resin is too thick, you can pour it into the syringe from the top, after removing the piston and closing the spout. Then both substances are thoroughly mixed to obtain homogeneous masses.
Each mass is also mixed with a separate tool. Epoxy resin can be difficult to mix due to its high viscosity. To facilitate the process, it is heated using a water bath. Heated resin mixes easier, but the temperature should not be higher than +55–60°C, as the polymerization process will accelerate. You should also carefully ensure that water does not get into the resin.
Ratio norms
To obtain a composition of proper quality, the correct proportions of ingredients must be used. Manufacturers, as a rule, indicate them in the instructions for use. Most often this ratio is 10 parts resin to 1–1.3 parts hardener. Some resins may require different proportions. The instructions should be followed to the letter. It happens that the instructions are not written down or are lost. In these cases, take 10 parts of resin and 1 part of hardener.
If you are not sure of the correct ratio of ingredients, the composition can be checked
You should take a little of the prepared mixture with the hardener and place it in a small metal container, and then heat it carefully, but do not bring it to a boil. When the substance has cooled, its quality can be determined
If the cooled mixture has hardened, then everything is done correctly and the glue can be used. If the mixture remains viscous, there is not enough hardener in it.
How to dilute?
The prepared epoxy glue remains liquid for a very short time. It can vary from 15 minutes to half an hour (depending on the manufacturer), and then quickly thickens and hardens. Sometimes this time is not enough to get the job done. To extend the working time of the glue, it can be diluted with acetone. You don’t need a lot of it - you need to take one part of it in relation to the amount of resin and mix it carefully.
How to make it more liquid?
For some surfaces, the use of viscous glue is not always convenient. Sometimes a liquid composition is needed to saturate the materials. To make the epoxy mixture more elastic and pliable for application, it can be made more liquid.
There are two ways to do this.
- Heating preserves the properties of the glue, but reduces the time of working with it. In addition, you can accidentally exceed the heating temperature, then the glue will be damaged. In this case, it is advisable, if possible, to heat the surfaces to be bonded. The advantages will be the preservation of the “life” of the glue and its easier application.
- Adding solvent. To obtain a more liquid composition, it can be mixed not only with acetone, but also with varnish solvents and denatured alcohol. By increasing the “life” of epoxy, they can change its color and damage the surface. Shrinkage of the resin and a decrease in its strength may also occur.
How to achieve transparent color?
Sometimes the color of the adhesive is important. In some cases, a transparent composition is needed to hide traces of repair, for example, jewelry. This composition may be needed when creating decorative items. Modern industry offers a wide range of epoxy compounds and dyes for them. With their help, you can achieve different colors, their shades and effects: any single color, matte, fluorescent, pearlescent, with sparkles.
It’s not difficult to prepare them: you need to add 5–6% paint in relation to the amount of resin in the composition. The same products will make the resin transparent if dissolved to 0.05% of the product. As available materials, you can use ballpoint or gel pen ink, alkyd paints. Air bubbles affect transparency, so you should carefully stir the composition. You can put it in a water bath, since heating will help the bubbles come out.
Purpose of hardeners
The role of the hardener is that it is not only a catalyst for the reaction, but also a full participant in it. The result is a compound of a certain consistency, suitable for work. And the resulting product after hardening will be reliable, durable and durable.
Modern compounds contain substances that accelerate the hardening process, which depends on the temperature of the solution and the type of hardener used. There are solutions on sale that harden even at low temperatures. Polymerization of some compositions is possible in conditions of high humidity.
Types of hardener
For domestic needs, a resin is used that hardens at normal temperatures; it is also called “cold-curing.” However, the most durable, chemically and mechanically resistant products are those obtained from hot-curing compositions.
The indicator of uniformity, hardness, durability and transparency of the composition depends on how accurately the proportion of the hardener is selected. Incorrectly selected quantity and mixing of components reduces the quality characteristics and affects the service life of the solution and the resulting product.
Varieties
The quality of the result is primarily affected by the type of hardener, not the resin. The most common low-cost varieties include PEPA and TETA hardeners. However, their quality is significantly lower than that of modified formulations.
Set with PEPA hardener
The main disadvantages of cheap compounds include the following:
- The temperature at which curing occurs for TETA is at least 30 degrees, for PEPA – 15 degrees.
- The compositions are vulnerable to moisture - this is a significant disadvantage when carrying out waterproofing work or when pouring a floor.
- Polymerization occurs quickly, so creating a thick layer is problematic.
As for modified compounds, these disadvantages are not typical for them. The only negative is the high cost.
Set with TETA hardener to obtain a clear solution
If we compare these two types of hardener, it is easier to work with PEPA, since it allows for slight deviations from the proportions and behaves well at room temperature.
Characteristics of different brands of hardener
TETA is an imported product, transparent, with low viscosity. There is a pungent odor. This hardener requires strict adherence to proportions.
Prices for theta hardener for epoxy resin
Theta hardener for epoxy resin
How to use?
Any master class for beginners that teaches techniques for working with epoxy resin contains instructions for using this polymer. Whatever method you decide to use for work, first of all, you need to prepare the work surfaces. They must be cleaned of contaminants and thoroughly degreased with alcohol or acetone.
After this preparatory stage, you can proceed to the next steps.
Fill in
If it is necessary to glue two parts, then a layer of epoxy resin no more than 1 mm thick is applied to the working surface. Then both surfaces with the adhesive composition are combined with each other using a tangential sliding movement. This will help to securely glue the parts and ensure the removal of air bubbles. For bonding strength, the part can be secured with a clamp for 2 days. When casting into molds is required, the following rules are adhered to:
- The composition must be poured into the mold in a horizontal direction;
- work is carried out indoors at room temperature not lower than +20°C;
- so that after hardening the product comes out of the mold easily, its edges are treated with petroleum jelly;
- If wood is to be poured, it must be properly dried.
Drying
The drying time of the polymer resin depends on its freshness; old resin takes a long time to dry. Other factors influencing the polymerization time are the type of hardener and its amount in the mixture, the working surface area and its thickness, and ambient temperature. Polymerization and hardening of epoxy resin goes through the following stages:
- polymer resin in liquid consistency fills the entire space of the mold or working plane;
- the viscosity in consistency resembles honey and it is already difficult to fill relief forms with resin;
- high density, which is only suitable for gluing parts;
- the viscosity is such that when a part is separated from the total mass, a trail stretches out, which hardens right before our eyes;
- The epoxy mixture is like rubber and can be pulled, twisted and compressed;
- the composition polymerized and became solid.
After this, it is necessary to keep the product for 72 hours without use so that the polymerization completely stops and the composition of the material strengthens and hardens. You can speed up the drying process by increasing the room temperature to +30°C. It is noteworthy that in cold air, polymerization slows down. Now special accelerator additives have been developed, when added, the resin hardens faster, but these agents affect transparency - products have a yellowish tint after their use.
Breeding rules
When diluting a two-component epoxy composition, strictly adhere to the dosage specified in the instructions.
Note! After the two components combine, an irreversible reaction occurs. Therefore, if you have to mix a large volume of resin, then first it is recommended to make several test mixes to determine the optimal dosage of the components.
Dosage of components
Sequencing
One method of mixing involves preheating the resin to a less viscous state, at which point it will not crystallize or boil. A sign that the resin has overheated is the formation of foam - if this happens, the composition can no longer be used. When the resin crystallizes, it is heated to 40 degrees with regular stirring, bringing it to its original transparent state.
The manufacturing process of the composition must take place using personal protective equipment
The heated resin is drawn up with a syringe and injected into a mixing container. The hardener is added in the same way. Using a wooden spatula, mix the ingredients thoroughly.
In everyday life, a small amount of solution may be needed, for example, for gluing parts. In this case, cold mixing technology is used. The proportion is 1:10 , where the first value is the resin, and the second is the hardener. The air temperature should not exceed 25 degrees.
In any case, experts recommend performing a test mixing to identify the most correct proportion and only then using the entire volume of components available for work.
Note! When mixing the composition in a “cold” way, heat is released during the reaction process. If the volume is large, then the amount of thermal energy will be significant. As a result, polymerization will occur very quickly, and the composition will lose its suitability for use.
If the hardener dosage is incorrect, the resin will boil
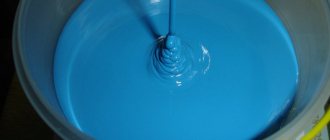
A sign of a high-quality composition is the absence of air bubbles, viscous consistency and absolute transparency.
If it is necessary to obtain a large volume of working composition, then “water bath” technology is used to heat the resin. The temperature of the substance should rise to 50 degrees. Due to this, the volume of the solution suitable for use increases and its viability is extended (on average by 1-2 hours).
In this case, the heating temperature should remain uniform throughout the entire time. When it increases to 60 degrees, polymerization will inevitably occur, and the composition will be spoiled. It is also important to prevent water from getting into the compound - the composition will become cloudy and lose its adhesive properties.
Table 1. Preparation instructions.
| Illustration | Description |
| The container is placed on the scales and reset to zero. | |
| Pour the required amount of resin. | |
| Pour in the hardener. | |
| For 5 minutes, thoroughly mix the components with a wooden stick so that as few air bubbles as possible form in it. | |
| The solution is ready for use. |
Prices for PEP hardener for epoxy resin
Pape hardener for epoxy resin
Video - What should you consider when diluting epoxy resin?
The role of plasticizer
It may often be necessary to add the plasticizer DEG-1 or DBP to the composition before adding the hardener, in an amount of 5 - 10% of the total resin volume. In this case, the proportion changes - the hardener is taken not 10, but 5 parts, pouring it in a thin stream. This eliminates the brittleness and fragility of the cured product.
Plasticizer DEG-1
A plasticizer is required when making large-format EPS products. By adding it, it is possible to prevent the formation of cracks during the hardening process.
DBP is a universal plasticizer with a wide range of uses. The specificity of its use with epoxy resin is the need to slowly cook the resin with DBP at a temperature of 60 degrees and vigorous stirring for 3 hours. In this case, the plastic effect will be minimal, but sufficient to prevent cracking of the product during hardening. Due to the evaporation of DBP, the ductility of the product will be reduced over time. The dosage of this type of plasticizer should not exceed 10%.
Plasticizer DBP
Another type of plasticizer, DEG-1, has been developed for working with epoxy resins. The proportion may vary, but is usually between 5 and 10%. The greater the amount of DEG-1 added, the more expressive the plastic effect will be - in the cured state, the resin may have the consistency of bitumen. The resulting resin is modified with a long shelf life. The downside of DEG-1 is its brown tint - transparent products cannot be made from it.
Note! The greater the plasticity of the product, the less its mechanical strength.
Solution pot life
Prices for DEF plasticizer for epoxy resin
DEF plasticizer for epoxy resin
How to breed?
Diluting glue requires maximum care, so it is better to prepare all the necessary tools and protective equipment in advance.
Rubber gloves and a mask will be required to protect the skin and respiratory tract, because both components are extremely toxic substances; containers for diluting the components and sticks for mixing them are required. In addition, the room in which work will take place must be well ventilated.
Rubber gloves and a mask will be required to protect the skin and respiratory tract, because both components are extremely toxic substances. You need containers for diluting the components and sticks for mixing them. In addition, the room in which the work will take place must be well ventilated.
Depending on the composition, epoxy can form compounds of different rigidities. One type of composition is produced for a soft elastic coupling, and a completely different one for a hard coupling. Therefore, it is necessary to purchase components and prepare the adhesive composition, strictly observing the proportions specified by the manufacturer.
Typically, bottles with resin and hardener are accompanied by instructions, which always indicate how to properly mix the components, while maintaining the proportionality of dilution. As a rule, to prepare the adhesive composition, it is necessary to dilute the components 10: 1 - 1 part of the hardener for 10 parts of resin.
The proportionality of dilution depends on the specific manufacturer. In one case, the ratio may be 10:4, in another – 10:6, and in the third, to achieve the desired consistency, you need to dilute 4 parts of the hardener in 6 parts of the resin. The proportionality of dilution depends not only on the specific manufacturer, but also on the release date of the resin and hardener, storage conditions, ambient temperature, and, of course, on the quality of both products.
You can use an old pen refill to mark a small amount. Before use, it is thoroughly washed and marks are applied to the surface at regular intervals.
You can measure the amount of the component using a more convenient tool - a syringe. There are already marks on it, you don’t need to draw them yourself, and they are applied much more accurately than those made on the rod yourself. To pour the hardener into the syringe, you just need to remove the needle and pump it through the piston, and you will have to place the resin in it in a slightly different way, because you won’t be able to draw it in through the spout - its consistency is too viscous. In the syringe, you need to remove the needle, remove the piston and plug the spout, and only then pour the resin through the top.
In order to properly mix epoxy, you first need to prepare each component for dilution. A measured amount of viscous transparent resin is added to the container and mixed thoroughly. Sometimes epoxy resin is very difficult to mix, so to facilitate this process it can be heated in a water bath, 50-60 degrees is enough. But it is worth remembering that increasing the temperature not only facilitates stirring, but also accelerates the polymerization process - it is enough to just increase the temperature of the mixture by 10? C, and the reaction will speed up 2-3 times.
After preparation, the components must be combined and stirred in a clean container, but this must not be done very vigorously, otherwise the appearance of bubbles will not be avoided. Their presence in the glue can spoil the appearance of the objects being poured if the composition is used as a filler.
The prepared composition has a liquid consistency during the first minutes, but after 10-15 minutes it begins to quickly thicken, and after 30 minutes it hardens. To extend the working time with the composition, you can use a product such as acetone - it will increase the duration of the glue to 1 hour. To do this, you need to dissolve only 1 part of this substance in a composition with a ratio of 10: 1: 1.
Precautionary measures
When working with EPS, it is necessary to follow basic safety rules.
- The room in which the compound is diluted must be well ventilated.
- Children and animals are not allowed to the work site.
- When diluting the composition, personal protective equipment is used: respirator, gloves, goggles.
- The work is carried out in special clean clothes, from the surface of which particles and threads will not get into the solution.
- Surrounding objects and furniture are also protected from accidental contact with the compound, which cannot subsequently be removed.
If the resin gets on the skin, wash it with acetone and soapy water.
Compliance with safety measures
Be careful!
Those who are planning to buy transparent epoxy glue in Moscow should also be aware that safety precautions must be taken when working with this product. In particular, it is prohibited to work with epoxies in a closed, unventilated area.
Inhaling the fumes emanating from epoxy resin can make a person feel sick. This means that access to open air is simply necessary.
If you do not have sufficient experience to confidently work with adhesives, we recommend that you use personal protective equipment. Otherwise, there is a possibility of accidentally sticking your hands together, damaging your skin, or staining your clothes.
When purchasing epoxy glue, always check its expiration date. An expired product is not only virtually useless, but can also be dangerous to human health when used.
It is also recommended to purchase epoxy only from trusted sales outlets where impeccable storage conditions are provided. For those who still have questions about how to properly use two-component epoxy adhesive, we recommend watching the video tutorial:
Making a vase from pencils and epoxy resin
Epoxy resin is easy to use and allows you to create unique decorative items. As an example, consider the process of making a vase from ordinary colored pencils.
Table 2. Vase made of colored pencils.
| Illustration | Description |
| Compliance with safety measures | You can use a small plastic bucket as a basis. The bottom of the future vase is formed using a circle cut from a thick piece of plywood, which will be placed on the bottom of the bucket. |
| The outline is outlined and cut out using a jigsaw. | |
| The top cover is made in the same way. | |
| A circle with a smaller diameter is placed on the bottom of the bucket. | |
| Lay out the pencils. | |
| A cavity is formed inside using a plastic cup. | |
| They insert the oppression - a glass filled with cement. | |
| Measure out the required amount of resin. | |
| Add the required amount of hardener. | |
| The composition is thoroughly mixed for 5 minutes. | |
| Carefully pour the voids between the pencils so that they stick securely together. | |
| Set oppression for 24 hours. | |
| The pencils are cut into several pieces to be placed on the bottom. | |
| Empty the inside of the workpiece and place cut pencils on the bottom. | |
| Prepare the required amount of composition. | |
| Fill the bottom. | |
| Set oppression for 24 hours. | |
| Remove the workpiece. | |
| Drill a hole. | |
| The workpiece is fixed on a lathe. | |
| The product is given the required shape. | |
| The plywood bottom-stand is cut off. | |
| The product is sanded and varnished. |
Vase of colored pencils
If there is a style that can be easily recognized without being an interior design specialist, it is the loft. The appearance of a residential or office space, similar in content to an industrial one, leaves no doubt about its identity. What to pay attention to when designing an office in the loft style? More details in a special article.
Yellowing
Effect – Uneven coloring of white or pastel colors after exposure to sunlight.
| Possible reason | Corrective Action |
| Polystyrene/wax coating from the matrix is transferred to the product from the matrix | Clean the matrix regularly. Do not clean the matrix with styrene solvents. |
| 2. Incorrect curing of gelcoat: 2.1. Catalyst problems | Check the catalyst (defective or old batch) and its percentage. Use only recommended catalysts in appropriate quantities. |
| 2.2. Contaminants (solvent, moisture, oils) | Contaminants affect the curing process. |
| 2.3. Inappropriate additives in gelcoat | Do not add any materials (except MEKR catalyst) to the gelcoat without approval from the manufacturer. |
| 2.4. Low temperature | Do not apply gelcoat at temperatures below 16C as this may cause the gelcoat to undercure. |
| 2.5. Old material | Upgrade your warehouse |
| 2.6. Film curing is inhibited by styrene fumes. | ensure the necessary air circulation in stagnant areas where styrene fumes collect. |
| 3. Preliminary separation | Most conditions that cause gelcoat to separate also cause yellowing. Check the same specifications as for pre-release gelcoat. |
| 4. Areas of laminate dominance | Control lamination technology. Especially in recesses where gelcoat cures atypically. This often causes the gelcoat to yellow. |
| 5. Resin separation | Overspray, excessive film thickness, separation of dissimilar pigments or contamination can cause binder/pigment separation. The concentration of the gelcoat binder on the surface of the product leads to a faster yellowing of the finished product |
| 6. Thickened gelcoat film | Avoid applying too thick a layer of coating |
| 7. Cleaning the finished product with alkaline cleaners | Do not use strong alkaline cleaners (such as ammonia or other pH >9 cleaners) to clean the gelcoat surface. |
| 8. Spray gun too close to the matrix | Maintain the required distance |
| 9. Spraying in one pass | Spray several times |
| 10. Insufficient variance | The gelcoat should be well dispersed. |
Epoxy painting.
How to paint epoxy? There are different ways to dye epoxy resin in different colors and for different needs. These needs can be divided into two types: decorative and technical.
Decorative epoxy painting.
Decorative painting of epoxy involves painting it in any color, adding and mixing special oil-based industrial dyes in any quantities for the sake of aesthetic characteristics. And as a result, neglecting the hardness and strength of the product. That is, here the aesthetic properties of an epoxy product (color, shade) and not the mechanical properties (strength, hardness) are put in first place. Decorative epoxy painting is used mainly in the manufacture of all kinds of hand-made souvenirs and jewelry, decorative crafts, etc. It should be said that the amount of added dye should not exceed 10% of the amount of epoxy. You can do more, but then the product will be too fragile or soft. To color the epoxy evenly, you first need to add the dye to the resin and stir it, and then add the hardener.
Technical epoxy painting.
Technical coloring of epoxy involves adding special dyes to it in small quantities that do not change its hardness and strength. Naturally, in this case the palette is rather sparse, but the goal here is no longer glamor, but industrial design and technical aesthetics while maintaining durability. For example, adding a small amount of printing toner to the resin will color the product black without changing its hardness. However, it is better not to paint critical and loaded adhesive joints and epoxy resin products at all. Or, if aesthetics are really necessary, paint it superficially.
Calculation of ingredients
Using math
As you can see from the introduction, a basic knowledge of mathematics will be very useful here, since we will be using formulas, namely:
Where: a is the amount of ingredient A required for mixing. b is the amount of ingredient A required for mixing. a+b is the weight of the total amount of mixture (resin) that we want to pour. k is a coefficient equal to dividing the share of ingredient “B” by 100.
Let's look at the formulas, using the same Transparente resin as an example in a ratio of 100: 60:
For example, you decide that you want to pour 80 grams of resin (a mixture of components). In this case, 80 g is a+b . Here we can also immediately find the coefficient k ; this is equivalent to dividing the proportion “B” by 100. 60 divided by 100 = 0.6 - coefficient k .
Find the quantity of ingredient A using the formula above: a = (a+b) / (1+k) = 80 / (1+0.6) = 80 / 1.6 = 50 g - quantity of ingredient A Second step is to find quantity of ingredient B using the second formula described above: b = a * k = b = 50 g * 0.6 = 30 g - quantity of ingredient A
Total: measure and mix 50 grams. ingredient A and 30 grams of ingredient B
in the formula b = a * k can be replaced by any value of a and we quickly get the number b and estimate in advance the weight of the mixture a + b that you want to get in the end.
Using the calculator
online calculators on the Internet to calculate the amount of resin and resin components needed to make a casting. The advantages of this method are obvious: fast calculation, simplicity and ease of use. Disadvantages: none.
Disadvantages: There are no disadvantages. mobile app was designed specifically for our resins (but you can legally enter any ratio you like). Our calculator is available for IOS and Android:
You can also use the calculator on our website (but the above application is better and more functional):
To dilute large quantities of polymer, it is recommended to consider the curing method (cold or hot). Based on this, it is easy to choose a mixing tool.
