Stretch ceilings have recently become an indispensable attribute of a presentable apartment. It is attractive, durable, and easy to maintain. Tensile coverings have only one drawback - the low strength of the canvas, which results in damage to the surface. It is very easy to damage the canvas; this can be caused by children’s games of throwing objects up or by a carelessly opened bottle of champagne “shooting at the ceiling.” However, this is not a reason to despair and refuse to install such a coating. Glue for suspended ceilings will help correct the situation.
When carrying out repairs, it is important to take into account all the details. The choice of glue plays an important role in this case. It is also worth knowing how to remove glue from the surface. You will learn about all the nuances by reading this article.
When gluing a stretch ceiling, you can use three types of glue:
- universal – an adhesive designed for gluing various types of materials. It can also be used on non-woven fabric or vinyl. The main feature of the substance is the presence of special resins in the composition, which give this effect;
- special glue - its name speaks for itself. It is used for a certain type of wallpaper and even for special gluing areas. There are three types of substance: with light, medium and heavy characteristics. Light wallpapers include wallpapers made from thin materials, such as paper; medium wallpapers include acrylic or fabric wallpapers; heavy wallpapers include vinyl and non-woven fabric;
- superglue - used for gluing materials that have a smooth surface.
Note.
Choose only transparent glue to hide the defect as unnoticed as possible. You should fix the damage yourself if the gap is not large. As a rule, we are talking about cuts less than 10 cm. Otherwise, you should call a specialist.
In general, there are many ways to eliminate a defect. Often, ordinary white tape is used for this. This applies to cases where the length of the damage is not large, up to 2 cm.
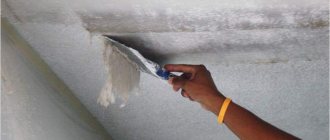
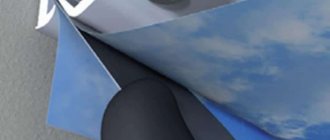
Repairing a stretch ceiling yourself In order to answer the question of how to seal a torn stretch ceiling, you need to know the algorithm for performing the work. To do this, the first thing you need to do is look through the remaining building material that appeared after installing the ceiling for the corresponding piece of fabric. It should be as similar as possible to the type of surface that you have. Cut a piece slightly larger than the size of the damaged area. If you don't have any extra material left, you should use the Internet and find the most appropriate type of fabric. The next step is to take glue and apply it to our patch. Do not pour too much of the substance, otherwise it may spread all over the ceiling and leave a noticeable mark. Bring the cloth to the damaged area and press firmly. However, do not press too hard to prevent the glue from creating creases. After the patch is securely attached to the ceiling, you need to smooth it out thoroughly.
Advice. The correct technique for applying glue to the material is described in detail on the packaging of the substance. Hold it firmly to securely fix the patch to the surface.
You should not focus on the choice of glue; the main thing here is that it contains cyanoacrylate. In addition to superglue or paint glue, you can even use latex PVA
When choosing an adhesive, you should be guided solely by the type of material that needs to be glued and the type of surface. You can already build on this. To achieve the best effect, select only a solution that matches your characteristics.
In what cases is it impossible to restore damaged canvas?
The question of whether it is possible to glue a suspended ceiling cannot be answered unambiguously. In certain situations, PVC canvas cannot be restored. The only option is to completely replace the canvas. Such problematic cases include damage that is located at the places where the seams pass. We can conclude that restoring a stretch ceiling is not the easiest task. In some cases, it takes a lot of effort to make quality repairs. The correct choice of glue is one of the most important nuances when working. You should choose only those formulations that are suitable for the method of application. Also, you must strictly follow the instructions that are on each package. By following these recommendations, it is quite possible to make high-quality repairs.
Most popular brands
Light bulbs for suspended ceilings: rules for selection and connection + layout of lamps on the ceiling
Today you can purchase products from popular brands that are ideal for gluing stretch ceilings.
Cosmofen
Cosmofen glue is suitable for various tasks. Using this product, you can quickly get the job done. This species is absolutely harmless to health.
The advantages of this glue include:
- suitable for various materials;
- hardens in a few seconds;
- is characterized by high strength;
- characterized by resistance to temperature changes and ultraviolet radiation.
Somafix
This glue is flexible and also has the following features:
- capable of gluing any materials in a few seconds;
- needs degreasing;
- after complete drying, it does not lose its plasticity, and at the same time acquires strength.
"Contact"
Superglue is great for repairing suspended ceilings. It is ideal for beginners thanks to its thoughtful design. It sets quickly enough, giving only two seconds to adjust the position. The advantage is transparency and reliability of gluing.
Loctite
Loctite offers a high quality range of adhesives that you can use with confidence on stretch ceilings. You can purchase glue in varying degrees of transparency and thickness. All types of glue are characterized by moisture resistance, resistance to temperature changes and are impact resistant.
Cosmoplast
The Cosmoplast company offers a wide range of adhesive materials, however, only grades 500, 513 and 500L are suitable for use in repairing tension fabrics. They differ in drying time and composition.
This is interesting: Heating scheme for a house with forced circulation: let’s take a closer look
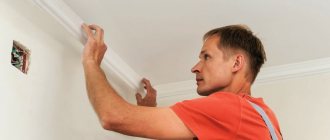
Gluing the ceiling plinth
First of all, we note that there are three types of ceiling plinths, differing in the material from which they are made.
- Foam plinth is the cheapest option for finishing the ceiling and masking the technological gap. But this plinth is quite fragile, does not have good flexibility, and is more suitable for straight areas.
- Skirting board made of polyurethane - this type of skirting board will last much longer, it is quite flexible, but it is not particularly decorative or beautiful. Polyurethane plinth has special installation features.
- Plastic plinth - allows you to imitate various textures: wood, metal, stone, so this plinth is in great demand.
It is best to glue the ceiling plinth before you glue the wallpaper. This is explained by the fact that the wallpaper may not support the weight of the plinth, it will move away from the wall, as a result, a gap may appear, or the plinth will disappear altogether. Another tip: buy a medium-length plinth; it’s easier to glue, and you won’t need to join a large number of small pieces of plinth. When buying a plinth, choose one with a wider surface for gluing.
Thus, each of the skirting boards has its own pros and cons. Therefore, when purchasing a plinth, give preference to the one that suits your room. No matter which skirting board you purchase, they are all attached in the same way. The following actions must be taken:
[custom_ads_shortcode3]
- Check that the installation of the stretch ceiling is complete and that everything is done. If you forgot something, after gluing the baseboard, you will have to tear it off.
- Cover the surface of the stretch ceiling with plastic film to prevent glue from entering; after drying, the film can be easily removed.
- Cut out the skirting boards for the joints in the corners in advance; for this it is best to use a miter box and a hacksaw; first practice on a small piece.
- Using a tapping cord, make markings to ensure the baseboard is glued evenly.
- Start gluing from one of the corners. Apply glue to the wide surface of the baseboard; Titanium or Moment Installation glue is suitable for this. Immediately coat the end part of the plinth to join it with the next one.
- After waiting a few seconds for the glue to set, press it over the entire surface to the wall.
- Immediately remove excess glue with a dry cloth.
- To ensure a strong connection between the wall and the baseboard, you can coat the seam with a primer.
- After complete drying, the plinth can be painted.
- When all work is completed, remove the plastic film.
In conclusion, we note that decorating a stretch ceiling is not such a difficult job, which you can handle on your own, without the help of specialists. The main thing is to carry out all the steps clearly and without haste. The external fit of the entire ceiling structure will depend on how carefully you glue the plinth and thermal insulating rings under the chandelier.
After all, sometimes minor flaws can spoil the entire integrity of perception. Good luck to you and good luck with the renovation!
When creating the original decor of a room, sometimes the main highlight is stretch ceilings. They allow you to achieve a feeling of luxury and create an original and unique atmosphere. However, there are times when the ceiling surface is damaged. This can be caused by various factors, including non-compliance with operating rules.
If damage appears on the surface of the stretch ceiling covering, the first thing that comes to mind is to replace the entire structure. Despite this, we need to look at the situation again. Thanks to modern technologies, you can easily and independently repair a breakdown. You can use regular glue for this.
[custom_ads_shortcode1]
What to do if the suspended ceiling has moved away from the wall
Do-it-yourself installation and dismantling of various types of suspended ceilings
The reason for this defect is the insufficiently good fastening of the frame:
- step too rare;
- low-quality screws;
- loose walls (for example, partitions made of plasterboard or aerated concrete) without additional fixation.
As a result of the action of tension forces, a gap may form between the profile and the partition.
To correct this defect, you will have to dismantle the canvas (along the entire perimeter or only in those places where it does not hold firmly) and additionally fix the baguette. There are three methods that are used in different situations:
- If the wall is strong, and the fastening was done too rarely (steps greater than 15 cm), it is enough to screw in additional screws.
- Several screws are screwed into loose partitions (plasterboard, aerated concrete) side by side, and they are placed in a “herringbone” pattern, that is, at an angle and in different directions.
- A more reliable way is to install spacers. It is also chosen when it is difficult or impossible to drill additional holes (for example, when finishing with tiles).
Let's take a closer look at the last option. You will need pieces of baguette, fasteners and tools.
The work progress is as follows:
- Spacers are made; for this, the baguette is cut into pieces of the required length.
- Place one end to the profile and the other to the ceiling, mark the location.
- A hammer drill drills holes in a concrete slab.
- Using a dowel, fix the section from above.
- The second piece of the profile is used to additionally wedge the support, screwing it to the frame.
- After this, the film is heated and the ceiling is installed in place.
Is it possible to repair the hole yourself?
If you installed the ceiling yourself, then gluing it without involving specialists will not be difficult, since you already have the necessary skills and tools. If you have no experience, then you can only repair small holes and cuts yourself. Anyone can apply a patch or decorative sticker. More complex repair methods, such as installing an additional lamp at the puncture site or re-harpooning the canvas, should be entrusted to professionals. The same applies to serious damage such as rupture of the film or the profile moving away from the wall.
Companies that install suspended ceilings must provide a guarantee. Certain types of repairs are performed free of charge. As a rule, this is the elimination of problems associated with shortcomings of specialists. Cuts and punctures caused by careless actions of the owners or other repairmen will be removed for a fee.
It is important to remember that any intervention in the ceiling structure (for example, installation of new elements or partial dismantling) will void the warranty.
In cases where the installation was carried out by specialists, you must first find the contract and check whether the warranty period has expired. And if it runs out, you should weigh the risks of repairing it yourself, since inept actions can lead to more serious damage to the canvas. It's cheaper to patch a small hole than a large cut.
Masking method and use of tape
Features and use of white glossy stretch ceilings in the interior
Many craftsmen use adhesive tape to solve this problem, since the method of work cannot be called complicated, and the end result amuses both the owners and the craftsmen themselves. We are talking about classic colorless tape. The double-sided analogue is not suitable due to its large thickness and variegated color. Colorless will be virtually invisible from the floor.
If the gap is small, then its walls can simply be glued together using tape. The sides to be fixed must be degreased and free of dust and dirt.
If the gap is significant, then you cannot do without a patch. Some people prefer to approach this problem with creativity and make appliqués at the site of the disguised breakthrough, thereby complementing the ambience and style of the room.
Professional craftsmen can recommend exactly how this should be done. Turning to specialists can save you from wasting time and money. In some cases, it is impossible to seal the gap, so the master will immediately say that the entire canvas will need to be replaced.
Also, for camouflage, a lamp or its likeness, made with your own hands using fabric or other materials, can be used. For example, you need to seal the hole with a plastic plate.
In this case, glue is perfect for fixation. For real setting, it is necessary to carefully degrease the surface of the plastic.
You can glue a ventilation mesh of a suitable size or even a pseudo-detector. A chandelier or lamp can also close the gap in the suspended ceiling structure, but for installation you need a hook on the surface of the “rough” ceiling.
These are just a few examples of how you can creatively disguise a deficiency, but your imagination will allow you to come up with a dozen more exciting ideas.
With the right creative approach, the ceiling can become the true highlight of the room. Before you glue a suspended ceiling with your own hands, you should consult with a specialist in this field.
When not to glue suspended structures
Do not rush to glue the ceiling surface with your own hands in the following cases:
- The suspended structure is torn at the seams. Even if you have experience in repair work, do not try to glue the product, you will aggravate the problem. This situation requires a complete reconstruction of the foundation.
- The ceiling came loose from the wall. In this case, the entire suspended ceiling is dismantled, the profile is strengthened or replaced with a new part.
The causes of cracks are varied, and therefore the methods for eliminating them are different. Control over a team of workers will prevent damage to the product if you do not carry out the installation personally. In the second case, before purchasing the material, check the quality and composition of the tension fabrics.
Types of Cosmofen glue
Cosmo glue has several varieties that differ in their properties.
To choose the right option, you need to pay attention to studying each one. Cosmofen CA 12 is based on cyanoacrylate, intended for joining plastic parts
Suitable for fixing EPDM seal profiles on aluminum or polyvinyl chloride panels. Cosmofen CA12 is intended for sealants made of silicone, polymer and rubber materials, elastomers. Application is carried out over the entire surface, adhesion will occur in fifteen seconds, and complete drying will take 16 hours. The seam has a transparent color and is especially durable. Super glue comes in small tubes with a long, narrow tip.
Cosmofen CA 12 is based on cyanoacrylate and is intended for joining plastic parts.
Cosmoplast 500 is available in bottles with a tip that makes it easy to apply the product in a targeted manner. Suitable for different types of materials, including rubber and plastic.
Often used in the following areas:
- For repair work with electronics;
- In the production of window products;
- Production of advertising banners and others;
- In the medical field;
- In mechanical engineering.
The seam has durable and moisture-resistant properties. After drying, it is resistant to high temperatures up to +80 degrees; high rates will lead to the disintegration of the seam. Also withstands exposure to aggressive substances.
Cosmoplast 500 is available in bottles with a tip that makes it easy to apply the product in a targeted manner.
The most popular types have been described above. But there are also other equally effective Cosmofen products. These include:
- Cosmoplast 500, Cosmo CA 500.120 are characterized by a short curing time. You can obtain an increased degree of strength by mixing the composition with a primer solution from the same manufacturer. Suitable for gluing polyamides, polyolefins, oilcloths, silicone seals, rubber and plastic parts. Popular use in shoe repair and working with leather materials;
- Cosmoplast 515 is intended for the purpose of creating a durable seam between decorative film and different types of materials. It is distinguished by the absence of bubble formation on the surface. Setting occurs in 180 seconds, which makes it possible to change the position of the parts if necessary. Often used for production purposes;
- Cosmofen CA 140 is used for gluing metal, plastic objects, rubber seals;
- Cosmoplast 564 allows you to create strong connections between porous surfaces; it is popularly used in the installation of sewer pipes and sealing materials;
- Cosmo SA 500.200 is a fast-acting product. Suitable for fixing more types of materials. The seam is durable, rigid and resistant to high temperatures; no thinners are used in the composition;
- Cosmofen Plus stands out with its white color and the seam is very strong.
What can be repaired?
The most common case when a film or fabric cannot be repaired is a tear along the weld seam. The scale of such a rupture makes its repair impractical. If there is a small tear, the craftsman may be able to repair it, but if the seam is torn over a large area, the entire fabric will have to be replaced.
Places where melting occurred from lamps or fixtures can most often be masked and strengthened. If this happens around a built-in lamp, the melted area around it is sealed with a special heat-resistant ring, which will mask the damaged area and strengthen it.
If a tear or cut occurs near the edge, no further than 15 centimeters from the baguette, you can simply remove it. To do this, the stretched material is removed from the baguette securing it and cut along its entire length, capturing the area with the cut. After this, the canvas is stretched again and tucked into the baguette.
Relatively small defects that are located far enough from the edge can also be masked. Where there is a hole or puncture, you can embed another lamp or ventilation grille. In general, it makes no difference what to install, as long as the break point is completely hidden by the installed device or decorative element.
If the tension covering is installed incorrectly, another type of damage may occur - tearing off the harpoon with which the fabric is secured in the baguette. This defect cannot be eliminated on your own - you will need to call a technician, who in most cases will fix the problem in a short time.
It is much worse when this happened due to too much tension in the fabric. It could have been cut incorrectly, in which case the entire fabric would need to be replaced.
When flooded by neighbors above, the stretched film will almost inevitably sag. It can be re-stretched, although it will require the arrival of a specialist with a heat gun. If it is not PVC film that is stretched, but fabric, then, after flooding, unsightly stains appear on it, which, unfortunately, cannot be completely removed. This coating needs to be replaced.
To better understand how a stretch ceiling is repaired when, for example, a cut occurs, you can watch the video presented below.
Here you can just see how a small tear in the stretched fabric is eliminated, near the fastening baguette. A complete replacement was not required - it was done by pulling on one side and moving the fastening element to a new location.
Features of materials
The method for eliminating the defect depends on the type of decorative coating, the cause of the damage, the size of the defective hole and its location.
Canvases are divided into two types:
- fabric. During manufacturing they are impregnated with special polymer solutions. The material is based on synthetic fibers with the addition of natural threads. The standard thickness of the finished canvas is 0.35-0.39 mm, the material is not afraid of sudden temperature fluctuations and is resistant to mechanical damage.
A tear in the fabric ceiling fabric
The fabric fabric cannot be stretched very much due to its weak elasticity. But, in the event of a cut, the material will not “crawl” to the sides, it will be easier to repair. A complete replacement of the decorative surface is done if the damage to the suspended ceiling is more than 30 cm;
- film They are presented in canvases based on polyvinyl chloride. Despite its small thickness of 0.17-0.22 mm, PVC film is not inferior in strength to fabric surfaces. The advantages of film ceilings include antistatic properties, fire resistance, and moisture resistance. As for the cons, the main drawback of vinyl coverings is the fear of sudden temperature changes.
The elasticity of PVC film sheets will allow you to stretch the material if, for example, the cut is located next to the baguette. However, it is not recommended to apply strong force, since the film will change shape, and after removing the cut, unevenness and waves will form on the ceiling surface.
Stretched stretch ceiling made of PVC film
Despite the fact that both types of materials contain polymers, the structure of the canvases is different, as is the method of installation. Consequently, the options for eliminating breaks in decorative surfaces will also be different.
Tools we will need
- screwdriver;
- perforator;
- roulette;
- level;
- heating device (heat gun or hair dryer);
- blades for film installation (angled and straight);
- canvas and profiles (plastic or aluminum);
- additional components for suspended ceilings: decorative inserts (can be of different colors); special clothespins; glue, plastic rings for lamps, various fasteners.
We make markings using a level. Profiles are installed around the perimeter on which the canvas will be installed. It is better to choose an aluminum profile, it will last longer. We warm the room to 40-50 degrees. Next, carefully unpack the film. If you find wrinkles on the canvas, do not worry - they will disappear over time.
Profile for stretch ceiling
Wherever you order the film, in addition to the fact that it must be the right size, it must have a “base angle” - installation begins from there. We install hanging clothespins in the corners. It would be best to wrap them in something soft so as not to damage the canvas. Next, we heat the already hung canvas to 70-80 degrees, remove the clothespins, and then use a special spatula to fix the film in the profiles. Gradually and very carefully we complete the fastening of the canvas. Then we finish finishing with fastenings
Causes of damage to tension fabrics
Rupture of the fabric at the seam
Rupture of the tension fabric can occur as a result of:
- installation of cornice. When a ceiling molding is installed, a pad of soft fabric is placed between the sharp ends of the cornice and the decorative fabric;
- children's games. Such situations occur extremely rarely, but they do happen. For example, a child, after playing, can throw a toy (dart, car, etc.) high. If it hits the ceiling, it will damage the canvas;
- a champagne cork flying into the ceiling;
- low quality materials and mistakes made by craftsmen during the installation process. In the first case, the fabric may come apart along the seam if it has been over-tightened. In the second, the guide profile, unreliably attached to the wall or surface of the base ceiling, will break out and break through under the weight of the canvas.
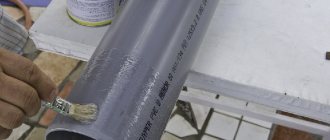
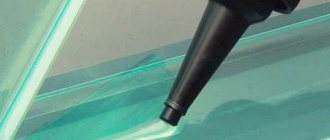
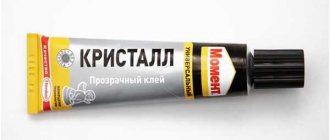
Application of glue
Glue is used for special pipe linings. The outline is attached to the transparent glue on the back side of the material. Transparent - you need to choose it so that there are no stains. In addition, the ring for the lighting fixture is fixed with glue. This is necessary to avoid contact between the canvas and the hot lamp. Also, glue is used to attach the ceiling plinth. It is attached to the wall, and not to the ceiling, because the canvas can be torn when dismantled. Skirting is needed not only for decoration. but also in order to close the technological gap between the wall and the canvas. If you damage the canvas, you need to put a patch on it, which, of course, is attached with glue. Finally, glue is used to connect parts of the canvas if it is not one.
Adhesive for stretch ceilings
Using removers or cleaning products
To remove fresh glue, use a special remover, moisten the stain generously with it, and then wipe it off. If the first time it was not possible to completely remove the residue, you can repeat the manipulation several more times.
It will take more time and effort to clean the surface of glue that has already dried. You will need a glue cleaner; it is applied and left for a day, and then removed with a sponge. You should know that the substances used for tension coverings should not contain chlorine or any aggressive substances. They have a negative effect on the film and can ruin the appearance of the structure.
If you tore the ceiling
Let's figure out how to fix this situation. Actually, it's not that difficult. We only need a few tools:
- glue for suspended ceilings;
- scotch;
- needle and nylon thread;
- knife or scissors.
If you have a piece of canvas left after installation, use it. If not, try to find the same film in the store. Algorithm of actions:
- Cut out the patch. Of course, it should be slightly larger than the hole.
- The patch is treated with glue. We press it to the crack. Try not to press too hard, otherwise a collection will form and the liquid will come out.
- Carefully smooth the surface.
If the hole is small, you can simply cover it with tape. If the ceiling is matte, it is better to choose matte tape.
Installation of additional lamps and piping
In place of a fresh hole in the ceiling, instead of a patch or appliqué, you can install additional decorative lamps. Other options include installing vents, fire detectors, air conditioning units and other useful or decorative elements.
To install such elements, you should use a plastic ring that is attached around the hole. A regular round hole is cut along its inner diameter. This will prevent the hole or puncture from spreading further. You can make the ring yourself using plastic a couple of millimeters thick, or buy a ready-made one at a hardware store (in the accessories department).
Installation of an additional lamp
Instructions for installing the lamp in place of the hole are as follows.
Step 1. On the original ceiling, which is hidden by a suspended ceiling, install platforms of the required height and install wiring for the lamp.
Step 2. Stretch the working PVC fabric.
Step 3. Find the platforms for the lamp by touch and make a mark where you need to cut a hole.
Step 4. Glue a plastic ring in place of the marker.
Step 5. Using a utility knife, cut a hole in the inner diameter of the ring.
Step 6: Pull the wires out of the hole and then install the lamp.
A similar technology is used to bypass heating pipes, which has to be done in almost any room. To bypass, a plastic ring is made equal to the diameter of the pipe plus another 5 - 7 millimeters.
Step 1. The ceiling canvas is tucked into a baguette throughout the room. A distance of approximately 20 centimeters is left next to the pipe on both sides.
Prices for recessed lamps
recessed lamp
Step 2. The canvas is cut from the edge to the pipe.
Step 3. A plastic ring (cut in one place) is threaded into the pipe and glued to the canvas at the cut site.
Bypassing pipes in a suspended ceiling