Today, paints are widely used to decorate the ceilings in apartments. The popularity of this material lies in the fact that it is highly resistant to external factors. The painted ceiling is easy to clean with wet cleaning. Painting the ceiling is as easy as whitewashing. Today we will look at how to properly paint or how to paint a ceiling with water-based paint without streaks.
How to properly paint a ceiling with a roller
How to paint a ceiling without streaks is a question asked by many beginners, because the desire to get a beautiful whitewash with your own hands is accompanied by the intention to save money on the services of a professional. You can handle this work yourself; it is important to properly prepare the surface itself. It is this stage that will largely determine the final quality of the painting. Therefore, all further steps will be described below step by step.
You can handle this work yourself; it is important to properly prepare the surface itself.
Let's start painting
Any work begins with surface preparation. The quality of the future coating will entirely depend on this. There are several types of ceiling surfaces: concrete, gypsum and plasterboard, although all of them are covered primarily with a layer of putty.
Surface preparation
All work can be done with your own hands and without the help of specialists.
Stages:
- Initially, it is necessary to assess the condition of the surface. If there are layers of old paint on it, it would be better to wash them off or remove them mechanically.
Advice. As for the whitewash on the ceiling, you can wash it off with a previously prepared vinegar solution. After this, the ceiling surface is again thoroughly washed with ordinary detergents and dried.
Removing old coating
- With water-based paint, the situation is much easier, since this type of paint is based on water. It is simply washed off from the ceiling surface with plain water and detergent.
- After complete removal of the old finish, the ceiling is well primed to improve adhesion. Bundles of dust residues and strengthens the surface.
- If there are traces of mold on the ceiling, then choose soil with antiseptic additives.
Deep penetration soil
Preparing the surface for work
First you need to prepare the room itself for work; to do this, remove unnecessary items from it. Large furniture is moved to the center so that it does not interfere with painting. It is recommended to cover everything that has not been taken out of the room with film; wallpaper and floors also require protection.
The stages of the preparatory part include:
- It is necessary to get rid of the old finishing material; this process is carried out carefully to obtain an ideal surface.
- The ceiling is covered with a primer, after which it is leveled with putty, after which the surface is sanded.
- The joints with the walls must be sealed with masking tape so as not to touch the finishing material.
- The water emulsion itself is prepared, the rules for mixing it are indicated on the packaging, these recommendations should be strictly followed.
The transition to painting occurs only after it has dried.
The ceiling is covered with a primer, after which it is leveled with putty, after which the surface is sanded.
Material selection
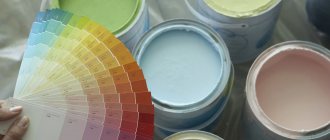
Before proceeding with the actual finishing, you need to select a material. When choosing it, you should pay attention to the microclimate of the room in which it will be used. This will create a strong and durable coating.
The most common option is water-based paints. They are best suited for finishing living rooms. The reason for this popularity is that it uses water as a solvent. This means that when painting and drying the coating no harmful fumes will be released into the air. Also, water-based paints dry very quickly. So, the surface will be ready within a day after painting.
As for the choice, today you can find several types of water-based paint on the market:
- Silicate. The basis is silicate glue. They have a low cost and are ideal for painting damp rooms. The only drawback is instability to abrasion. The finish is not suitable for cleaning with water.
- Polyvinyl acetate. Compared to the previous material, they have higher abrasion resistance. But, they are not suitable for cleaning with water. The finishing coating does not withstand high humidity well. So, even splashes of water can leave marks that will ruin the aesthetics of the coating.
- Mineral. The substance contains cement or lime. Often used for finishing brick and concrete structures. The only drawback is its fragility. The coating will need to be renewed periodically.
- Acrylic. The substance is based on acrylic resins and is very resistant to abrasion, as well as temperature changes and high humidity. Therefore, experts recommend using this option for finishing the ceiling in rooms such as the bathroom and kitchen.
- Silicone. Paint based on silicone resin. It can be used to hide small cracks. Ideal for wet areas. Easy to apply and highly resistant to negative environmental factors. The only drawback is the high cost.
As you can see, today there is a wide range of such finishing materials on the market. Therefore, you need to approach the choice very carefully.
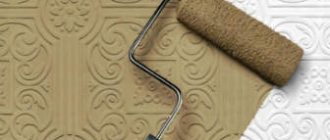
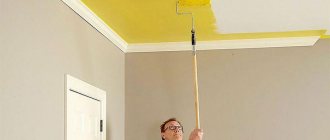
Rules for roller painting the ceiling
To better understand how to paint a ceiling with a roller without streaks, you need to study the following recommendations:
- It is better to do the work in natural light; heating of the lighting fixtures will spoil the result;
- The starting point is chosen to be the corner farthest from the entrance to the room;
- You need to paint in parallel lines. In such a way that the strips lie slightly overlapping each other;
- To avoid stains showing through, you need to apply the next layer only after the previous one has dried;
- It is better to apply a new layer perpendicular to the previous one.
You need to paint in parallel lines.
How to protect the ceiling from absorption of water-based paint before whitening
In the process of painting the ceiling surface, problems may arise due to uneven absorption of liquid by the concrete, plasterboard or wooden base. The best way to avoid stains is to pre-prime the surface. The acrylic primer can be diluted with a small amount of water and rolled with a foam roller in two layers, according to the scheme used when painting with water-based emulsion.
Advice! It is best to prime with a hard brush - a brush, the quality of the surface is beyond praise.
Sometimes it happens that it is not possible to buy primer, but you need to paint the ceiling now and then. As a primer, you can use a water-based emulsion diluted with water twice. The material will need to be applied to the concrete surface of the ceiling with a brush, intensively rubbing the liquid until bubbles form.
On concrete, it is better to prime with paint brush.
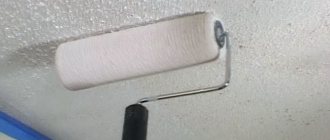
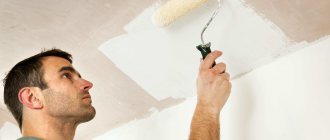
Paint application technology
When painting the first layer, water-based paint becomes more liquid, which promotes better adhesion to the surface. The roller is rolled in a special tray so that it is well wetted, but the excess should remain on the tray. To get rid of excess, you can roll it over a piece of unnecessary wallpaper. Starting from the corner, move along the entire wall; for this it is recommended to choose a roller with long bristles; for the rest of the ceiling it is better to use a roller with medium bristles.
It is more convenient to work with a tool equipped with a long handle.
The overlap of the strips should not be more than 5 cm. After applying the 1st layer, it is checked at different angles to identify unpainted areas, acting in the same direction. When defects are identified, they are painted over in the same direction. However, you should not paint them if the paint has already dried. In this case, it is better to correct them when applying the 2nd layer.
You should not move on to the second layer before the first has dried because this will cause streaks to appear on the surface. The manufacturer indicates how long it will take for the layer to dry on the packaging. It is applied perpendicularly, this helps to avoid streaks.
High-quality paints and varnishes require the application of only two layers to obtain an ideal result; cheaper options need to be applied in three layers.
Starting from the corner, move along the entire wall.
Do-it-yourself effective ceiling painting technology
You need to paint the ceiling using quick, even movements. The difficulty lies in maintaining an even application.
The surface must be treated within an hour. The process of applying ceiling paint with your own hands includes the following steps:
- Preparing tools. You will need a roller with the required attachment, a paint composition, and a container with a grooved edge. The volume of the water-based composition is selected in accordance with the area of the room. When applying the primary coating, the paint is diluted with water to the consistency of kefir. When forming subsequent layers, thicker material is used. To give the composition the desired color, color is added in small portions.
- Applying the first layer. The nozzle is moistened with coloring agent so that the cylinder is covered on all sides. The excess is removed by rolling the tool on the grooved side of the tray. This will prevent liquid paint from getting onto the floor and causing smudges. A handle is placed on the base of the clasp. The telescopic structure is given the desired length. At the first stage, hard-to-reach places are painted with an angled roller. After this, they begin processing flat surfaces, moving from the window to the front door.
- Applying subsequent layers. After pre-staining, wait 10 hours. The coating must dry completely. The coloring agent is applied in narrow strokes perpendicular to the previous one. After the last layer has been applied, the surface is treated with a clean nozzle, which helps eliminate defects.
How to avoid stains
Everyone wants to get a streak-free ceiling; beginners worry about painting more than experts. But if you adhere to painting technology, and also take into account the recommendations below, then getting the desired coating will not be so difficult:
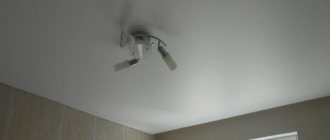
- Heating devices should be removed from the room and batteries should be turned off. Lighting fixtures on the ceiling should also be removed;
- Make sure that there are no drafts in the room during painting;
- You should check the quality of the coating using light, or looking at it from the other side;
- The work should be carried out continuously to obtain uniform drying;
- Coloring directly below the head should be avoided;
- Do not move from one area to another.
The work should be carried out continuously to ensure uniform drying.
The article described in detail how to paint a ceiling with water-based paint without streaks. Following basic rules will allow a non-professional to get the perfect coating. The main thing is not to rush and act step by step. And then the resulting result will please the owner of the premises for a long time.
Additional Information
The ceiling is painted mainly with water-based compositions, among which there are many varieties with unique properties, for example, latex ones create a waterproof coating.
Things to consider before painting:
- It is very important to choose the right tool for the type of paint you have chosen.
- Professionals paint ceilings and walls using a spray gun, but if you do the repairs yourself, it’s easier to purchase brushes and rollers.
What composition to paint? Some tricks
Important! Using a hand tool, you will not be able to get the same quality result as with machine application. However, this quality is more than enough in most cases.
How long does it take for water-based paint to dry on a ceiling?
On average, the water-based emulsion on the ceiling dries in 2.5-3 hours at room temperature. The drying speed largely depends on the temperature and humidity of the air. Typically, the manufacturer indicates the average for standard conditions on the packaging.
You should not try to speed up the drying process of the ceiling using drafts, hair dryers or the heating system turned on at full power. The layer must dry naturally, this is the only way to achieve good quality coating.
Preparatory work
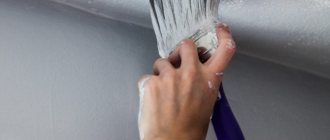
Before painting the ceiling with your own hands, you need to remove the old coating from it. The easiest way is to get rid of whitewash. To do this, you need to moisten the ceiling with water from a spray bottle, leave for half an hour and repeat the procedure. Then take a spatula and scrape off the whitewash. At the end, you just need to wash the ceiling with a sponge and let it dry.
Removing a layer of paint
Things are more complicated with paint. To do this, you must first treat the surface with a spatula or sandpaper to remove exfoliated fragments, then moisten the ceiling generously with water and leave it for a while. As a result, the paint will swell and swell, after which it can be easily removed with a regular spatula. Most often it is necessary to repeat the procedure several times.
The old coating is washed off or scraped off with a spatula
Removing stains
To remove smudges and rust, use a 5% solution of copper sulfate. To do this, apply the liquid to a rag and wipe the surface. If traces remain, you need to use one of the following options:
- a two percent solution of hydrochloric acid (when working with this product it is important to use personal protective equipment);
- a solution of 1 part drying oil and 20 parts lime;
- a thick lime-based product with the addition of water and denatured alcohol.
These compounds must be applied to the ceiling and left for 15 minutes, then rinsed off with water. In most cases, it is enough to repeat the procedure twice.
Not all stains are washed off the first time, so the attempt should be repeated at least a couple of times
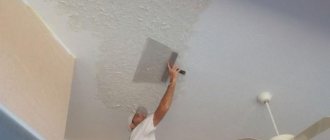
Ceiling leveling
After removing all the stains, you need to sand the ceiling again to remove any unevenness, and then brush off the dust. After this, you need to wait 1–2 days for the surface to completely dry. This is to check if the stains will appear again. If the coating is ready, you can start puttingtying.
Plastering a ceiling without experience is quite a difficult task, so it is advisable to invite professionals for such work.
Typically, standard finishing putty is used for interior work. The material is sold ready-made, so you just need to unpack the container and scoop some material onto a spatula. Use a tool to stretch the composition over the surface so that the layer is uniform. In this way, you need to finish the entire ceiling and let it dry again (the drying time is indicated by the manufacturer on the packaging).
A little less often, oil-based and glue-based materials are used for leveling. This putty is applied with a roller or brush. Before working with it, it is important to repair all large defects with cement-sand mortar.
Padding
This procedure is necessary so that the paint is better absorbed into the ceiling. The material is applied with a roller or brush. During work, it is important to ensure that the primer covers the entire surface. The first layer is left to dry, then the second is applied.
When selecting a primer, you should take into account the type of paint, as rejection may occur.