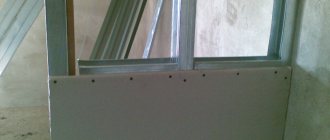
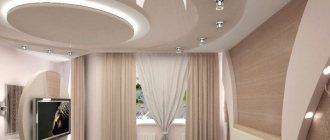
It is not uncommon for a new house to be purchased and the owner immediately begins remodeling and remodeling the rooms. Especially often, large rooms tend to be divided into two small ones. For this purpose, partitions made of two layers of plasterboard are actively used. A very important question when installing a plasterboard partition is which door to install? And quite often the choice falls on installing a built-in sliding wall. In its structure, such a door resembles a compartment and is ideal for installation in compact rooms where swing doors would take up too much space.
Installation of sliding doors, installation in a plasterboard structure
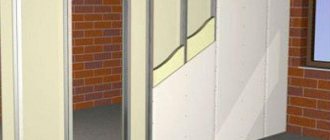
A sliding door in a plasterboard partition is one of the methods of saving space and dividing a room. From time to time, interior sliding doors are used as an element of a finishing design solution. What does the structure consist of:
- frame made of special iron profile,
- drywall,
- sliding mechanism,
- door leaf.
Plasterboard partition
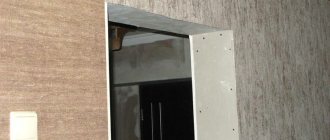
It can be attached to a solid wall or used as an independent decoration for the room. When closing, the door leaf is recessed into a niche between the two sides of the partition or a solid wall and a false wall.
Retractable doors
Varieties and features
All sliding systems are identical in design. They may differ in dimensions, material, design of rollers and guide rails . The dimensions adhere to standards that imply a door height of 1.9–2 m and a width of 0.6 to 1 m. For large openings, built-in double compartment doors are installed in the wall. If you need to deviate from the standards, the cassette is made to order in the required sizes.
The factory design is supplied in its entirety. The pencil case is already folded and ready for installation. When manufactured independently, the cassette is assembled from a thick board, timber, or galvanized profile. The door leaf can be adapted to any suitable size.
Of the additional devices, the system is most often equipped with a door closer . The mechanism creates a smooth closing of the sash. For complete convenience, the sliding interior door, hidden in the wall, is equipped with automation. The leaf opens when a person approaches and closes after he passes through the doorway. The automation is triggered by sensor signals. The canvas is moved by an electric motor.
Automation is rarely installed in residential premises due to cost and impracticality. Autonomous systems are in demand in stores and other buildings where a large flow of people passes through the day.
Profile
Wall with plasterboard
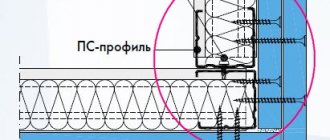
with a sliding door has a profile frame. The iron profile for its installation is made of zinc-coated steel. Its types:
guide - for the base of the frame,
- rack-mount - inserted into the guide,
- corner - for designing corners after cladding.
- width - 50, 65, 75, 100 mm,
- height - 37 or 40 mm,
- length - 2750, 3000, 3500 or 4000 mm.
The choice of profile size depends on the height of the partition, the number of layers of sheathing, the size, thickness and weight of the plasterboard sheet. The heavier the gypsum board cladding, the stronger the profile is needed. Fasten it to the wall using dowels and screws. The guides and rack profiles are fastened together with zinc-coated self-tapping screws and non-pressed washers. The pitch between the profiles is 600 mm. If you need a stronger wall, you can install the rack profile more often.
Fundamentally! The required length of the profiles depends on the height of the wall. It is necessary to choose it with reserve: for a partition with a height of 2800 mm, racks with a length of 3000 mm are suitable. It is unrealistic to increase the profile height.
Profile
The second stage is the construction of the sheathing
There are two types of frames that can be made for drywall.
- Wooden sheathing is cheap and easy to install. But short-lived and unreliable. Unfortunately, you will have to use a very expensive antiseptic to protect the wood from rot and mold. In this case, there is no reason to use this type.
- The metal frame is reliable, durable and practical. It can be reused, nothing will happen to it, even if it bends, it is easy to straighten. Although the price of such profiles will be slightly higher than for wooden ones.
The choice is yours, just remember one feature - if galvanized posts are quite difficult to bend, then it is difficult to find a wooden beam that is perfectly straight.
Frame installation instructions (metal):
- Initially, the guide profile is marked. For false plasterboard walls, it is installed on the floor and ceiling.
- Then the wall surface is marked for installing brackets.
- Now use a drill to drill out all the holes.
- The dowels are inserted and the brackets and guide profile are screwed on.
- Now the vertical posts are fixed on the canopies so that they form a perfectly flat plane. To do this, you can stretch the string from one corner to the other, or use a laser level.
The brackets have many holes through which you can easily adjust the vertical stand
Don’t forget that we have a false wall, which is used for an interior sliding door. Therefore, the frame must be fixed so that the door leaf can easily hide in the niche.
The sliding door mount is also installed in advance so that it is possible to adjust the movement of the door leaf
Drywall
The profile is only the skeleton of the structure with the door. The frame sheathing is made from plasterboard. Gypsum plasterboard (gypsum board, dry plaster) is a construction and finishing material consisting of a gypsum core lined with cardboard on both sides. The characteristics of drywall allow it to be cut not only in a straight line, but also to create curved shapes. The sheet has the shape of a rectangle and the following dimensions:
- thickness 6-24 mm,
- length 2.5-4.8 m,
- width 1.2 m (not counting sheets 24 mm wide, their width is 60 cm).
Types of plasterboard sheet:
- Ordinary (GKL). Grayish sheet with blue markings.
- Fire resistant (GKLO). Grayish leaf with reddish markings.
- Waterproof (GKLV). Greenish leaf with blue markings.
- Moisture and fire resistant (GKLVO). Greenish leaf with reddish markings.
Fundamentally! Antifungal components can be added to gypsum. The choice of type of drywall depends on the features of the room in which the partition will be installed. It is better to use water-resistant plasterboard for the bathroom, and moisture- and fire-resistant plasterboard for the kitchen.
Partition for a sliding door that slides into the wall
This video shows how to make a partition for a sliding door
.
The door will move inside the wall
.
Kitchen renovation: Plasterboard partition and installation of sliding doors
Kitchen renovation: Plasterboard partition and installation of sliding doors
.
Operating procedure
The first thing you need to do before starting work is to calculate all the dimensions and, if possible, draw up a very accurate and detailed drawing of the future structure. This is a necessary condition for installing a regular partition, and for installing a door, the drawing is simply vital. Calculate the height of the guide to have an accurate idea of the location of the future door, and the size of the opening so as not to mount a frame that will not be suitable for the construction.
Next, mount the partition frame. Already at this stage you will need a drawing so as not to miscalculate the size and location of the profiles.
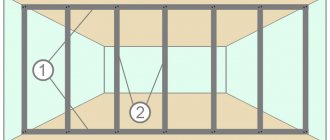
There is one detail that makes the metal frame more durable. The walls of the frame, in order to increase the rigidity of the structure, must be connected to each other with special jumpers, which are also made of metal. In this design, these jumpers are installed without fail. But here a problem arises. As mentioned earlier, there should be no obstacles in the path of the sliding door, so this structural element must be placed so that they do not interfere with movement. But how to do that? Instead of the usual strengthening, you will have to take a slightly different route. It is necessary to install double vertical posts. This is done in this way: one profile is inserted into another so that a rectangular section is formed. The profiles are connected using ordinary metal screws. You can see the frame with double vertical posts in the photo below.
The next step will be the installation of door guides, which have already been shown in picture No. 1. Also, you need to install door travel limiters. This is a very important detail that is often forgotten when installing a sliding door, but in vain. Door stops are needed to prevent damage to the wall, as well as the hinges and the door itself, when opening the latter. These parts set the maximum distance to which the sliding mechanism can advance. Often people who have neglected such a detail regret it very much when they repaint a recently purchased door that has suffered from impacts.
The frame is covered with plasterboard sheets. The structure is sheathed on both sides and in two layers. The two-layer lining of the partition is not only a prerequisite for installing a sliding door, but also a guarantor of the reliability and long service life of the structure. In addition, only double sheathing with plasterboard sheets can provide the desired sound insulation and thermal insulation. Then the clean floor is laid. And only after that it’s time to tackle the door itself.
It's time to hang the door leaf directly. After this, you need to install the platbands. There is a small nuance associated with these details that needs to be taken into account in the layout.
The width of the doorway in our partition is, for example, nine hundred millimeters. It is necessary to take into account the size of the platbands when calculating the width. We calculate twenty millimeters and get the required width of eight hundred and eighty millimeters. It is important to remember that the height of the opening always corresponds to the height of the door itself.
Particular care must be taken to correctly install the lintels located directly above the opening and in the direction from the opening into which the future door will slide. All of them must be located in the same plane, and the plane itself must be strictly horizontal. It is very important to correctly calculate the height from them to the subfloor. This height is selected equal to the sum of the following indicators.
- The thickness of the coating covering the floor;
- Six millimeters as the size of the gap, which is located between the floor and the door;
- The size of the bottom guide is fifteen millimeters;
- Door height. Let’s take roughly two thousand one hundred millimeters;
- The size of the pins located between the rollers and the door is about fifty millimeters;
- Guide height;
- The size of the timber is fifty by seventy millimeters.
After the frame of metal profiles is mounted, we install the guide, or rather, attach it to the beam. After this, we take the beam to which the guide is attached and install it on the lintels located above the opening. Make sure that the center of the guide is located strictly along the axis of the jumper. In the guides themselves, you also need to install pins with rollers, as well as limiters, the importance of which we have already talked about earlier. But the limiters still need to be adjusted. For this purpose, we take a piece of timber, which is equal in length to the width of the door leaf, and hang it from the studs. How to properly fix the limiters so that the door is convenient to use? It's easy to measure. When the mechanism is open, the blade should extend seventy millimeters beyond the opening. This ensures easy access to the door handle. When closed, the door leaf should be adjacent to the lining of the opening. If these conditions are met, you will reach the desired level at which the limiters should be fixed. If you do not fix the limiters correctly, the door may not open enough to provide free passage through the partition, or may not close completely, which is also undesirable.
After you have completed the installation of the mechanism in accordance with all the outlined parameters and drawings, only after this does the sheathing of the frame with plasterboard sheets on both sides in a double layer begin. When the partition is completely sheathed, all the seams are sealed and the rest of the dirty work related to the sheathing and creation of the partition itself is completed, you can begin laying the floor. Next you will have to work a little more with the door leaf. This is the final stage of work, which can be completed after the complete and final installation of the interior partition made of plasterboard sheets. We need to attach special brackets to the canvas, which serve to connect it with the roller studs, so that we have a solid structure where all the parts interact with each other correctly. Also, you need to select a groove for the lower door guide. We attach the lower guide to the floor, and also install the trims. This completes the installation of the door in the partition.
If desired, you can continue working by decorating the door with decorative elements. For example, many people like to draw a variety of beautiful designs on doors and depict various figures. Mirrors are often hung on the door. Not only ordinary mirrors, which are designed to be looked at, but also decorative mirrors are quite popular. Such elements, as a rule, are made in various forms, have colorful colors and go well with different types of interior. If you have taste, you can customize the retractable door to absolutely any design. But you can also always get by with a classic door and simply varnish or paint the door.
Mechanism and devices
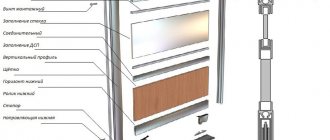
The door sliding mechanism consists of the following parts:
- upper guide - the canvas moves along it;
- lower guide - prevents the door from rolling;
- rollers on the carriage - ensure movement of the sash;
- mounting plates for installing rollers - their shape and size must correspond to the thickness of the web;
- bottom roller;
- stoppers - limit the movement of the sash.
Sliding mechanism kit
If the door has two leaves, in addition to the usual mechanism, a telescopic one may be introduced. Door leaves with a conventional mechanism are installed in one line. Telescopic doors
have sashes installed parallel to each other. They can move in different directions or move into the same wall.
Telescopic mechanism
You can purchase and install a mechanism with a synchronizer. When you move one of the doors, the second one will move automatically automatically.
Another useful addition that can be installed on sliding partitions is a door closer. It will ensure smooth opening and closing of the canvas. Pushing or closing the door
halfway, you can let her go. She herself will finish moving in the appropriate direction.
For comfortable removal of the leaf from the wall, you can install a pusher (Push-to-open mechanism) for sliding doors. When you lightly press the end of the door, which is pushed into the partition, it springs back and automatically slides out.
For smooth door
Handles of a special shape are installed in the plasterboard partition on the canvas. They are recessed deep into the sash. There are a huge number of options for such handles on sale: round, rounded, rectangular, square and others.
Handles for sliding doors
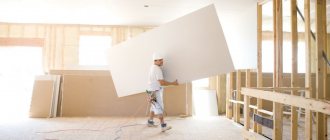
Installation and fastening of drywall
You need to start laying with solid sheets, that is, from the wall (photo above)
Please note that plasterboard on the partition is laid and fastened using the same technology as when cladding walls or ceilings
That is:
The distance from the edge of the sheet to the installation site of the self-tapping screw should be in the range of 1.0-1.5 centimeters.
The distance between fasteners should not exceed 25 centimeters, ideally this figure should be 10-15 centimeters. Adjacent sheets must be joined on the same profile. The head of the fastener must be recessed into the sheet to a depth of 0.5-0.8 millimeters.
The length of the self-tapping screw should not be less than 2.5 centimeters if the partition is being erected in one layer of drywall. If a two-layer method is used, then the length of the fastener should not be less than 4.0 centimeters
Here it is very important to maintain one indicator - the penetration of the self-tapping screw into the profile, which is determined by the size of at least one centimeter. By the way, the self-tapping screw must penetrate into the wooden frame to a depth of at least two centimeters.
When all the sheets of drywall are installed on one side of the frame, you can move to the other side. The next stage is laying mineral wool.
Here you can use either mats or rolled material. It is best to choose the width of the material a little larger than the interprofile space so that the heat insulator fits between the racks, so to speak, in tension, without leaving gaps.
Now you can start covering this side with plasterboard. The technology is identical to that carried out on the opposite side.
I would like to draw your attention to one point that some masters consider very important. This applies to drywall installation.
It doesn’t matter whether the door is in a plasterboard partition or not, but there is an opinion that the sheets must be installed on the frame with a vertical offset of forty centimeters relative to each other. Thus, a uniform distribution of loads that arise during the operation of this element is achieved
Thus, a uniform distribution of loads that arise during the operation of this element is achieved.
We will not judge anyone, and we will not argue with anyone. Each master has his own approach to solving the tasks assigned to him.
If he thinks that such a shift is necessary, then no problem, let him do it with the shift. We won’t advise you, as beginners who do this whole process with your own hands, to do this.
12055 0 4
Materials for canvas
The doors of sliding doors, as well as swing doors, can be panel or panel. Panel panels have a flat surface, panel panels consist of a rectangular or shaped frame, and panel inserts made of glass, polycarbonate, MDF, wood, etc. The sash base for sliding doors is made from the following materials:
- Iron profile. In most cases, aluminum frames are used. They are a frame for canvases that are 100% or partly glass.
Glass door in iron profile
- Solid wood. Paneled door panels made from solid valuable wood are decorated with milling, and panel panels are varnished. The base of a panel door is made from cheap wood, for example, pine, and then covered with natural veneer made from expensive wood.
- Chipboard. The cheapest material from which you can make a panel board or a rectangular frame for a paneled one. The disadvantage of chipboard is the presence of harmful substances in its composition. They stand out to a small extent, but if you have a choice, it is better to make the door from a different material. The ends of chipboard products are finished with an edge.
- MDF. This stove is slightly more expensive, but has a higher level of environmental safety. Another advantage compared to chipboard is the ability to produce curved parts. Because of this, it is possible to make from MDF a flat panel or a frame of a geometrically serious shape, and a shaped base for a paneled door with milling. For covering chipboard and MDF they use:
- natural veneer,
- laminating films (chipboard only),
- PVC films,
- eco-veneer (film imitating the texture and color of natural wood),
- plastic,
- paints (MDF only).
Installation
Installation of a sliding door into a wall or plasterboard partition is carried out in the following order:
- Measure the wall, floor and ceiling of the room in which the partition will be installed.
- Draw up a diagram of the installation of the frame and a sketch of the finished structure with the door. Select materials, type of mechanism, additional devices.
- Calculate the required amount of profile, drywall and other materials.
- Make an outline of the location of the frame on the wall or ceiling and floor. Secure the guide profiles. Stick them into their racks and secure them too.
- Cover the frame with plasterboard.
- Install the mechanism and door leaf with embedded handles.
- Cover the drywall with your chosen finishing material.
Installing a door that slides into a plasterboard structure will help solve many of the difficulties of room planning, while requiring little investment in time and money.
Plasterboard partition with door, self-installation
If you plan to make a structure from gypsum plasterboard with a door with your own hands without insulation, electrical wires and other communication elements are pulled inside the frame to the plasterboard lining. Electrical cables are packed in advance in corrugated tubes. Both an ordinary hinged door made of wood and a sliding door that is moved to the side or completely immersed in the body of the bulkhead are installed in the plasterboard partition element. You can also equip an arched opening. Taking into account the characteristics of the material, it is possible to construct a hidden panel, making the doorway invisible against the background of the plasterboard partition.
To prevent furniture from interfering with the opening of the sliding door, install a false wall. To do this, install an additional sheathing, the elements of which are spaced from the main partition at a distance of the thickness of the sliding door and 1–1.5 cm of margin for free opening. A characteristic feature of this design is the absence of a frame for the width of the sliding door. When arranging a solid base, the width of the wall increases by 5–6 cm.
All elements of the partition frames are fixed to each other using self-tapping screws. The construction of a doorway in a partition structure made of gypsum board requires strengthening the rigidity of the frame that fits the doorway. For this purpose, a wooden beam is used with such a thickness that it fits tightly into the profile. Or install two reinforced profiles fastened together.
Since the delimiting elements made of gypsum sheets are hollow inside, insulation and sound insulation can be made using modern materials.
How to treat the surface → Room decoration → How to choose the right paint → Surface treatment technologies → Leveling and finishing the walls → Selecting and applying a primer → Removal from the surface → Stretch ceilings and technologies → Reviews and testimonials
How to make a sliding partition in a room with your own hands: step-by-step instructions, video
How to make a sliding partition in a room with your own hands?
To do this, you will need special roller mechanisms that allow you to move the canvas, as well as guides for them. If you follow the installation rules, making sliding partitions with your own hands will not be difficult.
Sometimes you want to add some zest to your existing home, add something interesting and new. But, unfortunately, in standard houses, the demolition of interior walls or the installation of a brick partition is in most cases prohibited. But there are sliding partitions; in order to install them, you do not need permission from the relevant authorities. Therefore, you can safely place them anywhere in your apartment or house.
This option of dividing into zones will allow you to separate the private zone from the general one in a matter of seconds. This is especially true in large, spacious apartments where many family members live, but there are no separate rooms. Such a partition will allow everyone privacy. So, how to make a sliding partition yourself?
What is a sliding interior partition?
Before we learn how to make a sliding partition, it is worth defining its concept. This type of partition consists of canvases, usually several of them. When opening, one leaf slides over the second, thereby creating an opening through which you can pass and push the leaf in the opposite direction, then the opening will close.
There is another option - there is only one panel and it is installed in the doorway. This is called a sliding door. In this case, sliding doors as a partition do not take up much space. That is, when the door is opened, it simply slides to the side, and does not swing open, without interfering with the passage.
If there is no doorway, then a wall with a canvas on rollers is installed. This way you will separate one part of the room from another.
Installing a partition will be appropriate in any place where it is necessary. For example, in the kitchen, it can be used to separate the dining area from the food preparation area; in the living room, a relaxation area and a dining room are separated. In the bedroom you can separate the boudoir from the common area. Do-it-yourself sliding partitions for pantry are very popular. This design will allow you to zone the pantry and store food products in one place and, for example, seasonal items or tools in another.
When you need to make a partition with a door
In addition to your own desire to change the room, there are cases when a partition is necessary:
- Moving into a new apartment. Contractors hand over new apartments without planning. This allows the owner to decide where the office, living room will be, and what size it will be.
- Major renovation with redevelopment. Let's say you need a separate room for a child, a room for work. In this case, it is advisable to install a partition with a door and make sound insulation.
- Installing a partition to create a dressing room or pantry.
- Office reshuffles. Hiring a new employee requires a separate room. The way out of this situation would be to erect a partition with a door and niches.
- Warehouses. There must be a warehouse accountant in the warehouse. For quiet work, allocate a place and create a partition. Using drywall is the best option.
There is also the owner’s desire to completely change the home. Make an office or corner for fresh flowers. Create an interesting design in your apartment or apply a medieval style.
What are sliding partitions?
Do-it-yourself sliding partitions for zoning can be made threshold-free and rail-mounted.
Rails move on rollers and special rails according to the principle of a sliding wardrobe. Special rails are attached to the floor and ceiling, and canvases are already placed on them.
Non-threshold ones do not have a mechanism at the bottom, but are held only at the top. If the sound coming from outside is not very important to you, then you can use the non-threshold option, then you will not need to place the mechanism below and step over it every time. Rail versions also provide sound insulation, but the mechanism on the floor is not very convenient.
There is another option - folding. With such partitions, space is saved even more. The door folds like an accordion and takes up virtually no space.
According to the configuration of the partition profile, there are:
- Straight - the guides go straight, this is the simplest and most common option.
- Arc. The guides are shaped like a semicircle, the wheels will roll in an arc. A do-it-yourself sliding partition for zoning a room of this type will cost more than a regular one. Plus, its installation is much more complicated, there are more nuances and difficulties, since the guides will be indirect.
- Angular. The doors are at right angles. This option is even more complex than the previous one. It is installed much less frequently.
Depending on the type of material, do-it-yourself sliding partition doors are:
- Wooden;
- Plastic;
- From plywood, MDF, chipboard;
- Polycarbonate;
- Plasterboard;
- Forged with glass, wood or plastic inserts;
- Stained glass.
Nuances during manufacturing
Before you start making a sliding partition in a room with your own hands, you need to know some features:
- Correct measurement of dimensions is one of the very first and most important rules. We measured it incorrectly - we bought materials that were the wrong size. This means that the partition simply will not fall into place and time, money and effort will be wasted. Either you will have to trim or increase the volume, and this again means extra expenses and additional complications. The width of the canvas should not be greater than the width of the “pocket”, otherwise it simply will not move to the side.
- The ideal partition weighs little, but its base is quite strong.
- If the walls in the house are made of concrete or brick, then you can immediately attach the partition. And if they are wooden or plasterboard, then additional reinforcement will be required.
- If you have plasterboard ceilings, then you cannot attach a partition there. Over time, it will become deformed and the partition will move out. If the ceiling has not yet been made, then a metal beam is attached to the ceiling, and rails are already mounted to it, and only then the plasterboard ceiling is laid.
So, after you have taken into account all the tips, you can begin to study information on how to make a sliding partition with your own hands.
DIY installation of sliding partitions
Step-by-step instructions for do-it-yourself sliding partitions:
- At a hardware store you buy guides of the length you need. Typically these rails already come with rollers and everything needed for installation. When choosing a roller mechanism, pay attention to the coating. If there is rubber there, it will wear off pretty quickly, literally in a couple of months. Then you will have to change the mechanism. It is better to take steel ones, they are more durable and strong. There are also mounted and built-in mechanisms. The first one is easier to attach, but it is visible, while the second one is hidden behind the sliding door. But then you will have to cut grooves for it in the canvas.
- The door material can be either MDF or laminated chipboard. If you are for a budget and lightweight option, then take glazing beads, plywood and slats and build the canvas yourself.
- First you need to make a frame from slats. The slats are installed on a flat surface, coated with wood glue and secured with glazing beads. Then, again, you need to attach sheets of plywood to the frame using glazing beads. The canvas is ready, but it does not look very aesthetically pleasing; finishing is needed. Here you decide for yourself what you want to use. Any materials and options are suitable: painting, fabric covering, wallpaper or film, etc.
- Now all that remains is to attach all the components of the mechanism and place a partition on them.
- After installation, check if everything moves well; if not, then you can adjust the roller mechanism.
DIY sliding polycarbonate partition:
- Cut off the required amount of guide if you bought in reserve.
- Cut the polycarbonate to size.
- Now we need to connect the halftone material and frame guides. For this you can use screws up to 3 millimeters. The screw heads should not protrude, otherwise it will impede the movement of the structure.
- Assemble the wheel mechanism according to the instructions on the package.
- Mark the places for the rails on the stream and floor. If you are using a non-threshold installation, then mark only on the ceiling.
- Place double-sided tape on the stickers and place the rails on it. Insert the doors and check how the mechanism moves.
- If everything is good, then firmly attach the rails to the surfaces.
- Check the operation of the mechanism again; there is often a slight distortion, it is barely perceptible, and reinstallation is not required. It is enough to slightly adjust the mechanism.
That's all, the do-it-yourself interior sliding partitions are ready.
When choosing materials for such a partition, it is worth taking into account their operational and technical features. Not all materials can withstand stress or high humidity. This needs to be taken into account. If you want to decorate the partition, it is better to do this before installation.
Now the question of how to make a partition with sliding doors is clear. All that remains is to calculate everything correctly, select materials and you can start working.
Sliding door in plasterboard partition
One of the very popular door options is sliding doors, as they save the already small space of rooms. A common problem that arises when installing them is the need to somehow mask the mechanism of movement and fixation of the sashes. All these planks, boxes, overlays made of chipboard, MDF, laminate, wood do not always successfully complement the ambiance of the room. A partition, including one made of plasterboard, allows you to conveniently avoid these troubles. It turns out that the sashes slide along guides into a specially created gap inside the wall. The top profile, the stopper mechanism and all other parts are perfectly hidden there.
What should you pay attention to when installing a sliding door in a plasterboard partition?
- The partition frame must be assembled taking into account the future door, because it is necessary to provide a place for the sashes, in which there should be no profile jumpers or other obstacles to the driving mechanism.
- All work must be carried out strictly according to the level.
- It is imperative to ensure that no other openings or objects are planned in the partition along the door wings: sockets, switches, cable ducts, etc.
- Bottom guide: if any floor covering is provided, then you need to make sure that their height matches the size of the profile. In linoleum it is necessary to make a groove for the guide. If this is not provided for, the door will open noisily, difficultly, or get stuck.
Subject to these conditions, a sliding door in a partition will be one of the most aesthetic and ergonomic options.
Installation of a door in a plasterboard partition
What will you need to install the door?
- Door frame assembled or 3 beams of the required width.
- Actually, the door.
- Platbands.
- Door fittings (locks, handles, etc.).
- Polyurethane foam.
Tools:
- a simple pencil and a ruler, preferably a meter-long metal one;
- roulette;
- calipers and protractor (as a last resort, a square);
- building level;
- a set of screwdrivers or a screwdriver with bits;
- flat chisel;
- hammer and saw;
- knives.
The simplest option is to attach the door to a plasterboard partition with a prepared opening.
The work itself is carried out in the following sequence:
- Box installation. If it is prefabricated, then the box beams are connected to each other. At the same time, their joints need to be cut at an angle of 45 degrees (this is where you will need a protractor or square), if you miss the cutting angle, you will end up with a crooked door frame.
- Now you need to install the hinges. The hinges are either screwed on or cut in. The second option is more difficult, because You need to use a chisel and knife to remove from the surface of the door and frame a layer with a thickness and area equal to the base of the hinge. What makes the job easier is that the hinges can be purchased complete with screws. When hanging hinges on the door leaf, you need to ensure that it is clearly aligned with the door frame. Typically, hinges are hung at a distance of 17-20 cm from the edges of the door frame.
- The box is installed in the opening. This is done level to maintain verticality. The box is attached to the profile with screws or self-tapping screws. For a better decorative effect, their heads should be covered with plugs, or stickers, but they have a bad tendency to peel off. All cracks are filled with polyurethane foam. After it is completely dry (12-24 hours), all protrusions and irregularities can be cut off with a knife.
- It's a matter of fittings. Holes are drilled in the door leaf and frame for the lock and strike plate, the lock, handles, decorative trims, etc. are installed.
- The last stage is the installation of platbands. They can be nailed, mounted on screws or self-tapping screws, or attached with glue.
Arches and openings do not provide sound insulation to the room and do not create an isolated space at all.
Installing a door into a plasterboard partition is an excellent redevelopment option that provides privacy.
Installation of sliding doors, installation in a plasterboard structure
A sliding door in a plasterboard partition is one of the ways to save space and zone a room. Sometimes interior sliding doors are used as an element of a finishing design solution. What does the structure consist of:
- frame made of a special metal profile,
- drywall,
- sliding mechanism,
- door leaf.
A plasterboard partition can be attached to a main wall or be an independent part of the interior decoration of a room. When closing, the door leaf is recessed into a niche between the two sides of the partition or the main and false walls.
Retractable doors
How does a cassette sliding system work?
According to the principle of operation, cassette interior doors are no different from designs that require the door to be rolled back behind the wall. The mechanism consists of rollers and guide rails. The main difference is the ability to hide the door leaf inside the wall. This design is called a cassette or pencil case. It is made in the form of a flat box, replacing part of the wall. In addition to the sash, guide rails and a roller system are hidden inside the cassette.
The benefit of a pencil case for sliding doors is the creation of free space inside the wall; the door that rolls back into the cassette does not interfere with installing furniture close to the interior partition. The pencil case protects the door leaf from dirt, scratching by pets and other damage.
For normal operation of a sliding door, a wall thickness corresponding to the parameters of the cassette is required. The structure should form a niche that does not protrude beyond the plane of the pier. In the sliding system, the thickness of the sash and the side posts of the pencil case, as well as the gaps between the elements for the free movement of the canvas, are taken into account. The width of the cassette is always made twice as large as the doorway. The half, intended for rolling back the canvas, is hidden behind a false plasterboard wall.
Which is better: heated floors or radiators?
Warm floorBatteries
Profile
A plasterboard sheathed wall with a retractable door has a profile frame. The metal profile for its installation is made of galvanized steel. Its types:
guide - for the base of the frame,
- rack-mount - inserted into the guide,
- corner - for decorating corners after sheathing.
- width - 50, 65, 75, 100 mm,
- height - 37 or 40 mm,
- length - 2750, 3000, 3500 or 4000 mm.
The choice of profile size depends on the height of the partition, the number of layers of sheathing, the size, thickness and weight of the plasterboard sheet. The heavier the gypsum plasterboard cladding, the more powerful the profile is needed. Attach it to the wall using dowels and self-tapping screws. The guides and rack profiles are fastened together with galvanized screws and non-pressed washers. The pitch between profiles is 600 mm. If you need a stronger wall, you can install the rack profile more often.
Important! The required length of the profiles depends on the height of the wall. You need to choose it with a margin: for a partition with a height of 2800 mm, racks with a length of 3000 mm are suitable. It is impossible to increase the profile height.
Partitions from compartment doors
When working with plasterboard partitions, you can solve a number of problems at once. For example, sound insulation, the material itself perfectly holds sound waves, and when you use an additional soundproofing gasket inside the wall, you will completely protect yourself from excess noise. Then choose a door from our standard Smart series: they are almost always in stock, and you won’t have to wait long. Remove the old door and prepare the doorway. Install your sliding door using our step-by-step instructions.
When working with drywall, it is necessary to maintain the room temperature at least 14 degrees. This allows work to be carried out in winter. Drywall sheets. They come in different sizes and thicknesses and are designed for different spaces. For example, there is plasterboard for bathrooms; it tolerates moisture very well.
Yes, you can. Our sliding doors are made of lightweight modern materials, so there are no problems installing them on a plasterboard wall. Making a partition with your own hands from plasterboard sheets and a metal frame is quite possible, but sometimes difficulties arise when installing doors.
If you approach the repair from the right side, you can eliminate such moments.
- Stock up on the required amount of drywall;
- Purchase a metal profile, always with a reserve;
- Purchase facing aluminum profiles.
Let’s say there is a gypsum plasterboard partition with dimensions: length – 5 m, width 3 m. It has a door 80 cm wide, 2.1 m high. The frame is made of profiles 7.5 cm wide, the gypsum board cladding is 1 layer. The plan diagram is depicted on a regular sheet or graph paper. Based on the design and dimensions, markings are applied to the surface using a laser level, pencil, or meter.
Drywall
The profile is only the skeleton of the structure with the door. Plasterboard is used to cover the frame. Gypsum plasterboard (gypsum board, dry plaster) is a construction and finishing material, which is a gypsum core lined on both sides with cardboard. The properties of drywall allow it to be cut not only in a straight line, but also to create curved shapes. The sheet has the shape of a rectangle and the following dimensions:
- thickness – 6-24 mm,
- length – 2.5-4.8 m,
- width 1.2 m (except for sheets 24 mm thick, their width is 60 cm).
The advantage of plasterboard floors in apartments and houses
Drywall is a universal building material used in repair work. A partition created from GC sheets has a number of features:
- Features of the materials are resistance to moisture, temperature changes, and light weight. The created partitions do not weigh down the supporting structure of the building. Galvanized profiles do not rust. HA sheet does not emit harmful substances. Installation of the partition is easy, and the design is durable. It is possible to install lighting, make heat and sound insulation. The surface of the created wall is smooth, ready for finishing.
- Easy wall installation with doors. Installation of the structure is within the capabilities of a beginner. To get the job done correctly, you should follow the masters’ plan and take into account the nuances that arise during work.
- Electrical wiring and pipelines are laid inside the structure being created. It is possible to install hidden doors.
All materials used for the construction of the structure have reasonable prices, accessible to anyone.
Mechanism and accessories
The door sliding mechanism consists of the following parts:
- upper guide - the canvas moves along it;
- lower guide - prevents the door from rolling;
- rollers on the carriage - ensure movement of the sash;
- mounting plates for installing rollers - their shape and size must correspond to the thickness of the web;
- bottom roller;
- stoppers - limit the movement of the sash.
Sliding mechanism kit
If the door has two leaves, in addition to the usual mechanism, it is possible to use a telescopic one. Door leaves with a simple mechanism are installed in one line. Telescopic doors have leaves installed parallel to each other. They can move in different directions or move into the same wall.
Telescopic mechanism
You can purchase and install a mechanism with a synchronizer. When you move one of the doors, the second one will move automatically synchronously.
Another useful addition that can be installed on sliding partitions is a door closer. It will ensure smooth opening and closing of the canvas. By moving or pushing the door halfway, you can release it. She herself will finish moving in the right direction.
To conveniently pull out the leaf from the wall, you can install a pusher (Push-to-open mechanism) for sliding doors. When you lightly press the end of the door pushed into the partition, it springs back and automatically slides out.
To ensure smooth sliding of the door into the plasterboard partition, specially shaped handles are installed on the canvas. They are recessed deep into the sash. There are a large number of options for such handles on sale: round, oval, rectangular, square and others.
Handles for sliding doors
Which doors to choose?
The first thing you need to pay attention to when choosing a door is the total thickness of the partition . It is correctly calculated using the formula “profile + 2 gypsum boards”. The timber intended for the box must correspond to this value up to a millimeter.
If possible, the profile that frames the opening should also be reinforced with wooden beams. This does not need to be done just for sliding doors.
The opening for the doors must be laid into the partition at the installation stage . If this is not done, sooner or later it will be necessary to dismantle part of the partition, as well as the profile. And this costs both time and money.
Sliding doors - compartment
This type is considered very successful, since partitions are usually installed in conditions of limited space , and sliding doors save it.
The only inconvenience is that you will have to think about how best to visually hide the mechanism. The design of the partition, made of plasterboard, allows you to hide it.
In fact, the sashes can slide into gaps that are located inside the wall itself. The locking mechanism is also hidden inside the partition .
If you decide to give preference to sliding doors, make sure that the frame is assembled taking into account the space for the doors. That is, there should be no obstacles in the form of, for example, jumpers from the profile.
REMEMBER: All work is carried out using a level and strictly according to it.
Please note that there are no objects planned along the course of the sashes that would impede their free movement: sockets, wiring and other communications. If there is linoleum on the floor, you should make a groove for the bottom guide.
If there is a different type of coating, take into account the bottom guide when calculating the size of the opening. If everything is done thoughtfully and correctly, this type of door will become an aesthetic and convenient element of the entire room.
Swing doors
You can take such a door ready-made or make it yourself from the same drywall. The advantage of such a door is that you don’t need to bother with calculations of where to hide the sliding mechanisms and sashes. This type of door is considered classic and is quite easy to install.
The first step is to set the ceiling and floor guides. If there is no laser level that will give a projection on four sides, then you will have to use a regular level and plumb line.
The error cannot be more than 1-3 mm, otherwise the doors will “walk” , that is, close or open on their own.
Taking into account the exact dimensions, and this is the outer contour of the frame along with the door leaf itself, we begin to install vertical standing profiles. They should definitely be made double , since the opening must be strengthened.
If the metal profile is still single, it is reinforced with wooden beams . They are located around the entire perimeter.
After installing the vertical profile for the racks, proceed to the horizontal one, which is placed above the doorway. The entire opening in the plasterboard partition is made 10-15 mm wider. This will allow you to adjust the position of the door .
REMEMBER: Hinged doors are easier to install, but from the point of view of ergonomics and aesthetics, sliding doors win.
After work related to the partition itself, they work directly on the door. It is secured using self-tapping screws . Gaps in the form of space between the door frame and the opening must be sealed with foam.
Don't forget to install spacers . The latter should be located between the vertical posts of the door frame. If this is not done, the foam may deform them during the polymerization process.
Before foaming, liners 2-3 mm thick are laid between the door frame and the door leaf.
Materials for canvas
The leaves of sliding doors, as well as swing doors, can be panel or paneled. Panel panels have a flat surface, panel panels consist of a rectangular or shaped frame, and panel inserts made of glass, polycarbonate, MDF, wood, etc. The base of the sash for retractable doors is made of the following materials:
- Metallic profile. Aluminum frames are most often used. They are a frame for canvases made entirely or partially of glass.
Glass door in metal profile
- Solid wood. Paneled door panels made from solid valuable wood are decorated with milling, and panel panels are varnished. The base of the panel door is made from inexpensive wood, such as pine, and then covered with natural veneer made from expensive wood.
- Chipboard. The cheapest material from which you can make a panel board or a rectangular frame for a paneled one. The disadvantage of chipboard is the presence of harmful substances in its composition. They stand out in a small amount, but if you have a choice, it is better to make the door from a different material. The ends of chipboard products are finished with an edge.
- MDF. This stove is slightly more expensive, but has a higher level of environmental safety. Another advantage compared to chipboard is the ability to make curved parts. Due to this, it is possible to make from MDF both a flat panel or a frame of a geometrically strict shape, and a shaped base for a paneled door with milling. For covering chipboard and MDF they use:
- natural veneer,
- laminating films (chipboard only),
- PVC films,
- eco-veneer (film imitating the texture and color of natural wood),
- plastic,
- paints (MDF only).
Installation
Installation of a sliding door into a wall or plasterboard partition is carried out in the following order:
- Measure the wall, floor and ceiling of the room in which the partition will be installed.
- Draw up a diagram of the installation of the frame and a sketch of the finished structure with the door. Select materials, type of mechanism, additional accessories.
- Calculate the required amount of profile, drywall and other materials.
- Make an outline of the location of the frame on the wall or ceiling and floor. Secure the guide profiles. Insert the racks into them and secure them too.
- Cover the frame with plasterboard.
- Install the mechanism and door leaf with embedded handles.
- Cover the drywall with the selected finishing material.
Installing a door that slides into a plasterboard structure will help solve many room planning problems, while requiring a small investment of time and money.
Installing a door in a plasterboard partition - nuances
- When choosing a door, you must take into account the thickness of the partition. It consists of the width of the profile and 2 gypsum boards sewn onto it. The box beam must strictly correspond to the resulting number.
- It is also advisable to place timber inside the profile surrounding the opening for additional strengthening and to facilitate further work. The exception is the installation of sliding doors.
- The doorway must be embedded in the partition during its installation. Otherwise, you will have to dismantle part of the partition and profile, and this is unnecessary trouble and expense. The size of the opening should be 6 mm greater than the door frame in height and 6-10 mm in width.
