When buying an apartment, we want everything in it to meet our needs and requirements.
Sometimes you have to buy an option that requires additional modification. And we are talking here not only about new cosmetic repairs, replacing windows and doors, buying new furniture.
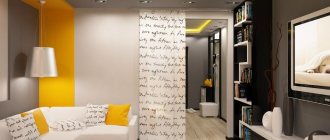
Today, apartment redevelopment is widespread, in which the arrangement of individual rooms is changed, partitions are removed or new walls are installed.
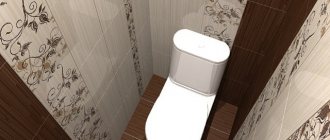
Often such changes concern kitchens and bathrooms. Today we will talk about how to divide a combined bathroom, although most often they try to combine the bathtub and toilet. Separating a bathroom may be required in any apartment if there is an urgent need to separate these two zones.
Such actions are strictly regulated by law and often require prior approval from special authorities.
Pros and cons
When determining the design of the room, it is necessary to take into account the advantages and disadvantages of each scheme. For living alone or for a family of 2 people, a combined structure is suitable. But as the number of people increases, it is recommended to install a light or solid dividing partition in the room, which will expand the capabilities of the bathroom.
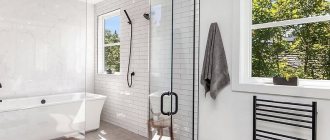
Combined bathroom - top view.
Combined bathroom
The combined block has disadvantages:
- poor ventilation, this deficiency can be eliminated by using additional air ducts and an electric fan;
- inconvenient layout, making it difficult to install a shower stall or washing machine.
Separate bathroom
Advantages of a room with an additional bulkhead:
- possibility of simultaneous use of the bathroom by 2 family members;
- improving ventilation conditions.
Law and regulation
Since installing a bulkhead is considered a redevelopment, information must be included in the technical passport of the apartment. Documentation adjustments are carried out by the BTI (Bureau of Technical Inventory) and the Housing Inspectorate on the basis of a project approved by the construction commission. The owner can build a wall without permission using bricks or lightweight building materials. But when selling a home, the passport is verified; the discovery of an extra bulkhead leads to penalties and an order to remove the structure.
Standard layouts of combined and separate bathrooms.
Required Permissions
To obtain approval you will need:
- passport of the owner of the premises;
- document confirming ownership;
- technical passport for residential premises;
- a redevelopment project prepared by a company licensed to perform such work;
- permission from a financial institution for premises that are pledged (for example, purchased with a mortgage).
The standard scheme allows you to separate the bathroom from the toilet while maintaining the area of adjacent rooms or corridors. Some owners order projects that involve moving the walls of neighboring rooms, which allows them to increase the size of the bathroom. BTI employees analyze the project and make a decision on the possibility or prohibition of redevelopment.
All actions of the state supervisory authority are based on the set of rules SNiP 31-03-2003.
After completing the work, it is necessary to obtain an act signed by representatives of the company that separated the combined bathroom with a partition. An employee of the Housing Inspectorate inspects the bathroom and certifies with a signature a document confirming the correctness of the redevelopment. The owner of the property must submit the act to the BTI, which issues a new technical passport.
Requirements for remodeling a bathroom
Basic standards that must be followed when carrying out work:
- Demolition or partial destruction of load-bearing partitions is not allowed;
- it is not allowed to expand wet areas into adjacent rooms due to insufficient waterproofing of the floors;
- The floor of the bathroom should be 20-25 mm below the base of adjacent rooms to reduce the risk of flooding of the apartment.
When placing equipment indoors, you should take into account the recommendations set out in SNiP. There are no strict requirements for maintaining clearances; if the rules are violated, no penalties are provided. For example, the distance from the front edge of the toilet to the door must be at least 600 mm, the free space in front of the bathtub or shower according to the standards is 700 mm.
How to Prepare for Separation
Preparatory work is divided into stages:
- determining the dimensions of the toilet and bathroom and developing a rough layout;
- finding a place to install an additional door block;
- selection of building materials for partitions;
- preparation of design documentation suitable for submission to supervisory authorities.
Room measurements
You should measure the bathroom using a tape measure or laser range finder, and then determine the position of the partition in compliance with SNiP. It is necessary to take into account the thickness of the bulkhead, which depends on the material used. The data obtained allows you to perform a preliminary layout of the premises and find out the possibility of installing a shower cabin or washing machine.
Determining the location for the second door
If the bathroom was equipped with a bulkhead, then it is necessary to determine the position of the door, which was sealed by the previous owners. If you combine a toilet and a bathroom according to the house design, you will need to cut an additional opening.
If the external partition is load-bearing, then the Housing Inspectorate and BTI will prohibit the conversion of the premises.
It is difficult to arrange a passage in the internal bulkhead due to the small area of the premises.
Selection of materials
Since the transverse bulkhead in the bathroom is not a load-bearing element, any material can be used for manufacturing. When selecting, it is necessary to take into account sound insulation indicators and the minimum thickness of the structure. For example, when using plasterboard, the partition will have a thickness of up to 100 mm; when choosing plastic panels, the parameter will decrease by 1.5-2 times.
Project preparation
The homeowner must contact a licensed company, which will prepare a package of documents. Current legislation does not provide for independent development of a project. The drawings indicate the dimensions of the premises, the type of bulkheads, the installation locations of door blocks and the entry of water supply and sewerage lines.
Moving a bathtub or toilet to another location
Since the sink and bathtub require pipes with a diameter of 50 mm with a slope of 2 to 4 degrees, moving them does not cause significant problems (be it a panel or brick house). Proper installation of plumbing ensures the natural elimination of liquid waste.
Important! Laying a sewer system without a slope will cause water to stagnate. This leads to blockages and the constant presence of unpleasant odors.
Changing the position of the toilet is somewhat more difficult, since it needs a large diameter pipe - 10 cm. It is important to remember that it is also located at an angle. The transfer procedure is complicated by the presence of “elbows” (corners) in the pipe. It is important to remember hygiene standards: the toilet is always installed in pairs with a sink, or a sink with a bathtub (although this method is used less frequently).
Features of installing additional equipment
Such parts of the restroom as a heated towel rail, washing machine, drying cabinet are installed in accordance with certain requirements of logic and convenience.
So, the heated towel rail must be located next to the water communications, otherwise this will lead to a change in water circulation and a general decrease in its temperature. Of course, if an electric heated towel rail is installed, then this requirement may not be adhered to.
Advice! Choose dryer models without many thin parts and narrowings, otherwise water will not circulate well in them. In addition, over time, scale and other contaminants accumulate in narrow places, which will lead to a sharp narrowing of the duct.
It is best to opt for a dryer, the size of which is 60 by 80 cm. You can choose any type of electric heated towel rail - the main thing is not to overdo it with the size, otherwise it will be too hot in the restroom. Connecting a washing machine requires a cold water supply and sewerage, but these procedures do not require coordination.
Features for different houses
The procedure for combining bathroom premises does not differ from the type and time of construction of the house. External bulkheads are not load-bearing (with the exception of panel houses); the owner can use any building material.
"Stalinka"
In residential buildings built according to designs from the 30s to the 50s. last century, in the bathrooms there was a dividing bulkhead made of wooden beams with light cladding. When re-building, you can use brick or plasterboard sheets; the structure is not load-bearing. It is necessary to provide cutouts in the partition for water pipes and sewer lines.
Sample of a Stalinist wall.
"Khrushchevka"
Most houses are from the 50s and 60s. In the last century, bathrooms were combined, but there are projects with separate toilets and bathtubs. Any material can be used to restore the wall. The situation gets worse in panel houses, in which the bathroom is made in the form of a single reinforced concrete capsule. It is prohibited to destroy the structure due to the violation of the strength of the building.
New building
When purchasing housing in a new building, the premises are often left unfinished. If the bathroom does not have a bulkhead, then the owner can erect it during the renovation, having previously received approval from the supervisory authorities and making adjustments to the technical passport.
Some developers offer separation of the bathroom at the stage of building a house; in this case, the buyer of the apartment immediately receives documents that contain a wall between the toilet and the bathroom.
Finishing
Since the bathroom is the wettest room in the apartment, finishing materials must be selected accordingly. Regardless of where the coating is located, on the floor, walls or ceiling, it must be waterproof. For this reason, wood is practically not used in bathroom interiors; tiles are the most popular. Also popular are plastic panels for wall decoration, waterproof paints, suspended ceilings, etc. Options for finishing a bathroom with a 4 sq.m. toilet. m after repair can be seen in the selection of photos below.
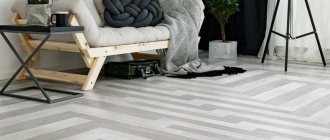
Flooring
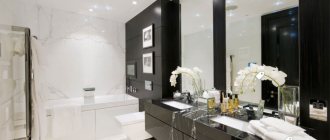
It is better to choose tiles or stone as a bathroom flooring. These are strong, wear-resistant materials, durable, and environmentally friendly. Stone and tiles are not afraid of water, mold does not grow on their surface, but it is worth treating the seams between the slabs well with sealants.
Most often, darker colors are chosen for the floor than for the walls and ceiling. On a dark (but not black) surface, stains and stains are not so visible.
Wall decoration
To decorate the walls of a bathroom with a toilet, you can use a variety of materials, with the possible exception of paper wallpaper and wooden panels. Each decor option has its own characteristics.
Tile
Ceramic tiles for finishing bathroom walls are a very popular material. The tile is quite durable, waterproof, does not cause allergic reactions, and does not deform. A rich palette of colors and textures makes it easy to choose tiles to suit any interior design.
In addition to colored and patterned tiles, there are mirrored, mosaic, metallic, pearlescent, photo printed, etc. And even ordinary white or gray tiles can be easily transformed by using colored grout. The tiles also differ in shape from the classic rectangular or square to round and polygonal. Various design options for a 4 sq.m. bathroom. m with tile finishing can be seen in the photo below.
Plastic panels
It is important to consider that plastic panels require a frame, which means an extra 10 cm on each side. The slats for the sheathing should be plastic or metal; wood is not the most reliable material in a bathroom. What does a 4 square meter bathroom design look like?
m with a toilet trimmed with plastic panels, seen in the photo below
What does the design of a 4 sq.m bathroom look like? m with a toilet trimmed with plastic panels, seen in the photo below.
Stone
The most expensive finishing material, but the hardest, strongest and most durable. Natural stone looks cozy and luxurious; it is suitable for both the classic style and various trends that tend to natural aesthetics. Despite the fact that natural stone will retain its appearance even after decades, its color range is not very diverse.
Dye
The simplest design option for bathroom walls is 4 m2. In conditions of high humidity, water-based paint should be used. To make a small bathroom seem larger, you should choose glossy paints.
Ceiling
When they are thinking about renovating a 4 sq.m. bathroom. m with a toilet, the ceiling rarely receives special attention. Traditionally it is left white by painting or using plaster. But there are more interesting options for ceiling decoration: tiles, frescoes, vinyl-based photo wallpaper, stretched fabrics. The latter are best suited for the bathroom.
The most practical PVC stretch ceilings. They do not deform from moisture, are durable, and can be washed. PVC sheets can be glossy or matte, white, colored, with or without ornaments. You can order a ceiling with photo printing according to an individual sketch. This finish has one drawback - the high cost of installation. Lighting in the bathroom 4 sq. m with suspended ceilings also looks different, as, for example, in the next photo.
Rebuilding the main wall
The construction of a permanent partition made of brick leads to a reduction in the area of the room. Since combined bathrooms do not have a standard wall, the use of a load-bearing bulkhead is not required. The owner can use brickwork, which reduces noise levels or allows ventilation ducts or sewer pipes to be laid inside.
In small rooms, the bulkhead is built from bricks laid on the side surface, which reduces the weight of the structure and preserves the usable area of the bathroom.
Is it possible with your own hands?
The owner of the apartment can build the structure with his own hands, but if there is no experience in construction work, it is recommended to invite specialists. It is necessary to clarify in advance the possibility of independent actions with the Housing Inspectorate, since upon acceptance of work, an act certified by the seal of the company that carried out the repairs may be required.
The partition can be erected from brick or aerated concrete.
What you need
To carry out construction work you will need:
- bricks or aerated concrete blocks;
- dry mix for masonry;
- concrete mixer or container with an electric mixer;
- building level and plumb line;
- hammer and angle grinder for cutting building material;
- trowel or notched trowel;
- tape measure and cord for marking lines of rows of bricks;
- rubber hammer for uniform compaction of masonry.
Preparation
At the preparatory stage it is necessary:
- Remove old tiles from horizontal and vertical surfaces, remove damaged areas of concrete or brick walls.
- Remove the decorative coating from the ceiling or peel off a layer of paint.
- Cut grooves in the bulkheads and lay plastic water supply pipes, calculating the consumer connection points in advance.
- Treat the surfaces with an antibacterial primer and seal cracks and grooves with pipes.
- Install plastic sewer lines; it is not necessary to change the cast iron riser.
- Check the quality of the screed and, if necessary, level the surface with a special mixture or cement.
- Apply markings indicating the location of the major bulkhead made of brick or aerated concrete blocks.
- Disconnect electrical wiring for the bathroom and toilet.
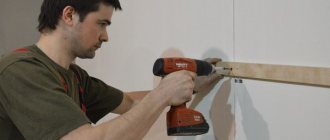
How to do masonry indoors
To build a brick partition, you need:
- Apply a thin layer of mortar to the flooring and lay out the bottom row of bricks laid on the side edge. Remove excess construction mixture and check the relative position of the elements with a hydraulic level.
- Lay the second row, arranging the elements in a checkerboard pattern. Check the relative position of the bricks and remove excess cement squeezed out of the joints.
- Place the bulkhead to a height of up to 1 m and wait for the mixture to harden. It is not recommended to erect the entire masonry, since the bricks may slip and the surface will bend.
- Bring the structure to the ceiling, bypassing water or sewer pipes. In the upper part it is necessary to provide a window for installing a ventilation duct.
- After the mortar has hardened, treat the bricks with an antibacterial primer and perform rough plaster; it is not recommended to lay tiles directly on the masonry.
Other separation methods
In addition to the capital structure, you can build:
- lightweight construction made of chipboard or solid wood with shelves for storing household utensils;
- a simplified brick bulkhead with a height of up to 1.5 m;
- frame structure covered with plasterboard sheets or plastic panels;
- tension screen made of synthetic fabric;
- a separate niche that partially hides the toilet;
- bulkhead made of impact-resistant glass coated with matte paint.
Wardrobe instead of partition
Instead of a wall, you can mount a cabinet made of chipboard sheets. Niches are used for storing household chemicals or various household equipment. When arranging the structure, it is necessary to seek a compromise between the width of the shelves and the area of the room.
Protection of surfaces from moisture and places for laying water supply and sewerage pipes should be provided.
Low brick partition
Instead of a full wall, you can build a partition 1.2-1.5 m high. The upper part is used for storing household chemicals, the outer surfaces are tiled. The design allows you to separate the toilet from the bathroom, but does not provide a complete division of the room into zones. Used when it is impossible to install an additional door.
Frame or plastic partition
To zone the room, you can use a frame structure filled with mineral wool and covered with sheets of plasterboard or plastic panels. A frame made of wooden beams or a steel profile is attached to the ceiling or floor, and technological hatches are provided for servicing the pipes. The design allows you to create niches for storing household chemicals.
Zoning option in the bathroom.
Screen installation
The design consists of guides to which a sheet or panel made of thin plastic is attached. The advantage is the possibility of quick installation and removal; the bulkhead does not need to be included in the technical passport, but approval for the installation of an additional door to the bathroom is required from the Housing Inspectorate. The screen is suitable for dividing the room in case of guests visiting, but the design does not protect against the penetration of noise and odors.
Niche organization
If the owner of a living space does not want to cut an additional doorway or remodel the premises, then a separate niche can be allocated for installing a toilet. For construction, drywall is used, mounted on a metal or wooden frame. The scheme does not improve ventilation conditions and is suitable for bathrooms with a small area.
Glass partition compartment
A panel made of impact-resistant glass reliably separates the toilet from the bathroom. For mounting on the floor, ceiling and walls, guide profiles are installed. If necessary, the structure is dismantled and approval must be obtained for the redevelopment of the entrances to the bathroom. The owner must provide separate ventilation for the premises; the ducts are installed under a suspended or slatted ceiling.
Separating glass partitions in the bathroom.
Creating zones using color
Another equally interesting and functional way of zoning is color zoning. This method is very common when designing various rooms. Both office and residential. So this method can be used without fear when zoning a bathroom. When creating zones using color, use contrasting shades of tiles and paint. This way you will separate the ceiling from the wall and the toilet area from the rest of the space.
How to furnish a smaller bathroom
Due to the reduction in space, owners are faced with the problem of placing a washing machine or a wide sink. In this case, you can install a shower stall and washbasin in the corner of the room, using the saved space to place a washing machine or a rack for storing household chemicals and shower accessories. The homeowner needs to think over the layout before starting redevelopment, since demolition of the bulkhead will entail additional costs and require re-approval of the project by the Housing Inspectorate and BTI.
Examples of dividing a bathroom with your own hands - photos of the results
A series of photographs show options for the layout of bathrooms after installing the walls. The owner of the apartment determines the position of the door and partition depending on the design of the house and the list of equipment that is planned to be installed in the bathroom. If there is insufficient space, some of the equipment will have to be moved to adjacent rooms. For example, a washing machine is installed in the hallway or integrated into a kitchen unit.
Option for remodeling a bathroom.
In this case, the bathroom was divided into zones by a cabinet with a washbasin.
A budget option for sharing a bathroom.
Another interesting solution for arranging a separate bathroom
in a small area.
Separating the shower area with a glass partition.
What is better: a combined bathroom or a separate one. Separated or combined bathroom: what to choose
During renovations, many apartment owners ask themselves the question: should they make a separate bathroom or a combined one? What are the pros and cons of each option and what should you choose?
In this article I will analyze the most common situations and help you decide on the right decision.
Combined bathroom
A combined bathroom can often be found in the first series of standard houses.
Combined bathrooms were made in order to save money during construction, but in the 80s new rules were adopted according to which if there is more than one room in an apartment, then the bathroom must be divided (into a bathroom and a toilet).
Today this rule is not relevant and apartment owners have the right to decide for themselves which bathroom to install.
Problems of choice
A combined bathroom is convenient because all plumbing equipment is located together, but in some cases this creates disadvantages:
- Closely. In the first standard houses, the area of the combined bathroom is a modest 3.4 - 4.2 sq.m.
- No space for a washing machine. Finding a place for a washing machine in a combined bathroom is a very difficult task. That is why owners of such apartments often install a washing machine in the kitchen.
- It is inconvenient if a family lives in the apartment. If a family lives in the apartment, then the combined bathroom creates a queue for washing in the evening, which provokes conflicts.
Separated bathroom in a typical house after redevelopment
Disadvantages of a divided bathroom
But a separated bathroom also has disadvantages, for example, in typical apartment buildings, washbasins are not provided in the restroom, which violates hygiene.
Also, in a divided bathroom, doors are often inconveniently located, blocking the passage in the corridor.
What to choose?
Standard house (two-room apartment)
During my practice, I have developed a number of solutions for bathrooms in typical houses.
Divided bathroom in a typical house
If a family (more than two people) lives in the apartment, then I will provide a separate bathroom and be sure to find a place in the restroom to place a washbasin.
Lavatory after remodeling
In the photo above is one of my reality projects, Renovation for a Million, where, with the help of competent redevelopment, I created a niche for the sink in the restroom.
Bathroom after remodeling
This apartment is located in a P-3M series building and you can repeat the decision.
Studio apartment
If the apartment consists of one room and one person or a couple without children will live in it, then it is better to arrange a combined bathroom.
This helps to place all the necessary equipment and create a complete bathroom.
Three rooms or more
When the apartment has more than three rooms, it is better to arrange two bathrooms: one combined, and the other a guest one.
Example of a guest bathroom
When you plan repairs and redevelopment, you always proceed from your requirements and the engineering capabilities of the apartment.