Home / Types of ceilings / Painted and bleached / Advantages, disadvantages and methods of applying textured paint
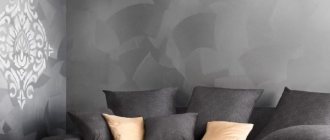
Everyone, when carrying out cosmetic or major renovations in their home, strives to give it a special individuality. Often, textured paint is chosen to decorate the ceiling or walls. This finish looks very interesting, and most importantly – beautiful. In addition, if you finish the ceiling surface in this way, the interior will become unusual.
Pros and cons of textured paint
Textured paint refers to a homogeneous material in the form of a dense mass of white color. This substance is most often produced on the basis of acrylic, which gives it excellent characteristics and opens up wide possibilities for use. By introducing various pigments into the composition of such paint, one can achieve one or another shade of the surface. As for silicate and silicone compounds, they are less common due to their high cost and susceptibility to fungi and mold.
Textured paint
The advantages of the material include:
- Reliability. This is ensured by a durable acrylic base. The fact is that acrylic is not afraid of moisture, resists abrasion well, does not accumulate static electricity, and does not support combustion. The surface painted in this way perfectly withstands direct exposure to the sun without fading over time.
- Easy to apply. Although there are some nuances in working with structural paint, anyone, even a beginner, can master this procedure.
Applying textured paint - Easy maintenance. The finished finishing surface is antistatic, which significantly reduces the amount of dust settling there. In addition, the moisture-resistant characteristics of the finish allow you to wash off various contaminants from it (including drawings with a felt-tip pen or pencil, which is often found in children's rooms).
- Harmlessness. The components included in the textured material are non-toxic, which allows them to be used without restrictions in any room.
- Masking minor flaws in the base. The presence of texture makes it possible to hide small defects up to 2 mm using this paint. This greatly simplifies the preparation process (especially grinding).
- High decorative characteristics. Using structural paints you can significantly transform any room.
Textured paint
The disadvantages of finishing usually include some difficulty in its application (compared to conventional paint) and the effect of blocking the room, which occurs due to the formation of a waterproof film on the surface being finished.
Recommendations for selection
Painting the walls is preceded by the purchase of a paint composition, and the purchase is preceded by a careful selection of its variety. Selecting paint for the walls in your apartment will be easier if you answer 5 questions:
- Which room of the house are you planning to renovate?
- What is the surface of the walls in the room (concrete, wood, plasterboard)?
- What is the condition of the walls now, is it necessary to mask small irregularities?
- What kind of coating (glossy, matte) and pattern do you want to get after application?
- Will the work be carried out in-house or by a professional craftsman?
The choice of textured paint is complicated by the fact that the packaging does not indicate what effect in wall decoration can be achieved with its help. Usually only the type of filler is indicated. For example, solutions with chalk, starch, and tiny crumbs are suitable for misuri.
In order not to make a mistake with the choice, to purchase exactly the color and effect that you need - ask the help of a consultant in a specialized store of finishing materials. It is best to show the seller a photo of the desired effect, so it will be easier to choose the composition.
Types of textured paint
According to the type of decorative effects created, textured paints are divided into the following types:
- Mizuri. In addition to acrylic, the substance contains modified starch, which makes it possible to obtain both a structural and smooth effect when applied. This or that texture depends on the laying tool used.
Textured paint "Mizuri" - Marseille wax. With this paint you can achieve a very realistic imitation of natural stone and balsa wood. Like Mizuri, Marseilles wax can produce a smooth or textured effect. To be fair, it is worth noting that in this case it will not be possible to obtain a completely smooth surface - the small depressions will still remain after smoothing. To protect against moisture and increase decorative qualities, a layer of wax is applied to the dried surface.
Textured paint “Marseille wax” - Atacama. The material has outstanding external qualities: the finish plays with numerous colors when viewed from different angles. This effect is achieved thanks to the quartz sand included in the paint and special metallized additives that form a reflective layer. In appearance and when touched, the finish creates a velvety feeling.
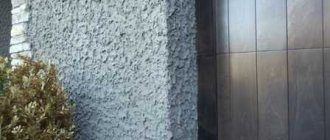
Textured paint "Atacama" - Relief. Acrylic components in this case are reinforced with quartz sand and a number of other substances, which makes it possible to create pronounced patterns. Relief paint is not suitable for creating a smooth surface. It is this finishing option that is considered the most striking representative of textured paint.
Textured paint “Relief”
Preparation before painting
This stage is very similar to preparing for the application of usually water-based paint. However, due to the greater viscosity of the textured composition, the strength requirements for the base in this case are an order of magnitude higher.
Operating procedure:
- Preparing the premises. Carrying out repairs of this type is accompanied by the formation of a large amount of dust and dirt. Therefore, it is recommended to completely empty the premises of all furniture and decorative items, remove chandeliers and lamps. Those items that cannot be removed due to their size should be moved to the center of the room and covered with film. Also, the entire floor area is covered with polyethylene (if the final floor finishing has already been laid).
- Stripping off the old finish. The walls and ceiling (if it will also be finished) are cleaned of all old finishing. Ideally, bare panels or plaster should be left. All fragments of the rough base that do not hold well and vibrate when touched must be beaten off with a hammer or pick. The cleaned surface is thoroughly impregnated with primer.
- Plaster, putty. After the primer has dried, a leveling layer of plaster or starting putty is applied. As a rule, the walls are leveled with plaster, and the ceiling with putty. At this stage, it is important to achieve visual smoothing of all irregularities, for which you can use the rule and beacons. If the base is mostly flat, apply finishing putty immediately (in 2-3 layers).
- Grinding. After waiting for the last layer of putty to dry completely (this usually takes at least a day), sanding is carried out using painting sandpaper (No. 120-140). If in the future you plan to use decorative paint that forms a texture, you can be lenient with minor scratches during sanding: they will not be noticeable on the finished surface.
- Finishing primer. A very important stage, since it is important to achieve the most uniform thickness of the primer layer over the entire application area. Otherwise, the finish will contain unevenness. It is recommended to use acrylic impregnation as a material, coating the base with it in 1-2 layers. The pause for drying one layer is approximately 6 hours.
Preparing textured paint
Before applying textured paint, you must carefully read the attached instructions. It contains information about drying time, preparation procedures and application recommendations. This type of material is usually sold in plastic buckets.
Textured paint
The consistency of the structural composition is characterized by decent density, so before application, add a little water to it and stir with a drill with a mixing attachment. It is important not to overdo it with water, because... a substance that is too liquid simply will not stay on the base (this is especially true for the ceiling). According to the recommendation of experts, the volume of added water should not exceed 1/10 of the total amount. As practice shows, usually an average of 4% is enough for stirring.
Adding water to textured paint
If, according to the design idea, the surface to be painted should have a different color (not white), the corresponding pigment is added to the paint composition. It is best to entrust this procedure to professionals in the store where the material is purchased. When tinting paint yourself, it is important to be very careful when introducing the pigment substance in small portions.
Adding colored pigment to textured paint
After each portion, you need to pause to stir and check the resulting shade. If its intensity is insufficient, the procedure is continued further. Checking the level of color intensity is carried out by applying a stroke of paint to the wall (you can use a hairdryer to speed up the drying of test strokes). The best pigmentation quality is achieved when using a color from the same company as the paint.
Mixing colored pigment with paint
What it is?
So, what are texture paints?
This material creates or imitates a relief surface. Essentially, the technique of applying decorative paint lies somewhere between decorative plaster and ordinary paint (especially when it comes to creating texture). Differences from standard paint:
- Consistency. The decorative coating is thicker, somewhat reminiscent of very thick sour cream.
- Composition. In addition to the base and pigments, filler particles are used in production, which are responsible for volume.
- Large expense. The layer of textured dye can reach up to 15 mm, while the usual one is 2-3 mm.
Differences from decorative plaster:
- Application thickness. A thinner layer of paint is required.
- Consumption. Due to the reduction of the layer, the material consumption will naturally be less.
- Textured paints for interior decoration can create standard plaster effects (bark beetle, fur coat, lamb), or imitate marble, velvet, leather, silk, embossed paper.
In the photo there is “crumpled” volumetric paint
Applying textured paint
Moving directly to painting the prepared base of a wall or ceiling, you will need competent organization of lighting. The fact is that the visual perception of the finished textured surface largely depends on the angle of incidence and light intensity. Therefore, in order to achieve the required decorative effect, it is important to create the same lighting conditions that will be in the room during its operation. The material for painting must be brought into the room about a day before the start of work.
Textured paint can be applied in several ways, depending on the specifics of the final result:
- With a spatula. To work, you will need a wide and narrow tool. Using the first tool, the total area is finished, and the second tool is used to decorate the corner areas. The layer of texture paint should be no thinner than 3 mm, otherwise it will make it difficult to obtain the required reliefs. It is recommended to start work in one of the corners, moving towards the other. Textured paint dries quickly enough, so you need to apply it without pauses. Otherwise, transitions and boundaries will be noticeable between individual fragments of finishing.
Applying textured paint with a spatula and trowel
- With a roller. In this case, the same technology is used as when applying any other paint. The prepared mixture is poured into a container, then a roller is immersed in it, rolled to remove excess material and transferred to the surface to be treated. When decorating walls, it is convenient to move from top to bottom from any angle. It is recommended to start painting the ceiling from the window. Depending on the requirements for the final result, the roller is selected with a regular smooth or shaped surface. Sometimes both methods are combined: one person applies the paint with a spatula, and the second smoothes it out with a roller.
Applying textured paint with a roller
- Spray. Using a pneumatic spray gun, you can quickly paint the entire surface. This is especially convenient when finishing the ceiling: in this case, the work is carried out from below, without the need for a construction trestle. Considering the presence of suspended particles in the composition, the diameter of the spray nozzle must be at least 3 mm, at a pressure of 5 atm. Unlike the first two methods, when the paint is applied exclusively in one layer, in this case two passes are often required. The pause for the first paint to dry is 3-10 hours.
Applying textured paint with a spray gun
Review of manufacturers
- Manufacturer Amourcolor produces high quality textured paints that are wear-resistant. Buyers are provided with 3 product options: Tactite with a suede surface or mosaic, Perlata with a pearl sheen and Escenta with a variety of undertones. All paints are water-based and environmentally friendly.
- Domestic offers paints with various textures: embossed, “Mizuri”, “wet silk” and others. All products of high quality can be purchased at a competitive price.
- The Russian company VGT has been producing paint and varnish products since 1992. It is possible to purchase various types of textured paints: facade and interior, water-based, crack-resistant.
The product is ideal for our climate. There are a lot of positive reviews about it. In the video below you can watch a master class from the manufacturer “VGT” on applying textured paint with the “Travertine” effect.
- Manufacturer from France Blancolor supplies many types of durable materials for decorative wall decoration. Among them are translucent paint Essuyables, silk based on cellulose fibers Tradimurs, waxed plaster effect Effets Platre Cires and many other types.
- Textured paints from the manufacturer Clavel have a variety of colors and perfectly imitate silk, brocade, and velvet on walls. There are different types of designs ranging from antique to modern. The composition uses environmentally friendly components.
