Plaster is a very important element when building a house or renovating. This mixture performs many important functions, for example:
- Thermal insulation. It closes microcracks through which cold air from the street passes.
- Improving the appearance of the wall. After plastering, the walls look smoother.
In general, this mixture has many more functions that can be listed for a very long time.
However, sometimes it happens that the plaster begins to collapse. This is a rather annoying problem. Fortunately, there are several methods to harden the surface.
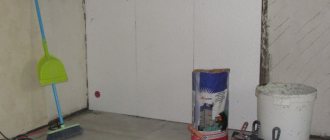
Preparing the surface for repair
Before strengthening crumbling plaster, you need to do the following:
- Take a rubber mallet and gently tap the area where the cracks appear.
- Thin and weakened areas will make themselves felt by shedding a layer of plaster.
- Assess the extent of the damage to the coating, and then make a decision regarding further repairs.
If only cracks appear and very little crumbles when tapped, there is hope to correct the situation without drastic measures. If, when lightly tapped with a hammer, the plaster easily comes away from the wall surface, then it needs to be dismantled.
There is no point in saving such a wall, since eventually collapses cannot be avoided. It is better to completely remove the plaster, prime the wall and apply a new layer of plaster.
Expert opinion
Mezentsev Sergey Petrovich
Residential renovation and finishing specialist
Advice! In order not to waste time, effort and money on remodeling, it is better to immediately perform plastering using reinforcing mesh. It holds the plaster, preventing cracking even when exposed to negative external factors.
How to strengthen crumbling plaster - 2 simple ways
Plaster – the coating itself is quite durable. But over time or if technology is violated, its strength may be compromised. In such cases, the plaster begins to crumble, peel off, and unpleasant cracks and other defects appear on it. Of course, every homeowner wants to stop this process of destruction.
There are two ways to do this, quite simple:
- use a strengthening special impregnating composition;
- secure the collapsing surface with a reinforcing mesh followed by putty.
Choose one or the other option depending on the situation.
Deep penetration primer
If the shedding is superficial and when you tap it with a hammer, huge pieces do not fall off the wall, then the situation can be corrected with the help of a deep penetration primer. It is easily absorbed by the plaster, penetrating deep into its layer, increasing adhesion to the wall.
The sequence of actions is as follows:
- We remove all small pieces from the wall in the crack area.
- Use a brush to clean problem areas.
- We take a primer with maximum adhesion rates (sold in cans ready for use).
- Stir the mixture intensively and pour it into the pan.
- Using a roller, apply first to problem areas, then to the remaining wall.
- After the primer has been absorbed, it is applied with a second layer.
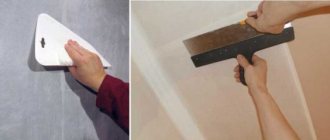
- After 2-3 hours, problem areas can be puttied.
- Next, the wall is leveled using finishing plaster and prepared for final finishing.
There is no point in applying primer where the plaster is coming off in large areas. It is impossible to stop the destruction in this case, so it would be advisable to dismantle it.
Advantages:
- Quickly and deeply absorbed;
- Dries well;
- Does not cause softening of the plaster structure.
Flaws:
- Suitable only when the plaster crumbles in small quantities at the crack stage.
There are a lot of manufacturers of primer mixtures and they are all quite good. When choosing the best option, you need to take into account the air permeability indicator, as well as density. The more liquid the composition is, the faster it penetrates into the plaster layer.
Strengthening impregnation for the plaster layer
Today you can buy wonderful impregnations , which are called “strengthening”. Their main purpose, as you might guess, is precisely to strengthen various surfaces. Including plaster.
These products can be purchased in plastic containers of various sizes. Use is simple: the product is poured into a more suitable container, and then applied to the plaster with a brush, roller or spray.
It may seem that saturating the plaster layer with some substance is not a sufficient measure. However, surprisingly, such compositions cope very well with the task. Some types of strengthening impregnations are capable of penetrating a layer of plaster (and even concrete) by more than 1-1.5 meters. All along the way, they bind microparticles of material and close the pores. The plaster strengthened by impregnation stops crumbling, existing cracks do not expand, and new ones do not form.
Related article: Decorative panels for exterior walls of a house
All that remains is to eliminate visible damage to the surface. You can see how to do this here.
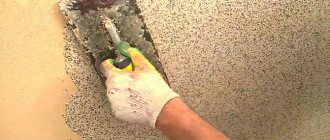
Reinforcement
If the area of crumbled plaster is large enough, but it is not possible to completely dismantle it, and the problem needs to be solved as quickly as possible, reinforcing mesh comes to the rescue. It can be plastic or metal. Both options are good and easy to use.
The sequence of actions is as follows:
- We remove all pieces of plaster that easily come away from the wall.
- Sweep the surface with a broom or damp brush to remove dust.
- Be sure to go over the entire wall with a primer mixture, which will help strengthen the existing coating. Let it dry.
- We take a piece of mesh, the dimensions of which depend on the dimensions of the area being sealed. The edges of the mesh should extend 5-8 cm beyond the contour of the recess.
- We attach the mesh around the perimeter, apply the prepared solution, level the surface and leave to dry.
- Apply the primer again and let it dry.
- We are preparing for the final stage of finishing.
Reinforcement simplifies the plastering process and also allows you to forget about premature destruction of the coating. With it, the service life of the plaster increases by 2-3 times. Experienced specialists recommend applying plaster, regardless of its thickness, to the mesh, which will prevent it from falling off in the future.
Advantages:
- You can quickly repair major damage;
- The mesh is not difficult to work with, even a beginner can handle it;
- The hardened coating will last for decades.
Flaws:
- When attaching the mesh to the wall, the remaining covering may come off, which will lead to the need for complete dismantling.
In order for the reinforcement to be correct, the mesh must be stretched as much as possible around the perimeter of the resulting hole in the wall.
It should be well tensioned and not sag under the weight of the liquid mixture. It is better to secure the mesh, since during the plastering process there is a risk that it will move away from the wall and will not fully perform its task.
Causes
First, you need to figure out the reasons why it crumbles. The reasons are errors when plastering the walls. Here are the most common ones:
- No primer. The presence of a primer is a prerequisite for plaster. Most people don't use primer because it prevents the wall from absorbing moisture. However, for such cases there is a special primer that improves adhesion and holds back salts. These salts come out of fresh concrete and over time reach the plaster, almost completely tearing it off.
- Violation of drying time. The plaster mixture dries from 7 to 28 days. Most people decide not to wait, but to apply the next coat ahead of time. Consequently, after some time it begins to fall off and crumble. The room where the mixture is drying should be well ventilated, this will speed up drying.
- Adding water to the mixture rather than slowly pouring the mixture into the water. Because of this, all sorts of lumps appear, which will greatly interfere with further work, since they are difficult to break. Consequently, the surface will be processed poorly, and this will provoke further destruction.
FAQ
When using a deep penetration primer, do I need to degrease the surface first?
Usually degreasing is not required, but you must definitely read the instructions, since everything depends on the composition and manufacturer’s recommendations.
Is it possible to strengthen loose plaster using self-tapping screws?
This is often done when restoring the outer finishing layer. Self-tapping screws will solve the problem, but not radically. After just a short period of time, the destroyed layer of plaster will still come off.
Is it possible to fix the reinforcing mesh with mortar?
It is best to secure the edges with dowels, since to obtain reinforcement, the mesh must be well stretched and not sag.
A solid foundation is the key to success
Before finishing, check the reliability of the old coating. In some cases, you will not have to completely remove the old layer, you will only need to repair it. How to clean plaster from a wall if the old one is cracked? Why can't you apply a new one right away? The base of the finish must be strong, otherwise the new coating will quickly fall off in pieces along with the old one.
Tap the surface of the masonry. If the sound is dull, it means that the layer is holding well and has not moved away from the brick wall. In places where the sound is loud, the finishing from the old masonry will have to be removed.
You will need the following tools to remove plaster:
- Wide spatula;
- An ax or any tool that has a V-shaped working surface;
- Hammer;
- Skins of different numbers;
- Spray bottle with water.
In addition to the tool, you need to buy materials:
We recommend a deep penetration acrylic or contact primer. Among the famous brands it is worth highlighting: Weber Veonit, Belinka, Lakra, Ceresit, Knauf. Price for 1 liter from 120 rub. The compositions have proven themselves to work well; user reviews of the coating are mostly positive.
Photos are enlarged, click!
Tool
To repair plaster you will need:
- a hammer drill (for removing the plaster layer and making notches on the concrete base) or a chisel with a hammer;
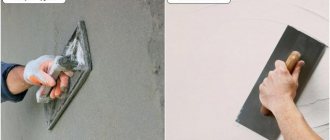
- trowel or trowel (for applying and forming a new layer of plaster);
- metal brush (for cleaning the surface);
- grater or grater;
- spatulas;
- paint brush (for wetting with water);
- jointing (for clearing cracks, deepening masonry seams);
- plumb line or level;
- roller (for priming for large repair areas);
- solution container;
- sandpaper (or sander);
- construction cord;
- mixer;
- rule;
- masking tape;
- rags.
What kind of plaster can tiles be laid on: gypsum, lime, glue and application technology
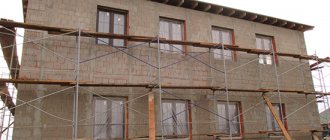
Tile is used to cover various types of substrates, including smooth concrete slabs and even chipboard. A common and reliable option in terms of adhesion is laying tiles on plaster, which can be either old or fresh, recently applied. In the second case, several important details need to be taken into account when tiling, including drying speed and type of building mixture. The surface prepared for finishing must be strong, smooth, dry and without flaking elements.
Several reasons why this is worth doing
Plastering walls under tiles helps make the base more even and eliminate slopes. They resort to it because the presence of even the most minor defects on the surface can affect the quality of the cladding. Due to unevenness, the tiles do not adhere firmly to the wall. This is due to the fact that the glue is unevenly distributed over the base.
Useful tips from the experts
The production experience of master finishers allows us to give beginners some advice on how to properly organize the work process.
Tip 1
A drill is the first tool when carrying out repairs. Therefore, if you decide to do something yourself, take care of purchasing it. Choose a tool with a power of 700-900 W. With its small dimensions and weight, such a drill is sufficient to perform most of the work encountered in the “do-it-yourself” practice.
Tip 4
The results of plastering and puttying work will be better if you use materials from one manufacturer with a decent reputation.
Barrier to moisture
The walls contain many pores and capillaries through which water penetrates into the inner layers. Poor waterproofing (plaster on the walls or wood does not matter) will not always cause liquid penetration and the appearance of dampness. Moisture can enter through the outer part of the wall, rise or fall along its surface through capillaries and create unaesthetic darkening, wet spots, and contrasting efflorescence.
Hydrophobization prevents wetting of the wall and prevents moisture from penetrating inside. Careful and intensive surface treatment with special water-repellent compounds can protect walls for a long time and even for the entire period of their operation.
It may be necessary to create a boundary for moisture penetration from the outside of the wall (direct influence of precipitation) and from the inside. Condensation and a poorly adjusted ventilation system lead to the development of fungi and mold. Rather than deal with consequences that are difficult to eliminate, it is better to prevent them.
Protection and cleansing
Modern wall waterproofing compositions perform several functions:
- create a protective water-repellent layer;
- promote self-cleaning of the plaster (water and dirt simply drain from the wall and do not linger on its surface);
- have sanitizing properties - they dry out the finishing layers and do not create favorable conditions for mold growth. The coating is vapor permeable, but creates an outer film against dust and water.
Water that penetrates building materials destroys them from the inside: brickwork oxidizes, efflorescence appears, paving slabs with pores filled with moisture crack in winter due to thermal changes. Therefore, how to protect the plaster from moisture and how to treat the wall to prevent its destruction should be carefully considered at the construction stage.
Cost of work
Most people who start renovating their apartment prefer to seek help from experienced craftsmen. This guarantees high quality and speed of work. Payment for plastering walls depends on the area of the room, the type of base and the quality of its preparation.
On average, the price of plastering 1 square meter with gypsum compounds is 450 rubles. In the case of mechanized application, the cost is reduced to 350 rubles per square meter. To get the final cost, you need to add the price of the material to this value and multiply by the area of the room. If you choose plastering or repair in any way with your own hands, then the cost of the work will be equal only to the cost of building material.
When the first signs of cracking or crumbling of the plaster layer appear, repair work must be carried out. They involve the use of special impregnations, primers or re-lining of defective areas. Reliability of fixing the leveling material guarantees the quality of finishing of the room.
The need to prime the walls
New walls, regardless of the type of plaster or finishing material, must be primed. After priming, the paint adheres well to the surface, eliminating peeling and the appearance of bubbles.
The primer guarantees durability and flawless condition of the coating. Increases the effectiveness of painting and protects surfaces from the effects of microorganisms (mold, fungi and lichens). Missing this step during renovation is one of the most serious mistakes when painting walls.
Failure to use a primer in many cases leads to:
- peeling and cracking of paint;
- staining and discoloration;
- spotted wall structure.