Three ways to connect two linoleum sheets: installing a threshold, cold welding and hot welding.
If you are puzzled about how to join linoleum seams at home, then you need to choose one of three technologies. We will talk about each of them in detail.
- Connecting two linoleum sheets using special thresholds. This method is very often used when you need to connect two sheets of linoleum between adjacent rooms. The threshold will be visible, but if it is located between rooms, then this is not entirely bad, because the space should be visually demarcated. To work, you only need a purchased threshold and a drill.
- Cold welding method for linoleum. It is often used when you need to connect two canvases within the same room as discreetly as possible. You need special glue and skillful hands.
- Method of hot welding of linoleum. Reliable and expensive, requires special tools. As a rule, it is used in public spaces where high wear resistance is important. If you are wondering how to hide the seams of linoleum and achieve perfect adhesion of the materials, this is the method for you.
How to connect two pieces of linoleum with a threshold?
Are you wondering how to join linoleum seams at home? Using a special threshold is the simplest and not very labor-intensive option. In the store you will most likely find aluminum thresholds and PVC thresholds.
IMPORTANT: We recommend that you use aluminum flashings to join the linoleum seams. They are strong and durable. The PVC threshold cannot be reliably pressed against the linoleum; dirt and water will get under it. In addition, it is short-lived and will crack after a few years of use.
Aluminum thresholds have a special shape, when you fasten them in the center with self-tapping screws, the edges securely and tightly press the pieces of linoleum that you are connecting.
Threshold for linoleum
- How to join linoleum seams at home with a threshold, step-by-step instructions:
- The first, and one of the most important stages of repair robots is preparation for this very work. Make sure you do everything in the correct sequence. You cannot install the threshold before you have installed the door frame and platbands! He will get in the way. Also make sure you lay the linoleum level.
- We accurately measure the required length of the threshold and cut off the excess with metal scissors. The threshold should “walk” a little, that is, be 1-2 mm smaller than the door frame. This is necessary in order not to scratch the door frame.
- We drill through the floor to insert dowels into it and insert them there. You need to drill, as for other repair robots, carefully, first we take a drill of a smaller diameter than required, then gradually widen the hole. If a drill can drill through your subfloor in normal mode, don't use the expansion mode. Treat the screed with the utmost care so that the threshold holds well.
Is linoleum intended for a concrete or wood base?
Linoleum can be laid on concrete. However, this is only if there are no depressions, bumps or noticeable differences in height on the base. All this then begins to protrude, to avoid which you need to level the floor before laying the covering on it. Self-leveling products are most suitable here, thanks to which unevenness is smoothed out well. If necessary, you can repeat the concrete screed. Linoleum can also be laid on a flat plank floor. Even such a base, if it is very dry and there are no pathogenic microorganisms in it, will not rot. But only if the linoleum is laid correctly and the floor underneath is then ventilated.
When fastening with hardware, you must ensure that their heads do not protrude above the surface, otherwise the finish will gradually be worn away by them. The caps must be coated with silicone sealant. You also need to ensure that the covering sheets are carefully connected and glued together. Linoleum can be laid on both a concrete and a wooden base, if it is smooth and does not have severe defects. For greater safety, you can additionally treat the coating with bactericidal preparations. If linoleum is laid correctly, water will never seep through it, which can cause great harm later. To avoid damage by water, you can use wide baseboards, which must be carefully pressed, and also treat the joints with sealing tape. When laying linoleum, a backing made of insulating material is often used.
It is optional, but it can even out minor unevenness and also absorb noise. If you have a cold basement, it is definitely better to lay a base: it will help retain heat. Here are the most popular materials for linoleum backing: jute; cork (crushed material goes onto the substrate); foamed polyethylene.
Substrates are often laid under linoleum to level out minor unevenness. Composite materials are often used as substrates. As for extruded polystyrene foam, this is a bad material for a substrate: sheets about a couple of centimeters thick will greatly soften the coating, which will make walking on it unpleasant and uncomfortable. Synthetics with a persistent pungent odor are generally unsuitable for such a purpose, since this directly indicates a defective product that cannot be used if your health is important. About linoleum substrates
How to join linoleum seams at home if there is a warm floor or soft screed below
Quite often it happens that it is impossible to install the threshold using the usual method of driving dowels into the floor. There could be a lot of reasons for this: there are underfloor heating pipes running underneath, and you are afraid to get into them, you insulated the floor with expanded clay or other loose material, and no dowels are holding in it, you have a crack between the concrete slabs just under the doorway and you are afraid that it may expand over time.
So, how to join linoleum seams at home if you can’t drill the floor? All that remains is to glue the threshold! The author of the following video claims that for this you need to use sealant , or silicone glue, but not “liquid nails”.
Metal
The most popular are metal options. They can be used for a long time. Externally, the models look very presentable. These products are made of aluminum or brass. Aluminum thresholds are more common, as they are more affordable. Such planks have one drawback: they are slippery. It is better to give preference to aluminum sills with a corrugated strip in the middle.
During the production process, metal thresholds are painted in colors that imitate gold, silver or bronze. Lamination allows you to create skirting boards with the texture of stone, wood or other materials.
VIDEO: How to glue the threshold to the floor?
If you are thinking about how to join linoleum seams at home, our step-by-step instructions are for you:
- We measure the required length of the threshold and cut it to the required size.
- Thoroughly degrease all surfaces, for example, with solvent or nail polish remover. It is important! After all, we will use sealant, and it adheres well only to smooth and well-degreased surfaces.
- We apply the threshold so that it lies flat, and draw lines along its edges with a felt-tip pen or soft pencil. Then we remove the threshold.
- We take masking tape and glue it clearly to our lines. Smooth the edges well.
- Apply silicone sealant in large drops to both the floor and the threshold itself. There should be a lot of silicone. It should come straight out after you press the sill down.
- We apply the threshold and press it tightly. Then remove the masking tape with the remaining silicone.
- After a day, the silicone will harden, and our threshold will be glued very firmly.
Glue the threshold with silicone
TIP : To make your floor look aesthetically pleasing, try to ensure that the threshold is directly under the door when it is closed.
What is docking and features of the process
Docking is a fairly simple manipulation. But it must be carried out adhering to certain regulations. The choice of type of linoleum joint between rooms directly depends on the characteristics of the coating and the method of its installation.
Today it is possible to purchase two types of linoleum - household and commercial. They differ in thickness. The commercial type is thicker than the household version we are all familiar with. That's why connecting it is much more difficult. But at the same time it is durable and strong. Before installation, you need to choose the type of linoleum that is right for you. If desired, it is possible to buy a semi-commercial type, which is intermediate.
How to make a linoleum seam invisible: cold welding for linoleum
If you can’t get by with one solid piece of linoleum, and you are thinking about how to make the linoleum seam invisible, then the following technology is for you.
This method will be useful if the room is too large and there is only narrow linoleum, or the room has an irregular shape. It will also help out when you or the store salesperson made a mistake when cutting the linoleum and you need to add a piece. Fortunately, cold welding for linoleum and accuracy help make the seam almost invisible.
Are you thinking about how to glue linoleum to linoleum at the joints? Adhesive for cold welding of linoleum is ideal; it comes in three types, which are designated by the letters A, T and C.
- Type A adhesive is suitable for new, freshly laid linoleum. The tube is equipped with a tip with a needle at the end. And the glue itself is liquid and provides a very strong hold. This adhesive is not suitable for linoleum with a soft felt backing.
- Type T adhesive is used for linoleum with felt insulation; when it hardens, it remains flexible. The tube of this glue is equipped with a T-shaped tip.
- Type C glue is used for old linoleum. It is suitable if over time the linoleum panels begin to diverge. It has a gel-like structure and is not as liquid as type A glue. Spreading along a crack, it is able to join sheets that are located at a distance of up to 0.5 cm from each other.
Cold welding for linoleum
We will look in detail at how to make a linoleum seam invisible using type A glue.
- The linoleum needs to be laid out evenly around the room and allowed to rest. Experts believe that linoleum, which has just been laid out from a roll and cut off at the edges, should lie in this condition for a day. For very thin linoleum, 6-8 hours may be enough. In this case, the floor on which linoleum is laid should under no circumstances be wet. And the room should be warm and draft-free.
- The two panels that we will connect joint to joint should initially overlap one another by 5 cm or a little more.
- When the linoleum is carefully laid out and has rested, you need to take a good, heavy construction trapezoid, like the one in the picture below. And press it tightly to the place where the linoleum overlaps.
The trapezoid rule is needed in order to evenly cut the linoleum
4. Press the rule firmly against the linoleum, and use a knife to cut two sheets at once. It is more convenient to cut from the side of the rule that is not beveled. Try to hold the knife strictly at a right angle so that the edge of the material is smooth, without bevels.
We cut the linoleum to make an even joint
5. When the canvases are cut, remove two extra strips.
How to glue linoleum joint to joint?
6. For reliability, the craftsmen performing the work in this master class suggest using two methods at once to glue linoleum to linoleum at the joints, cold welding and double-sided tape .
To glue the tape, one of the sheets to be glued is rolled up a little, and a line is drawn with a pencil on the floor along the edge of the second. Then the second sheet is rolled up. After this, glue double-sided tape to the floor so that the drawn line is in the middle of the tape strip.
We connect two pieces of linoleum with double-sided tape
Double-sided tape should be glued slowly, unwinding the roll 40 centimeters, and then smoothing and leveling the tape.
7. The top protective film is removed from the adhesive tape, and the linoleum sheets are put in place. They already look quite aesthetically pleasing. But we want to achieve good wear resistance, so this is not enough.
8. Take masking tape and stick it onto the linoleum sheets to be joined, so that the joint is in the middle of the masking tape.
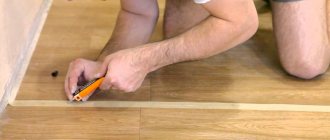
9. In our case, in the question of how to glue linoleum to linoleum at the joints, the best answer is cold welding for type A linoleum. Since our linoleum is new and the gap is very small. We put a needle on the tube of glue and pierce the masking tape directly with the needle, gradually pressing on the tube. Do not skimp on cold welding, it should protrude straight out of the gap! It is also important to insert the needle deep enough!
TIP : Do not cut the masking tape with a knife, as this may damage the linoleum. Cut the tape with the needle itself on the tube of glue; most likely, it will cope with this task.
Joining linoleum using cold welding
10. 10 minutes after applying the glue, the masking tape can be removed. And in a day the glue will dry completely and the joint will be ready!
Joining strips using double-sided tape
Anchor strips with double-sided tape are one of the simplest and cheapest options.
Unfortunately, this method has several disadvantages:
- low moisture resistance, so the tape will soon become unusable;
- cannot be used to attach covers to a felt base.
PHOTO: samodelino.ru The junction of the linoleum strips will be noticeable
What tape is used to fix linoleum
Double-sided tape is tape that has adhesive on both sides. Suitable for fastening polypropylene material, acrylic foam, as well as foam or fabric backing.
PHOTO: orfey.deal.by One side of the tape is covered with wax paper
How to glue strips together
Even a non-professional can connect the strips with double-sided tape.
The work consists of the following stages:
- Prepare the base: remove debris and dust and dry the surface.
PHOTO: pol-exp.com
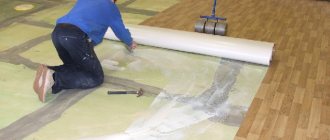
- Roll out the sheets one at a time and cut off the excess with a utility knife.
- Fold the edges of the sheets outward.
- Attach the tape to the base on one side and remove the protective layer.
PHOTO: obi.de
- Cover with a second sheet of masking tape and press firmly.
- For better fixation, roll up the joint with a hard roller.
PHOTO: otdelkino.ru
How to properly glue linoleum joint to joint: instructions for the hot welding method
Hot welding of linoleum is a professional industrial method. It is high quality, reliable and expensive. If you need to figure out how to hide the seams of linoleum, for example, on the floor of a gym or shopping center, the hot welding method will be very useful. With its help you can create beauty like the one in the photo below. And this floor will last.
Hot welding of linoleum
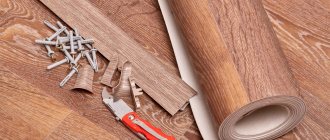
To work, you will need special tools: a hair dryer for hot welding linoleum, shown in the photo below, and a special cutter, with which a groove is cut at the joints of linoleum.
Hot Welding Dryer
A complete set of tools for those who are thinking about how to properly glue linoleum joint to joint is shown in the photo below. It includes:
- Industrial dryer
- Standard attachment for it
- Nozzle for cord welding, which fits on top of the first nozzle
- Grooving knife
- Crescent knife with attachment
Tools for hot welding linoleum
How to properly glue linoleum joint to joint: instructions.
- First, you need to take a seam knife and use it to cut a semicircular groove where two panels of linoleum meet. The molten cord will be inserted into this groove.
- We take a hair dryer and first put a regular nozzle on it, and then on top of it a special nozzle for hot welding linoleum.
- Insert the cord into the device. A special cord for hot welding is sold in construction stores in coils.
- Then you need to cut off the protruding part of the material. It needs to be cut in two stages: first with a sickle-shaped knife on which the nozzle is attached, and then simply with a sickle-shaped knife.
We cut off the upper part of the melted cord with a sickle-shaped knife.
Equipment for hot welding of linoleum can be different; in our next video, you will see professional equipment for performing this work.
Possibility of installation on old flooring
Some people want to lay new linoleum on the old one. However, it is still recommended to remove the old coating. It's very hard sometimes and there's simply nowhere to go but leave it on the floor. But this cannot be done if the old linoleum is irreparably uneven. The depressions should be filled with putty, the protrusions should be cut off, and the gaps between the facing tiles should be rubbed with a special agent. When preparing, you need to be careful and meticulously follow all the subtleties of surface treatment if you want the leveling to be successful. In principle, it is possible to lay new linoleum even on an old coating - parquet, tiles or linoleum.
Blisters, if present, should be pierced and then repaired with glue. Cracks are sealed, which is usually not a problem. The unpleasant side is the softness of the final surface, into which the legs of heavy furniture can go deeper. You can lay new linoleum on the old coating if it does not have pronounced defects and is fairly smooth. Before laying the finishing coating on boards or parquet, it is recommended to create a substrate by placing sheet material on it. Otherwise, the boards may bend, and this is clearly not beneficial for this coating. Here you can use plywood. But slabs made of wood chips swell from water, deforming the surface, making the finish much less attractive.
Video: Hot welding of linoleum
You may be interested in our other articles:
- How and with what should I level the floor to lay linoleum?
- How to clean laminate flooring?
- What is better laminate or linoleum?
- How to glue wallpaper correctly?
- How to clean linoleum after renovation?
Plastic
No less in demand are plastic thresholds made from polyvinyl chloride. The rich color palette of these elements is impressive. Paint is added to the original composition. Typically, such products are used to connect carpet and linoleum.
Another advantage of plastic skirting boards is their ability to bend. This is why they are ideal for curved joints. The service life of these products is not so long. Over time, the attractive appearance is lost. After some time, replacement is required. The cost of plastic thresholds is low, so you will not cause damage to the family budget.
Soldering iron
This method of gluing joints is considered outdated, but some still use it to connect small pieces of linoleum. It is advisable to use a soldering iron if the room area is small and there are few joints on the floor covering and they are almost invisible.
The essence of using a soldering iron is that it heats the edges of the linoleum, as a result of which they melt and join together. After hardening, the resulting seam is trimmed, if necessary. The joint location may differ from the rest of the coating texture. To smooth the surface, run a rubber roller along the still soft seam. Press down on the joint.
Advantages:
Flaws:
- the joints are not very beautiful;
- the seams are fragile, so in places where people often walk, it is not recommended to connect the joints in this way;
- not all modern varieties of linoleum can melt under the action of a soldering iron.
A soldering iron designed specifically for linoleum may differ in size and design.
Why connect with each other?
Even with the currently existing linoleum flooring up to 5 m wide, not every room has the opportunity to have a seamless floor. Therefore, there is a need for reliable joining of the edges of two or more canvases.
This connection gives the coating additional positive qualities:
- solidity;
- tightness;
- strength of attachment to the base;
- eliminating the accumulation of dirt at the joints;
- improving sound insulation of interfloor ceilings.
Violation of the solidity of non-joined canvases
In addition, the edges of non-joined canvases can be touched when walking, resulting in injury.
Glue gun
A similar tool can be bought in a store. The glue gun is connected to the electrical network, which ensures heating of the adhesive composition.
Cut the edges of the linoleum to the base, clean from dust, dirt and material residues. Then fill the gun with adhesive. Plug the tool into a power outlet and fill the joints with heated glue. While the glue has not cooled down, its excess can be removed; after it has completely hardened, this will be very difficult to do.
Glue types:
- “A” - suitable for sealing seams on all types of coatings;
- “B” - used to restore old linoleum, as it perfectly joins the recesses and levels the surface;
- “C” - connects polyester materials, used, in most cases, by professionals.
Connection methods
In general, they usually try to choose the width of linoleum so that there is only one piece in the room. Then there is no seam and no problems. But there is no way to get rid of the connection of two pieces in the doors. If the class of linoleum allows it (semi-commercial, commercial), you can call specialists, they will solder the coating. They have special equipment for this. If calling specialists is not part of your plans, you can create the joints yourself. There are two options: glue or cover with a metal or plastic threshold. The choice of docking method is determined by several factors. The first is the characteristics of linoleum itself:
- connecting soft (household) materials is easier and more reliable using a threshold;
- hard (semi-commercial) is more effective to glue.
The most important thing when choosing a connecting strip or threshold is to choose the right color
So what and how to join linoleum together depends on your linoleum. This has been verified. If you try to glue household soft linoleum, the seam will break after a short time. But you can put a threshold on semi-commerce. It will lie fine. It's just that not everyone likes this option. It is usually considered if there are no other options.
Thresholds are also laid at the junction with other types of coating. With tiles, laminate. Joining strips or thresholds also look better and more logical when connecting pieces of linoleum that are very different in pattern and color. If your class allows, you can, of course, cook it. But it will hardly look any better than with a well-chosen threshold or connecting strip.
Installation
Correct installation of the thresholds is required. They are often attached to dowels. In this case, a plinth with an aluminum strip is used. This type of fastening is hidden. The dowels are hidden under the overlay. The flooring looks perfect.
To attach thresholds when laying linoleum with arched or curved joints, you can mount the strips in two ways:
- Using a flexible baseboard attached to the floor. A decorative strip is put on it. Such products bend easily, which is very convenient.
- The aluminum profile hides small joints.
The threshold will complete the design of the covering and provide an opportunity to implement various design ideas.
I laid linoleum for a friend. Laying and trimming near the threshold
An old friend made himself known again the other day. He said that he was tired of renovating the kitchen and asked to lay linoleum. Last year he did some repairs on the staircase, for one thing, I thought, let me see if everything is in order there and if there are any cracks in the ceiling with the problem slab. In fact, everything turned out to be a planner, so the laying of linoleum proceeded with peace of mind.
The kitchen is not large, about 4.2 x 2 m, but the difficulty was that it has two doorways with ledges, which are located opposite. This means that trimming had to be done almost along the entire perimeter, since because of these protrusions, linoleum was purchased larger than the room and was wrapped on both opposite walls.
IMPORTANT! In this case, the roll should be unwound by two or three people and diagonally. The unwound canvas needs to be lifted and placed in place with a bend on the walls, holding it on those sides where the bends are larger, so as not to tear the wallpaper on the walls, which are often just pasted.
The trimming was done using a medium-length spatula, since it is not easy to bend dense linoleum with a long spatula and press it in the right place for cutting. Between the wall, as expected, I left a small gap, about 0.5-1 cm. The base is felt, but not very thick, so I used a regular construction knife with a replaceable blade with a small outlet for cutting (photo 2).
Even if the installation is carried out in the summer, when the linoleum has expanded as much as possible due to temperature, this does not mean that in winter it will escape from the cold, become smaller and therefore you can do without a gap. The gap is still necessary, because over time the linoleum stretches a little under your feet and begins to occupy a slightly larger area. Although this is not critical and if small waves appear,
it can always be shortened.
Photo 3. A trim line and gap are visible along the wall.
Photo 3. A trim line and gap are visible along the wall. As always, the most interesting thing was near the doorway. In one opening there are slopes to which the plinth was later attached, which did not create any difficulties other than even and precise trimming, especially along the angle of the slope. But in the second opening it was necessary to fit the linoleum under the door frame with a trim that rested tightly on the floor.
In this case, you can, of course, carefully trim the linoleum along the profile of the wooden box and baseboard and then glue the edges to the floor, but I don’t like this option, which is why I decided to trim the box itself with the trim without dismantling anything else.
Photo 4. The main part of the linoleum is trimmed so that it does not interfere.
Photo 4. The main part of the linoleum is trimmed so that it does not interfere. To make it easier to work in the opening, I first did all the trimming of the linoleum along the walls, and in the openings I shortened the edges to a safe minimum. I left the precise trimming along the threshold and under the trim to the very end.
Near the doors, a small wood hacksaw with a medium tooth came in handy. Although for greater accuracy the tooth could have been even smaller. Ingod, in such cases I even use metal blades, but this time I didn’t have that on hand.
Photo 5. I sawed down the platband and box to a depth of about 1.5-2 cm. Photo 5. I sawed down the platband and box to a depth of about 1.5-2 cm.
When I sawed down the platband and box from below, I didn’t try to do it as deep as possible, so Moreover, the threshold was also in the way. I think that 2 cm of depth in such cases will be enough so that the linoleum does not jump out even with a strong stretching movement to the side.
In order not to bother and measure how much the trim needs to be shortened, I placed a piece of linoleum under the hacksaw (photo 5) and sawed directly on it. So you'll definitely do it right the first time.
The cut edges just had to be finally adjusted to the depth of the cut and slowly placed under the box and trim with a spatula. And along the threshold it was also necessary to press the canvas with a connecting strip, which was screwed with self-tapping screws directly to the edge of the wooden threshold itself.
Photo 6. Finished opening. Photo 6. Finished opening.
The last photo also includes the end of an uncovered baseboard, the plugs for which were never found during installation. So the owner will have to buy it separately and install it himself.
As you can see, I didn’t show any special tricks, but if you would have done something differently, write about it in the comments.
Read other exciting materials and subscribe to the channel.
Reviews
Tikhonov Semyon Alekseevich, Syzran:
I made a plank for my linoleum from the remains of a sheet of monolithic polycarbonate. I had to work hard, it was worth it. Previously, there were plastic thresholds, no matter how you choose the color, you still won’t match the linoleum. I was very irritated by the appearance of the pads, I kept wanting to remove them. I installed transparent thresholds and the appearance of the floor immediately changed. True, once a year you have to polish scratches around, but this is a matter of five minutes of work.
Pakhomov Petr Ivanovich, Kursk:
Plastic is no good, it comes off quickly, you need to install metal thresholds, preferably with polyurethane or PVC film. Moreover, the film is glued after tightening the screws, they are not visible, but the threshold is securely pressed to the floor surface and does not dangle, as in models with grooves. If you coat it with silicone, then neither debris nor water will get under the linoleum, so installing crooked plastic strips, in my opinion, will be more expensive.
Rubber and cork strips
Two versions of rubber thresholds are also used: completely made of rubber and with an aluminum base. They are used when it is necessary to reduce the slipping of the coating to a minimum. Rubber skirting boards are suitable for connecting curved seams.
Cork strips are ideal for joining linoleum. This material has excellent shock-absorbing properties. Another name for them is compensation slats. Today, cork thresholds are made in different sizes and shapes.