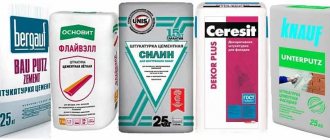
Plaster mixture on a gypsum basis Unis-Teplon (white) packaging - 30 kg
- Lightweight gypsum plaster TEPLON warms and creates a comfortable microclimate in the room:
- The plaster contains a unique additive based on a natural mineral - “perlite”.
- The heat reduces the load on the base and allows you to eliminate even deep unevenness.
- TEPLON “breathes” because it has high vapor and air permeability.
- TEPLON - officially approved for use in children's and medical institutions.
! Finishing of surfaces in damp heated rooms with Teplon gypsum plaster is carried out only for subsequent cladding with ceramic tiles, provided that the tile joints are thoroughly grouted.
If you do not find the necessary information here, call: 8, 73-99-80 , you can also send a request or a site plan for calculating the amount of dry mixture by fax: 8 (3952) 599-250 or email [email protected] , Our specialists will calculate the required amount of material. There is NO pickup for this product group. It is possible to pay for the order upon delivery, delivery within Irkutsk is 500 rubles! (up to 1 ton)
- When carrying out work, as well as during the drying period of the solution, the air temperature in the room should be maintained within +5. +30°C and air humidity level no more than 75%.
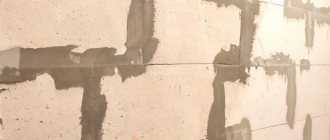
Surface preparation The base must be strong, dry, and have load-bearing capacity. Before applying the material, it is necessary to remove from the surface any crumbling elements, paint coatings, oil, bitumen stains and other contaminants that prevent the adhesion of the material to the surface.
To enhance the adhesion strength of the material to the base, it is necessary to treat the surface with a primer in one or two layers, and unevenly and highly absorbent bases (gas silicate, foam concrete, etc.) in several layers. The choice of primer is carried out in accordance with the type of base. The primed surfaces should not become dusty.
All irregularities, potholes, cracks with a depth of more than 20 mm must first be carefully sealed using the Teplon mixture. Further surface treatment should begin after 1-2 days.
Preparation of the solution To prepare the solution, pour the dry mixture into a container with clean water (0.45-0.55 l per 1 kg of dry mixture) and stir for 1-3 minutes until a homogeneous mass is obtained. Mixing is done mechanically: with a professional mixer or a drill with an attachment at low speed. Let the solution sit for 5 minutes and stir again. After this, the solution is ready for use. The prepared portion of the solution must be consumed no later than 50 minutes after mixing.
Attention!
When preparing the solution, it is necessary to observe the “dry mixture-water” ratio. It is not allowed to add any components other than water to the dry mixture. Adding any components, including water, to a ready-made solution leads to a change in the properties of the material declared by the manufacturer. To prepare the solution, use only clean containers and tools.
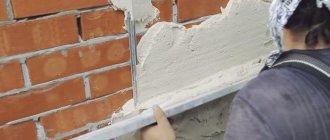
Installation of beacons Apply Teplon plaster solution to the pre-prepared base in the places where the beacons are installed. Without waiting for the mixture to dry, press the beacons into the solution applied to the surface. The correct installation of the beacons is checked by level. The distance between the beacons should be 20-30 cm less than the length of the rule. Further work is carried out 3-4 hours after installation of the beacons.
Application of the material The prepared solution is applied to the surface with a trowel or spatula within 20-30 minutes after mixing, then leveled with a rule. The layer of applying the plaster mixture without using a plaster mesh on the walls is from 5 to 50 mm and up to 70 mm when filling recesses, for ceilings - from 5 to 30 mm.
At the moment the solution begins to set (50-60 minutes after mixing the mixture), trim the applied layer using the rule, removing excess and filling the recesses. The resulting surface, after final drying, is suitable for gluing ceramic tiles.
Leveling differences of more than 50 mm If there are differences of more than 50 mm, preliminary leveling of the surface is carried out using the Teplon plaster mixture. To do this, the plaster mixture is applied in several layers, each layer is laid with a plaster mesh. Installation of beacons for applying pre-leveling layers is not required. Applying Teplon plaster in several layers is possible without using a plaster mesh; for this, cross-shaped notches are applied to the set but not yet hardened layer of plaster (50-60 minutes after mixing) using a comb or a notched trowel.
The thickness of each layer, if it is necessary to level out significant differences (more than 50 mm), should not exceed 30 mm. Before applying a new layer of plaster mixture, you must wait until the previous layer has completely dried and treat the surface with a primer.
Smoothing and glossing Depending on the thickness of the applied layer, 90-120 minutes after trimming, moisten the surface with water, rub it with a sponge grater and smooth the gypsum milk that appears on the surface using a spatula or trowel. The resulting surface, after drying, is suitable for wallpapering or painting.
Gypsum plaster Yunis-Teplon (white) 30 kg
You can buy gypsum plaster Yunis-Teplon (white) 30 kg in our online store at an affordable price. Gypsum plaster Yunis-Teplon (white) 30 kg: description, photo, characteristics.
Dear customers. Before visiting the office, be sure to call: 89501118580
Source
How to dilute putty: advice from professionals
One of the main stages of repairing walls in a house is leveling and preparing for finishing. The quality of this work affects both the appearance of the surface and its adhesion to other building materials. When doing this work yourself, you need to know not only the exact proportions of mixing water and dry raw materials, but also the mixing technique, consistency and other nuances depending on the purpose of the putty.
Basic rules for preparing putty mortar
First of all, the putty mixture, after mixing with water, must be elastic, homogeneous, plastic, easy to spread and level. Naturally, it should not come away from the wall surface in pieces or flow down. In turn, the putty should not stick to the spatula.
Important! For proper shrinkage of the putty mixture on the wall, thoughtful surface preparation is no less important. For good adhesion, the walls need to be treated with a primer, primer and removed from dust.
Manufacturers of building mixtures place instructions on the packaging for bringing them to working condition, but in reality, users face various difficulties. The main one is ignorance of what consistency of putty composition is best suited for a particular repair:
- When leveling large uneven areas, filling large cracks and potholes, the thick mixture is convenient. It easily fills depressions and smears without problems if too much solution is applied to the spatula. Thick putty is good for sealing joints between bricks in masonry and slabs.
- For finishing putty, a more liquid and plastic mixture is used. It should lay well in a thin layer and create a smooth surface.
- To putty the ceiling, it is necessary to finely select the consistency of the solution, because adhesion depends on a number of additional factors: the composition of the putty, the humidity in the room, pre-treatment of the base, etc.
Experienced finishers can determine what type of work the mixture is suitable for by its appearance, but ordinary users will most likely have to make several small batches in different proportions to find the desired ratio.
Important information! The putty should be diluted immediately before use, because it remains plastic and pliable for a short time. Once hardening begins, the solution changes properties and cannot be restored to working condition by adding water.
A good choice to simplify the puttying procedure is to purchase the ready-made mixture in a sealed sealed package. Such a solution immediately has the desired consistency and is produced taking into account the target characteristics. The user only needs to mix and bring the putty to a working consistency. However, this option has a significant disadvantage - ready-made putty mixtures are much more expensive than dry mortar mixed by hand.
How to dilute putty
Before starting puttying work, you need to prepare the walls by removing dust, splashes and deposits of plaster, greasy stains, and applying a primer. You need to start preparing the putty after all this work has been completed and the primer material has dried. To work, you will need a container with clean, smooth walls, a drill with a mixer attachment, or a spatula.
- Pour water into the container.
- Pour the dry mixture into the center of the container, having first measured out the required amount in accordance with the manufacturer's instructions. There should be a small slide.
- Wait until the dry solution settles into the water and begin stirring until completely mixed and smooth.
- If the mixture is too thick or thin, add dry mortar or water and then mix again. Parts of the mixture from the walls must be collected and sent to the total mass.
- Once you have the desired consistency, leave the putty on for a few minutes. It should swell and consolidate at the molecular level.
If you do not have the manufacturer's recommendations for the correct proportions, you will need to pour the powder into the center of the container with water until the slide above the surface of the water is approximately 1/3 of the underwater part. In a well-prepared putty, the spatula stands like a spoon, and the solution itself does not flow or fall off the spatula, but slides off slowly.
Tips from the professionals
- Do not allow the drill to rotate at very high speeds while mixing the solution. Air bubbles, which because of this get into the mixture, form empty bursting cavities after applying the solution to the wall.
- To prepare the putty, you must use clean water at room temperature. Adding too hot or too cold water can change the properties of the solution, causing it to crumble, fall off the wall in pieces after drying, etc.
- It is recommended to mix the putty in such a volume that you will have time to use it before the mixture begins to harden. The workspace should be organized so that the putter is distracted from the process as little as possible.
- It is useless to try to revive a solution that could not be used during the “working” period by adding water. The mixture may look usable, but will have poor properties and will not last long on the wall.
- The mixing attachment, spatulas and solution container must be washed after each batch and used completely clean. If remnants of old mortar get into fresh mortar, it will lead to the appearance of grooves and bulges on the wall.
- When calculating the shelf life of a fresh putty solution, keep in mind that the hardening time depends on the volume of liquid in the composition. Therefore, a thick mixture should be consumed faster than a liquid one.
The catalog of the Remonstr online store presents dry and ready-made putties intended for different types of finishing work. Our managers are always ready to help in selecting the necessary material and calculating its quantity, greatly facilitating the choice and saving your time. In addition, building materials calculators are available on the site, with which you can find out the required amount of putty yourself.
vote
Article rating
Scope of application of Teplon plaster
Unis Teplon plaster is much lighter compared to other gypsum plasters.
In addition, Teplon gains strength faster compared to cement plasters. Its only drawback is its low moisture resistance: it can absorb moisture up to 400% of its own weight . That is why this kind of mixture is intended only for interior plastering work.
Teplon's enhanced water absorption has both positive and negative effects for builders
One of the advantages of the mixture is the high strength of the finished coating, due to its gypsum viscosity and low weight. Therefore, it is successfully used for:
- plastering the surface (wall and ceiling) without the use of reinforced mesh;
- preparation for painting;
- preparation for facing with expanded clay tiles;
- removal of small depressions up to 7 cm deep.
Like all gypsum plasters, Teplon creates a smooth, even and glossy surface even without additional putty.
Can be used for the following types of surfaces:
- wooden;
- brick;
- gypsum;
- gas and foam concrete.
All surfaces should be pre-treated with a primer before plastering.
At the last stage it is not necessary to use a plaster mesh. The consistency of the solution is homogeneous, light and characterized by rapid setting . All this adds up to significantly speed up construction work and increase productivity.
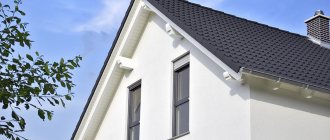
Gypsum plaster for exterior use
Gypsum plaster is intended for leveling vertical and horizontal surfaces and preparing them for further decorative finishing work. Gypsum plasters have a high degree of adhesion to any decorative coatings, are not subject to cracking and have lower thermal conductivity coefficients.
Before buying gypsum plaster, carefully read its composition. The price of gypsum plaster depends on the quality, composition and properties of the dry mixture. Focusing only on a favorable price when choosing gypsum plaster, you risk buying low-quality plaster, which will entail unpleasant consequences. You can buy gypsum plaster at all construction stores. Ask sales consultants to tell you about the characteristics of gypsum plaster from a particular manufacturer in order to choose the right gypsum plaster for your working conditions. Information about gypsum plasters can be found on the Internet. Type the phrase “I’ll buy gypsum plaster” into a search engine and you can go to sites where you will be offered a wide range of dry mixes with detailed descriptions. By also making a request with the words “I’ll buy gypsum plaster,” you can order the material with home delivery.
There is a huge selection of gypsum plaster on the modern market, so it is difficult to answer the question - which gypsum plaster is better? The greatest demand is for gypsum plaster from the German manufacturer Knauf. Imported brands are competed by domestic manufacturers such as Staratelli and Unis. In order to answer the question - which gypsum plaster is better, you need to determine on what surface you will use the plaster - smooth or rough, what material will be used as a base - brick or concrete, and, based on these data, choose the appropriate gypsum plaster .
Gypsum plaster is considered an interior finishing material and is practically not used for exterior work. Gypsum plaster is not able to withstand environmental influences - sun, wind, humidity, so it is not advisable to use it for outdoor work. Gypsum mixtures are intended for use in rooms with low humidity.
How to thin gypsum plaster
To prepare a solution of gypsum plaster, pour the contents of the package into a container with water at the rate of 0.5 liters per 1 kg, then mix with a mixer or electric drill with a special attachment. After keeping the solution for 5 minutes, mix again. The prepared solution must be used within 30 minutes from the moment of preparation.
To reduce the time and cost of plastering work, machine-applied gypsum plaster is used. Machine-applied gypsum plaster eliminates the formation of cracks, ensures a more uniform distribution of the solution and high adhesion. The dry mixture is poured into the plastering machine, which is mixed with water in the mixer. Next, the resulting mixture flows through a hose into a mortar gun and is distributed onto the work surface. Good ventilation in the room will ensure that the plaster dries quickly. For decorative finishing, the plaster should be coated with a primer.
Finishing materials made from gypsum include plasterboard. Drywall consists of two layers of cardboard, between which is a layer of gypsum. There are several types of drywall: regular, moisture-resistant and fire-resistant. Drywall perfectly levels walls even with very large uneven areas, it is perfectly processed and saves working time. But plastering plasterboard walls is not always appropriate - the work process is labor-intensive, and the result does not always justify the effort. Plastering plasterboard walls is only necessary if there are small irregularities and dents on its surface. In this case, the drywall must be moisture-resistant and of high quality - otherwise the plaster will begin to crack and fall off. Irregularities are filled with putty, then a thin layer of plaster is applied. If there are deep dents and distortions on the surface of the drywall, then plaster will not help. You will have to dismantle the damaged sheets and replace them with new ones. It is much more convenient to plaster walls with decorative plaster. Decorative plaster quickly polymerizes and dries without harming the drywall.
Main advantages
The advantages that Teplon plaster has are divided into several groups:
- good permeability for steam, which creates a healthy microclimate in the room; it becomes easy to breathe, which has a good effect on people’s condition;
- low thermal conductivity creates a heat-insulating layer, enhancing the heat-protective characteristics of wall ceilings and ceilings;
- environmental cleanliness; the mixture contains only natural and synthetic components that are not harmful to humans;
- profitability, reducing costs for finishing the premises;
- no shrinkage or cracking after drying; the coating is smooth and durable - if the technology for preparing the mixture, its application and drying conditions are followed;
- ease of application and leveling; there is no need to pre-reinforce the wall with mesh with a layer of up to fifty millimeters;
- the low weight of the Unis Teplon plaster reduces the load on the plane of the surface being finished;
- fast setting: finishing time is minimized;
- gloss after complete completion of work; if desired, white plaster can act as a finishing coating;
- there is no need to use finishing putties, which affects the additional benefit of using Teplon.
What should be the choice
Do you know whether walls are plastered under tiles, but what materials are used for this work? The choice of putty mixture is associated with the following features:
- constant level of high humidity and frequent contact with water;
- high probability of fungus formation and the development of other harmful organisms;
- choosing a material that is not prone to shrinkage;
- environmental safety of the material;
- presence of temperature changes.
Not every material meets these requirements. Of the entire range of plaster mixtures, only two options suit us: cement and gypsum plaster. It is these that we will consider in detail. So, how to plaster the walls in the bathroom under tiles, let's look for the ideal option for you.
Cement based plaster
This material is not afraid of moisture and even direct contact with water. It is not surprising that this option is chosen for baths and outdoor work. The binding component is Portland cement or white cement. Sand is also used, which differs in grain size. Plasticizers/additives are also added to such mixtures, which significantly increases performance characteristics.
Cement plasters are valued for their plasticity, adhesion and immunity to moisture. Such materials are often created independently, which allows you to save some money. To get high-quality cement plaster, you need to combine one part of cement (M400, M500) and sifted fine sand. Add 3 tablespoons of any detergent to a bucket of solution. Such an additive will make the mixture plastic, but at the same time it will shrink and increase the drying time.
If you nevertheless decide to buy a ready-made composition, then our brief review of popular brands will be very helpful. So, what plaster should be used to plaster the walls under the tiles so that the result does not become a complete disappointment.
- EK TT30 is based on gray cement. The mixture is plastic, durable, not afraid of moisture, does not crack and is not subject to shrinkage. Various types of surfaces can be used as a working base: concrete, brick, aerated concrete, cement. The layer can have a thickness from 8 mm to 3 cm. The solution is mixed for 2 hours, and the time for complete drying is 24 hours.
- IVSIL THINER is created on a cement-lime base with the addition of polymers. Very well suited for leveling any type of surface. Valued for excellent ductility and adhesion. The layer thickness starts at 5 mm, but cannot exceed 2 cm. Requires application for 3 hours, dries in 24 hours.
- Profit Hydrophobe has a cement base with an average grain size. This plaster repels water, adheres well to various surfaces and pleases the user with its plasticity. The finished solution must be used within 3 hours. Only after 20 days will the plaster be as strong as possible, as intended by the manufacturer.
- Ceresit CR 65 is well known in the construction market. The composition contains polymers; the material is not affected by water, alkalis and salts. Working with this solution is easy even for a beginner. There are restrictions for working with gypsum surfaces. After application, you will have to wait three days until the material dries.
- Consolit 540 is created on the basis of non-shrink Portland cement, lime and polymer additives. The coating is not afraid of water, does not crack and exhibits high adhesion. A couple of hours are given to consume the finished solution, and it dries within a week.
Do you know what plaster to use to plaster walls under tiles if cement materials are preferred. But don’t rush to go to the store, because there are still gypsum mixtures that can now be used in rooms with high humidity.
Gypsum based plaster
Previously, such materials were used exclusively in dry rooms. Modern manufacturers have begun to change the composition of gypsum plaster, making it resistant to high humidity. This effect is achieved thanks to additives and modifiers. Gypsum materials are valued for their high plasticity, easy application and excellent adhesion, which remains at a high level regardless of the type of working surface.
For a bathroom, of course, you need to choose waterproof materials, but even in this case, direct exposure to water is extremely undesirable. The use of such mixtures is advisable in the following cases:
- leveling surfaces in bathrooms and kitchen spaces;
- in bathrooms with shower;
- in rooms with high-quality ventilation that works flawlessly.
Gypsum plaster is not as durable as cement plaster. This means that it cannot be used for large, thick tiles. Such a load will cause the tiles to lag along with the plaster. But thin tiles adhere perfectly to such material. The only condition is double priming of the plastered surface before applying the adhesive.
Have you decided to choose this particular material? So you need to know what is the best way to plaster bathroom walls under tiles. Let's choose a brand.
- Knauf Rotband has polymer additives in its composition, which provide an excellent level of adhesion and equally good ductility. This material can be used on any surface in rooms with high humidity. It is necessary to use up the prepared solution in 20 minutes, which for an inexperienced person will be a problem at first. It will take a week to dry.
- UNIS Teplon resists moisture well, does not shrink, is easy to apply, and does not crack. An hour of time is allotted for using the solution, which is a good indicator for gypsum plaster.
- VOLMA-Plast tolerates high humidity conditions well. This option is best suited for leveling brick, concrete and gypsum board surfaces. An hour is given to consume the finished mixture, final drying is achieved after a week.
Specifications
Teplon as plaster has such technical characteristics that even a non-professional can easily handle it. The addition of perlite to the mixture determines a number of its special properties.
Compound
Unis teplon is a dry universal mixture based on gypsum. Additionally, the composition includes additives that ensure optimal mixing time and strength of the finished coating, crack resistance and a high level of adhesion of the solution to the surface.
One of the most popular mixtures on the construction market is Unis Teplon 30.
Strength
The strength of gypsum plasters is lower than that of cement plasters. The strength of Teplon is 2.5 MPa, i.e. 1 cm² can withstand a pressure of at least 25 kg without destruction. This is the standard strength level for all gypsum plasters . For comparison, the strength of its analogue - plasterboard - is slightly higher - 3 - 5 MPa. The adhesion strength is 0.1 MPa. This is also an average for mixtures intended for interior finishing work.
Layer thickness
The optimal layer thickness for the ceiling and wall is 0.5 cm, the maximum thickness for the wall is 5 cm and 3 cm for the ceiling . If it is necessary to make the layer thicker, plastering should be carried out in several stages. After waiting for the first layer to dry completely, you can proceed to applying the second.
To improve the adhesion of the next layer, it is recommended to apply notches or grooves using a spatula approximately 1 hour after the plaster has dried on the first layer.
Reinforcing mesh allows you to significantly increase the thickness of a single layer
Frost resistance
The frost resistance of the plaster mixture is 35 cycles , which means that it can withstand freezing and defrosting 35 times.
Colors
Unis is represented by two main types of gypsum plasters: gray and white Teplon. They differ not only in color, but also in technical characteristics. Therefore, before purchasing, it is advisable to read the instructions additionally.
More details about some of the differences in technical characteristics depending on color can be found in the table:
| Some technical characteristics of Teplon dry mixes | ||||
| Comparison criterion | Teplon | |||
| White | Grey | MN | Moisture resistant | |
| Color | white | grey | white | beige gray |
| Consumption at a layer thickness of 5 mm, kg/m2 | 4-5 | 4-4,5 | 6 | |
| Viability, min | 50 | 90 | 50 | |
In addition, the manufacturer allows for slight shade correlations depending on the gypsum used. The exact color will appear only after the surface has completely dried.
Thermal conductivity
Teplon has low thermal conductivity - 0.23 W/m oC , which provides thermal protection for the room.
This is achieved due to the modifying additive perlite included in the composition. It is believed that the lower this indicator, the higher the thermal insulation qualities of the building material.
Adhesion (stickiness)
The mixture is characterized by a high level of adhesion (adhesion of the solution), therefore the resulting coating is non-shrinking and crack-resistant. The coupling strength is 1.0 kgf/cm2 . Thanks to this, even without using a plaster mesh, you can increase the layer thickness to 0.7 cm.
Additional characteristics can be viewed in the table:
| Color | White gray |
| Temperature of work and operation | from +5 to +30°С |
| Amount of water per 1 kg of dry mixture | 0.45-0.55 l |
| Layer thickness without using plaster mesh | 5-50 mm |
| Consumption at a layer thickness of 5 mm | 4-4.5 kg/m² |
| Viability of solution | 50 minutes |
| Beginning of setting of the solution | no earlier than 50 minutes |
| End of setting of the solution | no later than 180 minutes |
| Drying time for a 10 mm thick layer | 5-7 days |
Moisture absorption
Thanks to the modifying additive perlite, high moisture absorption of the plaster is achieved, which should also be taken into account when choosing a mixture.
Consumption
Water consumption for Teplon is 4.5-5.5 liters per 10 kg . The viability of the solution is 50 minutes. This is a small indicator. For comparison, the viability of Rotband is 2 hours.
All gypsum plasters tend to set quickly, so the volume of the batch must be strictly combined with productivity
How to apply Teplon
At the first stage, it is necessary to carry out preparatory work. To do this, you need to remove old plaster and wallpaper from the surface to be treated. Also, the walls need to be washed and dried. All “growths” must be cut off. Despite the fact that the composition has good adhesion, it is recommended to apply small notches to the surface. After this, the walls must be coated with a primer (2-3 layers) and Teplon solution diluted.
Preparing the mixture
The solution must be diluted according to the proportions indicated on the package. The standard ratio is 1 kg of plaster per 0.45-0.55 liters of water. However, if you use white plaster, then the volume of water must be increased to 1.8 -2.2 liters.
Healthy! If there is too much water, the solution will simply spread over the surface. If you are greedy with water, the diluted composition will begin to crack.
The mixture must be thoroughly mixed with water; it is best if you have an electric mixer or drill with an appropriate attachment on hand. After mixing, the solution must be left for 5-6 minutes, after which the plaster is mixed again.
It is recommended to prepare the mixture in small portions. Some believe that it is better to do a large volume of material at once, so as not to suffer later with constant stirring and waiting. In this case, this approach will not work. The “life” of the plaster is only 50 minutes (it is recommended to do it within half an hour), after this time the mixture will become unusable. If you use already “expired” material, the coating will be very fragile. After some time, such plaster will simply crumble.
What to look for when purchasing
The material is distinguished by its ability to maintain a comfortable microclimate and normalize humidity levels thanks to its “breathable” and steam-permeable coating. Among its useful properties are heat conservation, noise absorption, and plasticity. Technical characteristics of Teplon plaster:
- it is allowed to apply the solution in a layer of 5-50 mm without using a reinforcing mesh;
- recommended temperature for repair work: +5 - +30 degrees;
- initial drying period: 50 - 60 minutes;
- final setting time : 3 hours;
- the diluted solution can be used for about 50-60 minutes;
- material consumption per 1 sq.m. area per layer thickness of 10 mm – 8.5 kg ;
- final strength gain (layer 10 mm thick, taking into account normal humidity levels) - 5 days - a week;
- thermal conductivity – 0.23 W/m*C;
- strength indicators: compression – from 25 MPa, adhesion to the surface – 0.1 MPa;
- the percentage ratio of water and plaster when mixing the solution is 0.5:1;
- Shelf life: 6-12 months.
With a minimum permissible layer of mortar for walls or ceilings of 5 mm, the maximum thickness will be different - 50 and 30 mm, respectively, but within its limits you can do without reinforcement. Preliminary priming is mandatory.
Teplon gypsum plaster requires compliance with a temperature range from +5 to +30 degrees, which helps the solution gain strength and prevent shrinkage and cracking of the surface. The thicker the layer, the longer it takes to dry, and vice versa.
If there are large bulges or depressions, the maximum possible layer thickness is increased to 70 mm, but the solution is applied in several stages (25-30 cm each), allowing each layer to dry before applying the next one and treating it with a primer. After 50-60 minutes, it is recommended to make notches or grooves so that the second and third layers stick to each other better.
Benefits of plaster
The material does not contain chemicals harmful to the body and conducts heat well.
The consumption of the mixture per 1 square meter is minimal , which makes it possible to spend it economically. The dimensions of the room are practically preserved; plastering takes only 5-10 cm of the room along its perimeter, depending on unevenness and defects.
is very plastic in use and easily takes the required shape when filling cracks and depressions. Good elasticity allows the mixture to remain stable for a long time and not crack; the material does not decrease in volume - it does not dry out or shrink afterwards.
Thanks to its resistance to mechanical stress, Eunice Teplon White plaster applied to the surface of a wall or ceiling will not be damaged if you hammer a nail into it and hang a heavy decorative element on it. The plaster layer will not deform or collapse.
Return to content
Places of application
Eunice Teplon White plaster is used to level ceiling surfaces and walls in rooms with moderate humidity.
| Area of use | Compatibility |
| For interior work | + |
| For outdoor use | — |
| Under a brick base | + |
| For concrete/reinforced concrete | + |
| Under foam concrete | + |
| Under old plaster | + |
| In dry rooms | + |
| In wet | Moisture resistant only |
| In unheated | Moisture resistant only |
| As decoration and plaster | — |
| Like texture wallpaper | + |
| For special institutions | + |
Suitable for almost any load-bearing surfaces, except bathrooms . The exception is a wall that is insulated from moisture. This can be achieved by laying tiles or ceramics over plaster. The seams should be carefully rubbed down. When in contact with any type of coating - brick, concrete, wood, it retains its useful qualities - plasticity, good adhesion and vapor permeability. The only condition is that the primer for each surface must be selected accordingly, and the whitewash must be removed before starting work with plaster, and only then can priming begin.
The main composition of Teplon White is gypsum. Additionally - special fillers - expanded perlite or glass hydroxide of volcanic origin. This allows for increased thermal insulation ability.
Plastering wood - choosing a solution and application - Blog Stroyremontiruy
There are several options for finishing wooden walls - these include plasterboard covering, clapboard, varnish and plaster with the obligatory content of gypsum, an important binder.
We will talk about his role below. The last method is somewhat outdated, but still relevant, because wood plaster is:
- — Surface leveling,
- — Increasing the heat and sound insulation of the wall,
- — Tree protection.
Features of application
Gypsum plaster is easy to use; you just need to figure out how to properly mix the solution, apply it to the surface and carry out the final stage of repair work - grouting and priming. Instructions for using the mixture include:
- removing previous coating from walls or ceilings, cleaning from oil stains and dirt;
- leveling the base, areas where chips and bulges are noticed;
- the need to wait two days after applying the solution to places where the coating was deformed;
- coating walls or ceilings with a primer in one or two layers before applying plaster;
- diluting the mixture with water at the rate of 0.45-0.55 liters for 1 kg , stirring for 2-3 minutes until the lumps completely disappear and the composition becomes homogeneous;
- when the mixture is infused - 5 minutes after mixing, it is mixed again;
- installation of beacons, metal guides with an interval of 1.2 m or more;
- applying the composition to the surface using the throwing method (allows you to increase the density of application) and recessing the beacons in it with mandatory orientation according to the level;
- removing excess mortar using the rule, without pressing the lath too much so that grooves do not form on the surface;
- 50-60 minutes after applying the mixture, the solution begins to fill the existing recesses;
- repeated removal of excess solution;
- smoothing and glossing (for wallpaper or painting);
- coating the surface with a primer after it has completely dried.
Disadvantages of using plaster
During the application of the solution to the work surface, during its direct mixing and grouting after drying, a lot of construction dust and dirt accumulates . But almost none of the types of repair work can do without this.
There is a need to make grooves - “grooves” for laying wiring. This is an unnecessary mechanical impact on the surface, requiring care and professional skills.
The time required is high - the solution takes a long time to dry, it must be applied in several layers, because it is impossible to immediately achieve an ideal result. After applying each layer, you need to wait until it dries, prime it, and only then, when the primer has also dried, start working on the next one.
Return to content
Calculation of the required amount of mixture
The consumption of gypsum plaster before carrying out repair work can be calculated independently in order to protect yourself from wasting money and trying to deceive you.
Let's make a calculation for 10 sq.m of load-bearing surface:
- requirements – 5 cm ;
- the beacons are installed with deviations of 2, 4, 6 cm at three points - we add up these indicators and get 12, divide the sum by 3 (the number of beacons) - we get 4 - the average permissible thickness for one layer of plaster;
- look on the back of the package to see how much mixture will be used per 1 cm layer for 1 sq.m - this is approximately 8.5 kg;
- in order to find out how much plaster is needed for a layer 4 cm thick, multiply 4 by 8.5 (the number specified by the manufacturer), resulting in 34 kg for 1 sq.m of surface ;
- for a wall with an area of 10 sq.m, 340 kg of mixture will be required - this is 10 (area) multiplied by 34 (amount for 1 sq.m);
- Yunis Teplon gypsum plaster is produced in packages of 30 kg. Therefore, for 10 square meters of surface, 4 cm thick, you will need 11-12 packages of the mixture .
Now you know the technical characteristics of Teplon plaster, its advantages and disadvantages, application features, as well as a way to calculate the required amount of mixture - this is enough to competently prepare for the start of repair work and bring it to its logical end with benefit for you.
Component ratio
The proportions of different components in the finished solution always differ, depending on the task at hand and the type of layer. Typical ratios are shown in the table below.
| Solution | Component ratio (in parts) | ||
| First | Second | Third | |
| cement - sand | 1 — 3 | 1 — 0,2 — 3 | 1 — 2 |
| lime - sand | 1 — 3 | 1 — 3 | 1 — 2 |
| lime - sand | 1 — 4 | 1 — 4 | — |
| lime - clay - sand | 0,2 — 1 — 3 | 0,2 — 1 — 5 | 0,2 — 1 — 3 |
| lime - gypsum - sand | 1 — 1 — 2 | 1 — 0,5 — 2 | 1 — 1 — 5 |
| clay - gypsum - sand | 1 — 0,2 — 3 | 1 — 0,2 — 3 | — |
The indicated proportions are not a constant and can be adjusted in each individual case.
Overview of characteristics and properties
The main components of Teplon are gypsum, synthetic additives and filler. For the latter, perlite is used - expanded mica chips, which helps the plaster retain heat well. Due to limitations in the thickness of the applied layer and high price, the material is not considered as an independent heat insulator, but it enhances the thermal resistance of structures. The key technical characteristics of plaster include:
- The recommended temperature for application is within +5-30 °C.
- The permissible thickness of the layer not reinforced with mesh is 5-50 mm.
- Average consumption for a thickness of 5 mm is 4-4.5 kg/m2.
- The viability of the solution is at least 50 minutes, final hardening is 5-7 days.
- Strength: compressive strength – no less than 2.5 MPa, tensile strength – 0.3.
- Thermal conductivity coefficient -0.23 W/m °C.
The optimal scope of application for this UNIS series is leveling work; the required quantity largely depends on the curvature of the walls or ceilings. When applying a layer up to 10 mm thick, the plaster consumption per m2 does not exceed 10 kg, the average value is 8.5. User reviews confirm the value specified by the manufacturer; it is noted that the composition is distributed in a thin layer without problems and does not form shrinkage or cracks. According to the instructions, the material is not suitable for sealing cracks with a depth of more than 7 cm; the maximum permissible thickness when leveling ceiling structures is 30 mm.
Changing the proportions or introducing foreign substances is not allowed; in order to reduce the consumption of Teplon UNIS mixtures, preliminary preparation is carried out aimed at increasing adhesion (degreasing, dust removal) and filling large voids with other, more affordable compositions.
When working with large areas, it is advisable to buy options marked MN (machine applied). According to the manufacturer, their consumption is practically no different from conventional brands, but, according to reviews, it is slightly more than the specified 8 kg (but not higher than 10). Savings in this case are achieved by reducing labor costs. The maximum consumption is observed with a moisture-resistant non-shrinking variety - according to the instructions for use, it reaches 6.5 kg with a layer of up to 5 mm.
“I switched to plaster mixtures from Unis a long time ago; in terms of quality and characteristics they are not inferior to Rotband, but are cheaper. Almost all brands of this company are identical to each other and differ little, but in general they are convenient to use. I consider their good thermal conductivity, moisture resistance, good vapor permeability and strength to be a big advantage. For gluing thin wallpaper, I recommend gypsum plaster Eunice Teplon White, it does not need to be painted.”
Advantages and disadvantages
Let us summarize the consideration of the properties and characteristics of Teplon gypsum compositions.
Pros:
- does not shrink when it sets and hardens;
- does not form cracks;
- easy application due to plasticity and low weight;
- maintainability;
- it is possible to obtain a glossy surface suitable for painting and covering with thin wallpaper;
- does not overload weak bases;
- easy to form, holds patterns (can be used as decorative);
- suitable for most types of substrates;
- high vapor permeability.
Minuses:
- not resistant to water;
- less durable than compositions based on mineral binders and polymers.
Application of material
Unis Teplon plaster is applied using devices made of stainless steel. A wide spatula or trowel will do.
It is not necessary to use a mesh for plaster. Before starting work, construction beacons are placed. The first ones are installed at a distance of thirty centimeters from the corners, then every thirty centimeters - the rest. After this, slats are attached to the surface, for which alabaster is used.
The maximum layer of the mixture is fifty millimeters. For ceilings - no more than three centimeters. The consumption of Eunice Teplon plaster depends on what layer it will be applied.
In the process of applying the solution, it is important to ensure that it slightly covers the beacons. After the mixture is applied to the selected area, about an hour later, you need to remove excess solution using the rule. If depressions have formed, they are filled with plaster. After another half hour, the layer is moistened and treated with a grater with a spongy structure.
When the solution is completely dry, you can apply the next one, if necessary. But first the surface must be primed. This is done if the surface being treated has a height difference of more than fifty millimeters, the plane must be leveled. To do this, apply several layers of the mixture, strengthening each with a reinforcing mesh.
Expert advice: if you are working with such a composition for the first time, it is better to use the rule, the length of which is about one and a half meters. At the same time, it is reasonable to set its width to one meter twenty to one meter thirty centimeters.
The result is a smooth matte surface. After it has completely dried, you can glue wallpaper onto it. It is believed that the mixture dries completely after seven days. Moreover, the mixture should be applied at a temperature of (+5; +30) degrees Celsius. It is important for it to dry at the same temperature. Then there will be no cracks, and there is no need to worry about shrinkage.
If you want to decorate the wall with tiles, the surface should be glossed. The Yunis Teplon plaster is glossed using a Venetian trowel. The movement is performed in the form of a cross.
How to properly dilute gypsum plaster, in what proportion?
How to properly dilute gypsum plaster, in what proportion?
- The proportions are indicated on the packaging. And if you explain it with your fingers, then take the amount of water corresponding to approximately half the volume of the plaster you need. (That is, if you need half a bucket of plaster, then pour a quarter of the water). Pour the dry mixture into the water (approximately 1 part water and 1.5 parts dry matter) and mix. A small volume can be mixed with a spatula, but if you need more, use a mixer. Here, look at the circumstances - you need it thicker or thinner, taking into account the fact that after a few minutes the mixture will become a little thicker.. Accordingly, add water or dry mixture. Leave for 5-10 minutes. Stir again. The plaster can now be used. Keep in mind that the thicker the layer of plaster, the thicker the mixture should be. And lastly, each mixture has its own production time - from 20 minutes. up to 2 hours (indicated on the package). Then the mixture hardens and becomes unusable. Take this into account and correctly calculate your own strength. If you work slowly, then it’s better to do half a bucket twice than throw away a bucket and half a bucket at once!
- With a mixer, it’s more correct to use 18 liters of water per 1 30 kg bag. Source: the mixture is poured into water
Ceiling nuances
Yunis Teplon gypsum plaster (white color) is applied to the ceiling with some specific nuances. The process proceeds in the same way as when working with walls, but the maximum layer of mortar is allowed no more than three centimeters. It is also important to very accurately monitor the evenness of the coating: on the ceiling, the slightest irregularities are especially noticeable. Using such a solution for finishing ceilings allows you to:
- improve thermal insulation;
- reduce the load on the entire structure by using fairly lightweight material;
- carry out the work very quickly and easily;
- get a durable layer.
Gypsum plasticizers
However, at home it is quite possible to make gypsum-based mixtures with your own hands, for example, quite plastic ones. But the reaction between gypsum and water occurs quite quickly, so gypsum plaster hardens quickly.
To make a solution convenient to work with, one of the plasticizers must be added to it:
- diluted PVA glue
, about 1% of the total volume; - lime,
used as a plasticizer and to increase hardening time; - Tartaric and citric acid
will also slow down setting. Special liquids, for example, Plast Retard PE, can extend the setting time to several hours, prevent cracks and improve the wear resistance of gypsum.
The car comes to the rescue
An important advantage of using Eunice Teplon plaster is that it can be applied using a special machine. To do this, you need to purchase a mixture intended specifically for machine application. It is a little more expensive than the composition that is used for manual work.
Gypsum plaster "Unis (unis) Teplon" in a thirty-kilogram bag will cost about seven to eight dollars. The consumption of Unis Teplon plaster in the machine version will be slightly different from how much mixture is spent when applied manually. However, in the end, the costs are justified by reducing the time required to arrange the plaster layer.
Source
Technology for proper plastering of house walls with your own hands.
Tool:
For plastering work, a minimum set of tools is required:
trowel - it is used to mix, pour, dose, pour and level the solution
trowel (trowel) - it is used to apply and smooth the solution
grater - it is used to level and rub in the mortar
rule - it is used to level the applied solution along the guides, as well as a plumb line and level
mixer - for mixing the solution.
Technology for applying the plaster mixture to the wall:
For better adhesion of the plaster solution to the surface, it should always be applied in several layers.
Application is carried out in several layers in different ways and with plaster of different consistencies.
Spray application.
The first layer, directly adjacent to the surface to be plastered, is laid using the spray method, called “spray” and has a thickness of 4-9 mm. To do this, use a liquid solution similar to sour cream in thickness. It is applied with a trowel, with a strong and sharp, sliding wave of the hand, throwing it along the wall. This is done to ensure that the wall is moistened as much as possible with the composition.
Applying plaster primer.
After the first layer has dried, apply plaster or simply spread a thicker composition on the walls, the so-called primer.
The second layer is “primer”, applied in one or two steps, 10-30 mm thick, it covers all irregularities.
The plaster mortar is applied by throwing it onto the wall with a trowel and pulled out, usually pressed tightly against the beacons.
Plastering requires dexterity and skill, so this technique of plastering walls is performed mainly by professionals. And applying the mortar to the walls takes much less time.
Applying the cover.
If necessary, the operation is repeated with a more liquid solution. On top of the second layer, after it has dried, a third, more liquid composition is applied again.
The thickness of the third layer of “covering” is 2-3 mm. Such broaching achieves filling of all voids and obtaining a high-quality layer of plaster, finally leveling it.
It makes the surface of the plaster smooth. That is, after applying the second layer, the evenness of the plaster is checked using a rule that removes excess and smooths out the homework where there was not enough mortar.
After some shrinkage, the excess mortar is cut off with the sharp side of the rule. The solution is suitable for further use.
Grouting plaster.
The set, but not dried, plaster layer is rubbed with a “grater”, pressing it against the wall in a circular motion, with preliminary moistening. A high quality of the plastered surface is achieved.
For plastering the walls of non-residential premises, you can get by with two layers, and sometimes you can only get by with the second method.
The time for complete drying of the plaster on the walls is a day. Previously, it is not recommended to carry out any work related to the walls. After the walls have dried and are ready for further work, it is necessary to coat them again with an antifungal primer, this time based on PVA. It will give plastered walls additional strength and durability.
It should be noted that the entire process of plastering walls is quite labor-intensive, requiring a certain skill and experience. By paying special attention to this part of the repair, you can get excellent results. However, if you have doubts about your own capabilities, it is better to contact specialists who have sufficient experience in repairs and will guarantee the high-quality performance of their plastering work.
Watch the video: Plastering walls with your own hands. How to properly align walls with beacons.
Putty
Puttying walls after plastering is a serious area of work, so it is better to separate it into a separate section. Before you start making a topcoat, you need to choose the type of material that is ideal for your conditions. There are three types of mixture in total.
Cement
This material is used for work after plastering and has the following advantages:
- resistance to temperature changes,
- moisture resistance,
- ease of use,
- affordable price.
All these advantages have led to the fact that this mixture is often used after applying plaster to make the final layer. The main reason that the material has not received an overwhelming advantage in the market is a number of disadvantages, including:
- the possibility of cracks due to shrinkage;
- long drying period;
- low adhesion.
Cement putty is used when work needs to be done in rooms with high humidity. Moreover, it perfectly tolerates harmful environments. It is also often used when, after the construction of a house, it is necessary to finish the facade.
Plaster
Gypsum putty is also used quite often when work needs to be done after plastering walls. It has the following advantages:
- no shrinkage,
- low probability of crack formation,
- high plasticity,
- ease of application,
- high adhesion,
This material is easy to apply. Moreover, it is easy to level it after completing the main work on plastering the walls. But, of course, there were some downsides:
- Plaster is afraid of moisture. Therefore, you should not do any manipulations with it in a room with high humidity.
- Plaster hardens quickly. On the one hand, this is a plus, but on the other hand, you shouldn’t make too large volumes of the solution, otherwise you won’t have time to use it all up.
- To get a high-quality finish you will have to do at least two layers.
If you decide to putty with gypsum, you must take into account that you need to wash such walls extremely carefully, otherwise you will have to make new putty, and possibly plaster.
Polymer
In recent years, more and more companies have decided to make putty based on polymers. This decision is easily explained by a number of advantages that this material gives to builders after treating the walls with plaster and primer, namely:
- Using the mixture, you can make a coating in rooms with water.
- It is possible for craftsmen to make only one layer of putty.
- It should also be noted that it has high adhesion.
- The substance dries quickly, is inert to temperature fluctuations and does not absorb odors.
Polymer putty, which is used to create the final layer of wall finishing after plastering, has a long service life. Moreover, it has high ductility, it does not crack or dry out.
Despite all the apparent advantages, before you start putting putty on the walls using gypsum, you need to learn about the negative aspects of this substance. Fortunately, there are only two of them. This is high cost and difficult to apply.
Most often, polymer mixtures are used when it is necessary to putty walls indoors. Some varieties are even used for external work. Such widespread use is explained by the high quality of the substance.
Packaging
To start making walls, you need not only to choose the type of putty, but also the packaging form. The fact is that there are dry mixtures on sale. After purchasing, you just need to dilute them with water.
You can also buy the substance in buckets. In this case, you won't have to do anything else. The putty can be immediately applied to walls that already have plaster. The first option is best suited for professional builders, and the second for beginners.
Calculation of plaster consumption per square meter
Carrying out finishing work in an apartment often includes leveling the walls using plastering. In order to determine in advance the amount of material to be purchased, you need to know the consumption of plaster required for this operation. Such awareness will help not only to avoid downtime caused by a lack of dry mixture, but also to avoid unnecessary costs. Hired workers, wanting to earn extra money, often overestimate the amount of dry mixture consumed, and such a calculation will bring them to clean water.
Important! To calculate the consumption of plaster that will be required to obtain a flat surface, it is not enough to simply multiply the consumption of the dry mixture per 1 m2 indicated on the bag with the plaster mixture by the area of the wall being treated. In the calculation, parameters such as the curvature of the walls and the type of material used for plastering should be taken into account.
Determining layer thickness
To make a preliminary calculation and find out how much material is required per square meter of coating, you need to determine the thickness of the plaster to be applied. To do this, the first thing you need to do is clean the wall surface as thoroughly as possible.
Smooth walls in apartments, especially those built during the Soviet period, are quite rare. To find out the deviation of the wall, you should level several beacons on it. The layer thickness is calculated as follows:
- The deviation from the plane is measured for each beacon.
- All results are summed up and divided by the number of measurements. The resulting value will be the average layer thickness, on which the consumption of plaster required to level the available square meters of wall will depend.