Concrete putties today are presented on the market in a wide variety and are used to protect and repair the base. The concrete surface is quite dense, but under the influence of external negative factors and time it tends to become deformed and become covered with a network of cracks. To avoid this effect and significantly extend the life of the concrete surface, it is protected with various compounds, one of which is putty.
The main functions of concrete putty:
- Restoration of the monolith, elimination of defects and protection from further destruction.
- Heat/sound insulation of the room.
- Leveling the surface before finishing.
- Reliable protection of concrete from various aggressive influences (both outside and indoors).
There are different putties for concrete - there are both universal compositions and special substances designed to perform a specific function. When choosing, you should focus on operating conditions, main tasks, features of the concrete surface, etc. But there are some requirements that all types of putties must meet.
The main requirements for concrete putty:
- Thixotropy
– the composition must liquefy during use (so that working with it is comfortable and it is possible to create the highest quality coating) and become viscous as it hardens.
- Moisture resistance
– this property is important for a composition that is planned to be used outside or in rooms with high humidity levels (kitchen, bathroom, toilet).
- Elasticity
– thanks to this characteristic, the putty can penetrate the pores of the concrete surface and seal them, preventing external negative factors from affecting them.
- Durability
to sudden temperature changes, low/high temperatures - important for putty that is planned to be used for exterior finishing.
Standard characteristics of concrete putty:
- Complete drying time can vary from 4 hours to 5 days (it all depends on the specific type of substance).
- Waterproofing of concrete surface is about 98%.
- Frost resistance – up to 35 freeze/thaw cycles.
- The time for using the dry composition after it has been diluted according to the instructions is about 2 hours.
Regardless of which putty you choose for concrete walls, it is important to pay attention only to high-quality products from well-known manufacturers, who guarantee that the composition meets all requirements and provides detailed instructions for its use.
Features of the base
Monolithic concrete has certain properties, which is why putty for finishing surfaces of this type must be selected taking into account the characteristics of the material. The main feature of concrete is low water absorption (hygroscopicity), which reduces adhesion with building mixtures (including putties and plasters).
The mechanism for applying such mixtures involves the penetration of the binder into the unevenness and pores of the surface on which they are applied. And in heavy concrete, the pore size is minimal, so the mixtures do not adhere very well to the surface. To solve this problem, quartz primers are used, which are made from fine river sand and a polymer binder. After the binder has set, the surface of the concrete becomes rougher and more effectively accepts the putty.
The problem can also be solved by first gluing a plaster fiberglass mesh to the surface. But in order to completely hide its texture, putty is applied to the concrete monolith in a layer of at least 2-3 millimeters, or even more.
It is also important to select the correct putty compositions for concrete, which will provide maximum adhesion, protection and durability of the finish.
Putty work
It is quite possible to putty the walls yourself, but in this case there is no need to talk about good results, although the work is not one of the difficult ones. Most likely, skill is developed through time and practice.
Theoretically, the filling process looks like this in stages:
- preliminary preparation . The first stage is to clean the surface, dry it, remove greasy areas, old putty, and former paint. Avoid working on dirty or frozen surfaces;
- on the contrary, it will reduce the degree of adhesion of any material to zero. Hence, there is a risk of loss of putty in solid layers.;
- primer. This stage should not be ignored. Primer of all putty layers including the final finishing layer before wallpapering. This procedure will provide additional strength;
- puttying. Based on the purpose of the room, the application of one or another type of putty and the number of layers itself are varied. In this procedure, it is necessary to let each layer dry thoroughly , and then treat it with a primer;
- The starting version of the putty is applied in portions. To avoid visible transitions, application occurs with some overlap on the layer in front of it. The tool is held at an angle of 31-36 degrees relative to the surface;
- The finishing layer can be applied only after a day. To do this, you should resort to a narrow spatula, which will reduce the thickness of the layer to 2 mm;
- final primer immediately before wallpapering the walls.
Principles of puttying corners
Sometimes evenness and clarity of corners are an extremely important component of a repair. To do this, the walls planned for pasting must be leveled. This procedure will seem very labor-intensive for an inexperienced finisher.
Professionals recommend not removing excess material from the corners in order to grout the corner with abrasive to the required condition.
The most effective in this work will be an angled spatula, which operates on the principle of “supporting the wall.”
At home, it is quite appropriate to use a silicone tube or syringe (standard confectionery), which allows you to distribute the required volume of putty mixture. After which the corners should be sharpened with abrasive.
Slope putty
Puttying slopes occurs in the same way as the corners or walls described above . The only difference is that the process itself is very painstaking, so beginners have practically no chance of coping with this task. Professionals recommend using an angle spatula and leveling with abrasive.
Vapor permeability
It is very important that the putty meets the requirements for vapor permeability. The general rule is this: the vapor permeability of any building structure should increase from the inside to the outside. Only in this case will it be possible to remove excess moisture from the room through the walls, preventing condensation from accumulating inside the room or in the finishing.
What happens if the exterior finish exhibits less permeability:
- Steam is filtered faster through the inner layers of walls than through the outer ones.
- The humidity inside the material from which the walls are built begins to rise.
- Humidification reduces the thermal insulation properties of walls and leads to condensation accumulation.
- In winter, the dew point moves inside the house, as a result of which the wall begins to freeze.
All this leads to the appearance of fungus, mold, deterioration of the indoor microclimate and other problems that can lead to deformation and destruction of the building, as well as problems with people’s health and well-being. The water freezing inside expands and tears the wall material from the inside, causing early deformations and the spread of cracks.
Due to such features, for internal work you need to choose a putty with low vapor permeability, for external work - with high one. Here you need to take into account all the materials that are used in the construction and decoration of walls in order to follow the general rule.
Important Terms
Before you begin leveling with putty, the surface to be treated must not only be cleaned, but also free from cracks, if any. To do this, they must be expanded with a spatula, and the resulting surface must be primed with a roller or brush. After the soil has dried, gypsum plaster should be applied to the wall; for this you can use a trowel or spatula.
Leveling is done with a spatula, and you can create any required layer thickness, usually a couple of centimeters, taking into account the fact that reinforcement will be performed.
The putty must be prepared according to the instructions, but one should not forget that it is necessary to initially place the dry compound in the container, and only then add water, which will help avoid the formation of lumps.
Varieties
Puttying of concrete surfaces can be carried out using various compositions, which are classified according to several criteria. Craftsmen usually select materials according to the order of application - starting, finishing, universal. The starting composition is used to eliminate defects and smooth out sharp transitions. Finishing putties are useful for leveling the surface for finishing. Universal views can be used in any format.
Types of putty for concrete according to composition:
- Cement mixtures are very popular, suitable for indoor/outdoor use. The main advantage is low cost, the disadvantage is shrinkage, which can lead to surface deformation and the appearance of defects.
- Gypsum compositions - used for interior work, are not suitable for exterior finishing and where there is high humidity.
- Acrylic putties are universal compounds that are suitable for any application conditions and different types of substrate.
- Epoxy - demonstrate increased strength and drying speed, but have the only drawback in the form of high cost.
According to the degree of readiness of concrete putties, there are:
- Dry mixtures - before use, the composition must be diluted with water according to the instructions. To mix a high-quality solution, it is advisable to use a drill with a special mixer attachment. Beginning craftsmen are not always able to mix putty correctly.
- Ready-made mixtures - they can be used immediately after opening the package. Putties are usually easy to apply and good for beginners, but are more expensive.
Requirements for putty
Concrete structures are constantly exposed to mechanical stress, the destructive effects of moisture, as well as various chemicals for cleaning surfaces. This is especially true for floors. Therefore, when choosing a putty, special attention should be paid to its pros and cons.
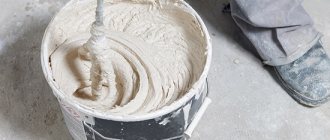
Use a spatula and scoop up the finished putty.
If you want the walls and floors of your home to be reliably protected and carefully leveled, the product you choose should have the following advantages:
- strength;
- good adhesion properties;
- not exposed to water and moisture;
- safety;
- resistance to external influences;
- durability.
One of the common disadvantages for all types of putty is its inability to glue the covering layers of the concrete coating to the substrate. Most often, putties are applied to the primer. In addition, the disadvantages of this material are the following qualities:
- elimination of defects and irregularities of only a minimal size;
- finishing requires special skills;
- If flooded, the putty surface will still suffer.
To reduce the negative consequences, you need to figure out which remedy is the best?
Return to contents
Surfaces and materials
Before choosing a putty for concrete, you need to analyze the main selection criteria - which surfaces need to be puttied (floor, ceiling, walls, etc.), whether you plan to carry out work inside/outside, what finish the concrete monolith is being leveled for, what is the purpose premises, etc. Today in Moscow and the regions you can find a variety of formulations at excellent prices, so you should choose carefully.
Walls outside
If you need to putty the wall outside the house, then choose cement facade compositions, which are characterized by moisture resistance and high mechanical strength, resistance to sudden temperature changes. The separating layer between the monolithic/panel wall and the finishing can be a layer of adhesive primer (for example, Osnovit T-55).
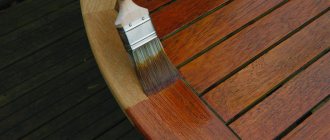
Cement plaster is usually used as a starting coating, but it is advisable to use an acrylic composition for the finishing (it can also act as a decorative coating).
When choosing an adhesive primer, you need to look at its purpose and the types of compounds under which it can be applied. Most often, exterior finishing is carried out simultaneously with wall insulation.
What the façade structure looks like:
- Monolithic wall made of reinforced concrete or reinforced concrete panels.
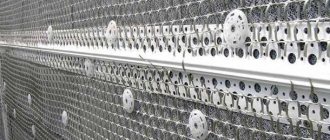
- A layer of insulation (expanded polystyrene or mineral wool), mounted on disc dowels and cement glue.
- A layer of cement putty reinforced with fiberglass mesh.
- Decorative plaster or facade paint.
Walls from the inside
The inner layer of finishing can be done only with putty, without plaster, but provided that there are irregularities on the surface of a maximum of 2-4 millimeters, and all defects can be removed with putty. If the size of the defects is greater, then first the wall is plastered along the beacons (if there are irregularities up to 5 centimeters) or leveled with plasterboard over a frame made of galvanized profile (if there are defects more than 5 centimeters).
Main features of choosing and using putty indoors:
- For dry rooms (corridors, bedrooms, living rooms), gypsum compositions are chosen, which are inexpensive and easy to apply and process.
- For the bathroom and kitchen it is better to buy a cement composition.
- Acrylic putty is suitable for finishing rooms with high and low humidity; it can be used without a starting layer (but with a primer required), as it evens out small wall defects and is easy to apply.
- Gypsum putty can be used in conditions of high humidity, if the room is well ventilated, the top layer is covered with a waterproof finish.
So, in addition to waterproof paint, gypsum putty can be covered with vinyl wallpaper, but in a damp room they are glued to waterproof PVA (and not regular glue), which is applied to the wall and strip of wallpaper.
Ceiling
Finishing the ceiling is not much different from the treatment of other internal surfaces. The rules are the same: minor repairs can be done using acrylic putty, which provides an important advantage: by maintaining a white color after setting/drying, it avoids the need for painting.
A universal mixture or a gypsum finishing mixture with preliminary priming with concrete contact may also be suitable.
Floor
To eliminate cracks and potholes, use cement putty or ordinary cement-sand mortar (mixed in a ratio of 1:2, 1:3). The cracks are opened in advance (widened with a chisel or a light pick), all potholes are deepened, dust is removed, and they are primed with an acrylic penetrating compound.
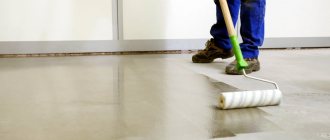
To level the floor under the finishing coating, polymer-cement building mixtures are used. Self-leveling self-leveling floors are evenly distributed over the surface (including potholes, cracks), the substance is very fluid and creates an ideal horizontal surface.
Basic leveling is also carried out using a cement mixture, but it is better to use a composition based on the same binder on which the future self-leveling floor is made (polyurethane, epoxy). Both types of binders demonstrate a high level of adhesion, adhere well to the finishing coating and seal defects.
Windowsill
Concrete window sills are usually leveled for painting. Minor irregularities can be eliminated with acrylic-based façade putty after thorough priming with a penetrating compound. Here you can do without an adhesive primer, since acrylic adheres well to a concrete monolith after impregnation with a primer based on the same acrylic resins.
If there are serious defects on the surface of the window sill, it is leveled with facade cement putty with preliminary reinforcement with fiberglass mesh. It is advisable to reinforce the edges with a galvanized corner profile.
And in order to achieve maximum strength, the surfaces are ironed - carefully rubbed with cement without adding sand, diluted to the consistency of sour cream.
Why is alignment necessary?
Walls are puttied when there are obvious depressions, uneven places, bulges, cracks and other imperfections that may affect the result of the repair work.
If the walls in the room being finished are uneven, dancing, and the discrepancies at different points are more than 3 cm, even the most luxurious wallpaper will not be able to save the situation, since they will:
- Fall off.
- To tear and burst.
- Severely distort a pattern or design.
In the process of repair work, it is impossible to do without puttying, even in cases where the walls are plastered with beacons. All the same, the surface is not smooth enough for wallpapering. Using putty, you can easily prepare walls for finishing, as it creates a smooth surface without the slightest roughness or unevenness.
Putty will help avoid such problems. You just need to choose the right one that is suitable for the base for the wallpaper.
Consumption
The consumption of putty depends on the substance itself and many factors - on the conditions under which the work is performed, the condition of the surface, preparation, layer thickness, etc. Exact numbers are always presented on the product packaging. But on average, the consumption is 0.7-1.5 kilograms of substance per square centimeter, provided that a layer 1 millimeter thick is made. To obtain accurate values, the indicator is multiplied by the layer thickness, defects are taken into account, etc.
You can make putty for concrete with your own hands - some craftsmen do just that. For concrete, the most suitable composition is considered to be a gypsum-chalk composition, which can be used in rooms with an optimal level of humidity.
What you will need to make your own putty:
- Chalk powder – 2-3 kilograms.
- Plaster – 1 kilogram.
- 5% solution of wood glue - usually determined approximately.
How to prepare the material: place the glue in a container, pour plaster and chalk into a separate container, stir thoroughly. Then pour the dry powder mixture into a container with glue, mix thoroughly using a construction mixer or drill with a special attachment. The finished product should be used within 20-25 minutes, as after a longer period of time it begins to dry out.
Comparison
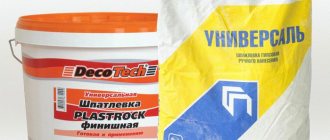
There are quite a lot of different materials on the market, and they all differ significantly from each other, so we will simply present a few examples of building mixtures that are widespread in the domestic market.
Ceresit S. T. 29. It is based on gypsum and does an excellent job of leveling lime, brick and other surfaces. Used at temperatures from 5 to 32 degrees, hardens within 50 minutes, 7.2 kilograms of the mixture are consumed per square meter.
SCANMIX LH STANDARD is the exact opposite of the composition mentioned above. It is based on polymer materials, the putty provides high adhesion, does not shrink, and has all the advantages of polymer compounds. Polymerization takes a day; 1.5 kg of composition is consumed per m2.
Application technology
Applying putty on concrete is quite simple. The main thing is to take into account the characteristics of the surface, choose the right composition in accordance with the size of the defects and the desired result. The work is carried out in several stages, each of which is important.
The process of applying putty to concrete:
- Surface preparation is mandatory; it involves thoroughly cleaning the base from the old coating, degreasing (gasoline, acetone or white spirit are suitable). Oil stains are treated twice. Then the base is brushed, washed with water, and allowed to dry.
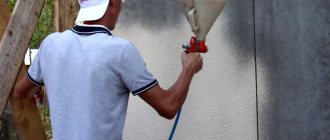
- Priming - a primer is used to improve the adhesion of materials if mesh reinforcement is not intended. The primer is applied with a roller, brush or spray gun in two layers with a technological break for each of them to dry.
- Reinforcement - often used when puttingtying walls, when a special fiberglass mesh is used instead of a primer. The material is pressed against the wall, PVA glue is applied on top, it is allowed to dry and they begin to putty.
- The putty is applied as follows: sealing cracks and defects with the compound, applying the starting putty with a wide spatula, waiting for the drying time (it can be found on the packaging), cleaning the surface using P80 sandpaper, removing dust from the base, treating with a primer, applying the finishing putty, waiting time drying, sanding the material with P120 sandpaper. Next, two layers of primer are placed on the base, allowing each of them to dry thoroughly, and finishing is performed.
Expert advice
Use the following tips to make puttying concrete easier:
- do not use a household vacuum cleaner - concrete particles will damage the filter;
- to make working with the primer easier, moisten the concrete with a spray bottle;
- use the prepared solution within a maximum of 2–3 hours after mixing;
- cement putty is distributed over the surface after application;
- to treat large areas, purchase dry mixtures rather than ready-made ones;
- Level the fiberglass with a plastic spatula, puttying with a metal one;
- do not use putty to level the walls - this will significantly increase consumption;
- To level the concrete base, apply gypsum plaster before puttying;
- on the ceiling, fiberglass is fixed to the starting layer to prevent sagging;
- If there are no significant defects or cracks on the surface, do not apply the starting putty, go straight to the finishing putty.
Concrete surfaces can be puttied without prior plastering if they do not require leveling. Concrete contact is required as an initial soil, and universal deep penetration is required as an intermediate soil. It is important to choose non-shrinking plastic compositions. Then the risk of cracking and reduced durability will be minimal.
Rating of the TOP 15 best putties for walls under wallpaper for 2022
| Place | Name | Price |
| TOP 3 best putties for walls under wallpaper by price/quality for 2022 | ||
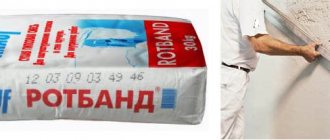
| 1 | KNAUF Rotband Pasta Pro | Find out the price |
| 2 | PUFAS Full+Finish | Find out the price |
| 3 | Weber LR+ | Find out the price |
| TOP 3 best gypsum putties for walls under wallpaper | ||
| 1 | KNAUF Uniflot | Find out the price |
| 2 | Unis Blik | Find out the price |
| 3 | Volma Shov | Find out the price |
| TOP 3 best latex putties for walls under wallpaper | ||
| 1 | TEX latex Pro | Find out the price |
| 2 | DANOGIPS Dano Box 1 | Find out the price |
| 3 | TEX finishing Pro | Find out the price |
| TOP 3 best putties for walls on concrete under wallpaper | ||
| 1 | DANOGIPS SuperFinish | Find out the price |
| 2 | Weber VH | Find out the price |
| 3 | Prospectors Finish Plus | Find out the price |
| TOP 3 best putties for walls on drywall under wallpaper | ||
| 1 | Ceresit IN 95 | Find out the price |
| 2 | Tikkurila Euro Filler | Find out the price |
| 3 | Weber KR | Find out the price |
Cost of plaster.
The price of plaster includes the volume of materials used (sand, concrete). Hired workers indicate only the cost of their work per m2, without taking into account the costs of purchasing building materials.
The method for calculating the required amount of materials depends on the curvature of the walls:
- Smooth walls. The plaster has a layer of approximately 2cm. It is enough to multiply 0.02 m (2 cm) by the “square” of the surface to be plastered to obtain the volume of the required mixture in cubic meters.
The brand of cement also matters: for example, M-500 requires 5 buckets of sand. This means that 1/6th of the volume is cement. Accordingly, the result must be divided by 6 to find out how much cement is needed and calculate its cost.
By multiplying this number by 5, you can find out the required volume of sand.
- Curved walls. The consumption of the solution increases significantly if the walls are curved. They can be curved, concave, or inclined.
It is impossible to reliably accurately calculate the need for mortar in case of severe curvature of the walls. It’s easier to do the following: calculate the volume of plaster in one layer (as if the walls were smooth), and then add to them the approximate volume of areas requiring thicker plaster.
You can buy the components of the mixture in a deliberately smaller volume in order to subsequently purchase the missing quantity (when there are not many unplastered surfaces, it will become easier to accurately calculate). This will help you avoid buying extra material.
Workers performing plastering work charge per sq.m. But this does not apply to special situations. For example, plastering of slopes and corners is charged per linear meter, not per square meter. This is due to the particular complexity of the work.
The way to save money can be as follows: you can plaster the walls yourself, and order more precise and scrupulous work to be done by professionals.
FINAL PUTTY FOR CONCRETE CERESIT CD 24 25 KG
CONCRETE PUTTER CERESIT CD 24
Finishing putty for concrete (up to 5 mm) Ceresit CD 24 has universal properties and can be used to level the surface indoors or outdoors. It is not recommended for working with plasters or processing brickwork.
Advantages of finishing putty for concrete
After application, the finishing putty hardens very quickly, allowing construction work to be carried out as quickly as possible. The material is environmentally friendly and is often used for interior work.
Among the advantages of Ceresit CD 24:
- frost resistance;
- minimal shrinkage;
- resistance to constant influence of moisture;
- immunity to anti-icing reagents.
Ceresit CD 24 maintains the quality of the coating for a long time without showing a tendency to crack.
Using Ceresit CD 24
Finishing putty for concrete is applied manually or mechanically to vertical or horizontal surfaces. The viscosity of the material allows you to level out significant chips, cavities and cracks in reinforced concrete and concrete structures. The number of layers is applied depending on the depth of damage. After drying, any type of decorative coating or paint is applied to the putty.
FINAL PUTTY FOR CONCRETE CERESIT CD 24 25 KG - Characteristics
not less than 0.8 MPa
Thickness of the applied layer: