Seeing in front of you straight rows of tiles in the bathroom after a fresh renovation, you may get the impression that this is an incredibly difficult job and only a professional can handle it. But by understanding the basic principles of how to install bathroom tiles on a wall and acquiring some practical skills, tiling the walls will not be such a difficult task. Moreover, laying tiles with your own hands does not require a large amount of specialized equipment or expensive tools.
Tool for the job
After you learn how to glue tiles to a wall, you need to know the necessary equipment. The preferred, but not required, option will be indicated in parentheses:
- straight spatula, comb spatula;
- rubber hammer;
- primer brush (spray);
- level horizontal, vertical (2 in 1);
- thread for marking, plumb line (water level, laser plotter on a tripod);
- containers for mixing glue (electric drill with a special attachment or construction mixer);
- a set of crosses;
- square, glass cutter, steel ruler (machine tile cutter);
- rubber spatula.
Waterproofing
This stage is desirable, but not mandatory when working in the bathroom. Application of waterproofing compounds allows you to extend the service life of the plaster layer under the tile and avoid unexpected moisture leaks in corners and joints. A particularly positive effect of waterproofing is noted when using plaster compositions based on gypsum. These compounds are applied in one or several layers with a roller or brush, after which a leveling pass is made over the resulting surface with the same tool. You can take care of waterproofing your bathroom in advance by applying it to the bathroom walls before plastering. This option is preferable if there is a thin partition, for example, between the bathroom and the kitchen.
Scheme for applying layers and laying tiles
The tiles are scattered
The staggered pattern is an installation of rectangular elements with every second row offset by half the width of the tile. The result will be a beautiful pattern, similar to brickwork. For original design solutions, the square shape of the elements can be used, which will create an unusual visual effect.
Laying tiles in staggered patterns is recommended for high-traffic areas of the apartment - kitchens and hallways. With this method, tiles are laid out only horizontally. The pattern with imitation brickwork creates a special atmosphere in the interiors. Glossy rectangular elements laid out staggered are suitable for rooms decorated in retro style. Brown tiles with scuffs are used in country style designs.
Primer
Having made sure that enough time has passed to begin the next stage of work, the technology instructs to prime the wall. The primer additionally cleans the surface, destroys potential sources of fungus and increases the adhesion of tile adhesive to the wall material. This adds up to longer tile life and improved sanitary performance in the bathroom. Primer compositions are most often sold in ready-made liquid form. It should be applied to the entire surface of the wall using a brush, roller or spray, and then wait until it dries completely.
The time intervals after which the next stage of work can begin are indicated by the manufacturer in the instructions on the packaging of building mixtures
Pre-layout
Before you start laying tiles in the bathroom with your own hands, you need to accurately understand the layout diagram, how many whole tiles will fit in one row, how many cuts you need to make, and how many rows you plan to lay out to the ceiling. It is advisable to draw a layout diagram with dimensions. For clarity, you can lay a row of tiles along the wall along the floor. It should be remembered that you must strive to lay the largest cut segments of tiles. A large number of 2-4 centimeter inserts spoil the aesthetics and complicate the installation process. It is better to try to place such an undercut in the bathroom only when absolutely necessary.
It is better to start laying from the bottom row and move to the top
The bar for supporting the bottom row of tiles must be leveled
It is somewhat easier to glue the very bottom row and gradually move up to the ceiling, installing the topmost row of tiles cut to height. With this design, it is necessary to take into account the thickness of the future floor covering. If you plan to install a suspended wooden system or install a stretch ceiling, the trimmed top row can be completely hidden. More difficult to perform, but more correct, is to start laying from the bottom from the second row, measuring the height of the lowest row of trim tiles.
Laying ceramic tiles on a wall requires preparing a set of support templates (it is possible to use pieces of tiles or a wooden support of the required height), which will serve as a support until the glue sets and replace the bottom row and floor tiles in thickness.
There are the following ways to correctly lay out a horizontal row with your own hands - from the corner and from the center. The corner method is much simpler - you need to lay a whole tile from the selected corner and continue the row until completion, simply cutting the last segment to the required size. In this case, we cannot control the size of the undercut. To lay out from the center, you must proceed as follows:
- Shift entire segments to the center.
- Take measurements of the openings for the tiles.
- Cut the tiles to size.
- Lay and glue the resulting segments.
To get rid of a small undercut, when laying out from the center, you must first count the number of whole tiles, then simply remove one and place the undercut along the edges of the required size. This method requires slightly more material, but the result looks much better.
What you need to know
Before purchasing the material, it is worth calculating it so that the total area of the tile coincides with the area of the surface to be finished.
When buying facing material, you should pay attention to:
- Angles must be strictly 90 degrees.
- The thicknesses of the samples are the same, minor differences are allowed.
- The length and width of the tile, for each sample these parameters must match accordingly.
Tiles cannot be attached to a curved surface. If the wall is uneven, it must be leveled with plaster. Before facing work, you should mark the future masonry: arrange the tiled finish depending on the chosen scheme. For symmetry, the layout is performed from the center or the most visible corner to the sides. After this, the outer samples are cut to the desired size.
It is also necessary to prepare working tools in advance so that during the finishing process everything you need is at hand.
Masonry process
Before laying tiles in the bathroom, you need to prepare the adhesive composition. To prepare the glue mixture, you must follow the instructions on the package.
Adhesive mixtures have an extremely finely dispersed structure; it is imperative to use respiratory protection when working.
As a rule, the mixture is poured into a glue container, filled with the specified amount of water and mixed. Then you need to let the solution sit for 5-10 minutes and mix again. Mixing all the lumps in the solution with your own hands will take a lot of time; it is correct to use an electric drill with a special attachment or a construction mixer.
Drill attachments for preparing solution
Before laying, some decorative ceramic tiles need to be moistened with water to improve adhesion to the adhesive. Laying each tile in the bathroom requires the following operations:
- The glue is applied to the wall in the bathroom with a comb spatula in an even thin layer.
- With a precise movement, the tiles are installed on it.
- The position of the tile can be adjusted if necessary.
- The tile can be slightly pressed with your own hands or tamped down with gentle, gentle blows of a rubber hammer.
- Plastic crosses are installed in the corners to maintain precise gaps.
It is necessary to try to place the tiles on the walls in the room as accurately and correctly as possible; it is allowed to only slightly move them to the side during correction. Removing tiles and gluing them again is a very unpleasant procedure.
If the tiles are not level, they need to be removed and re-installed.
It is best to apply adhesive to install only one tile. Yes, it's much longer. Having filled your hand, you can apply the adhesive solution under 2-3 tiles. But smearing a large area with glue and then sculpting tiles on it one by one is fundamentally wrong. The surface of the glue will have time to dry, which will sharply worsen adhesion.
Do not press the tile too hard to ensure that the adhesive protrudes through the seams. Firstly, it will then need to be cleaned off the front surface. Secondly, this will complicate the subsequent process of grouting (jointing). For tiles that have a mirrored front surface, it is correct to prevent the adhesive solution from getting on it in principle. After installing each tile in the bathroom, you need to check its position relative to those already glued using a level. If there are differences in depth in the corners, the position of the tiles is adjusted using a rubber hammer.
How to lay tiles on drywall
Is it possible and how to lay tiles on drywall? A common question that can be heard from home craftsmen.
In order to lay high-quality tiles, a flat surface is necessary. Using drywall you can get a perfectly flat surface. Today, gypsum plasterboard is used to level walls, and partitions are created from plasterboard.
You can cover plasterboard walls with tiles. If drywall was used in the bathroom, then it is better to use a moisture-resistant version of plasterboard. It is also recommended to cover the walls under tiles with two layers of plasterboard.
Installing tiles on drywall is no different from tiling a regular wall. It is also necessary to perform priming.
Corner technology
Internal corners are formed at the joints of the walls. It is necessary to try to lay out the trim as accurately as possible. Many novice craftsmen leave gaps of 1-2 cm in the hope of sealing them later with tiled grout. This is not true, because first of all, it violates the aesthetics, and secondly, the grout is not intended for such tasks, and after a short period of time it will weather and begin to deteriorate.
External corners, as a rule, are formed to hide the installation of niches and projections for communications. You can form a corner joint with uncut, factory edges of the tiles, making an undercut near the wall. The easiest way is to lay it “overlapping” on the corner, leaving a gap of 3-4 mm between the tiles for grouting. The verticality of the corner is checked after laying 1-2 rows using a plumb line.
When forming an end-to-end corner, after drying, you can glue a special rubber corner. It will hide possible defects in the joint and make the protruding corner itself softer, which will subsequently protect the owners from possible household injuries.
Corners can be sealed with a corner
Accompanying work
In most cases, using a level is sufficient to control the horizontalness of the rows. But if you wish, before starting work on the next row of tiles, you can install the thread along the beacons at a distance of 2-3 cm from the wall, using a water level. After completing 2-3 rows, the thread is rearranged. This procedure will be simplified by a laser axle builder on a tripod; if you have the opportunity to borrow or rent such a device for the duration of the work, then it is better not to neglect it. The ideal option is to use a special elevation tripod, which allows, using a screw mechanism, to accurately set the height of the horizontal line projected onto the tile. If you have a laser builder, it is much easier to control the formation of vertical rows when laying end-to-end. But under normal conditions, the technology allows the use of a simple plumb line.
You can apply markings to the wall in advance
When cutting tiles with a glass cutter, the process is reminiscent of working with glass. On the front side of the tile, you need to make a cut under the ruler, and then simply break the finished product. A machine-mounted tile cutter greatly simplifies this process - perpendicular or 45° cutting is performed in two movements. Some collections of ceramic tiles have a relief surface and complex ornamental curves, and without special tools it is almost impossible to correctly cut such tiles for installation. You can use a grinder to trim tiles yourself, but this is a rather noisy and dusty process.
A cut is made on the tile with a tile cutter, then it breaks easily
Choosing ceramic tiles for walls
Some important points when choosing ceramic tiles:
- You should immediately decide on the dimensions when choosing tiles. For independent work and without special skills, there is no need to purchase large-sized material. Moreover, tiles with parameters greater than 300 mm will not look very good in small rooms. It is better for a novice master to stop at sizes no more than 250 * 250 mm (250 * 300 mm). This tile is much easier to work with.
- When laying tiles on the outer parts of the building, you should choose material only for external work. The tile must have a “snowflake” indicator, this indicates the frost resistance of the material.
When laying tiles in rooms with high humidity, you should purchase material with a water absorption of no more than 3%.
- It is mandatory to purchase tiles from one batch. The main criterion is the coincidence of the article and tone on the packaging (the numbers must match), since even the same article cannot guarantee a match of tones if the material was produced on different shifts. When laying such samples, the appearance of the room can significantly deteriorate.
- Attention must also be paid to the type of product. It is advisable to purchase quality tiles. It will be easier to install and will look good. Samples of the 3rd grade can be used when finishing rooms that are less visited.
- You should immediately check the tiles at the market, as damage may occur during transportation and loading and unloading.
- Before work, even 1st grade tiles must be sorted additionally. Its best examples should be set aside for installation on areas of the wall that are more visible to the eye, and slightly oversized elements should be used on secondary sections of the wall.
Grouting joints
To give aesthetic and sanitary properties to the bathroom, when finishing, you need a special mixture - grout for joints or jointing. It is necessary to select a color composition that is in maximum harmony with the color of the tile. Before grouting, it is best to go through the seams with a vacuum cleaner and remove all possible dirt from the surface of the tile.
If you decide to use a silicone or epoxy compound, the front enamel along the edges of the seams must be taped with masking tape.
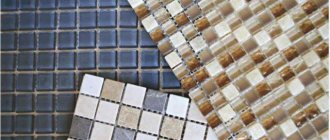
It should be noted that the technology for laying small mosaic tiles with your own hands requires the use of an epoxy fugue to further strengthen the surface.
You can learn how to grout the joints in detail by studying our instructions, but here we will describe briefly. The grout is diluted with water according to the instructions and stirred until the desired consistency is obtained. It is best to apply the fugu with a special rubber spatula. After filling the joint with the mixture, several passes are made with a spatula along the joint groove, which should deepen it and create a smooth, aesthetically completed surface. After the grout has completely dried, it is necessary to remove all auxiliary products and wash the tiled surface in the bathroom.