- home
- Useful articles
- How and with what to fill dowel holes
»
»
Almost all advice for renovating an apartment/house boils down to the fact that first of all you need to eliminate the cracks, holes and openings left after removing the dowels. There are always a lot of the latter within the walls. If they are small in size, then during the repair it is quite simple to close the hole from the dowel by covering it with wallpaper. You just need to remember these places so you don’t drill there later.
If the holes have a diameter of 1 cm or more, you will have to worry about how to seal the hole from the dowel. Experts advise eliminating all such damage, since they can then increase in size and cause additional cracks and other troubles.
How to repair a hole in a wall caused by a dowel
The first thing the new owner of the living space has to do in terms of repairs is to remove the old decorative and finishing wall coverings. After this procedure is completed, an unsightly sight will be revealed to the eye - numerous holes in the wall left from the previous owners.
Concrete walls are stronger than brickwork or wooden partitions, but in order to hang a picture, shelf or mount a TV, you need holes made by drilling with a hammer drill or simply a hole in the wall. The arrangement of furniture and household items is individual for each person and, as a result, each resident decides that the existing mounting points are not enough and another hole in the wall is needed. So, as a result of drilling and for natural reasons, holes of various diameters and depths are formed, requiring an individual answer to the question: “How to repair holes in a concrete wall yourself?”
How to seal small holes?
In order to seal holes from drilling, you need to remove the dowels, for this you need:
- screw in the self-tapping screw 10-15 mm so that it is fixed, but does not spread the dowel;
- Grab the head of the fastener with pliers, swing the plastic or wooden chop from side to side, and pull it out of the wall.
In order to seal the holes after removing the dowels, you need to perform the following algorithm:
1. Use a vacuum cleaner to remove concrete debris in the form of dust and crumbs.
2. Moisten the internal cavity generously with water using a brush, foam swab or spray.
3. Cover the hole in the wall with a spatula, for which putty or repair mixture can be used.
4. The putty is carried out sequentially in several layers with intermediate surface treatment with sandpaper to obtain a flat plane without a depression.
5. If a repair mixture is used to repair defects, the surface must be covered with a layer of putty to level it.
Using the above method, you can fix with your own hands any hole in the wall of small diameter (up to 50 mm) and the same depth, formed during drilling. If the depth of the hole in a concrete wall exceeds 50 mm, it must first be sealed with polyurethane foam, after which the technology described above is applied.
Wide range of polyurethane foam options
Polyurethane foam can be used to repair a hole in a wall of any diameter and depth, and the following instructions must be followed:
1. Before sealing a hole in concrete, you need to remove concrete debris (dust, crumbs) from the inner surface using a vacuum cleaner or brush.
2. The thickness of the polyurethane foam layer should not exceed half the depth of the cavity being repaired; it will swell when it dries.
3. It is recommended to fill the hole by sequentially applying filler in the direction from bottom to top.
4. After swelling and drying, excess polyurethane foam is removed with a knife, making a slight indentation from the edges to the center.
5. In order for the wall to acquire an even plane, it is necessary to cover it with a repair mortar, on top of which putty is applied.
6. After the finishing layer has dried, you need to remove any unevenness with sandpaper.
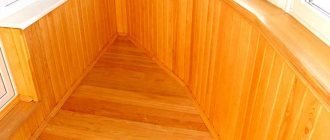
Holes in the wall on the balcony can be sealed using frost-resistant foam, and an external supporting surface must be provided, because trimming the outside of the balcony after the filler has dried will be problematic.
To maintain the thermal contour of a balcony with a large cross-section of the hole, you must:
- prepare a piece of foam plastic with a thickness less than the thickness of the wall, 5-10 mm;
- adjust the transverse size of the insert, which should be slightly smaller than the hole in the wall (the gap on the side is about 10 mm);
- insert polystyrene foam, filling the main space, and foam the gaps.
In order for the wall to have a smooth surface, you should cover the foam insert, for which:
- secure an alkali-resistant polymer mesh with a cell size of 10-15 mm on the plane of the foam plastic using metallized tape;
- cover up the difference in height by successively applying a layer of a mixture of cement and sand, and then putty;
- After drying, sand the surface with sandpaper.
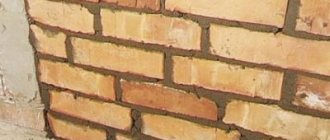
Recommendations for eliminating defects on a brick wall
In order to repair a crack in the wall of a brick house, you should follow simple instructions:
- carefully inspect the entire building, identify and eliminate sources of cracks;
- periodically check the condition of wall surfaces;
- if the slightest cracks are detected, you must immediately do everything possible to prevent the spread of defects;
- when cracks form, it is necessary to clear the necessary internal area of the cracks, as well as to maximize interaction with finishing agents;
- After checking the walls and treating the cracks, you should cover up the discovered cavities and apply external insulation (or finishing).
In addition, it is necessary to constantly check for the rate at which cracks are growing. To do this, the gap must be marked with markings made of putty or concrete mortar. The desired strip sizes are 100x40mm with a layer thickness of less than ten millimeters. There is also a simpler method using paper. Checking for tears should be done every day for five weeks. If problems arise, a major overhaul of the foundation of the structure and the help of a professional is necessary.
It is worth remembering that a crack width greater than twenty millimeters is critical. In such a situation, auxiliary reinforcement of crack edges and strengthening of brick structures is necessary. Areas susceptible to destruction need to be dismantled.
Through holes
Holes in the wall after replacing pipes can be removed with your own hands in the following ways:
1. Scheme with polyurethane foam: fill the cavity, after drying, trim, cover the difference in height by mixing cement and sand, plaster the surface, and after drying, eliminate unevenness.
2. Scheme filled with concrete:
- to fill a hole in the wall, you should select a cotton rag, which, when crumpled, almost completely fills the section;
- prepare concrete solution;
- thoroughly moisten a rag in the mixture, push it into the void, compacting it so that there are no protruding parts;
- After drying, the hole will be almost completely filled, all that remains is to cover the difference in height with liquid concrete and carry out the final finishing.
The latter scheme allows you to seal a through hole not only in a horizontal wall, but also in an interfloor slab, as well as a hole in the bathroom, using, if necessary, a waterproofing mixture to soak a rag.
By replacing the concrete solution with liquid glass, which should be used for impregnation, you can eliminate mice holes in a similar way.
In order to remove holes from rats, which have sharper teeth and stronger stomachs, as a filler, along with a rag soaked in liquid glass, you need to use crushed glass, on top of which the external finishing is done.
Expert advice
Restoration of any defect in the wall does not require special knowledge and skills in the field of construction. But, before starting repair work, it is important to prepare the necessary materials and study the process of eliminating various holes. This will prevent you from making serious mistakes later, which means getting a high-quality result. In addition, it is worth considering the following rules for repairing all kinds of damage on the surface of the walls:
If the renovated area is not subjected to excessive loads and the room is used correctly, then you don’t have to worry about repeated destruction of the foundation.
Through holes
Holes in the wall after replacing pipes can be removed with your own hands in the following ways:
1. Scheme with polyurethane foam: fill the cavity, after drying, trim, cover the difference in height by mixing cement and sand, plaster the surface, and after drying, eliminate unevenness.
2. Scheme filled with concrete:
- to fill a hole in the wall, you should select a cotton rag, which, when crumpled, almost completely fills the section;
- prepare concrete solution;
- thoroughly moisten a rag in the mixture, push it into the void, compacting it so that there are no protruding parts;
- After drying, the hole will be almost completely filled, all that remains is to cover the difference in height with liquid concrete and carry out the final finishing.
The latter scheme allows you to seal a through hole not only in a horizontal wall, but also in an interfloor slab, as well as a hole in the bathroom, using, if necessary, a waterproofing mixture to soak a rag.
By replacing the concrete solution with liquid glass, which should be used for impregnation, you can eliminate mice holes in a similar way.
In order to remove holes from rats, which have sharper teeth and stronger stomachs, as a filler, along with a rag soaked in liquid glass, you need to use crushed glass, on top of which the external finishing is done.
How to seal large cavities?
If the cross-section is large, you can fill the resulting hole with small pieces of concrete or brick and sand-cement mortar; for this you need:
- Remove concrete debris in the form of dust and small stones from the cavity.
- Wet the surface generously with a brush, foam rubber or spray.
- Lubricate pieces of concrete or brick with mortar and place them in the cavity so that there are no protruding parts.
- After drying, fill the holes with cement and wait until dry.
- Putty the cement patch.
- After drying, remove roughness using sandpaper.
The considered method allows not only to seal a hole in concrete formed after drilling and chipping of concrete, but also to repair holes after foam if such filling did not justify itself.
Initially, you need to cut the crack using a spatula or chisel, after which, depending on the width and depth, it is recommended to use:
- if the depth and width are large, it is necessary to foam the section, followed by finishing with repair mortar and putty;
- For a narrow crack, it is permissible to use several layers of putty to smooth out the unevenness.
Often during repairs it turns out that a hole has formed in the wall. In order for the finish to look beautiful, the damage must be repaired. The technology of restoration work differs depending on the size of the damage and the material from which the wall is built. Even a person without experience in construction work can properly repair a hole.
Sealing options
Brick walls can be sealed in different ways, which have more advantages than disadvantages. The choice of option depends on the type of crack, area of distribution and its depth. In some cases, a combined sealing option is used (2-3 options simultaneously, applied to the surface one by one).
Injection
This method consists of eliminating the seal by sealing existing leaks and restoring the load-bearing capacity of the brick. This method is especially recommended after eliminating accidents associated with leaks (pipe burst, precipitation) that caused the crack to appear.
The advantage of this method is the ability to quickly restore a brick wall, without the need for dismantling and re-laying. But injection must be carried out by qualified workers using special equipment. They also select the necessary material.
For the chosen method, different materials are used:
- microcements;
- polyurethane, one-component, silicate compounds;
- epoxy resins;
- methyl acrylate gels.
The injection method resembles drilling, and large cracks must be opened. For drilling, points (holes) are marked, which are placed in a checkerboard pattern, after blowing them with compressed air. The repair composition is pumped with a construction tool (pump, gravity), which is filled into the existing pores through a special hose.
The only downside of this method is that you cannot do it yourself without special qualifications and equipment, and hiring a specialist will require additional financial costs.
Injection allows you to penetrate deeply into the damaged area and completely fill the crack and damaged parts of the wall with a repair compound.
Concrete mortar
Cement mortar with the addition of fine crushed stone is suitable for sealing the surface of a brick wall. This is a popular and quick type of repair, and you can do it yourself.
Polymers or milk of lime are added to the finished repair mortar to increase strength. Cement, sand, water (cement composition) are construction classics. If you add crushed stone to it, you get a concrete solution.
The proportion of the concrete composition for repair is 1 (cement): 3 (river sand): 5 (crushed stone up to 15 mm). Water is added to the finished mixture gradually, the composition is mixed until creamy and applied to the wall using a trowel and spatula.
For repair work, you need to use a small amount of the composition, so it needs to be done in small quantities, as it hardens quickly (in 1-1.5 hours).
Sealant
This material penetrates deeply into the pores, performs a protective function and does not change the appearance of the wall.
There are different types of sealants. There are single-component and multi-component materials that are characterized by varying degrees of hardening and elasticity. Also, sealants are silicone, acrylic, mixed, bitumen, polyurethane. An example of a polyurethane sealant is foam concrete (spray foam).
When choosing a sealant for repairing brickwork, you need to pay attention to the fact that the packaging indicates that the material must be moisture resistant, withstand temperature changes and exposure to sunlight. This material is considered fast and effective, and this is its main advantage.
The only downside is its cost.
Experts recommend choosing a breathable sealant for brick walls that will resist peeling.
Why do holes form in walls?
When old wallpaper or other decorative covering is removed during renovation, they discover that holes have formed on the walls. Before answering the question: how to repair a hole in a wall, you need to understand what kind of holes there are and why they arise.
Small holes on the wall arise from dowels, nails, screws driven into them, or as a result of mechanical damage.
Holes from relocating sockets can detract from the appearance of the finish. How to repair a hole in a brick wall or on a concrete surface will be described below.
Through holes occur in places where communications pass through mechanical stress, when deep cracks are not repaired for a long time.
Cracks form when the house shrinks and when the building is exposed to vibration loads.
Timely repairs extend the life of the building and ensure a beautiful appearance of the decorative finish.
Selection of materials
To fill a hole, it is important to prepare a high-quality construction mixture. It should be as close as possible to the existing type of defect. Before purchasing any composition, you need to familiarize yourself with its characteristics, main pros and cons. Today you can see several varieties of such products on sale.
putty
A paste-like mixture that is used to level the surface and eliminate minor defects. It comes in several types, so it is important to understand their compositions and basic properties.
Cement
Great for sealing holes inside and outside the home. Among the advantages of this composition, it is important to note that its use results in a highly durable and waterproof base. However, cement-based putty has a number of significant disadvantages: prolonged drying, complete lack of plasticity. Because of the latter, the surface becomes covered with multiple cracks over time, and therefore requires the application of an additional finishing layer.
Plaster
Most often used for interior decoration in rooms with low humidity levels. The main advantage of this composition is that after its application, small cracks do not form on the surface, so laying only one layer is always sufficient. Disadvantages of gypsum putty: intolerance to extreme temperatures, low resistance to moisture.
Acrylic
It belongs to the group of finishing compounds and has the following advantages: it perfectly levels the surface and can be used in conditions of high humidity. Such material cannot be used when filling large holes, since according to the instructions, it is applied in a thin layer. An important disadvantage of products made on the basis of acrylic is its high price.
Attention! Construction mixtures, regardless of composition, cannot be used to seal through holes. Otherwise, the created base will not be completely sealed.
Polyurethane foam
The product is considered universal: it is used when installing windows and doors, sealing recesses, and other defects. Coming out of the can, the substance increases significantly in volume and eliminates holes of any size. As a rule, after final hardening the material is characterized by high tightness and does not allow moisture penetration.
Sanfor floor cleaner
Today, two main types of construction foam are produced:
Before you start sealing cracks in the wall, it is important to study the instructions for using the purchased product.
The main advantages of polyurethane foam include intensive hardening and strong adhesion to concrete bases. Since such material is supplied from the cylinder in a thin stream, it is extremely convenient for them to remove deep holes of small diameter. The main disadvantage is the possible shrinkage of the frozen substance over time.
Repair mixture
It is considered an excellent tool for getting rid of unnecessary recesses in the walls (internal, external) of buildings. Advantages of this composition:
Modern repair mixtures are produced in two types: for finishing vertical and horizontal bases. You should pay attention to this when purchasing material in order to subsequently successfully repair the damaged wall.
Restoring surfaces with small holes
If there is a dowel left in the wall, you must first pull it out. To do this, screw a screw into the dowel, grab it with pliers and pull it out of the wall with loosening movements.
After this, the hole is cleared of dust, which will be an obstacle to the surface from adhering to the solution. Wet the hole with water. The following can be used as a mixture for sealing holes in walls:
- cement-sand mortar mixed in a ratio of 1:3;
- building gypsum;
- Ceresit tile adhesive.
The prepared solution should have a creamy consistency. If the hole is large, add small pebbles to the mixture.
Push the solution to the very base, compact it well with a thin stick or other object. After the surface has dried, it must be plastered, filling the remaining voids and cracks formed during drying.
When the surface is completely dry, grout with sandpaper.
What can be done with the “unnecessary” second window in the corner room
If a window is in the way, then the first thing that comes to mind is to block it with bricks and plaster the masonry. It would seem that the problem is solved, now there is a solid wall in the room. What about the heating battery? What, cut it off? But this is not a solution. Firstly, such operations require special permission, and in most cases it is unlikely to be given. Removing the battery is easier, although permission is also required. But you are unlikely to do this yourself - the apartment is a corner one. I offer several options for decorating an unnecessary second window.
Option 1. Arched niche with shelves
In order to make such a niche, we proceed as follows. According to the size of the window opening, we cut out an insert from a sheet of moisture-resistant plasterboard and fasten it around the perimeter with liquid nails to the frame. First, the back side of the sheet should be primed and covered with light paint. If you have the appropriate abilities, you can even draw something on it - the drawing will look good from the street.
After installing the plasterboard insert into the opening, we begin to make an arch in the resulting niche. To do this, we cut out a strip of drywall with a width equal to the depth of the window opening and a length depending on the desired shape of the arch. For the side walls of the niche, we cut out two strips of drywall of the same width as to form the arch. We attach these strips with liquid nails to the slopes of the window opening and install the prepared upper lintel on them, forming an arch. To bend a plasterboard strip, you need to make transverse cuts on the outside of the workpiece and lightly moisten it with water. The distance between the cuts is approximately 2-3 cm. However, before installing the arched lintel, you need to install the electrical wiring for the built-in lighting.
Having installed the arched lintel, we close the upper corners of the opening above the arch with plasterboard overlays cut to the shape of the arch. To fasten them, we used available materials: aluminum corner profiles, wooden blocks, foam plastic and, of course, self-tapping screws and dowels. We carefully putty all the seams and after that we paint the walls and surfaces of the arched niche. We mount shelf holders on the side walls. In our case, two dark glass shelves were installed.
The battery under the niche clearly spoiled the overall appearance. That's why they decided to hide it. First, we covered the battery with a sheet of chipboard, naturally making slits at the bottom and top for air circulation. And the pipes leading to the battery were decorated with artificial greenery. Ultimately, the composition turned out to be very original.
Option 2. Adding a fireplace to the arched niche
The previous version of the window design, although it turned out quite well overall, did not have any “zest” in it. And then, instead of traditionally decorating the heating radiator with a protective screen, they decided to make an imitation of a fireplace portal, inside which this radiator would be located, covered with a grille. We decided - we did it. What happened is up to you to judge.
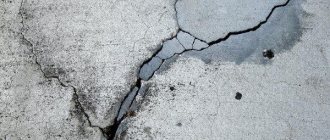
The interpanel seams have come apart
This section provides information on how to repair a hole in a concrete wall if the seams have come apart.
If cracks have formed in the interpanel seams, they need to be repaired urgently. To close deep holes in the wall, use foam. It is sold in two types: professional for a construction gun and non-professional with a straw. If the house has a device for a foam bottle, it is better to purchase a professional type, since it has lower consumption and higher quality.
Step-by-step instructions on how to repair a hole in a concrete wall:
- Clean the surface from dust and debris. Cleaned from remnants of building materials.
- Polyurethane foam adheres better to a damp surface, so before applying it, the gap is generously moistened with a spray bottle.
- Shake the container well and fill the hole with foam. If the hole is very deep, the foam is applied in layers. Each subsequent one is applied after the previous one has dried.
- Within 1-2 days, the foam expands, filling the smallest microcracks on the wall. Until it dries completely, its integrity must not be disturbed.
- When the foam hardens, cut off its protruding parts with a knife.
- Level the surface with plaster or putty, then sand it with sandpaper.
When working with polyurethane foam, you need to be careful. The material adheres firmly to skin and clothing. Can be washed off the body with a solvent. If it gets on clothing, it will be damaged.
Sealing and treatment of cracks in foam concrete
We knock down the plaster. The depth of the filling must be equal to the thickness of the metal.
- Select the type of fastener. These can be anchor bolts, dowels or long bolts with nuts.
- We clean the cracks and grooves and fill them with polyurethane foam. We insert the channel into the opening and fasten it. We install a reinforcing mesh on top and plaster the emergency zone.
- We smooth, reinforce, putty.
Additionally, you can use staples. To prepare them, you will need reinforcement, which is shaped into a bracket by bending. To install it on the walls, you need to make grooves of the required size for a normal fit and holes of the required diameter.
To determine the progression of cracks, it is enough to cut paper strips and stick them on the crack in different places. Paper tearing is a sign of increasing splitting.
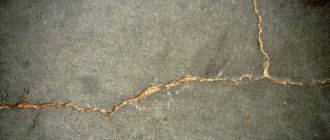
Let's look at how you can repair cracks in a concrete wall:
- We widen the gap in the plaster onto the concrete using a spatula, cutting it no more than 5 mm, and remove the old edge. If this cannot be done with a spatula, you can use a hammer and chisel.
- Carefully lubricate the crack with water.
- Using the DSP, carefully cover it, pressing the solution firmly (the solution used should be of medium thickness).
- Using a damp sponge, smooth the surface.
To increase reliability, you can use serpyanka (reinforcement). It must be laid over the entire surface of the crack. First, the gap is puttied with a layer of up to 2 mm, after which reinforced tape is placed in it, which is carefully puttied.
Let's look at how to repair small cracks in a concrete wall:
- We make gypsum dough with the addition of chalk.
- We fill the cracks with gypsum dough.
- Carefully prime the surface in two layers.
- We smooth the surface, rubbing against the old plaster.
Quite often, gypsum is used instead of plaster. You need to know an important point - unlike ordinary plaster, gypsum can easily fall off in the presence of vibration, because has the property of only a mechanical connection. Therefore, we recommend not using plaster mass near the doors, because due to constant slamming, it will simply fall off. Gypsum dough is best used on plasterboard partitions. We also recommend making notches on smooth concrete slabs before applying plaster using a chisel.
Let's look at how cracks in foam block walls are repaired:
- Open the cracks with a spatula or knife.
- Apply one layer of putty to the wall.
- Using special glue, glue the fiberglass to the surface.
- >We putty the fiberglass with finishing putty.
- We carefully grout the finishing putty.
Restoring the integrity of the wall after moving sockets
When moving sockets, excess holes must be sealed with cement or gypsum mortar. When the hole is large, the question arises of how to seal the holes in the concrete walls so that the material does not crack.
The technology of restoration work depends on the depth of the hole. If it is more than 5 cm, you will need a stone or piece of foam of the appropriate size.
Step-by-step instructions on how to repair holes in a concrete wall:
- The cavity is cleaned of dust and debris. Moisten with water.
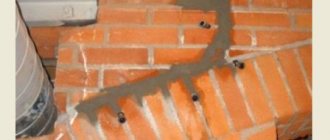
- Drive several self-tapping screws along the edges; they will hold the solution and filler.
- Fill the bottom of the hole with solution.
- Cover the inside with stone or foam.
- Fill the hole with cement or gypsum mortar. If cracks form after it dries, seal them again.
- Apply a thin layer of finishing putty to a dry surface.
- The putty hole is cleaned with fine-grained sandpaper.
Holes left after moving sockets.
Compliance with the work technology helps to obtain a flat surface. It is not recommended to blow out dust; it may get into your eyes; it is better to use a vacuum cleaner.
What difficulties may arise?
During the process of repairing concrete walls, errors may occur. These include the following factors:
- Refusal to eliminate the main reason that led to the formation of the defect. If in this case, the cause is problems with soil heaving, an unstable foundation, incorrectly calculated loads, then it will be necessary to strengthen the foundation in accordance with technological rules, otherwise current repairs on the surface will have a short-term effect, and the destruction of the wall will continue.
- Failure to comply with the level of the intended markings when pouring the monolith. Deviation in vertical or horizontal levels, ignoring the marking line along the cord can create bulges and divergence in corners, which is especially unacceptable at wall joints. Such defects cannot be eliminated with plaster, since the main rule of wall construction is that the seams of one surface must coincide with the seams of the adjacent one.
- Refusal to remove corroded reinforcement. If the rods or mesh are not removed, and they already show all signs of destruction, then the strength of the monolith will be in question. In order for the mortar to be poured into the formwork to be strong and durable, it is imperative to replace the damaged areas of the reinforcement with new steel.
- Carrying out work on dirty surfaces. If you do not remove debris with a brush and rags, and do not wash the surface before restoration work, then the new composition, even if it is the same in composition as the previous (old) one, may poorly adhere to the repair site. This applies to both concrete mix and sealants. Efficiency of repair is the main rule when restoring a monolith.
- Inaccurate sealing with repair compound and the use of poor formwork.
The finished solution must completely fill the space of the crack or hole, otherwise, under the influence of atmospheric influences, it will begin to diverge again. Formwork that has become unusable (old rotten boards) will serve as a poor-quality fill when restoring the desired section of the wall.
In some cases, especially on load-bearing walls, attention is paid to the depth of damage. If necessary, you can also use a screed, especially in old houses
Fresh cement mortar must be prepared from proven quality materials.
Through Hole Repair
Holes drilled through for installation of communications in a brick wall or panel are sealed using silicone sealant, polyurethane foam or cement-sand mortar.
How to fill a through hole with cement mortar:
- Clean off dust and wet the surface.
- Prepare cement mortar. Add small stones to it. If there are none, take a rag and dip it in the solution so that it is well soaked. Stuff the fabric into the hole. It is compacted well. It may take several cuts to fill the entire space. The fabric should not protrude outward.
- Cover the remaining space with concrete.
- After drying, complete leveling is performed with finishing putty.
Technology when using polyurethane foam:
- Remove dust using a vacuum cleaner. Spray the cavity with a spray bottle.
- Blow out the space with foam.
- After drying, cut off the protruding material with a knife.
- Perform final leveling using putty.
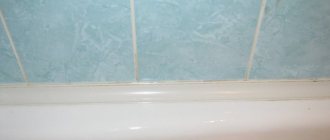
Fixing a through hole in the wall.
This method of restoring through holes is suitable for both dry and wet areas. Cement mortar can be used in the bathroom and kitchen; it is not afraid of exposure to high humidity.
Injection
It is carried out during the restoration of seams in brickwork.
Injection is performed with mineral, epoxy or polyurethane compounds that do not allow moisture to pass through. The choice of a specific composition is influenced by the condition of the masonry, load and humidity. Organosilicon mixtures are considered the most suitable for restoration. Kerosene or white spirit is used as a solvent.
The crack is plugged and the composition is injected under pressure. The solutions are viscous and penetrate into small crevices.
To prevent delamination of the composition, fine sand is added to it. Otherwise, only the liquid component will penetrate into the depth of the crack, and the base will remain at the top.