Before laying fiberboard floors, you need to prepare them. This stage includes several steps:
- Eliminate unevenness in the form of knots, layers of old paint, etc.
- Recess protruding fasteners (nail heads, etc.).
- Get rid of sagging in the flooring, creaking, and secure loose floor elements.
- Remove sag between boards (significant differences in height).
Sometimes it is necessary to carry out antiseptic treatment measures.
How to make chipboard floors using joists with your own hands
This simple solution will avoid squeaking.
The slabs can be fastened with ordinary self-tapping screws. In this case, it is advisable to recess the heads of the screws into the slab. Laying chipboard on a screed or concrete floor is slightly different from laying on a wooden floor. The difference is that to attach to concrete, you need to pre-drill holes both in the slab and in the floor surface and install dowels.
In case of strong differences in the surface, chipboard can also be laid on logs, but the thickness of the slab in this case should be at least 16 mm and preferably 18 or even 22 mm. In this case, both the step between the logs and the distance between the sheathing bars should be no more than 60 cm (ideally even 40 cm).
Leveling floors using logs and chipboard has a right to exist, but the use of plywood or OSB instead of chipboard provides greater rigidity and strength of the floor structure, and therefore a possible resource. You can read how to level a floor using plywood in this article.
Advantages of the method Several installation methods Preparatory work Features and nuances of installation Docking of units
In order not to regret later about wasted time and money, during repairs you should try to do everything as efficiently as possible, and the closest attention should be paid to the walls and ceiling
It is very important that they are perfectly level, but the floor also plays an important role here. Its repair is no less important, since high-quality work will significantly increase its service life.
One of the most common options today is chipboard floors with joists.
Its repair is no less important, since high-quality work will significantly increase its service life. One of the most common options today is chipboard floors with joists.
It is very important that they are perfectly level, but the floor also plays an important role here. Its repair is no less important, since high-quality work will significantly increase its service life.
One of the most common options today is chipboard floors with joists.
Pros of choice
Fiberboard is made by hot pressing waste from wood processing (sawmilling), to which synthetic resins and antiseptics and other stabilizing agents are added. Thanks to this, such flooring has differences that make it more profitable than natural wood flooring. Moreover, if you correctly paint the fiberboard and open it with a special varnish. After these procedures, it acquires a dense structure that holds self-tapping screws, nails, and screws well, and resists mechanical damage. Laying fiberboard is also beneficial because it is not expensive. It is absolutely not a pity to actively exploit it. This, in fact, is typical for any floor, especially in residential and other regularly visited premises.
It is worth noting that many experts recommend painting the floor of this material with waterproof paint or using water-repellent varnishes. This is necessary because the material contains water repellents, which can become deformed from excess moisture.
In addition, such flooring without proper protective coating can wear out quite quickly. And lastly, it’s worth painting it, if only because the visual appeal of fiberboard is not particularly high. Here the wooden floor, with all its shortcomings, is definitely superior.
Wood floor leveling technology
How to properly lay laminate flooring with your own hands
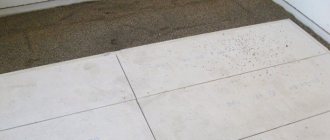
You can restore the geometry of the floor covering in several ways - putty with a mixture of sawdust and PVA glue, scraping or sanding, re-placing the tongue and groove, leveling with plywood.
Why does a floorboard hump occur?
However, laying chipboard on a wooden floor with leveling pads has minimal labor costs and repair budget.
The main nuances of the technique are:
- leveling is a cosmetic repair, so no changes are made to the design of the floor/floor pie;
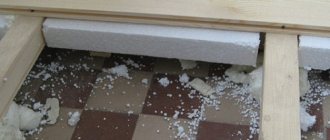
- layers of insulating materials (insulation, vapor and waterproofing membranes) must be laid under the boardwalk during its installation;
- floors are partially opened if necessary, but only to eliminate squeaks or replace defective areas;
- in the absence of a horizontal plane of the existing floor covering, only plywood pads are used, but not logs;
- The developer decided to leave veneered or edged boards to reduce the labor intensity of repairs.
Advice! Before starting work, you should dismantle the floor plinth and make sure that the boardwalk has a gap around the perimeter of 5 - 10 mm from the wall cladding.
Area of use
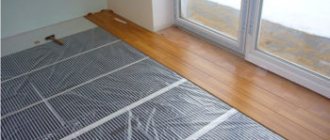
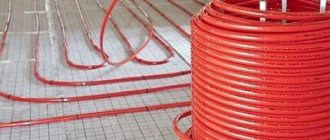
How to make heated floors correctly, system selection and installation
The advantages of this material allow it to be used for various designs. For example:
- Floor installation. Moreover, this material is suitable for both conventional subfloors and floating ones.
- Leveling and insulating walls, erecting partitions. With the help of such slabs it is very easy to build partitions and sheathe walls. After which you can use almost any material for finishing the slabs - wallpaper, plaster, plastic panels, etc.
- Roof construction. A tongue-and-groove moisture-resistant board can be used as an insulation layer in roofing work.
- Ceiling lining. This material is great for leveling the ceiling, after which you can use the finishing touch.
- Foundation work. Can be used at the initial stage of construction in the form of removable formwork.
This material is also well suited for constructing objects with additional load, for example, sports fields, etc. It can be used for warehouse-type buildings.
Where is it used?
Finishing specialists recommend installing tongue-and-groove chipboard for rough leveling of walls. A decorative coating is already applied to this base: lining, board, laminate, and so on. Also well suited for interior partitions.
The slabs perform quite well as a suspended ceiling. Unlike drywall, they do not sag, are easy to install and weigh noticeably less. Regarding floor leveling, chipboard has a special role here. Pre-leveling promotes insulation from moisture and noise, which will reassure the neighbors below. Linoleum or parquet is already applied to the surface of the sheets.
Joists and fasteners
Detailed instructions on how to properly lay laminate flooring on the floor in an apartment. Is it possible to lay laminate on penoplex?
According to SNiP 3.04.01–87 (SP 71.13330.2017) “Insulating and finishing coatings”, chamber-dried wooden beams with a humidity of 12–18%, without cracks, bark and traces of rot, are used to form the floor along the joists. In this case, the length of the jointed supports must be at least 2 m, thickness - from 40 mm, and width - 80–100 mm.
Although many experts recommend purchasing slats with an aspect ratio of 1:1.5 and 1:2, in practice, logs of 50x40, 50x50, 50x70 and more are most often used. Moreover, the height of the supporting elements depends on various parameters: the load level, the cross-section of the insulation used, the maximum floor height and even the personal preferences of the customer. There are no universal recommendations; components are selected in each case separately.
To equip a load-bearing frame in apartments and private houses, you need the most even, durable timber made from inexpensive species: pine, spruce. If finances allow, you can purchase products made from larch, aspen, and alder that are resistant to changes in humidity.
It would be useful to mention the support elements for the logs. Building codes do not recommend the use of wooden wedges and bosses due to the fact that the material easily changes shape with changes in humidity. When installing on a concrete or plank floor, mineral screed or point supports under the timber, it is better to lay strips of hardboard.
In practice, many craftsmen prefer to lay pieces of OSB, chipboard, MDF or moisture-resistant plywood on the floor. The minimum size of the lining should be 10x10 cm or 10x15 cm, the interval between them should be at least 30 cm.
Laying joists on glued plywood pads.
As an alternative, which is insensitive to moisture, you can use special support and fastening elements with an anti-corrosion coating, designed for the installation of adjustable floors.
Let's consider another important component of the floor structure - hardware. In addition to the joists, you will need fasteners to secure them to the base, as well as to attach sheets of plywood to the frame. These can be anchors, nails, universal or self-tapping screws, metal corners, etc.
The range of fasteners is huge. To fix the pads or the joists directly to the concrete base, dowels are most often used - threaded nails with a diameter of at least 6 mm or mechanical-type metal anchors. The former are cheaper, but the latter provide more reliable and durable fixation of the slats to the base.
An example of fixing joists to the floor with corners.
Anchor fasteners for concrete and brick are made of high-quality alloys - brass, stainless steel. It consists of a spacer or working sleeve (changes dimensions when forming a connection) and a non-spacer part - a rod. To mount the frame to the base, a hole is drilled in concrete with a diameter equal to the cross-section of the sleeve or 0.5 mm less than it. When hammered or screwed in, the mounting post pushes the sleeve inserted into the channel. And due to this, it is firmly fixed in concrete.
The dimensions of the hardware product depend on the dimensions of the supports. For the installation of underlay elements made of chipboard, plywood, OSB, as well as wooden logs, products of the M6–M12 category are most often used, that is, with a rod or wedge diameter of 6 to 12 mm. The length is selected based on the thickness of the joists and/or support supports, taking into account the depth of insertion into the concrete of 5 cm or more. The approximate interval between fasteners is 30–60 cm.
To rigidly attach pads or joists to a wooden subfloor, you can use wood screws with rare threads or universal galvanized ones with a diameter of 4 mm or more. The distance between hardware is at least 30 cm, screwing depth is from 30 mm. To attach plywood to joists, it is most convenient to use special self-tapping screws for gypsum fiber boards and chipboards or universal galvanized ones. The first ones differ from the standard ones by mixed screw threads and notches on the cone-shaped head, which provide countersinking. The length of the hardware should be 2–2.5 times the thickness of the coating, the diameter should be 3.5 mm or more.
You can also use regular nails with a cylindrical shaft and a sharp end. The efficiency and speed of work will increase several times if you use fasteners not in bulk, but in a cassette designed for nailing. The product is often aimed at the base or supporting frame at a distance of 15–25 cm.
Installation of logs, features and installation nuances
Parquet laying diagram.
Laying chipboard can begin after all finishing work in the room has been completed. To work with wooden materials, the room must have a normal climate, namely, humidity should not exceed 60%, and the air temperature should not be lower than -8 degrees.
In order for such a floor to last longer, this percentage of humidity must be maintained constantly; minor changes will not entail any consequences.
But in the event of a significant increase in humidity or, conversely, its decrease, the wood will begin to contract and expand, which will lead to its deformation. Before starting work, all logs must be treated with a special antiseptic. It will prevent the formation of fungi and protect the wood from various bugs and insects.
In order to install logs, you first need to make all the markings and install beacons along which the beams will be installed. In order to level the surface of the future floor, it may be necessary to raise some places. To do this, columns of the required height are placed under the logs.
Scheme of floor insulation by joists.
After all the readings have been checked using a level, the logs can be glued to the base using mastic or other adhesive.
In order to securely fasten the wooden blocks to the floor, it is very important to secure them with anchors. When all the elements are secured, you can proceed to the next process - lathing
These are transverse elements located at a distance of 50 cm from each other.
These floor elements are attached to the joists with self-tapping screws. All cells that were formed in the wooden floor structure can, if desired, be filled with insulating material. It is best to use expanded clay; it is much faster to lay. You can also use mineral wool or ecowool.
https://kuhnyamoya.ru/youtu.be/kUsTwm5-G3U
Sectional diagram of a wooden floor.
After all the preparatory work, you can proceed directly to installing the chipboard on the floor. To make it easier to lay, it can be cut into pieces; the dimensions must correspond to the joists, and all edges should lie only on it. All sheets are attached to the joists using self-tapping screws. Fastening (installation) also needs to be done diagonally. The pitch between the screws should be 15-20 cm.
When laying chipboard on the floor, it is important to control the corners; there should not be 4 corners at one point. It is better to lay the slabs in a checkerboard pattern
There must be at least 9 fastening points per sheet. To fasten chipboard, you need to choose self-tapping screws 3 times larger than the thickness of the sheet, this will allow you to securely fasten it to the joists.
You cannot screw screws into the edge of the slab; you must retreat at least 1.5 cm. The heads of the screws must be recessed into the surface. After finishing the work, the fastening points must be puttied.
https://kuhnyamoya.ru/youtu.be/pvlhnnChkUg
That's it, the question of how to make a floor from chipboard should not bother you anymore. Good luck!
Necessary tool
After we decide whether it is possible to lay chipboard on the floor in a particular room, it is worth collecting the tools necessary for installation.
His list includes:
- hammer;
- ruler and tape measure;
- pencil;
- saw;
- screwdriver or drill.
Nails, dowels and self-tapping screws are used for fastening, and putty is used for final processing, which is used to level the base.
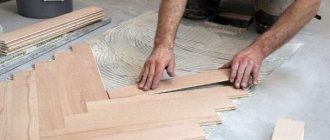
Laying chipboard on the floor
Hello, dear reader of the blog #171;StroyDom#187;. In order to renew an old wooden floor or insulate a concrete floor before laying the final flooring (laminate, linoleum, parquet, etc.), lay chipboard on the floor. Using this procedures, you can create a perfectly flat surface of the subfloor, and this material is cheaper than, for example, plywood, not to mention boards. Do not forget that chipboard is not suitable for laying on floors with significant loads (offices, etc.). And laying chipboard on the floor in places with high humidity (bathroom, etc.) is undesirable, because exposure to moisture, chipboard will deform and collapse.
Laying chipboard on a concrete floor.
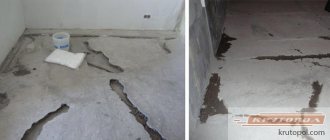
Chipboard can be laid on concrete in two ways. Method one #8212; laying chipboard directly on concrete, in this case the base must be level. To do this, you can pour a concrete screed. The base of the floor must be dry, free of dust and small debris. Then you can lay chipboard sheets cut to size on it, so that there is a gap #8212; between the wall and the sheet. 1 #8212; 1.5 cm.
Before laying, the sheets must be coated with drying oil or an antiseptic. After which, the sheet is attached to the base of the floor with dowels. To do this, holes are drilled in the concrete directly through the chipboard. When installing the dowels, we distribute them over the entire surface of the sheet. Option two #8212; We lay chipboard not on concrete, but on logs. In this case, the thermal insulation will be better than when laid on concrete. Since the air gap serves as an excellent thermal insulator, the space can also be filled with insulation. With this method, no screed is required. The result is not only financial, but also time savings (drying the screed lasts at least 1 month). Wooden blocks are used as logs. Chipboard is more fragile than wood, so logs are placed more often than when laying a wooden floor. Laying begins with the installation of logs. The outermost logs are placed at a distance of 2 #8212; 3 cm to the walls. The next ones are placed 40 cm apart from each other (no more). The logs must be placed in the same plane, placing wooden wedges under each if necessary. We fix it with anchors. At the next stage of work, if necessary, a heat insulator is placed in the free space. Then we lay the chipboard. The sheets must be cut so as to provide a gap from the wall of 10 #8212; 15 mm, and the joint was made in the center of the lag. This will ensure reliable fastening. We fix the sheets with nails or self-tapping screws every 30 cm. The heads of the nails (screws) must be recessed into the slab so that there are no rough spots on the floor. Now you need to rub in the gaps and cracks at the joints of two sheets; for this you can mix PVA glue and sawdust (this will help avoid creaking of chipboard floors).
Laying on a wooden floor.
To lay flooring, it is often necessary to make a fairly level subfloor (laying laminate flooring, etc.). This is difficult to do on an old wooden floor. And here #8212; Chipboard. First you need to check the integrity of all boards, we check not only for mechanical damage, but also for damage by fungus and mold, we replace damaged boards. We also check the places where the boards are attached to the joists, including for the absence of squeaks, if necessary, we eliminate the latter and attach them to the fastenings proper appearance.
Upon completion of the preparatory work, we lay sheets of chipboard on the floor. We align them, then fasten the sheets with self-tapping screws to the wooden floor, leaving a gap of 10 #8212 between the wall and the chipboard; 15 mm. And the last stage of installing the floor from chipboard #8212; puttying joints and heads of nails or screws. We sand the floor and cover it with 2 layers of varnish. After the varnish has dried, we install the baseboard. That's all, see you on the pages of the site. Good luck to you and warmth to your home. Questions that arose while reading the article can be asked in the comment form, I will definitely answer. Watch video #8212; Laying floors and walls from tongue-and-groove slabs:
When is a substrate needed?
Wooden floors can be assembled from various products: ordinary solid boards, parquet, parquet boards, wood boards, fiberboard, laminate. When laid on a concrete base, their bottom layer is quickly erased from external loads. This occurs due to incompatibility of materials.
Wood is a more “delicate” and subtle creation. Its natural content requires careful handling. Stone and concrete are hard, rough and cold materials. If you refuse to use an intermediate layer, they will quickly render the wooden covering unusable.
All floor coverings made from natural wood have the property of free movement. During operation, they are able to expand from heat and humidity and contract when the air is cool and dry. To keep them in place and keep the floating floor in its natural state, underlays are used.
A layer of natural or artificial materials perfectly retains heat and unwanted noise. A 2-4 cm thick canvas can reliably isolate an apartment from the outside world.
The use of the substrate is especially important in children's rooms and bedrooms, where people are forced to walk barefoot on the floor. With the help of a layer, wooden products are not cooled on a concrete base. If the subfloor is made of substandard floorboards, the underlay will become an obstacle to the occurrence of drafts penetrating into the cracks between the boards.
If the bases are too crooked or deformed, sheets of plywood are used. They play the role of a solid substrate for modern type-setting floor coverings. The surface finished with them becomes absolutely smooth and performs the same functions as a synthetic or cork fabric.
Product benefits
Chipboard of this type has a number of advantages:
- Environmental friendliness. This material is superior to many others in its safety and environmental friendliness. Its composition allows the slabs to be used even in schools and preschool institutions and other premises where increased sanitary requirements are imposed;
- Reasonable price. Even the addition of chipboard boards with such qualities as moisture resistance and tongue and groove did not make it expensive compared to plywood and other materials;
- Overall dimensions and light weight make installation easier and you can do it yourself;
- Wide range of use;
- Resistance to fungi, mold and various microorganisms;
- Strength and durability;
- Guarantee of a perfectly flat surface without additional time costs;
- Possibility of restoring the structure after simple dismantling;
- High quality indicator. Moisture-resistant tongue-and-groove chipboard is durable, does not bend, does not break, and can withstand high pressure;
- The low weight does not put a load on structures built using slabs;
- Tongue and groove ensures the strength of the base mounted using slabs, its rigidity and stability;
- Good sound insulation and thermal insulation characteristics;
- The moisture resistance of such sheets makes it possible to use them in rooms with high humidity - in the kitchen, bathroom, balconies, etc. This material does not swell or change size when exposed to moisture;
- Does not require additional preparation for finishing;
- Simple and quick installation of the material allows you to significantly save time and effort.
How to lay chipboard on a concrete floor
There are two ways to install particle boards on a concrete base. Both methods will make the floor equally comfortable and warm.
Laying chipboard directly on concrete.
To do this, the floor needs to be: cleared of debris; dry; align. To level the surface, additional screed filling is used. Chipboard sheets must be cut and treated with drying oil in advance. The material must be laid taking into account a gap to the wall of at least 1 centimeter.
When laying pressed slabs directly on a concrete base, it is better to use dowels for fastening. In this case, you need to make holes with a hammer drill.
Laying chipboard on joists
The advantages of installing particle boards on logs are:
- great thermal insulation;
- the possibility of using additional insulation;
- no additional screed required;
- saving time.
Important. Chipboard is not a strong enough material, so logs must be placed quite often
This shows how to install joists correctly.
In this method of laying pressed slabs, work must begin with the installation of logs. If there are gaps between the beams and the concrete, fill the problem areas with wedges. The outer beams are installed at a distance of 250 millimeters from the walls. All subsequent ones are in an interval not exceeding 400 millimeters.
The logs are fixed in one plane. Check using a level and secure with anchors. Next, lay the chipboard sheets. They are distributed in such a way that the joint of the slabs occurs exactly in the center of the log. Attach with screws around the perimeter at a distance of no more than 30 centimeters.
The heads of the screws must be below the surface of the slab. The seams between the plates are treated with putty, dried and sanded with sandpaper. On the floor prepared in this way, you can put laminate, linoleum or hide it with varnish.
This shows how to properly install chipboard onto joists.
If desired, the concrete floor can be additionally insulated. To do this, the insulation must be inserted into the sheathing or placed directly on the concrete base. This will not only create greater thermal insulation, but will also protect against excess noise.
Any filler can be used for these purposes. The most popular are technical cork and isolon.
Cork, with a fairly small thickness (from 3 to 10 millimeters), has very good heat-insulating characteristics. At the same time, it is an environmentally friendly material. But its main disadvantage is the price. The cost of such products is quite high.
As for isolon. this material is very easy to use. It is rolled out over the surface, cut to the required size, and the joints are glued with regular tape.
If you do not have the skills for such work, you can contact specialized companies. Many companies offer their services in this area. The price for such installation depends on the quality of the material, installation method, and amount of work. Each company has its own price list, which indicates the price of services.
Using these recommendations, you can make the floor in your home warm and comfortable. After all, this is the key to the comfort and health of the whole family.
https://bouw.ru
What is the secret of popularity?
Chipboard sheets have many good consumer qualities:
However, there are some restrictions on use, including:
Taking into account all these characteristics, we determine what types of work we perform with this material. For inexpensive renovations in a house or country house, the slab is quite suitable; in addition, these slabs fit perfectly onto existing floors.
Basically, chipboards are used as insulation and soundproofing material, as well as as a base for a decorative finishing coating.
Information: Particle boards are produced by pressing wood shavings using resins as a binding component. Based on the content of harmful resins, slabs are classified into different hazard classes. The use of new technologies has brought the slabs to a Super class level that is safe according to sanitary standards. When constructing the floor, slabs of medium safety classes E1 and E2 are usually used.
Gluing plywood to the floor
Laying plywood on a concrete floor allows you to hide minor irregularities in the screed and make it warmer.
To attach the sheets you will need glue and dowel screws. Tools: notched trowel, hammer drill, screwdriver or screwdriver.
The best glue is with the addition of pine resin (often it is not indicated in the composition, but its presence can be determined by the smell); this is, for example, Thomsit 200 or 400.
For better adhesion of glue to plywood and concrete, the floor is first primed.
The length of the dowels is selected so that they go 4-5 cm deep into the screed.
- Before starting work, thoroughly clean the screed from dust and debris and coat it with a deep penetration primer.
- Apply glue with a notched trowel to the plywood or floor and lay it with offset joints. We also leave technological gaps of 2-5 mm between the sheets and near the wall.
- For additional fixation, we drill holes with a hammer drill, insert dowels and tighten them so that the screw heads do not stick out.
- We fill the gaps between the sheets with gypsum plaster. If you plan to lay the laminate on plywood later, you can leave them as is, or seal them with sealant.
- When the plaster hardens, it is treated with a grout mesh and the seams are taped with reinforced tape.
Features of laying laminate over the previous finishing coating
How to lay laminate over the previous coating?
Laminate installation options.
Laminate can be laid over absolutely any old flooring, with the exception of one thing: long-haired carpeting. The latter must be dismantled before laying the laminate and use one of the methods of leveling the floor, as for the rough version (either with a screed or lumber).
Let's consider several coating options on which laminate can be laid.
Wooden floor (boards, parquet).
In this case, you need to make sure that the old dried out floorboards are still suitable. For these purposes, they are diagnosed and, if necessary, restored. Small defects (cracks, holes, chips) are repaired with putty in order to prevent further destruction processes.
Leveling wooden boards by scraping or laying lumber (plywood or chipboard 15 mm thick) is the next stage of work. The sheets must be laid offset, that is, so that the seams do not meet. Dust is removed so that it does not become the cause of annoying squeaking of the laminate in the future (since it can get into the locks of the laminate).
A layer of dense polyethylene film and underlay are laid on top of the prepared wooden floor, that is, the laying pattern is repeated.
Chipboard acts not only as a leveling layer, but also as an excellent analogue of concrete screed. To ensure that laminate flooring can be laid on chipboard without problems, you need to adhere to the above steps.
Linoleum
The structure of household linoleum.
The linoleum must be thoroughly inspected and all depressions and protrusions identified, which can be eliminated by using another layer of backing under the laminate in those places that need to be “raised.”
Before laying the substrate, one or two layers of polyethylene film are placed on the old coating to provide an additional layer of waterproofing. It is fixed with masking tape. You should not leave linoleum that is too worn or soft; it must adhere closely to the floor surface.
Ceramic tile
Technological characteristics of ceramic tiles.
The tile itself is a fairly smooth surface, and installing a laminate on it will not require any additional actions.
Here it is important to pay more attention to the substrate, since the tile for the substrate is a very slippery surface. The substrate must be firmly fixed to the tile with masking tape.
The best option is to use a backing made of extruded polystyrene foam. This material is elastic, does not wrinkle, and can be securely fixed using masking tape. And since tile is a fairly cold coating, it is possible to install a film heated floor system on top of it, specifically designed for laminate flooring.
Which underlay for laminate flooring is better to choose?
The lining, which is placed under the laminate, will play a big role in the quality operation of the floor covering. Today, manufacturers offer several types of laminate substrates.
Expanded polystyrene
The most common type of substrate.
It is moisture-resistant, resistant to mold and fungi, and has good insulating qualities. But under mechanical influence it wrinkles a lot.
Cork
The material is environmentally friendly, with good insulation qualities, resistant to mold growth and stress. This material is the most expensive of all on the construction market.
Composite materials
Bitumen-cork or rubber-cork is something between the first and second types of substrates, both in price and in characteristics.
The choice of substrate must be made based on its purpose and resistance to mechanical loads. Assembling the laminate on the previous finishing coating involves laying polyethylene foam, and it makes sense to lay a cork backing on the concrete screed. Composite materials are versatile.
Substrate laying technology:
- a layer of substrate 0.2 mm thick is laid on the prepared surface;
- sheets or canvases are laid in the transverse direction of the future laminate laying, slightly touching the walls (3 cm in height);
- individual elements of the substrate are connected with masking tape;
- The corrugated side of the substrate is placed downwards, and the foil side is placed up.
https://youtube.com/watch?v=ul8gg_UtxIw
Laying laminate flooring is possible both on the subfloor and on the previous coating. In the first case, you need to prepare a reliable base for the laminate.
Distinctive qualities of a wooden floor under laminate
For anyone who still doubts whether it is possible to lay laminate flooring on a wooden floor, let’s say right away that it is possible. A wooden base is no worse suitable for laying laminate flooring than, say, a concrete base. However, it should be borne in mind that plank flooring has some distinctive characteristics that may affect the further operation of the laminate.
Therefore, before laying laminate flooring on a wooden floor with your own hands, it is worth understanding all the intricacies and features of such a material in order to avoid possible complications in the future.
In essence, there are only a few basic requirements for the surface under a laminate - cleanliness, that is, the absence of dust and dirt, dryness, evenness and reliability.
The main differences between a plank base for laminate and concrete are as follows:
- Stability. This means that the fastenings of the floor boards weaken over time, individual sheets may move somewhat relative to each other, which leads to an increase in the load on the locking mechanisms of the laminate. By the way, it is the locks that are the weak points of the laminate.
- Mechanical strength. In this regard, a plank floor is significantly inferior to a concrete floor, since wood becomes more fragile and weaker over time. Therefore, before laying laminate flooring on a wooden floor, you should make sure that the underground structures (support beams or joists), as well as the plank flooring, are durable and do not require additional repairs. Otherwise, you need to eliminate all defects before laying laminate flooring on a wooden floor.
All about the substrate
First of all, let's look at the main functions of the substrate:
Purpose
A layer of insulation, noise absorption and moisture protection
| Function | Comments |
| Thermal insulation | For example, linoleum itself is cold, and laying it on a bare subfloor board, even if it is insulated between the joists, will lead to the formation of a cold zone in the foot area in winter. The substrate has a low thermal conductivity coefficient and will help retain the heat generated by radiators in the room. |
| Waterproofing | Moisture is the main enemy of wood. If you are the owner of a private house, then ground dampness will always threaten your flooring. An additional layer under the decorative layer will protect it from excessive humidity. |
| Noise insulation | When the thickness of the substrate is more than two millimeters, it perfectly absorbs all kinds of sounds. Thanks to this, you will certainly not disturb your neighbors below if you live in an apartment building. |
| Depreciation | For example, laminate can be deformed and quickly wear out when in contact with a rough board. The soft layer softens the contact between the two layers and significantly extends the service life of the decorative coating. |
Tip: to increase the thermal insulation effect, it is recommended to use a substrate with a foil layer. Such a coating, in addition to not allowing heat to pass through, also reflects it, thus increasing the room temperature by about 30%.
Plywood underlay on a wooden floor with a layer of aluminum foil
Polyethylene underlay for carpet on wooden floors
Substrates can be made of various materials, which has some impact on their technical characteristics:
Underlay for laminate on a wooden floor made of extruded polystyrene foam
Advice: if you don’t know what to put under linoleum on a wooden floor, then it’s best to opt for a balsa wood underlay. It has sufficient elasticity and reliability so that the linoleum coating does not sag in the future, and high thermal insulation so that your feet do not feel cold in the winter.
Laying linoleum on a wooden floor with a cork underlay
Laying
The instructions for placing the substrate on a wooden surface are simple:
Tip: It is recommended to use an electric sander for sanding. It will allow you to cope with the task quickly and efficiently.
Sanding the plank base
Unwinding a polyethylene foam roll
Underlay for linoleum on a wooden floor, taped with construction tape
After this, you can safely install any decorative layer, including laminate, parquet, chipboard, plywood and carpet, with confidence that it will be sufficiently protected from earth dampness, contact with base boards and heat loss.