The cost of painting a part in body shops is growing day by day: you arrive in an old “nine”, and the price of painting is announced as for a brand new plane. Maybe the quality of the paint is worth it, but is the car worth the investment? “Car repair shops” in garages paint cheaper, but no one will give you guarantees, and when it comes to repairing parts, you can be sure that the main way is to apply a thick layer of the cheapest putty. Immediately after painting, it looks decent, and at first you will be happy with the look of a freshly painted part, but such repairs will not last long: over time, the putty will burst, the paint will fall off, and the money spent on repairs can be considered wasted. What if you just need to paint the bumper? Is it possible to do this with your own hands without special tools, and what will you need for this? What differences will there be in painting a completely new bumper, an entire contract or used one, and a part that requires repair? What do you need for partial spray painting? You will learn about this and much more below.
Do-it-yourself painting of plastic car interior parts
The fresh look of an old plastic car interior part is the result of not only painstaking work on applying restoration products. This is, first of all, their correct selection. Look at the pictures of a bad painting experience, when the owner simply applied paint to one of the interior elements, and it immediately crumpled up. And yet, negative experiences should not discourage you from painting yourself. After all, doing this is no more difficult than removing scratches from windshield wipers from a car window with your own hands. The Autostadt.su team offers to get acquainted with all the intricacies of the technology of painting plastic elements, and analyze the main mistakes that beginners encounter.
Characteristics of dyes for plastic surfaces
Aerosol sprays for painting plastic are popular with most decorators due to their ease of use. The following types of enamel are available in cans:
- Polymer, combining the functions of a primer and a dye. Polymer paints for plastic are characterized by high adhesion and do not require a preliminary primer layer.
- Resistant to damage. These are especially durable compounds, in the manufacture of which polyurethane additives and acrylates are used. This type of enamels is used for surfaces subject to great mechanical stress.
- Structural. When dry, such dyes give a beautiful, slightly rough surface, hiding small flaws that have arisen on the plastic. The use of structural paints allows you to create original decor.
- Soft touch. A coloring composition that allows you to obtain a surface that is velvety to the touch. Objects decorated with this type of enamel create a feeling of softness and comfort.
- Monad, designed for PVC plastic. Adheres well to the base and is UV resistant.
Such a wide range of painting compositions allows you to select an aerosol preparation suitable for a specific type of plastic.
How to paint car interior plastic
- Sand it.
- Degrease.
- Find out whether it needs to be primed or not.
- Restore texture if necessary.
- Paint it the desired color.
How to sand
To matt interior plastic under primer, red Scotch-Brite is usually sufficient. It is a felt-based abrasive material, similar to the hard side of a dish sponge. The advantage over fine-grained sandpaper is its softness, which allows this tool to efficiently process various bends and indentations.
How to degrease
Experienced painters advise using only anti-silicone. The fact is that classic solvents in the form of white spirit or solvent can ruin a plastic unit. For example, after using organic matter, stains form that are difficult to hide even with painting. By the way, we have already recommended abandoning white spirit when performing the technology that describes how to remove tar from a car body without damaging the paint.
Do you need primer on plastic or not?
The reason for fresh paint clumping and peeling is that no primer was applied first. This is a composition with a special formula of various additives and plasticizers, which improves the adhesion of paint to the surface. However, not all plastics require primer treatment. To determine whether to prime the interior plastic or not, you need to conduct two experiments:
- Set fire to a piece of the product being processed.
- Immerse the part in water.
If the plastic smokes and sinks, it is not necessary to use primer on the plastic.
When a plastic element burns like a wax candle and floats on water, you cannot do without a primer. It is important to choose the soil wisely. So ordinary automotive compounds are not suitable - the paint peels off instantly. You need a special primer designed specifically for plastic.
When is structural paint needed?
If you have ever touched a black plastic bumper or a dark side mirror housing on an inexpensive car, you probably felt that the tactile surface seemed to be covered with small pimples. The matte rough effect is structural plastic. The paint in question recreates this same effect and is typically used to cover up scuffs and light scratches.
What about the paint itself?
First decide what kind of coverage you want to get. Here are some examples:
- Soft-Touch. Usually used for dashboards. The surface is slightly silky and rubberized. This coating is applied to the panel from the factory.
- Normal, rough. Apply to hard plastic. For example, the side parts of the center console, lower trims on door cards or handles for closing doors.
- Glossy. Used for finishing interior levers intended for opening the door.
Then find out for yourself which shade to choose. If you plan to paint the interior exclusively in a restoration manner, then take the trouble to find a company catalog with the distribution of interior and exterior colors by VIN numbers. The original paint, selected according to the factory catalog (for example, for VW it is ETKA), will preserve the monotony of the overall picture of the interior. This will be because there will be no noticeable difference between the painted and unpainted parts.
For your information. For restoration work, it is better to order original paint and only from the car manufacturer.
If we talk in terms of the examples given, then it is better to purchase the Soft-Touch aerosol can through the official line. To get a regular rough layer, it is enough to use classic paint paired with structural paint. Here are examples for common shades:
- Black. The VAZ black Cosmos (code 665) will do.
- Grey. The VAZ decorative (graphite) intended for bumpers fits perfectly.
However, the color and origin of the paint are purely individual things and are selected solely according to one’s own preferences. Continuing the conversation about rough coatings, it is appropriate to mention the well-known RAPTOR U-POL, a protective coating for the exterior of a car, and its similarity - HB BODY.
Glossy objects are regular paint covered with several layers of varnish. The latter is recommended to be purchased in aerosol cans. There are no strict requirements for this component.
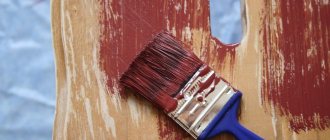
We recommend painting plastic parts of the car interior only with a spray can. When applying enamel with a brush, there is a risk of drips. In addition, such a layer takes much longer to dry, which means that the likelihood of catching dust particles is much higher.
Tips and tricks
Popular brands of varnishes are:
- Mobilehel 1K. Used for painting cars. Forms a dense layer without drips. Transparent, applied over paint as a topcoat. Dries completely in 60-90 minutes.
- Brulex. Acrylic varnish spray creates a decorative glossy coating on surfaces made of wood, metal and plastic. Air dries and does not turn yellow.
- Holex. Acrylic spray for body painting, dries quickly (less than an hour). Very durable, does not become cloudy.
Before applying, it is better to practice on an inconspicuous place, especially if the work is being done for the first time. Remember to shake the bottle of varnish before use so that the composition is uniform. When working indoors, you should use a respirator and protective gloves, since many varnishes contain toxic solvents. These tips will help you varnish with excellent results and be safe for your health.
How to paint interior plastic without the paint peeling off
Let's start by analyzing the main mistake: why does the enamel layer peel off? The reason is that the material has nothing to cling to, that is, weak adhesion of the paint layer to the primer or plastic.
The fact is that before applying any type of paintwork on the surface to be treated, it is necessary to create small grooves and scratches, that is, grind. This improves the adhesion of the new coating to the base, making it durable and resistant to peeling. What else is sanding useful for? During treatment with Scotch Brite, stubborn dirt that is difficult to remove with anti-silicone is removed.
Hard plastic painting technology
We have already outlined the main stages of restoration work in the selection of materials. Now let's look at the technical part of each operation.
- Sand it. According to painting terminology, this transition would be correctly called matting. The bottom line is that you need to moisten red Bright tape in anti-silicone and rub it on the plastic part.
- Degrease. Soak a cloth in anti-silicone and walk over the treated surface.
- Prime. Apply 3-4 layers of special primer for plastic and wait until it dries.
- Sand it. Treat the primed surface with Scotch Brite.
- Paint it. Apply 2-3 layers of paint of the desired color. If there is a need to restore the structure, then structural enamel is applied before the main painting. The places where it is sprayed are determined by location: this is either the entire surface of the part, or some of its sections. If the goal is to obtain a varnished surface, then 20-30 minutes after receiving the painted coating, apply varnish in 1-2 layers.
When painting interior plastic, follow the well-known rules for working with aerosol cans:
- Place the part in a closed room with an exhaust hood to prevent dust from entering the processing area.
- Cover untreated surfaces with newspaper, cardboard or thick fabric, securing it around the perimeter with masking tape.
- Shake the can for 1 minute to obtain an even layer.
- Try spraying paint on some cardboard. Check the color match and prepare the can to spray evenly.
- Apply paint/primer to the surface with quick but smooth and non-stop longitudinal movements. Drying time between layers at a temperature of +25°C averages 20-30 minutes. Complete polymerization occurs after 24 hours. When painting, shake the can periodically.
- Turn the can over and press the button. This is relevant if there is paint left in the container. This is done to ensure that the material does not freeze in the sprayer.
Working with Soft-Touch coating
We have already noted that the above painting technique is relevant for hard interior plastic. Plastic with a soft coating, such as dashboards or door cards, requires special treatment:
- The old soft-touch layer must be completely removed. If this is not done, the new paint will peel off again. To easily remove the coating, the part should be soaked in 646 solvent.
- When using original Soft-Touch paints, plastic is usually not primed, and one layer of coating is enough to successfully close the issue of restoring interior elements.
Adhesion promoter
p, blockquote 11,0,0,0,0 —>
- The formula of the adhesion enhancer may vary from manufacturer to manufacturer. The basis of such primers are strong solvents that “open the pores” on the plastic surface for better spreading and adhesion of paint. An adhesion promoter not only changes the surface properties of the plastic, but its additives can act as a glue between the plastic and the paint.
- The adhesion enhancer (primer for plastic) should be sprayed at a distance of 30 cm from the surface. Apply a thin layer. Spraying too much of an adhesion promoter can, on the contrary, cause problems with paint adhesion.
- It is always best to research how to apply an adhesion promoter to containers.
- The duration of action of special primers that increase adhesion may vary. Some manufacturers even guarantee action for 24 hours after application.
Painting plastic car - types of paints, instructions for work
Painting plastic parts of a car is a responsible procedure that requires careful preparation. What materials will be needed to restore the surface of a plastic element? Will pre-priming be required? What paint is best to use? The nuances of painting plastic car parts will be discussed in this article.
Specifics of water-based paints
Many people call this type of material acrylic enamel. Its main components are a hardening agent and a hardener. The main advantage of this option is durability.
The plastic coating treated in this way does not fade over a long period and is not destroyed under the influence of ultraviolet radiation.
Before starting work there is no need to carry out priming, it is enough to just clean the surface well. This option is suitable only for external use.
How to paint plastic
The variety of paint and varnish products makes it difficult to choose a specific paint for the plastic of a car. When purchasing, you need to take into account the type of plastic, as well as the location of the part that needs painting. If it is located inside the car, then the requirements for paintwork materials will be the same, if outside - different.
The following options are available on the market:
- acrylic enamels (water-based compositions);
- Soft-touch paints (polyurethane base with the addition of hardener and pigments);
- aerosol paints.
Acrylic enamel is a composition of two components - a coloring element and a hardener. Thanks to the hardener, the surface after painting becomes resistant to atmospheric and mechanical influences, and the applied layer is uniform. Soft-touch paints (read as soft-touch) help to obtain an abrasion-resistant matte finish. Good adhesion to plastic parts and hygiene are advantages of paints. Paintwork materials are used to process elements of the car interior. Aerosol paints have become the most popular because it is convenient to paint plastic car parts from a spray can. Color variety, even spraying and quick drying are the advantages of aerosols for cars.
The nuances of coloring plastic
- Plastic is famous for its insulating qualities, and, as a result, mediocre adhesion. In this regard, not every paint will be able to adhere firmly to the polymer surface;
- Hard types of plastic are easier to paint. Paint may peel off soft surfaces that constantly bend during use. For painting soft products, it is best to use elastic enamel;
- If we are talking about a hard type of plastic, such as that from which containers are made, then universal acrylic enamel is ideal for painting;
- Painting is not carried out in the case of such types of plastic as polyethylene, polystyrene and polypropylene.
Instructions for painting plastic in a car
The plastic element of the car that requires painting can be new or dismantled old. We recommend an article about painting a car dashboard. Moreover, the painting procedure will be different depending on whether this element is primed. First, it’s worth presenting the stages of painting a part without a primer layer.
Working with plastic without primer
Before you begin painting, the surface must be prepared. The stages will be as follows:
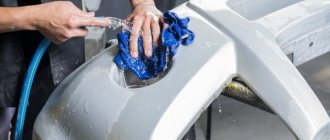
- Washing. For work you will need: a container of hot water, car shampoo and a brush (an alternative is a sponge, rag). Washing is necessary in order to get rid of the lubricant that is used to separate the finished part from the mold.
- Evaporation. It involves heating the part in a chamber for half an hour at a temperature of 60 °C, followed by degreasing the surface. It is difficult to carry out such a procedure in a garage, so it is better to immediately purchase primed plastic elements of the car. You can skip the evaporation procedure.
- Degreasing. Involves the use of branded products that also provide an antistatic effect. The part with the static charge removed is less likely to adhere to adhesion-reducing dust. White spirit is also used for degreasing.
- Grinding. The abrasive materials used are P300-P400 sandpaper, red or gray Scotch-Brite (for hard and soft plastic, respectively). Plastic can be sanded dry or using water (“wet” sanding). After treatment, the surface must be degreased again.
- Padding. A responsible procedure that solves the adhesion problem. Plastic primer (primer) is used for initial processing of the material. It should be applied in a thin layer, for which it is better to use an aerosol can. An important nuance is that the treated surface retains good adhesion for 15-20 minutes. Therefore, painting should begin without delay.
Technology when working with a primed part
Before painting, it is necessary to evaluate the quality of the primer applied to the plastic. To do this, apply a cloth soaked in solvent to the surface for two minutes. A softened coating is a sign of a poor primer, which must be removed with fine-grained sandpaper or Scotch-Brite before painting. If the coating remains unchanged, then the process looks like this: degreasing, matting, re-degreasing, painting. Damaged primed surfaces are sanded, puttied (putties for plastic are used), sanded again, then primed. The roughness of the abrasive for processing should not exceed P180.
Staining procedure
When the surface is completely prepared for painting, the most critical stage begins. Mistakes will negate all previous steps (paint drips, for example, will not make the part aesthetically pleasing). At home, using a spray gun is not always convenient, so it is better to use spray cans or an ordinary brush. The room in which work is carried out must be ventilated. Paint for plastic is applied in an even, thin layer so that no drips form. The surface needs to be treated with 2-3 layers. The interval does not exceed 25 minutes. When spraying paintwork from a can, the distance to the part should be 20-30 cm. The varnish gives the surface a glossy tint and enhances protection from subsequent exposure. Upon completion of the work, the part is left to dry naturally. When using acrylic paints on plastic for cars, it is important to add a plasticizer to the composition. Without it, the coating will not cope with the bending load and will become covered with cracks. Add a plasticizer in accordance with the manufacturer's instructions. The drying time of paint with additives increases. Adhesion reaches normal levels after a few days. It is better not to pressure wash painted plastic for a month.
Preparing plastic for painting
If your type of plastic is suitable for coloring, and you really want to change the color on your drinking water bucket, then you need to start with degreasing (solvent, white spirit), treating with an antistatic agent and putty. The latter is necessary if the plastic has flaws and damage. Sanding with sandpaper while exposing it to water will also help remove cracks and cracks if they are small.
The most important preparation step is priming the plastic surface. We have already said that the adhesion of such a polymer coating is extremely mediocre, and a primer will help improve it.
Preparing and painting ABS plastic using aerosol cans.
Subscribe to the author
Follow the author if you like his publications. Then you will receive notifications about his new posts.
You can always unsubscribe from notifications in the author's profile.
Preparation for painting parts made of ABS plastic.
Good day, dear friends and colleagues.
Many people like to work with abs plastic. It is easy to process and has good physical and mechanical properties. One of the important advantages of ABS is post-processing and coloring. I immediately apologize for the quality of the video and photos. The main task is to demonstrate the technology.
Let's start with something simple. This is the preparation of the printed model.
After we have removed the part, we need to inspect it for defects. If the model suits us, we move on. We need to create micro-roughness on the surface of the plastic and smooth out the irregularities. For this procedure we will need a superfine type sanding sponge (P400 grit). If the part has pronounced layers, you can start processing with P320 abrasive or place it in acetone vapor into the part (then process it with a P400 sanding sponge). Hard-to-reach areas must be treated with a sanding sponge such as Scotchbrite red.
List of materials you will need for preparation:
Superfine abrasive sponge (P400 grit size)
Abrasive paper strip, grit size P320.
Painting parts made of ABS plastic (application of primer, enamel, varnish)
After our part has passed the preparation stage and is securely fastened, we can begin painting.
It is necessary to degrease the part first. For this, you can use either specialized products or just gasoline “galoshes”. I advise you to look at how not to apply enamel.
It is necessary to open the paint supply outside the part to be painted.
Now that we have an idea about working with aerosols. Let's continue.
For good adhesion of acrylic primer, we need to apply a primary adhesive primer. This can be almost any primer, adhesive plastic primer. But for a good final result, I advise you to use proven materials and read reviews (I recommend 3M).
Adhesive primer is applied in 1 layer. Pay attention to hard-to-reach places. There is no need to be zealous; a large amount can only spoil the result. Let the soil dry for 10-20 minutes depending on the temperature.
Partial painting: how to do it correctly
You will need:
- everything is the same as for completely painting an old bumper
- aerosol solvent
We proceed according to the same scheme as when completely painting, but we work only with the damaged part of the bumper. We remove the coating, sand the adjacent area, putty, level the surface, matte, prime, wash, paint, varnish.
Step by step pictures
Such a scratch can be removed locally
We use a grinding machine with a wheel of hardness P120
Cover the bumper under the ground
Apply primer and wait for it to dry
The primer has dried
Sand after complete drying
We increase the repair area for paint
First layer of enamel
Second layer of enamel
Wait for it to dry completely and see the result
Bumper after painting
Please note: the scratch may be small, but the area of each subsequent step should increase. Let's say you removed the coating from a circle with a diameter of 5 cm; putty overlapping the part that was not removed - it turned out to be a circle with a diameter of 9 cm; rubbed the putty over the paint - 15 cm; prepared the surface for priming and again increased the area of repair - the diameter of the circle is already 19 cm. The numbers are indicated only to clarify the recommendations, you do not need to rely on them: just expand the area of work with each step, then you can achieve uniform painting.
Example of aerosol painting on video
The only new action that appears when partially painting the bumper: after varnishing, coat the part of the paintwork adjacent to the area to be repaired with an aerosol solvent. This will make the transition from the repaired area to the non-repaired part of the bumper smoother.
Spray painting: tips from the experts
Recently, paints in aerosol cans have become in demand. Thanks to them, the most inaccessible areas are painted, where it is difficult to work with a brush or other painting tools. Spray painting does not require these devices or various solvents. If you use spray paint skillfully, then the loss of material will be minimal. To do this, you need to understand the types of aerosol CMs, study application technology, and prepare for possible problems when working with a spray can.
Aerosol can device
The concave bottom protects the cylinder from high pressure. Inside there is paint (varnish) and inert gas and there is a tube through which the paintwork material flows upward. It ends with a spray head with a valve, the latter does not allow the product to escape until pressed.
The varnish in aerosol form contains a sufficient amount of diluent (solvent), so it is sprayed in very small drops. But liquid varnish can be applied in several layers, which gives a better result.
Area of use of different types of aerosol CM
Manufacturers produce paint for painting various surfaces in different types of spray cans:
- Acrylic-based composition is widely used. It covers plastic, glass, wood, ceramics, and metal.
- Stone and wood are coated with an alkyd composition This aerosol CM is widely in demand in car repair work.
- KM epoxy in a can is a restoration material, in demand in construction, it interacts with wood.
- The nitrocellulose composition decorates and protects metal, wood, glass, and ceramics.
Spray painting allows you to create a matte, semi-matte, or glossy finish on the surface, with different effects. The range of ready-to-use dye colors is very rich. If you need to create a phosphorescent coating, give the surface a chamelin effect, or imitate the texture of natural materials, then the best option for accomplishing the tasks is aerosol CM. But it can also be used to simply update decorative items. In order for your plans to be realized, you need to know how to spray paint.
Types and properties of plastics
Plastics are materials with a polymer base. Due to the content of various plasticizers, stabilizers and other fillers, plastic is endowed with good properties of fluidity, ductility, strength, etc. There is a classification of plastic according to the following criteria:
But, perhaps, the main criterion for the characteristics of this material is how the plastic behaves when heated. Based on this property, the following types are distinguished:
- Thermoplastics are plastics that melt when heated and return to their original state when cooled. Thanks to this property, such parts can be welded and soldered. This type of material is the most used for the production of car parts: panels, bumpers, radiator grilles, wheel caps, etc.
- thermosets are materials that become soft when heated only once - during the formation of the part, but remain hard during subsequent heating. They cannot be welded or soldered, otherwise the material will simply collapse. Thermoset plastics are heat-resistant, so they are used for the production of hoods, trunk lids, fenders, etc.
- Elastomers are plastics that are highly elastic. When loaded, it bends, and when it is removed, it returns to its original shape. The main advantage of this type of material is that even at very high temperatures they remain elastic. Tires, seals, etc. are made from it.
Spray painting technology
Before spray painting, the materials necessary for the work are prepared. Depending on the desired end result (simple coloring or creating an original texture), a set is assembled:
- Aerosol composition. It is recommended to choose cans from well-known brands. This guarantees uniform surface coverage. Sometimes it is enough to apply the material in one layer. Difficulties may arise with paint from an unknown manufacturer. In addition, the consumption of cheap material is much higher.
- Primer composition in a can . The kit contains primer and dye from one manufacturer. Although primer treatment is not always necessary, primer is still applied for high-quality painting. The adhesion of the dye to the base and the brightness of the color of the coating are enhanced.
- To ensure that the result of the work is preserved for a long time, varnishing is carried out with aerosol varnish. The protective layer resists the UV rays of the sun, has a glossy shine, and creates a 3D effect on the base.
When paint is sprayed, mist settles on objects around the work area. To protect them you need: masking tape, masking paper, plastic film, newspapers. Using tape and a paper stencil, patterns are created on the surface.
Unwanted drops of CM are wiped off with a soft cloth. It must be prepared before starting work.
Personal protective equipment (respirator or mask) protects the respiratory tract from absorption of particles from the paint cloud.
Preparatory work
The base of any material is prepared before painting. Materials needed: sandpaper, solvent, dishwashing detergent, cloth.
- Metal base. First, use a solvent or acetone to remove the old paint layer and all contaminants. The metal is processed with sandpaper. It is polished in one direction. The cleaned base is washed and dried.
- The wood is sanded with an emery sheet along the grain. Use a cloth to remove dust from the surface.
- Glass, plastic, and stone are not easily sanded with sandpaper. A sheet with a fine grain is used. This is done to enhance the adhesion of the smooth surface to the dye. After this, the objects to be painted are washed and dried.
The clean and dried base is degreased with a special composition or liquid containing alcohol.
Arrangement of the work area
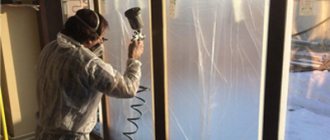
It is ideal to work with spray paint in a spray booth or outdoors. If painting is done in a room, there must be ventilation. Water-based paint (DUPLI-COLOR AQUA series) is safe and does not require special conditions.
The temperature for better paint fixation is 15-20 degrees above zero, air humidity no more than 65%.
If not the entire surface is painted, then use tape to outline the area to be painted.
Aerosol painting
The process of working with a spray can requires patience since each coating takes longer to dry than when working with a spray gun.
First of all, the question arises of how to paint with a spray can correctly, at what distance from the surface to keep it. The coating will lie flat if there is a distance of 20-25 cm from the juza to the base. Throughout the entire painting, the same distance and right angle between the line falling from the juza to the surface is maintained.
The layer is formed uniformly if the droplets merge into a single coating when sprayed. If the base is translucent, then the distance is large and needs to be reduced. Since the paint in the can is abundantly diluted with solvent and the proportion of pigment in the composition is reduced, the covering power of the composition is low. Therefore, the coating is made in multilayers. Several thin layers help avoid smudges. Each layer takes an average of 10-15 minutes to dry.
The button with the nozzle is pressed at the start and released at the finish when the torch is not directed at the base. The dye is applied in strips that overlap each other by 50-75%. The answer to the question of how to paint from a spray can without smudges lies in choosing the speed of movement of the hand with the aerosol. If the speed is low, there will be smudges; if the speed is high, there will be no uniform coverage.
Area of application
Varnishes in the form of aerosols belong to the group of paints and varnishes (paint and varnish materials) and have a variety of areas of use in the household. The most well-known and widely purchased universal formulations can be used in this way:
- as a car varnish for body repair;
- for covering wood, varnishing various types of furniture;
- for applying a protective coating to works of art, bathroom and kitchen accessories;
- for varnishing toys;
- in the construction industry;
- in the electrical field.
Other varnishes are used narrowly, for example, they are bought only for cars or wood coating. Some acrylic products are designed solely to protect electrical components from damage. And yet, many paints and varnishes in cylinders are interchangeable; they can be sprayed onto various types of substrates. All aerosol varnishes have one thing in common - the area for their application should be small. To cover the floor, you should purchase regular paint and varnish from a jar.
Useful Tricks
To ensure high-quality painting, professional craftsmen recommend:
- Purchase cylinders with replaceable tips that make it possible to adjust the width of the dye jet.
- Apply a new layer only after the previous one has dried.
- If the product is intended to be used frequently, it is recommended to apply more layers.
Following these little tricks and strictly following all stages of painting guarantees an excellent result.
It is very convenient to use aerosols for painting plastic products. If you choose the type of dye in accordance with the purpose of the item and the type of plastic, then the decorated item will delight you with its beautiful appearance for a long time.
What are plasticizers and acrylic paints?
In terms of complexity, the process of painting plastic parts is no different from painting metal elements of a car body. Painting of plastic is done with a tool called a spray gun; the painting composition should consist of enamel and plasticizer. Painting with aerosol paints is also possible, but it is worth remembering that the surface will not be elastic enough, which will subsequently lead to cracks.
How to paint plastic car parts in a garage Please rate this page
DIY painting
You can paint any plastic parts in your car yourself. But the situation is most difficult with plastic bumpers. To paint them, you need to select the exact color. If you cannot find exactly the same paint in cans, you will have to contact a specialist.
To paint bumpers yourself, you must have:
The equipment is not cheap and it makes no sense to buy it just for one-time painting. All of this can be rented, but the experience is not rented. Either you need to constantly practice, having your own equipment, or find a good painting workshop.
Painting plastic elements of the exterior and interior of a car, for which you do not need to select paint exactly to match, can be done using aerosol cans. Moreover, almost every motorist can do this kind of work. To paint, you need to remove the part, thoroughly clean it and degrease it, after which you can apply paint or primer.
Please note that spray paint (nitro enamel) contains an aggressive solvent. If you pour too much of this paint onto plastic, it may dissolve. The entire part, of course, will not soften, but the surface layer may very well be so.
In order to avoid dissolving the plastic, you should either use a special primer or apply paint by spraying, waiting until the volatile substances have completely evaporated after applying each layer. The first few layers will create a kind of primer that will prevent a thick layer of paint from interacting directly with the plastic. However, even in this case, the last layer should not be applied too thickly.
It is also useful to read: What is useful to know about quickly painting car parts yourself
When painting plastic, the quality of the paint is an important factor. It's no secret that today there are a lot of fakes, and the cans may not contain what is written on it. There have been times when there was paint that could take over 10 hours to dry and still be tacky. High-quality paint dries in no more than 15 minutes, which allows you to paint plastic without the risk of it dissolving.
In conclusion, I would like to inform you about such an innovative method of decorative finishing of any materials, including plastic, as hydrographic printing. A special textured film is applied to water, activated with a special substance, and the part is immersed in it. As a result, this part receives a top quality textured finish.
Tools needed for decoration
Despite the fact that painting with aerosols is simple and convenient and this method allows you to do without painting tools, you still need to prepare the following:
- fine-grained “skin”;
- water, detergent and soft cloth;
- covering material;
- degreaser (white spirit or other alcohol-containing solvent);
- primer (for some types of plastic surfaces);
- gloves, safety glasses and a respirator.
If the item to be painted is heavily scratched or has dents, it is additionally recommended to stock up on plastic putty.