Before you start painting, you need to prepare everything that will be needed during the work process. Make sure you have the following materials and tools on hand:
- masking tape, which can be used to protect surfaces that do not need painting;
- brushes of various sizes and densities;
- container for paint (it is best to take a shallow one - it will be more convenient to work);
- primer with antiseptic effect;
- sandpaper (both coarse and fine abrasive);
- metal sponge.
It is also recommended to take care of face protection. You can use a special mask or wide glasses.
If you paint furniture in your apartment, be sure to protect the floor with a thick layer of newspaper or cellophane, and also provide a constant flow of fresh air.
Methods for aging wood and other materials
There are several ways to age furniture and other types of materials:
- application of special compounds that change the appearance and properties of the top layer of coating (available for wood and metal work);
- painting with several paints of different colors so that the lower layers show through the upper ones;
- processing with sandpaper and other abrasive materials;
- the use of pigments that create the illusion of aging and some dirt.
Dyeing white
Oak, pine, birch and maple lend themselves well to repainting in a light tone.
Dyeing method:
- wipe the surface with a damp cloth to collect dust;
- remove old paint first with coarse sandpaper and then sand with fine-grained sandpaper;
- cover carved decorations, moldings, slats with paint of a more saturated shade - light beige, pale blue;
- Apply white paint in 2-3 layers to the entire object and dried parts.
Tint paint emphasizes the decor on furniture, otherwise it blends into a plain surface.
Wooden furniture can be lightened using bleaching paste. As a result, whitish marks characteristic of antiquity remain on the surface of the product. Porous species are suitable for bleaching - oak, ash. To do this you will need a metal brush.
How to lighten furniture:
- paint the surface, cleaned of dust and old coating, with colored paint in one layer;
- after drying, make furrows with a wire brush along the wood fibers;
- apply the paste.
Clean the dried coating from any remaining paste with a dry cloth and secure the result with a finishing coat of varnish.
DIY furniture painting
The process of painting furniture with your own hands is a very exciting and interesting job. Using only paint and the most ordinary tools, you can return your pieces of furniture to a beautiful look, or simply update the appearance of something that has already become boring.
Painting tools
To carry out painting work on furniture, acrylic paints are most often used. You will also need a primer, rollers and brushes. Whether to use a brush or a roller in your work depends entirely on your desires. The only difference is that it is very convenient to paint large, flat surfaces with a roller; in this case, the painting process is faster, and the layers of paint are applied evenly. And the brush is convenient to use for painting small parts, seams, corners, etc. In addition, we need 2 types of sandpaper, coarse-grained and fine-grained, in order to clean the surface, and a rag with soft bristles to remove dust from the wood.
Preparatory work
Painting furniture yourself will be better done if you disassemble the product that requires painting in advance.
Only in this case the paint will lie exactly on the entire area of the furniture. Thus, the first stage consists of disassembling the piece of furniture and dismantling the elements. Here we will need the simplest carpentry tools. It all depends on the type of fastening, the type of fittings, so it could be a screwdriver, hammer, wrench and much more. The next step will be to remove all obstacles that could spoil the process of applying paint in an even, neat layer. It is especially worth noting that the painting will be of very high quality if there is no glossy coating on the surface - enamel, varnish, adhesive film, etc. Paint should only be applied to wood. In order to remove the old layer of paint, varnish, enamel, use an emery sheet of paper. Only in some cases will it be necessary to use a rasp, but it must be used very carefully. Then the entire surface must be thoroughly brushed with a wide-tipped brush and wiped with a rag; this is necessary to remove dust and wood shavings.
Most people do not prime wood before applying paint, reasoning that wood is already very capable of absorbing paint.
Undoubtedly, wood absorbs well, and if you compare 2 pieces of wood, one has a primer applied before paint, and the other does not, then at first the difference is not felt. But over time, the difference is clearly visible; a piece without a primer has a duller color and begins to peel off, especially when there is high humidity. In this regard, it is worth noting that if you do not want to paint furniture yourself , then it is better to first prime it before applying paint.
Painting furniture in two colors
After the primer has dried, you can apply paint. If we talk about painting in one color, then there are no special instructions; the main thing is that the paint layer is even; if necessary, you can paint in 2 or 3 layers. If you want to paint furniture in 2 colors, for example, the background color is a light shade, and individual parts are darker, then the work becomes more complicated.
How to artistically paint a closet
Before varnishing, the surface can be decorated with painting (manually or using a stencil), appliqué or decoupage composition.
Acrylic paints work well for the first option. Painting is carried out after the base composition has completely dried. It is better to use thick paints so that they do not spread from under the stencil and do not mix with each other. The stencil can be made from a piece of foam rubber. When the ornament is dry, the surface is coated with several layers of varnish.
An aged wardrobe can be decorated with a gold pattern . Gradient coloring is also becoming widespread . A smooth transition of tones is achieved by using compositions with different pigment concentrations or independently varying the dose of color.
Painting furniture yourself: choosing paint, step-by-step instructions
No matter how much you strive to transform already boring furniture, the main thing is to carefully prepare it for finishing work. If you treat this stage negligently, you will most likely have to do it all over again later.
You need to start working on furniture with an inspection. The furniture is disassembled, carefully inspected, and pronounced defects are removed. Now you can remove the old coating - with chemicals, using a hair dryer, or sanding. Fine-grained sandpaper is useful, working in the direction of the wood pattern, so as not to damage the structure and primer. The surface is primed, defects are puttied, degreased using acrylic impregnating material. They cover the product evenly and wait until the material dries, puttying and sanding, removing debris, priming, painting furniture. Use brushes, rollers, aerosols, and spray guns.
Choose the paint carefully - read the instructions. Remember - it does not protect furniture from humidity and the negative effects of solar flow and temperature changes. Therefore, select an appropriate protective coating for the coloring composition.
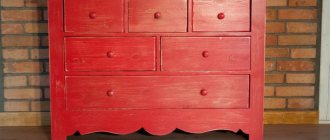
Antique painting of furniture occurs according to certain rules, depending on the chosen style, the effect of a shabby surface. When the product is already painted, sandpaper is used to rub the fastest wearing areas - ribbed areas, corners. And then they clean the entire surface a little to the extent that the owner of the furniture likes it, the effect of a surface contaminated with time. Areas of frequent hand touch are unevenly treated with dark-colored wax, creating a patina effect. The beauty of relief patterns can really be emphasized by applying gold or silver. Patina looks especially impressive on matte furniture. For metal objects, patina is a blue-green coating formed over time, a coloring effect. The main goal is to achieve a special impression from aged wood, based on a unique combination of color and texture, the crackle technique. A special composition of varnish allows you to create a pattern formed by small cracks. After this, the furniture looks as if it was sunburned and began to crack and peel.
Preparatory work
To ensure an even coating, the surface must be properly prepared for painting.
Visual inspection
Before work, assess the condition of the piece of furniture. Old chairs, sofas and armchairs often need to be reupholstered. Before painting, you also need to fix wobbly legs and squeaky doors.
Removing old coating
In addition to sandpaper and the sanding attachment of the grinder, varnish is removed from furniture using solvents or heated with a hair dryer, and then cleaned off. But the easiest way to roughen a smooth surface is by sanding it with sandpaper.
Sanding
Wooden furniture is sanded along the grain lines. For better adhesion, the metal surface is degreased with acetone, alcohol or white spirit.
Puttying and priming
Deep cracks, chips and scratches that could not be smoothed out with sandpaper are covered with putty. For durable coating, latex compounds are used that form elastic compounds. As a result, the paint will not crack due to temperature changes.
Expert opinion
Zakharova Irina Yurievna
Cleaning professional with 15 years of experience. Our best expert.
Ask a Question
For metal, an anti-corrosion primer is used, and for previously painted surfaces, deep penetration compounds are used.
Before applying the primer, areas with putty are sanded again. A surface coated with a water-based primer should not be wiped with a damp cloth before painting.
See also
How can you paint plastic, top 5 suitable compositions and how to apply
Necessary materials
Grandparents, and sometimes their grandchildren, often still use furniture made during Soviet times. The motto of socialist production was often expressed in the phrase “With an axe, but for centuries.” Wardrobes, sideboards or beds are still suitable for use, but over the years the furniture has completely lost its attractiveness.
External wear on objects made of strong wood can be easily corrected by washing and painting. After appropriate processing, it will no longer be “junk”, but “vintage”.
In order for painting furniture with your own hands to bring pleasure and a positive result, you need:
- products for restoration;
- pre-calculated amount of paint;
- appropriate solvent;
- masking tape;
- brushes or rollers;
- paint container;
- protective gloves and mask;
- old newspapers or polyethylene to protect the floor.
What you need for work
Approximate list of materials and tools:
| Inventory | Description |
| Dye | In cans or aerosols |
| Varnish | Glossy, matte or semi-matte |
| Putty, primer | Same base as paint |
| Sandpaper | Coarse and fine grain |
| Plastic bath | For paint |
| Paint brush | With synthetic bristles, for painting small parts |
| Roller | Short pile, for large surfaces |
| Small rubber spatula | For spreading putty |
| Screwdriver | For dismantling prefabricated objects - tables, sofas, cabinets |
| Masking tape | Paste over fixed fittings |
| Newspapers, plastic film | Place under the product |
You will also need gloves and safety glasses for work if the paints and varnishes emit a pungent odor.
Advice from the experts
You should choose four colors of paint: two bright ones, gray and basic white.
Use natural conditions for drying. Apply the next layer only after the previous one has dried.
Wax is applied to areas that are frequently touched and touched, creating a frayed appearance.
Putty creates volume, texture and relief, as if the product had been coated with paint many times.
When using the method of artificially aging furniture, 3-5 layers of paint are enough.
MORE: What rope should I use for packing?
After painting, the product is thoroughly sanded, removing excess paint.
Conclusion
Using fashion trends and color combinations, you can turn modern furniture into antique or vintage items. You don’t have to spend money on purchasing an old wardrobe or chest of drawers. Having chosen the appropriate method, you should try to “age” the necessary item yourself, turning it into an antique item.
How to paint chairs with antique white paint?
If you are the owner of a large amount of reliable, but not very beautiful standard furniture from the times of the USSR, then our article is just for you! Such items are ideal for honing your decorating skills. Unfortunately, the painting process is only easy in theory. It will be quite difficult for a beginner to get a quality result. Therefore, if you doubt your abilities, trust the painting to professionals. If you really want to show your creativity, old furniture that you don’t mind throwing away is best suited for this.
Stage 5. Continue painting
When applying layer after layer of paint, it is important to stop in time. Usually three to five layers are more than enough, but I, succumbing to the not very appropriate love for minimalism on this day, completely limited myself to two. But in my free moments I had time to look at what the other participants in the master class were creating. It was interesting to see how some of the girls - apparently not consciously - created frames exactly in the colors of their clothes. Someone hid many bright layers under a dark top one - and it was precisely these frames that ended up being the most “Provençal”.
Stage 2. Dry
Before applying each new layer of paint, the previous one must be thoroughly dried. It’s better to let the paint dry in natural conditions, fortunately, this takes 10-20 minutes, but we needed to work as quickly as possible, so everyone was asked to take hair dryers with them, and there was a uniform hum in the colorful Apollo photo studio where we worked .
Stage 4. Add putty
Putty is a wonderful thing. Not only can it cover up dents from self-tapping screws, extra cracks, etc. It can also create volume and texture, achieve relief and the effect that a dozen layers of thick paint have already been applied to the item. It was at this stage that we realized why we needed aprons and medical gloves (as well as shoe covers): the easiest way to apply putty turned out to be with our fingers, so even the most careful ones would not remain clean.
Stage 3. Rub with paraffin
Do you remember how in childhood, before painting with watercolors, you ran candle stubs across the paper and got beautiful patterns? It turned out that you can work with wooden objects in the same way. We rubbed paraffin on those parts of the product that should be beautifully shabby: edges, corners. Later, the paints of the next layers will come off more readily from these places.
