Home decorations made with your own hands are gaining more and more popularity. They add special charm and comfort to the room. Using various techniques, skilled needlewomen decorate bottles, flower pots, make bookshelves and kitchen shelves, walls and even ceilings beautiful. We suggest starting small and decorating a glass jar with your own hands.
Hand-made jewelry is not only unusual in appearance, but also contains a piece of the soul, giving a special atmosphere to the home interior.
Which jars to take and where to use them
Painting glass jars is a simple and accessible technique that is highly valued by designers. Unusually decorated products have such a stunning look that they can become both a catchy decoration for an apartment and the basis for a gift to friends and family. You can put homemade jam or sauce, homemade sweets, and even a New Year's garland in jars painted on the outside! In addition, beautiful utensils will make excellent holiday decor:
- a self-sufficient accessory;
- a vase for flowers and fir branches;
- candlestick or night light;
- decoration for the kitchen and a container for cereals;
- container for storing small items.
Absolutely any jars are suitable for painting and painting - from three-liter jars to those sold with baby food. You just need to decide on their purpose and choose the appropriate option.
Still life painting
Painting with stained glass paints on glass not only paints glass vases, but also creates indescribable still life paintings. To draw, just find a square or rectangular piece of glass. If you paint the glass correctly, it will turn out to be a masterpiece that will wonderfully decorate the kitchen, hallway, hall, and so on. Inventory and materials you can’t do without:
palette where paints are mixed;- a pair of cotton swabs;
- contours;
- a set of stained glass paints;
- regular graphite pencil;
- blade;
- tassels;
- glass;
- cosmetic pencil;
- several cotton swabs;
- alcohol;
- paper sheet;
- wooden frame for glass with a pattern.
In addition to still life, there are other subjects; the choice is up to the artist.
Step by step coloring
After everything necessary, the master proceeds to the main thing - degreasing the glass.
If this is not done, the quality of the work will be poor, since the paint will not be able to firmly adhere to the glass surface. If a beginner wants his work to be different from others, then he must make his own unique sketch. To do this, you will have to make a template by hand. The still life you like is selected, then a sheet of paper is taken and the picture is redrawn so that it turns out modified, with added details. Not everyone can draw beautiful drawings by hand, so the problem can be solved by printing them on a printer.
After making the sketch, you should begin transferring the picture to the glass surface. The most common and effective way: take the outline, place the sketch under the glass and draw the main lines. The outline can also be drawn using a cosmetic pencil. This outline of the image can be easily erased with cologne or regular alcohol. It is important to close the entire outline, since when pouring, paint can seep into the gaps of the lines and ruin the still life.
Very often, beginning artists are faced with the following problem: during the process of drawing a contour, a mistake may occur; the lines may be slightly located in places other than intended. In this case, a blade helps. The master uses them to scrape off uneven areas and draw new lines. But the manipulation is carried out only after the contour has dried for three hours. The drying time can be shorter, it all depends on the thickness of the contour made.
Materials for painting jars
Paints for painting glassware are sold in construction and art stores. Acrylic compositions are best suited for this purpose; they produce bright, opaque shades, do not have an unpleasant odor and dry fairly quickly. Instead, you can use stained glass paints, but the resulting pattern will be translucent, which is not always suitable for glass decoration.
Also for work you need to prepare a container for water, brushes of different sizes, napkins and rags for erasing strokes. Professionals prefer to coat the glass with a special primer before painting, but this step is not necessary.
How to paint: sponge, brush or spray
- In order to paint a glass or plastic bottle, you can use a nylon brush, but in this case it will be very difficult to achieve a perfectly flat surface.
- You can use a sponge and dip it into the paint using point-to-point movements and apply it to the surface. This way the marks will not be visible, but you will have to cover the bottle with several layers of paint, each of which must dry, and this will take some time.
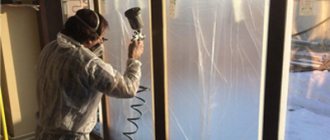
- The fastest and easiest way to achieve an even paint job is to use spray paint, which dries very quickly.
But you shouldn’t spray paint in an apartment, because it has a strong smell and takes a long time to air out.
External painting of cans for the New Year
Before starting work, be sure to thoroughly clean the product from dirt and dust. Wipe off traces of glue and completely clean off the label or price tag. The glass is degreased with soapy water or alcohol and allowed to dry. Then they start working:
- apply the first layer of acrylic paint to the outer surface of the object using foam rubber or a brush;
- as the paint dries (about 20-30 minutes), apply another layer to make the coating thicker;
- when completely dry, turn the jar over and paint the bottom in the same way in 2 layers;
- to give the product an aged look, lightly pass over its surface with fine-grain sandpaper;
- To ensure a beautiful shine, the top of the jar is coated with acrylic varnish in 2 layers.
Painting the outside of the can
Glass bottle paint
You should be very careful about the choice of paint, since the final result will depend on this.
- Regular waterproof paint works well, as do acrylic paints, which come in matte and glossy, transparent and thick, and are sold in cans and sprays.
- Acrylic paints can be used in the form in which they are sold, or they can be diluted with water, it all depends on what effect you want to achieve.
- There are also universal paints on sale that are perfect for painting glass and plastic bottles.
How to paint the inside of a jar
For painting, utensils are prepared in a similar way - they are well treated from the inside, the surface is degreased and dried. Such a souvenir cannot be filled with water, but it is ideal as a New Year's decor and as an independent decoration for the home.
Painting is done in this way:
- pour a little acrylic paint inside the beam (only 30-50 ml is enough for a liter bowl);
- shake the coloring matter vigorously in the container, tilt it in different directions, put it on its side and roll until the entire inner surface is completely covered with paint (leave gaps if desired);
- add water to a mixture that is too thick and repeat all the steps again;
- Place a flat plate on the table, a pack of paper towels on it, place the jar with the neck down so that excess paint runs off;
- after a few minutes, turn the jar over to the bottom, wipe off the paint from the neck with a damp cloth and allow the product to dry;
- If the coloring is of poor quality, repeat all the steps again or even add a second color.
Several important aspects of decoration
Before you start decorating, you need to consider several important points that affect the further course of action:
- Can size. The amount of consumables and the choice of design depend on this parameter. After all, a certain design may be suitable for a small jar, but look bad on a large one.
- Purpose. The choice of method and material for decoration depends on this moment. After all, the purpose of the decorated jar depends on the conditions in which it will be located and how it will be used.
- Room style. This aspect must be taken into account, because we are creating decor for a specific room that has its own style and color scheme. Make sure that your creation fits harmoniously into the overall picture of the room.
Small vases for fresh flowers
Now you can safely take a glass jar, purchase the necessary materials for decoration and begin finishing. But first we need to decide what materials we need based on the chosen technique.
See also Interior collage
Patterned painting of cans
If you have artistic skills, you can easily make an original souvenir from an ordinary glass jar. If you don’t have professional skills, stencils printed from the Internet will help. The simplest way to pattern paint is this:
- apply a stencil to a dry, clean surface, “paint over” its slots with hot hot melt glue using a gun;
- allow the glue to harden, then apply acrylic paint of the desired color to the entire area of the jar;
- As the composition dries, the adhesive strips are removed and a layer of varnish is applied on top.
Most often, jars are painted with simple patterns - curls, hearts, snowflakes, and inscriptions. You can paint the outside of the product, and then make a stencil design with contrasting paint.
The contours can be either clear or blurry, bright or translucent. It will be quite simple to draw a picture from a stencil that is glued into the jar from the inside (this option is suitable for a container painted in a loose layer).
What paint to choose for a plastic bottle
How to paint a plastic bottle for crafts? For decoration, you can use exactly the same paints as for glass. It is best that they are not aggressive.
- Acrylic paints are perfect for painting plastic bottles, but to protect the surface, you need to coat them with colorless acrylic varnish.
- Colored acrylic varnish is an ideal way to paint plastic bottles for crafts.
- Spray paint is also suitable for decorating a plastic bottle.
- The most durable and beautiful effect is produced by car paints; plastic bottles painted with this paint will not change their color for several years.
- You can also paint with regular enamel paints.
What can be made from a painted plastic bottle: a flowerpot, a beautiful vase, or watch the “Candlestick from a plastic bottle” master class.
Acrylic painting on glasses
Glass glasses are easy to purchase. They are inexpensive and can be purchased at any kitchen supply store. But usually such things are found in every home. To surprise guests, you can make exclusive masterpieces from glasses, just use your skills and ingenuity. Tools and materials for painting with acrylic paints on glass for beginners:
- any solution containing alcohol, for example, cologne or lotion;
- scissors;
- acrylic contour;
- glasses, preferably not faceted, but round;
- graphite pencil;
- paints for painting on glass;
- tassels;
- album sheet;
- cloth or napkin.
Important! During the drawing process, bristles from the brush may stick to the image, so the work being done should be inspected from time to time. If the lint dries, it is difficult to remove.
Door decor
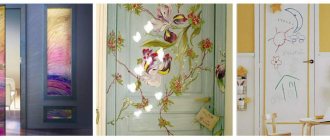
Painting glass doors is now gaining popularity. This solution is used for wardrobes, interior doors, and kitchen units. Stained glass painting produces extremely beautiful results.
How to create stained glass windows
- Remove the door from its hinges.
- Prepare a sketch of the future drawing.
- Draw a sketch on the glass door of the kitchen unit with a pencil and then with a black felt-tip pen.
- Take out the glass and degrease it.
- Apply the contour with a special pencil-contour on the glass.
- Do not break the outline, otherwise the paint will spread.
- Give the outline time to dry.
- Paint over the drawing.
- Let the glass dry. This takes days.
How to make stained glass on glass, see here:
Step-by-step work with description
Painting on glass requires degreasing the surface of the object. The technician wipes the surface with cotton wool soaked in alcohol, and then removes the applied alcohol with a dry cloth. A landscape sheet is needed for the sketch. The author must draw the picture that he wants to depict on the glass. Finding an image you like is very easy - on the Internet, in a book or magazine. It is important that the picture fits the parameters of the glass and fits on its walls.
The sketch made is cut out with scissors and placed evenly from the inside of the glass. It is advisable to secure the paper blank with tape. Otherwise, during the redrawing process, the image may move, and it is difficult to restore it. An outline is drawn on the outside of the glass. All drawn lines are closed; contour breaks are not allowed. This will make it easier to upload the image. After which the made contour dries for about 3 hours. It all depends on the thickness and layer of the contour.
After the outline has dried, the novice artist must fill in the individual details of the picture. Only basic coloring is used without mixing several colors. Individual fragments will be separated, making it easier to apply subsequent colors. When the glass is decorated, you will have to re-draw the contours separating the details of the drawing. This is an important rule, otherwise the whole picture will merge together and will be poorly visible. The acrylic paint dries, and the master paints the light and shadow areas - this will add realism.
Some craftsmen use beads and rhinestones, gluing them onto a glass. In principle, the work is completed. Many craftsmen create unique glass paintings and spend little time on it. However, painting quickly will require experience. It is better for a beginner to practice on a piece of glass, and then start painting glasses, vases and creating paintings. If there are old glass objects in the house, then they can be made truly unique and beautiful. It’s enough to turn on your imagination and stick to the glass painting master class for beginners.
What will you need for work?
- Clear glass jars and bottles (you can also take green and blue bottles, orange glass jars);
- Acrylic paints - artistic paints are quite suitable for you, or you can purchase a special one in the department for creativity; Firstly, acrylic dye dries quickly; while it is still wet, it can be removed from the surface with plain water. Secondly, when it dries, it will adhere to a reliable film. It can only be removed with sandpaper or solvent.
- Liquid for degreasing the surface - acetone, white spirit or regular alcohol.
- Synthetic brushes - for the first “test of the pen”, take a flat brush, as well as a round and oval one. For small details you will need a thin brush, and to fill the background - a flat and large one (even a paint brush will do).
- Dish sponge - if you want to create a relief effect
- Medical syringe - if you want to paint a vessel with a narrow neck from the inside.
- Palette - if you don’t have a special one, take some old dishes. After finishing the job, you can throw it away or wash it.
- Primer for working on glass - optional.
What can you make from tin cans?
10 ways to put tin cans to good use...
- A place to store clean towels...
- Hairdryer holder…
- Growing plants
- Baking dishes...
- Stand for kitchen utensils…
- Decor in the form of candles
- A vase for flowers …
- Wall decor
Interesting materials:
How much does 1 shot from a tank cost? How much does 100 grams of human hair cost? How much does a pressure measuring device cost? How much does the Beeline unlimited tariff cost? How much does a ticket to Divo Island cost? How much does a ticket to the Medeo skating rink cost? How much does a ferry ticket to South Korea cost? How much does a ticket to Sapsan Tver St. Petersburg cost? How much does a ticket from Vladivostok to Korea cost? How much does a ticket to the Bolshoi Theater for the Nutcracker ballet cost?
