Regardless of what defects in the wooden floor in the house need to be eliminated, restoration work is carried out in several stages. First, you should prepare the room for renovation. Before refinishing a wood floor, furniture is removed from the room, curtains are removed, and good ventilation is ensured. After completing the preparatory stage, they begin directly to the repair: sanding, replacing dried boards, eliminating cracks and other necessary work. The final stage is the selection and application of paint and varnish material.
Do-it-yourself repair painting of a wooden floor
Many people think that restoring old plank floors in a wooden house is impossible, and even if it is possible, it is difficult to do such work.
This is wrong. Probably, in the past there were difficulties with repairing wooden floors, because such work required special materials and tools that many could not afford to purchase, but today there are no problems with this. The market offers a selection of paints, varnishing compounds, sanding equipment and other specialized tools with which you can repair a wooden floor yourself. In addition, today you can rent a sanding machine, in which case restoring a wooden floor will be cheaper than if you had to replace the old floor covering with a new one.
The main advantage of wood is that the material can be easily processed, so if the house has an old and ugly floor, which also creaks, this is not a reason to tear off the boards and throw them away. Even if some of the floorboards are very loose and cracks appear on them, it doesn’t matter, such a problem can be easily fixed. In this article we will talk about how to repair and paint old floors, find out when you need to replace old floorboards and much more.
By repairing or restoring your flooring correctly, you will get a beautiful, reliable and durable wooden floor that will delight you with its beauty for a long time. The most common problems with wood flooring are:
Now let's talk in more detail.
How to restore parquet after flooding?
Everyone knows that wood absorbs water well and expands at the same time. And if the parquet floor is flooded with water, then before your eyes you can see two scenarios:
- a swollen parquet board torn from the base;
- deformed parquet elements that have not come off the base.
In the first case, you will have to replace damaged parquet elements - you can do this yourself, but only if small areas of the flooring are damaged. If the parquet boards are deformed, while maintaining the strength of the fastening on the base, restoration work can be carried out without replacement.
What can be done with swollen parquet:
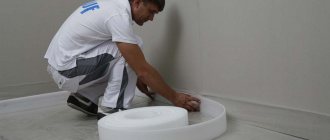
- Thoroughly warm the area with a hair dryer - this is a long process, it will take at least an hour and a half. The smell of mastic that appears will indicate that the heating is complete.
- Now you need to quickly spread any textiles - burlap, knitwear, cotton - on the heated place.
- You need to place a weight on top of the heated section of the swollen parquet. It must be very heavy - at least 10 kg per square meter. m - these could be tube TVs (old granny’s apartments usually have such “goods”), stacks of thick books, weights, and so on.
- After a day, remove the load and see what happened to the damaged area. If the swelling has decreased, then the operation to restore the parquet must be repeated. Otherwise, the parquet is hopelessly damaged and you should prepare for a full replacement of the floor covering.
Please note: if the parquet was flooded with water not today/yesterday, but the swelling was a week ago, then it is not worth carrying out the described operation - fungal colonies have already awakened, multiplying and actively living in the thickness of the wood. Step-by-step video instructions for repairing parquet with your own hands are presented in the video review:. Step-by-step video instructions for repairing parquet with your own hands are presented in the video review:
Step-by-step video instructions for repairing parquet with your own hands are presented in the video review:
What to do if the floorboards are held together?
When the floor squeaks a lot, it is very annoying. How to repair an old creaky wooden floor? In this case, you first need to find out the reasons for the creaking sound, and most often there are three of them:
Often this problem can be solved by using a small wedge made of wood: hammered between the joist and the floorboard. This action will allow you to support the boards that are very loose and eliminate the backlash, then the creaking will stop. But if friction occurs between the boards, clean the cracks from the accumulated debris and only then seal them with foam. However, it will relieve the squeak for a short time, because over time it will begin to deteriorate, and then the unpleasant squeak will reappear.
If the cause of the annoying creaking of the flooring is the friction of nails hammered into the boards against the wood, in this case, instead of nails, you need to screw in self-tapping screws, then the boards laid on the floor will be more strongly attracted to the installed joists, eliminate the formed cracks, and will not allow the floorboards to bend. Today, this is an effective way to repair floors on joists while eliminating squeaks.
There is another way that allows you to remove squeaking - installing anchors.
Attention! It makes sense to use anchors if there is a concrete base under the wooden floor. However, please note that this method will require labor from you.
True, this method of elimination is expensive, but you will get rid of squeaks for a long time. The wood is fixed to the concrete base using anchors. Due to the fact that the anchors provide reliable fixation of the floorboards, the risk of sagging disappears, and therefore there will be no squeaking. This method is used when there is a concrete base under a wooden floor.
Ways to eliminate squeaking
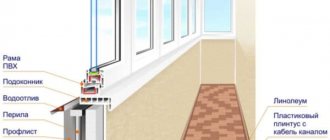
Technology of laying linoleum covering
You can lay linoleum on a wooden floor in the following ways:
No gluing. This method is the simplest, but not reliable.
Only suitable for small rooms up to 12 square meters. Its essence lies in the fact that a carefully leveled coating is simply pressed along the perimeter with baseboards. Fixed with double-sided tape. This installation technology ensures longer service life of the material.
Adhesive tape is first applied around the perimeter of the room, and then in the form of a lattice with a side of about 50 centimeters - over the entire surface of the floor.
The protective paper film from the adhesive tape is removed only when the linoleum is already directly glued. And not all at once, but meter by meter, as the work process progresses. Each area of the surface is thoroughly smoothed. With glue placement. The most durable option, and if the room is large, then the only reasonable one.
Let's look at the adhesive installation of linoleum on a wooden base in more detail. Work order:
We invite you to use our online calculator to calculate the required amount of linoleum:
If the room is large, you will probably have to work with two or even three sheets of linoleum.
This, of course, complicates the task a little, but the whole principle remains the same - first glue and press one half of the canvas, then the second. Just remember that each subsequent canvas must overlap the previous one (about 2 centimeters). This allows you to cut both edges at the same time, resulting in perfectly joined seams.
The cutting of joints is carried out two to three days after laying the linoleum. It is produced using a long metal ruler and a special sharp knife. The resulting seams are cleaned of any protruding compound and pressed with a board and weight until completely dry.
If the material sheets were glued really carefully, the seams will be almost invisible. But it won’t hurt to completely isolate them.
For this, cold or hot welding is used. The strongest possible mechanical joint is obtained by hot welding, but in everyday life they usually use cold welding. This is explained by the fact that working with it does not require special equipment or special skills.
How to repair if the floorboards are loose or damaged
If you're wondering how to repair a wood floor that's damaged or wobbly, these tips will help you out. So, if the floor is wobbly, then this problem can be corrected if the floor boards are pulled tightly to the joists. Self-tapping screws are used for this. A cracked floorboard can be easily replaced with another one, or you can saw off the damaged section of the board and put a new piece there. As you can see, repairing a damaged or wobbly wood floor is easy, as long as the repairs are carried out in a specific sequence.
Leveling the floor
To level an old wooden floor, you can use the following methods:
Among these, the easiest method is puttying. To do this, you need to prepare a mixture of PVA glue and sawdust. The mixture should be thick. Then pour it between the beacon slats. The mixture can be poured in several layers. The thickness of each layer is from one to two centimeters. It will take time for the mixture to dry completely, so this method is not recommended if a quick restoration of an old, uneven wooden floor is required.
If you have your own grinding machine, then you can level the flooring using the scraping method, after which the boards can be painted or varnished. If you do not intend for the old floor to serve as a finishing surface, in this case leveling can be done using OSB boards or plywood sheets.
Repair of OSB floors with slabs
Self-repair of a plank floor using slabs is good because you can then lay parquet boards or laminated panels on such a base under the floor without any problems. Plywood sheets are mounted on joists, on a screed or on a wooden base. Leveling with OSB boards provides the advantage of creating additional waterproofing for the wooden floor covering. Leveling wooden floors is labor-intensive, but a repaired and smooth floor will delight you with its beauty for a long time.
Attention! The final restoration of a wooden floor involves painting or varnishing the laid and repaired boards using special compounds.
Leveling with plywood on joists
Leveling with plywood on joists
If, in addition to the wavy surface, the floor has a noticeable slope, another leveling method is used - attaching plywood to joists. This way you can even out differences from 3 to 10 cm in height and prepare a reliable base for any coating. Beams, strong boards, and strips of plywood up to 4 cm wide are used as lags. The preparation of the base is carried out as standard: everything unnecessary is taken out of the room, the baseboards are removed, the old coating is cleaned, and defects are repaired.
Step 1. Marking the floor level
From the highest point of the base, a mark is projected onto the wall using a level gauge. Step back upward a distance equal to the thickness of the coating and put another mark. Now, using a water level, marks are placed at this height along the entire perimeter and connected in one line. This is the floor level.
Step 2. Installation of logs
Plywood joists
If there is a risk of the base becoming damp, a waterproofing film is placed on top of the boards; in other cases, the logs are attached directly to the wooden surface. The beams can be installed both along and across the boards.
Installation of logs
The logs are laid flat in parallel rows at a distance of no more than half a meter and fastened with nails. Then, using a level and wooden pads of different thicknesses, each joist is aligned horizontally. To prevent the linings from moving, they are glued together. When all the logs are level, the nails are driven in completely, securely securing the beams to the wooden floor.
If the plywood is thin, the logs should be placed at a short distance
Step 3. Laying plywood
Laying plywood
Sheets of plywood are cut into squares and laid out on joists for fitting. On each square it is necessary to immediately mark the places for fasteners so that during installation you do not drill extra holes. If the material lies neatly and evenly, there are no unnecessary gaps, you can attach it to the joists. Start with the outermost square and gradually move along the row. The screws need to be slightly recessed into the plywood so that the caps are 1-2 millimeters below the surface. Be sure to watch the joints - they should not match anywhere.
moisture resistant plywood
Plywood flooring on joists
Step 4. Installation of ventilation holes
To extend the life of the wooden base, it is necessary to make small holes in the floor for ventilation. In opposite corners of the room, preferably under heating radiators, determine a place for ventilation grilles and make neat cutouts in the plywood. A ventilation grill is installed on top, covering the joints with glue or sealant.
Ventilation grill
Step 4. Finishing the floor
The finished coating is checked with a building level, all joints and fastening points are inspected. If no defects are observed, the seams and recesses from the screws are covered with putty, then the surface is sanded and dust-free. Finally, apply the primer mixture and allow the base to dry.
Priming a plywood floor
Painting old wood flooring
What paint and color to choose for an old wooden floor can only be decided after preparation. This circumstance plays a big role when painting a wooden surface. So, if paint is applied to old boards, no matter what color, it must be completely removed. Such repairs will require strength and patience from you. It’s good if you have the opportunity to use scraping equipment, which is equipped with a special bag-shaped dust collector, to remove old paint. In this case, the paint removal process is easier.
Removing paint using scraping equipment
Considering that a scraping machine is expensive, it is unreasonable to buy it for a single use, but you can rent such equipment. In addition, today there are a huge number of companies that are ready to perform such work, but many cannot afford their services. In this case, there is only one way out: to scrape the wooden floor yourself. And for this we need to prepare the following tools:
Now you can carry out work to remove old paint. The process consists of several stages:
Today, on store shelves there is a huge assortment of paint compositions and paints of any color that are designed specifically for the floor, so there will be no problems with the choice. However, if you find it difficult to make the right choice, then ask for advice from a sales consultant; he will definitely help you decide on the color of paint to cover a wooden floor.
But you will learn how to properly paint a wooden floor from this video:
Source
Materials for restoration
To protect the parquet floor from external influences, it is opened with special varnishes.
There are 4 types of parquet varnishes:
- Alkyd and uralkyd varnishes. They are inexpensive, do not emit toxins, dry very quickly, so you can be indoors within an hour after varnishing. However, such varnish will last no more than 10 years. Uralkyd varnishes are somewhat more durable, although they are more expensive. As a rule, they are used for short-term repairs followed by sanding and varnishing, as well as around the perimeter of the room.
- Based on epoxy resins. Such varnishes provide a durable and reliable coating for 30-40 years, although they are not cheap. As they cure, they release toxic volatile substances, so you should not start working without personal protective equipment (gloves, respirator, goggles). Windows should be open, but the door to adjacent rooms should be tightly closed. It will take about a week for the epoxy varnish to harden and gain density. Only after this can you be in the room.
- Acrylic varnish consists of a base and hardener, which are mixed immediately before application. This composition is practically non-toxic, but much more expensive than epoxy. With proper care, the service life of the coating will be 50 years or more.
- Water based. Rather, it is a finely dispersed suspension of some polymer, for example, PVA, in water. This varnish dries in a day, while it is non-toxic and inexpensive. Provides long-term protection to wood by penetrating deep into its structure. Mastic can be applied over the coating. The treated surface becomes less sensitive to minor mechanical damage. However, such varnishes somewhat change the color of the wood and quickly fade in direct sunlight.
Repairing wooden floors: features and step-by-step instructions (20 photos)
The use of any type of floor is associated with its destruction and abrasion of the top layer. Even the most advanced maintenance methods will not provide 100% protection against scratches, dents, or varnish wear. How to refinish a wood floor to make it an elegant feature in your home, no matter its age.
From our article you will learn:
Wood Floor Refinishing – When Should You Make a Decision?
Each type of wood, regardless of its hardness and resistance to mechanical damage, wears out under the influence of use and can be subject to various deformations. Sometimes boards are subject to deformation - they are inadequately or too heavily used, they bend, swell under the influence of water, or peel off due to improperly used glue.
However, the most common problem is the rubbing of the top protective layer. Even high-quality varnish can disappear from wooden boards after several years of walking and moving household appliances. This results in chafing, uneven wood consumption and unsightly stains or even discoloration.
The most frequently used places, such as the corridor, passages in the living room or kitchen, as well as the floor in the children's room, are subject to intense abrasion of the varnish. It is also difficult to avoid small dents, scratches and marks, especially when the floor is made of pine, basswood or mahogany. Pets' claws and children's toys leave marks.
Solid wood floors can take a lot of wear and tear, and the longer you wait to protect any abrasions or cavities that occur, the more likely it will be impossible to completely remove them later. If the boards are exposed to water, swelling and other substances - in a word - the wooden floor needs repair!
Hardwood floors - how to prepare for renovation?
If the surface you want to update is limited to one specific room, the renovation will be relatively simple. The hardest part is removing larger furniture and items sitting on top of it. It would be optimal to remove all items from the room or kitchen, because when cleaning the old layer of wood, dust and dirt appear, which settles in the smallest cracks. You'll avoid cleaning and protect your favorite things.
If it's not possible to take everything from a room or kitchen, you can theoretically move them to one corner and do the job in stages. However, this can be more complex and requires careful protection of the furniture from dust. It is also necessary to take into account that sometimes individual parts of the floor will differ slightly in color or shade.
Wood floors require careful preparation before cleaning. You will need appropriate equipment and protective clothing. After removing unnecessary equipment, it is also worth cleaning the entire floor, removing any stains and everyday dirt. This will make it easier to sand small parts and cavities later.
To properly repair a floor, you will need protective gloves and glasses, different weights of sandpaper, a sander, a wood paint roller, primer, varnish or wax. Remember to start work early in the morning - this way you won't have to continue working the next day, and strong daylight will allow you to work the surface more accurately.
How to quickly remove?
There are several ways to remove paint from a wall, each of which differs in the complexity of execution, the necessary tools, and the presence of certain knowledge and skills.
Mechanical methods
The mechanical cleaning method involves the use of the following tools:
- painting knife;
- putty knife;
- chisels;
- scraper;
- axe.
Algorithm of actions:
- Prepare the tool. It is necessary to check that the blade is well sharpened and tightly fixed to the handle.
- Place the tool at an acute angle to the wall, and make many cuts with short strokes (the more, the better).
- Moisten the wall generously with water from a spray bottle.
- Scrape or knock down the swollen layer of paint.
Work with hand tools is carried out only in protective glasses, gloves and thick clothing. Otherwise, there is a high risk of injury from flying pieces of old decorative coating.
Heat treatment
The simplest, fastest and most effective way to clean a wall is to heat the decorative coating with a hairdryer. Everything is very simple: the paint on the wall is burned with a stream of hot air from a hair dryer, and then very quickly removed with a spatula or scraper.
In order for the cleaning process to go faster, it is carried out simultaneously by two people (one burns, the second immediately removes the paint).
Limitations of using the thermal method:
- it is problematic to use the burner in apartment buildings;
- It is unacceptable to burn the wall without using personal protective equipment (during the burning process, the paint releases elements hazardous to health);
- absolutely not suitable for removing decorative coatings from metal and plastic surfaces;
- It is prohibited to use the thermal method in rooms without ventilation.
In cases where it is not possible to use a construction hair dryer, it can be easily replaced:
blowtorch (it is important to follow fire safety rules); iron and foil (cover the painted surface with foil and then heat it with an iron); household hair dryer (inferior to a construction hair dryer only in terms of service life).
Electromechanical
You can remove paint from a concrete wall as quickly as possible using an electromechanical method. Simply put, a variety of power tools are used to clean walls:
- A grinder with a wide grinding wheel (it is recommended to use a wheel with an abrasiveness of at least 40). You can also use a grinder with a special attachment in the form of a steel wire brush.
- Drill with a paint remover attachment. The nozzle is a structure of three chains, each of which has thirteen links. During operation, the chains break the decorative coating (flying off in pieces) with a minimum amount of dust.
- Drill with crown bit. The process of cleaning a wall with such a power tool is quick, with minimal risks of injury and dust formation. The only thing that needs to be taken into account is the high cost of the nozzle and the need for its frequent replacement.
Work using power tools is very rarely used on wooden surfaces (active rough cleaning disrupts the structure of the wood).
Use of chemicals
The chemical method of removing paint from a wall involves the use of special liquid or gel removers and solvents:
- White Spirit,
- acetone.
Work with chemicals is carried out only in a very well-ventilated area and using personal protective equipment (gloves, respirator, goggles).
Basic rules for applying chemical solvents
- liquid compositions are applied using a spray gun, gel solvents - with rollers or brushes;
- before cleaning the wall, you must wait a certain period of time (indicated by the manufacturer on the label);
- remove the softened paint using a spatula or iron brush;
- The wall cleaned with chemical reagents is additionally treated with an acidified solution (water with the addition of citric acid or vinegar).
If signs of illness (dizziness, nausea) appear during the use of chemicals, work must be stopped immediately and the premises must be left.
Is sanding a wood floor always necessary?
Before starting work, it is worth answering the question, what final result do you expect? If you are afraid of difficult coatings and repairs, you can choose only exposed areas on the wood to protect the varnish. However, dot painting on wood can give a very unsightly effect, which is also short-lived and requires constant repetition.
Sanding wood floors involves dust. Even with very good equipment, this is a long and complex process. If only a small layer of the floor is damaged, near windows, joints with other materials, such as stone tiles or metal, you can sand the surface and re-seal the surface. However, these are risky actions that may not bring the expected effect.
How to update an old wooden floor?
An owner using wood for flooring may notice many benefits from this approach.
A wooden floor is reliable, has high insulation characteristics, looks impressive and helps maintain the most favorable microclimate in the home.
But in order for this type of finish to remain in good condition, the wooden floor must be properly updated from time to time.
What actions does proper treatment of a wooden floor require? The most important of them will be described below.
How to care for parquet
In order for parquet to serve faithfully for many years, to remain in good condition and not need repairs, you need to be able to properly care for it (for more details: “How to care for parquet correctly - tips”). Most of all, parquet is damaged by direct sunlight, large particles of dust or sand, as well as insufficient or excessive humidity. When exposed to excess moisture, parquet swells, in too dry a room it dries out, the sun makes it ugly and dark, and sand destroys the top layer of the protective coating.
Subtleties of care:
- Avoid direct sun - the light should be diffused by tulle or vertical blinds. Horizontal blinds are not recommended in this case, since, on the contrary, they create a directed flow of sunlight.
- You can walk on the parquet only in soft indoor shoes, and under no circumstances in street shoes. Before entering the room, you can lay a small mat made of fabric so that grains of sand linger on it. Pile carpeting will not protect parquet floors from sand.
- To bring less dirt into your apartment, it is better to place a plastic pad at the front door for cleaning shoes.
- Do not allow humidity levels to drop below 20%. In winter, place containers of water under the radiators to humidify the air.
- Ventilate the room as often as possible. In summer, curtain the windows with mosquito netting, which will also serve as protection against large dust particles.
- You need to vacuum your parquet floor, the more often the better. But wet cleaning can only be done manually and no more than once a week. A microfiber cloth is ideal.
Sanding wood floors
This is the most important and priority activity that should be carried out in relation to wooden floors.
Sanding helps remove the worn layer of wood, reduces the risk of rotting, and allows you to get rid of small cracks on the boards.
Today, special grinding machines are used for grinding. They are equipped with sandpaper, which carefully removes a thin layer of wood and returns the floor to its former freshness and presentable appearance.
Repairing cracks in floor boards
After sanding, it is necessary to inspect the wooden flooring and identify any cracks present on it. You can get rid of them using wood putty. You can make it yourself if you mix a little wood glue and sawdust.
The mixture should be thick. This putty is applied to existing cracks, and also covers the gap between the floor boards.
Sometimes the entire floor area is covered with a thin layer of this mixture. But such processing also requires subsequent re-grinding, which allows you to eliminate excess putty.
After the applied composition has dried, the floor is treated with a wood primer.
Attention! If there are significant gaps, they are sealed using wedges cut from wood; sometimes it is also necessary to replace rotten boards.
When all these measures have been completed, you can begin finishing the cladding.
Renewing wood by painting the surface
Painting a wooden surface is the most famous, inexpensive and “ancient” way to renew old wood. It's a simple process.
- Paint is applied to the surface using a brush, roller or spray gun.
- Not the most effective and durable method, of course, but widely used.
The main disadvantages of renovating old wood are:
The paint, after drying, leaves a film on the surface of the wood that prevents the penetration of moisture, but also prevents the wood from breathing
Staining hides the natural grain of the wood
The staining method is a short-lived method of renewing wood. As a rule, the paint composition applied to the surface lasts for 1-2 years. No more.
Finishing wood floors
Wooden floors are covered with paint, varnish, and various types of protective impregnations. It is important to consider that paint hides the natural texture of wood, and varnish impairs its breathability.
But modern impregnations make it possible to make the texture of wood brighter and do not negatively affect the practical capabilities of the material. Some formulations also contain antiseptic substances to protect against fungus and mold.
Such actions must be carried out regularly. On average, they have to be performed every 5-7 years. With a responsible approach, it will be possible to keep a wood floor in excellent condition for decades.
Source
Selecting finishing material
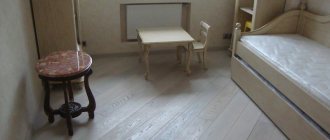
In the process of refinishing a finished wood floor, you will also need boards. Their dimensions are not very important, because the main load will fall on the outer covering. Today on the market there are boards whose width reaches 135 mm, while the most popular are 100 mm products. The thickness of the floorboards can be selected taking into account the size range - from 28 to 40 mm, but most often boards of 30 or 35 millimeters are used.
When choosing a length, you need to focus on the largest size of the room. One floorboard should cover the entire room lengthwise. It is not recommended to install lumber with a thickness of less than 22 mm, as this coating will sag and individual elements will quickly fail. The quality of the wood will play an important role, so you need to choose the best grade of floorboards with a minimum number of defects.
Repairing an old wooden floor or replacing it completely? How to update an old wooden floor?
Wooden flooring is a rather fancy material. Over time, it loses its former aesthetic appeal and requires high-quality repairs or replacement with a new one.
The main disadvantages of old wooden floors are that the floorboards begin to sag, rot and crack somewhere; warp in places where dampness appears; they squeak a lot. Old floors can even harbor insects!
Many people get so used to their original wooden floor that they do not want to change it to another covering. If replacing an old wooden floor is not your thing or you don’t have enough money for a new flooring, you can simply renew the old floor .
The stages of “rehabilitation” of an old floor are not that complicated.
Assessment of the condition of the wooden base
You can get a first idea of the condition of the floor when purchasing a home. To do this, it is enough to energetically walk along it, or even better, jump. If the floor does not make any sounds and does not wobble under your feet, it has passed the preliminary test. Even if the surface of such a coating is not very smooth, it can almost certainly be leveled with minimal effort.
Places where the color of the wood has changed should be tried to pierce with a screwdriver. Healthy wood should be solid, but if you manage to pick out a small piece of joist, you're out of luck, your floor is susceptible to rotting
The main enemies of a wooden floor are moisture and insects. Even a seemingly durable floor can be susceptible to rotting or damage from woodworms. Before you begin restoring the floor covering, you need to make sure that the joists and the underside of the boards are intact. To do this, you need to tear off one of them and look under the floor. Armed with a flashlight and a screwdriver, look under the floor and carefully inspect all the wooden parts.
Another natural enemy of wood is insects that lay larvae in it. Having hatched, the “cubs” can live in your floor and feed on it for about 4 years. A clear sign of uninvited guests are “eaten through” grooves in the wood. If you find something like this, you must treat the wood with special means. In case of local damage, you can handle it yourself, but for treating large surfaces it is better to call professionals with special equipment that will allow you to reach the most remote areas.
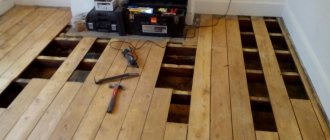
Sanding a wooden floor with your own hands
The grinding device is a special wood grinder operating from a 220 V network, on which a 2.3 kW electric motor is installed.
To operate, the machine must be connected to a socket with a power rating of 16 A and a wire cross-section of 2.5 mm.
So let's get started:
Let's fill the drum of a machine for sanding a wooden floor with the coarsest sandpaper number 40. After pressing the engine start button, we pass near the right wall of the room. The drum rotates at high speed and the sandpaper sands the floor surface.
In one pass, a strip of 20 cm is processed.
We reach the limit and process it again. Then we move the machine to the left half of the drum and proceed further, and so on, according to the back-and-forth system.
In this case, you need to turn off all household electrical appliances and slightly reduce the power of the drum pressure and give the engine a break until the voltage returns to normal.
The main goal when working with paper No. 40 is to make the floor smooth by cleaning it from excess dirt and the old layer of varnish.
Naturally, one pass will not give tangible results, so we need to carry out, if possible, several such operations, working on grinding along and across.
It is important to replace the old emery with a new one as it wears out , because it begins to set fire to the wood.
After we have completed the cleaning, we should remove from our floor all the scratches left by coarse sandpaper. To do this, you need to change the sandpaper No. 40 to a more gentle one - No. 60 , walk with the drum several times, then change with paper No. 80 - and so on a couple of times.
Next, we scrape those corners and hard-to-reach places in the room that have not been sanded (for example, under the radiator) with a grinder or a hand scraper.
How to renew a floor: polishing and waxing
Finally, polish the wooden floor until smooth using a #120 abrasive (with slight drum pressure). The floor should become smooth.
Due to the fact that wood has the ability to absorb liquid applied to it, before applying varnish to the surface, the floor surface must be primed or covered with a filler. To do this, we make our secret super-paste (primer), with which we subsequently fill all the small pores, which, by the way, reduce the quality of the transparent layer.
There are many different mixtures for soil, but many of them are harmful to health and are not as effective as the lightest ones we offer in their composition and production method :
Manufacturing example:
Wax pastes are prepared in an enamel (tinned) vessel, where rosin (if it is included) is melted.
Next, carefully mix melted wax and paraffin (stearin) into the mixture, remove from heat and carefully pour gasoline or turpentine into it in a thin stream, stirring constantly.
Let the mixture cool and use a good, expensive brush (with short, stiff bristles) or a cotton swab to cover the wood with the prepared solution.
Upon completion of work, the wooden floor should dry at a temperature of 18 - 20 ° C.
The mastic should penetrate into all pores and strengthen.
Did you know that bamboo flooring is 3 times stronger than oak flooring?
When there is no money for real parquet, cork flooring will serve as an excellent replacement. Find out more details there.