The foundation serves as the foundation for the house, and the service life of the entire building will depend on its integrity.
The concrete foundation is constantly exposed to the harmful effects of precipitation, sunlight, and cold. This leads to chipping and shedding of the outer layer of cement, reducing the strength of the foundation. The easiest way to protect it is with the help of special compounds.
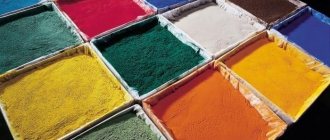
Concrete dye has good vapor permeability and does not let moisture in. Water-dispersed and organic dyes meet these requirements.
Materials and tools for work
Before you start painting the foundation of a cement house, you should prepare everything you need.
To apply paint you will need:
- different brushes and rollers with bristles, as they are more resistant to wear from contact with concrete;
- wire brush, water hose;
- shovel;
- individual protection means.
To prepare the surface for painting, you will need cement to seal cracks and chipped areas. In addition, it is necessary to prepare a primer mixture to reduce the absorption of the concrete surface, thereby reducing paint consumption.
You will also have to decide what is the best way to paint the foundation of the house, calculate the need for a paint composition, taking into account the characteristics of the material and its approximate consumption.
Preparing concrete walls for painting
The process of preparing concrete walls for painting consists of several stages.
- Surface cleaning, which may include: removal of old oil paint, removal of mold and dirt. If the concrete is fresh, cement laitance forms on its surface, which must be sanded after the material has dried.
- Removing dust from the surface (you can use a vacuum cleaner).
- If there are cracks and potholes, they are filled with plaster, putty or polyurethane foam.
- After the mixture has dried, the surface is sanded manually or with a special grinding machine and then primed.
Now you can proceed to painting, having previously carried out tinting. To do this, use a white base paint and add pigment.
Requirements for paints
Today, ready-made latex paint for foundation plinths is produced in the form of a concentrated composition that requires dilution with water or solvents in a certain proportion. It is important to read the recommendations on the packaging.
The principle of interaction between paint components and foundation materials is clear - to create maximum adhesion for the protective film. It should also:
Summarizing all these factors, it becomes clear that the ideal paint for a concrete foundation should be, at a minimum, frost-resistant, moisture-resistant and vapor-permeable. Additional properties are environmental friendliness, practicality and durability.
If there is a large supply of paint left, you can use it to treat other surfaces that require protection:
- Blind area;
- Facade decor;
- Fences and fences;
- External stairs;
- Verandas and gazebos;
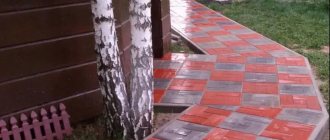
- Garden path edges;
- Poles for lighting gardens and areas.
Primers and impregnations for concrete, stone and brick
First, you need to prepare the base - scrape off the peelings, embroider and repair cracks if leveling is necessary. Next, surface priming is mandatory. This will ensure better adhesion of the paint to the base and uniformity of painting, in other words, it will significantly increase the convenience of work, and as a result, the quality of painting the foundation or its basement part. At the same time, it is important to choose the right primer for concrete and brick, because manufacturers offer a huge selection of multifunctional materials and special impregnations for porous bases. However, they all work in basically the same way: they reduce the ability to absorb moisture and increase water resistance.
After careful preparation, staining is carried out. For this, manufacturers offer compositions soluble in organic solvents - they are of significantly better quality, or with water - a relatively budget option. It is worth listening to the instructions - use primers, impregnations and paints of the same type, or even better - the same manufacturer.
Materials and tools for work
For craftsmen who have confident painting skills, painting the basement of a house will not be difficult. You will need standard tools:
- Bayonet shovel for cleaning dirt;
- A hard metal brush for cleaning off deposits;
- Paint brushes and roller with attachments;
- Construction spray gun;
- Set of spatulas (trowel).
Kawabanga!
How to remove paint from concrete walls: 3 main methods The set of tools may vary slightly, depending on the conditions of the work and the degree of neglect of the old foundation. A hose for rinsing under running water, brooms and brushes may be useful.
Why do you need foundation protection?
Part of the foundation underground is exposed to undesirable destructive influences; in order to preserve it, waterproofing work is immediately carried out. And the above-ground part, the base, not only at the beginning of construction, but also in the future, often for quite a long time, is used without any external finishing or any cladding. At the same time, it manages to become dilapidated, even begin to partially collapse. It becomes obvious that the foundation base needs to be painted. Let's take a closer look, name a few fundamental reasons, and then the advantages of painting the foundation and basement of the house:
- The main building materials for the construction of the foundation and basement of houses are concrete and brick. Although they have sufficient strength, condensation and temperature changes from negative to positive values can spoil and destroy them in a short time. Protective painting of a concrete plinth will cover small flaws, pores of the outer surface, and protect against the formation of condensation and moisture concentration.
- In addition, protective painting of the foundation will change the appearance of the entire building for the better - imperfections will disappear, it will immediately become neater, even more respectable.
- And it is better to choose a paint that will not only prevent moisture from penetrating into the material, but will ensure its rapid removal - such protection will allow it to “breathe” and prevent the appearance of condensation.
Of course, if desired, the problem can be solved with other materials, but painting the base of a house is a good, high-quality, relatively budget-friendly alternative, a high-quality replacement for more expensive methods of finishing facades. It will no less effectively slow down the aging process and protect against aggressive environmental influences. At the same time, it will create an attractive, aesthetic appearance for the foundation and plinth of the building.
Important
: the quality of protection can be ensured only by waterproof façade materials.
Let's look at the properties of paints for concrete
Acrylic paints
Silicone paints
Due to the high degree of elasticity, no additional surface tension is created, which significantly extends the life of the paint. In addition, it perfectly withstands the influence of ultraviolet radiation, without fading and maintaining its attractiveness.
Epoxy paint
The cost of this type is quite high, but with the help of this material it is possible to protect the base not only from atmospheric influences, but also from mechanical damage.
Polyurethane paint
To achieve maximum durability, it is necessary to apply the paint in two layers. The second one needs to cover the surface after the first one has dried. Within a week the base will gain mechanical strength, and after two weeks it will become resistant to aggressive influences.
Silicate
However, there are also disadvantages to silicate paints. Among the main ones are a long drying period and a low coefficient of vapor permeability.
Alkyd
Despite the high resistance to ultraviolet radiation, it is necessary to periodically renew the surface. This should be done approximately once every three years.
Oily
This paint has a very attractive appearance and is consumed very economically, while the cost of such a paint coating is quite reasonable, which makes it not only reliable, but also profitable.
Cement
Any of the listed paint and varnish materials can make the base attractive, while providing it with additional protection from the influence of external factors. But this is only possible if the application technology is followed.
How to paint the foundation of a cement house?
The foundation is the basis of the entire house. It is this that guarantees the stability of the walls and the longevity of the house. Therefore, the foundation must be reliably protected to prevent subsequent destruction and cracks. It would seem that the cement itself is strong. However, over time it can crack and crumble. To prevent this from happening, the foundation of a cement house must be covered with special protective paints and varnishes. The construction market offers a wide range of paints, and today we will look at what paints are available and which ones are best to give preference to for the protection and long-term functioning of the foundation.
Acrylic paint. Quite popular paints and are widely used for painting the foundation of a house. The advantages of the paint include: ease of application, quick drying, good adhesion, withstands temperature changes and mechanical stress.
Latex paints. The material contains a special pigment, water, and polymers. It is not often used for painting foundations, but, nevertheless, it has a lot of advantages: fills microcracks, frost resistance, moisture resistance.
Epoxy paints. A good material that protects the foundation of a house for up to 25 years. Advantages: vapor permeability, moisture resistance, resistance to temperature changes and ultraviolet radiation, resistant to alkaline solutions.
Polyurethane paints. The paint improves the properties of concrete, is chemically resistant, frost-resistant, fills microcracks and pores of cement, and forms a protective film.
Alkyd paints. They are also very popular when painting the foundation of a cement house. The advantages include: rapid drying, resistance to ultraviolet radiation, resistance to low temperatures, economical consumption, deep penetration into cement, resistance to alkali.
Despite all this diversity, experts recommend using organosilicon paint “KO-174” when painting the foundation of a cement house. The paint can withstand high temperatures up to +150°C, while being frost-resistant, resistant to mechanical and chemical influences. Penetrates well into the pores of cement and fills all microcracks. In addition, the coating has water-repellent properties, is easy to apply and is available in a wide range of colors, which means you can paint the foundation of your house in any desired color and not only protect the concrete from the external environment, but also give it an attractive appearance.
Painting the foundation with “KO-174” paint can be carried out in winter, when the temperature can reach -35°C, and in summer, at a temperature of +40°C.
If you are looking for a reliable paint and varnish material at affordable prices, feel free to choose KO-174 paint. You can order paint from EGO LLC.
Technology for painting the base
When paint for facades and plinths has been selected, you should study the features of its application. Manufacturers usually indicate the characteristics of coloring using the composition. But there is also a general technology for applying paint to the surface.
Surface cleaning
Sealing cracks and leveling the surface
Sealing cracks
If you need to create a more durable solution, you can add a plasticizer to it. 2 days after embedding, they begin leveling the base. Further procedures are carried out after the solution has completely dried.
Surface primer
The primer is applied to a dry surface. It is important to coat the plinth thoroughly so that the compound penetrates into every crevice. This guarantees perfect paint adhesion. You can cover the wall with two layers of primer.
Primer work
This is due to the fact that after the first application the primer is almost completely absorbed by the base. You can coat the base with a primer using a brush or roller.
Kawabanga! How to plaster foam concrete
Painting the base
Final coloring
Each subsequent layer is applied after the previous one has dried. Typically, the time when the base can be coated with the next layer is indicated by the manufacturer.
A painted base is not only beautiful, but also reliable. Correctly selected composition and adherence to the technology of its application will help prevent damage to the surface from the influence of external factors.
In addition, a large abundance of paints and varnishes makes it possible to embody original design ideas, where the base will become an integral element of the overall picture of the facade.
Painting the underground part of the foundation
Foundation treated with mastic on both sides
This procedure should not be neglected. The underground part of the foundation of a house is subject to numerous cyclic loads during operation. Especially in the case when groundwater in the fall can rise high to the surface of the earth due to rain. Water in the soil will first saturate the surface of the foundation, and then freeze in winter, which will first cause cracks to appear on the surface, and then they can grow deeper and destroy the concrete.
The part that is most susceptible to this is the one located close to the ground surface, so it is advisable to treat the foundation before backfilling at least a meter from the ground surface.
To protect the foundation, special waterproofing coatings are used to prevent water from entering the pores of the concrete. The simplest material for painting the underground part is a primer - a solution of bitumen in gasoline. For more reliable protection, special waterproofing compounds can be used.
You can buy a primer in a store, or prepare it yourself.
To prepare, you will need two buckets, the second one is twice the volume of the first, as well as a special ladle with a long handle. A sheet of metal is also useful, which, in the event of a fire, can be used to close the bucket and extinguish the fire.
Applying primer with a roller
Gasoline is poured into a large bucket; measure the amount using a small bucket. Then place a small bucket on the fire and throw pieces of bitumen into it. Repeat until the mixture is hot enough to stir with a stick, but not too hot that the gasoline will ignite. Then pour the melted bitumen into the gasoline using a ladle so that you are at a distance from the gasoline and mix. After this, let it sit and cool. The primer is ready.
The primer can be used not only for the underground part - it is practical for painting the base. When painted it gives a black semi-matte tint. For the walls of the basement of a house, the primer is less suitable, since the black color of the walls in a dark room is not perceived very comfortably by a person.
The best paint for the base
When deciding how to paint a concrete foundation, you should take into account the surface material of the building structure, local climatic conditions, cost, durability, surface application technology and the desired color shade.
How to paint the foundation of a house for a beautiful appearance? Depending on your financial capabilities, use alkyd or polyurethane paints. Among the colors and textures offered on the market, you are sure to find the best option.
To coat surfaces made of porous materials, silicone paints must be used. No other paint can provide them with a higher level of protection.
Do not forget about preliminary priming of the surface. This operation improves surface adhesion and ensures the durability of the paintwork. Therefore, when purchasing paint, do not forget to purchase the appropriate primer.
Which one is better to choose?
The foundation is divided into an underground part and a basement. Each of them has its own coverage. For buried foundations, use a primer based on bitumen or analogues. The main thing is to ensure reliable waterproofing and completely eliminate contact of concrete with the ground.
The outer protruding part has a decorative function, so it is carefully leveled and painted. The stone and brickwork finish looks interesting. This coating is painted with simple acrylic or latex paints.
Otherwise, it is preferable to use two-component formulations. The basement side of the foundation can simply be whitened by adding copper sulfate or another antifungal agent to the solution.
Types and characteristics of paints for protecting the base
For the lower part of the building, it is recommended to use the following types of paint for the plaster plinth:
- acrylic, diluted with water;
- alkyd, based on natural and synthetic solvents;
- silicone based;
- epoxy;
- polyurethane.
Acrylic paints
Alkyd paint and varnish compositions
Silicone based paints
Epoxy paints
They are the strongest and most durable. Ensures complete sealing of the coating. They consist of an epoxy base, a coloring pigment and a hardener, which is added to the composition just before application to the surface.
Epoxy paint can protect the base not only from precipitation, but also from strong mechanical influences. The main disadvantage of the material is its high cost.
Polyurethane coloring compounds
How to choose the right paint
To choose a good paint, it is recommended to pay attention to several points.
First you need to assess the intensity of use of the concrete base. For example, to paint walls you will need less wear-resistant enamel than to paint a concrete floor in a garage.
It is important where the painting will be done. For interior work, non-toxic, odorless enamel is required. For outdoor work, resistance to precipitation, UV rays and external damage is important.
Many manufacturers produce universal paints, and before choosing one, you need to carefully study the composition information on the label and recommendations for use.
There is a complete list of requirements for enamels for concrete, however, there is still not a single brand that could combine them all:
- waterproofing properties;
- resistance to low and high temperatures;
- fire resistance;
- health safety;
- neutral smell;
- resistance to physical and mechanical damage;
- ease of care.
Instructions for painting the base
After selecting and purchasing paint with the appropriate primer, you can begin painting the surface of the basement of the building. They include the following steps:
- cleaning from dirt and mold;
- primary priming;
- sealing cracks and leveling the surface;
- second soil treatment;
- coloring.
Tools for painting work you will need:
- paint brushes, roller or spray gun;
- paint roller tray or other wide container;
- spatula, wire brush, hammer and chisel;
- trowel, grater and short plastering rule.
In addition, you should prepare a tool for possible mechanical removal of mortar residues and other contaminants.
Surface cleaning
Sealing cracks and leveling the surface
Before painting the base, it is necessary to repair the cracks and level it. Before performing this work, the base should be treated with deeply penetrating primer. This will bind any remaining dust particles and strengthen the concrete or brick surface.
Work on sealing cracks must be done with a cement-sand plaster mortar prepared in a ratio of 1:4. To improve the quality, it is recommended to add a plasticizer or liquid detergent to the solution.
Painting the base
Before painting, the surface must be treated with primer again twice and allowed to dry for 24 hours. This will strengthen the places where the leveling layer is applied.
Kawabanga! Grinding concrete floors
Painting scheme with a spray gun.
Painting the foundation
Finishing materials
The photo shows a special acrylic composition.
Manufacturers offer paint and varnish compositions diluted with water or solvents/thinners. Moreover, the instructions strongly recommend purchasing the appropriate primer at the same time. Only the combination of two compatible components will give an ideal result.
Which paint to choose
The material can be smooth or textured, this expands the possibilities.
- The most commonly used are acrylic paints diluted with water. Ideal for application to concrete, brick and stone surfaces. The materials are water resistant and at the same time vapor permeable. They have good adhesion, are frost-resistant, and do not fade.
- Polyurethane and alkyd paints. These are compositions based on organic or synthetic solvents. They do not react to alkaline environments, as well as temperature changes. They are not afraid of water, ultraviolet radiation and mechanical attacks. This type of concrete paint for a plinth will last a long time if applied in combination with a suitable primer.
- Silicone paints. They have proven themselves well on highly porous surfaces. Suitable for both application to new bases and restoration of old ones. The lowest price does not justify the quality of the product. They do not interfere with steam emanating from the structure and allow air to pass through, but not moisture.
- Polyvinyl acetate paints have an adhesive (PVA) base and are diluted with water. They are cheap, but wear out pretty quickly. Several cleaning cycles can significantly reduce the quality of the layer.
Painting the base with enamel.
- Enamel compositions. These materials are based on varnish and resin or polymers and are diluted with special solvents. A number of advantages include absolute water resistance, durability, gloss, bright colors. However, they are not safe for health due to the strong chemicals in their composition. Another drawback is that the enamel layer does not allow air to pass through.
- If it is necessary to protect the bottom of the facade from elevated temperatures, it is possible to use fire-retardant metal paints Polistil applied to an iron base. Such a base will withstand even strong heat.
Note! It is worth purchasing only waterproof materials. For example, a water-based product will not suit you for external work, since the coating will quickly dissolve from precipitation
Primers for external work
To improve the quality of the coating, the base must be primed.
For better adhesion to the base and enhancing the positive properties of the decorative coating, it is recommended to pre-prime the surface.
- Before painting the base of the house, it doesn’t hurt to fill the entire surface with primer. For urban buildings that are often exposed to acids, alkalis, salts and other contaminants, it is worth choosing one of the breathable acrylic solvent-based primers.
- Owners of country houses, where the environment is cleaner, may well purchase a water-dispersed analogue.
- Manufacturers offer a wide selection of facade multifunctional acrylic primers. They improve adhesion and serve as excellent intermediaries between paint and base.
- Materials are also available for walls with increased porosity. For example, hydrophobic impregnations. Thanks to them, the water absorption of the base surface is greatly reduced, and water resistance is increased.
Types of paints for concrete
- high and low temperatures (and their differences);
- humidity changes;
- exposure to precipitation;
- UV radiation and air pollution.
You can choose a color to suit your taste
The paint for the base must withstand both the action of all these factors at the same time, and the intense impact of one of them, for example, constant sun rays on a sunny southern façade.
Coatings designed specifically for concrete include acrylic, silicone, epoxy, polyurethane, silicate and alkyd paints. Budget option - oil, cement.
Acrylic paints
They can be recommended for protecting concrete products, fiber-cement slabs and plinths from moisture. Given their low vapor permeability, acrylic paints are not suitable for silicate substrates and lime plaster.
Concrete that is to be painted with acrylic paint must be primed with a primer from the same manufacturer. In addition to creating a high-quality coating, this protects the surface from the penetration of moisture and salt.
Silicone paints
Epoxy paint
These materials require careful cleaning and surface treatment. Suitable solvents are esters, ketones, aromatic hydrocarbons and alcohols are used as solvents.
The influence of the atmosphere is manifested in the loss of gloss of the coating, but this feature does not weaken the anti-corrosion properties of the coating, which is very important for concrete paint for foundations.
Polyurethane paint
Due to its properties, it is ideally suited for exterior work and painting the foundation/basement.
Silicate
Schwyz – town hall painted with silicate paint
Silicate paint is considered very durable and weather resistant. Its service life significantly exceeds one hundred years. An example is the town hall in the city of Schwyz in Switzerland, covered with such a coating in the 19th century.
Painting with silicate paints requires skill and experience, since liquid glass destroys metal and ceramic tiles. So it is better to entrust painting work with this material to a specialist.
Alkyd
Oily
It should be applied to a completely dry, pre-primed base - concrete or plaster.
Basement repair - procedure
You don’t have to do it manually—technical tools will help you with your work.
So, the paint for the base has been purchased, it’s time to move on to action. Fortunately, the plane is new, so there is no need to prepare it separately. The only point: you have to wait until it dries completely. After this, painting and priming can be done.
If we are talking about restoration, then everything is not so clear. This process is largely labor-intensive; the master must act very carefully and carefully.
What to do?
- The walls are carefully inspected, all peelings are cleaned off, as are crumbling fragments. If metal elements are found, it is recommended to dismantle them. The bottom line is that if the metal is painted with a zinc base, it will not be possible to obtain the desired adhesion - the facade paint will not adhere;
- When the walls are cleaned, a primer is applied. Then everything is dried - as stated in the instructions. There is nothing unusual here;
- A wide brush or roller is perfect for painting the facade. And if you want to get this or that relief, you can always use a roller that has a long pile. Texture can be created with thick paint, which has not been thinned.
Why do you need a plinth on the foundation?
The plinth is an intermediate building structure between the foundation and load-bearing walls. In this case, the base simultaneously performs several important functions:
- protects walls from adverse atmospheric influences;
- perceives weight loads from walls, floor slabs and other building structures and transfers them to the foundation;
- allows you to level out uneven foundations;
- reduces heat losses of the building;
- stops the flow of moisture from groundwater and melted snow.
Its presence will ensure the durability and reliability of the building without damp, cold walls and floors.
Technology for painting concrete indoors and outdoors
After all the preliminary work has been completed, you can proceed directly to painting.
You need to prepare the necessary tools in advance: open and fluff the brushes, wet the rollers under water. Cover all joints with other surfaces with masking tape so as not to stain them during painting. Doorways, baseboards and window frames are also taped indoors. After finishing the work, the tape can be easily removed.
First, all the joints are painted with a brush, and then the main surface. The enamel is applied in a thin layer to avoid smudges. After the first layer has dried, re-painting is carried out if necessary. The second layer is applied in a direction perpendicular to the previous one.
For large areas it is easier to work with a sprayer. It’s more convenient to do this together: one sprays, the other rubs the paint into the base and watches for smudges.
For outdoor work, it is important to carefully study the instructions for the paint and varnish material and find out what temperature it is designed for. Otherwise, the technology of work is similar to painting indoors.
Don’t forget about safety precautions when carrying out work: be sure to use goggles and gloves to protect your skin and mucous membranes while painting. If the enamel has a strong odor, it is better to wear a respirator.
The actual work of painting concrete is not very labor-intensive. More attention is paid to surface preparation. However, if all stages are carried out correctly, you will get a beautiful and even coating that will delight you for many years.
Using rubberized paint for concrete work
Penetrating primer for concrete work
How to paint a plastered house outside the facade
Choosing putty for exterior work on the facade
Source
How to sheathe a foundation using sheathing
All options for finishing the plinth, which involve installation on the sheathing, have a common technology for covering the structure:
Work begins with preparing the base.
It is cleaned of dust and dirt, all cracks are carefully covered with putty. If there is serious damage, then before finishing the base of the house, it is advisable to strengthen the foundation. Due to the fact that this part of the building is exposed to greater moisture, it is treated with antiseptics. It is better to carry out impregnation in several layers. After preparing the surface, a frame is erected.
A wooden beam or a metal profile can be used for this purpose.
It is important to consider that wood needs to be treated against rot, and metal parts cannot be cut with a grinder, this leads to corrosion. The racks are installed perpendicular to the direction of laying the material. If the products have identical sides, then the vertical method is considered preferable. Insulation is placed in the resulting cells
It is fixed with special anchors. Vertical connections are mounted between the frame posts and space is left for installing the ebb. The material for finishing the base is laid in several ways: overlapping, using a tongue-and-groove connection, using special brackets or clamps. Fixation is done with self-tapping screws. If the products are subject to thermal expansion, then the fastening is loose. The ebb is installed.
For foundations finished with panel elements, additional moldings are used. They are installed on corners for a better decorative look.
Feasibility of application
If it is necessary for the basement of the building to be strong and reliable, it is finished with natural stone - granite.
In what cases is it advisable to use granite and granite tiles:
- If you plan to increase the speed of finishing work.
- When using brick and reinforced concrete for laying the base itself.
- To provide an “expensive” appearance.
- To create beautiful compositional solutions.
- To reduce the cost of work.
- For additional strengthening of the building belt.
After finishing the basement of the house with granite or granite tiles, the owners will completely no longer need to carry out annual repairs to the cladding.
Cheap and cheerful: finishing the base with cement mortar
The base is the part of the foundation protruding above the ground and is one of the most important elements of the building, which must be reliably protected from external influences and at the same time look aesthetically pleasing, since it is always in sight. It can be finished easily and at minimal cost with cement mortar.
Will need
- cement grade M300 (M400);
- sifted quarry sand;
- clean fresh water;
- transparent wide tape;
- liquid soap.
The process of finishing the base with cement mortar
Using a trowel, we apply cement mortar from bottom to top in small sections onto the cleaned and moistened base surface, simultaneously rubbing and leveling it.
We apply the rule to the bottom of the base covered with the solution, press it and move it upward with oscillatory movements. Scrape the solution on the rule with a trowel into a container. We repeat the operation until we remove all the excess solution.
We cover the bottom row of bricks lying on the base with tape and spread the mortar over the top of the base and into places with recesses and crevices. Again, we level the surface using the rule, repeating the operation if necessary.
We apply the rule horizontally along the top of the base and use a trowel to form something in the form of a slope. Then, by moving the rule to the side, we separate it from the outline. Then remove the tape.
Let the solution dry a little for 20 minutes. Next, prepare the solution again by pouring a measuring bucket of water into the mixing container and pouring out a bucket of cement and sand. We also add a little liquid soap to increase the plasticity and quality of adhesion of sand and cement to each other. Mix the ingredients with a shovel until smooth. Pour another bucket of sand into the container and then carry out the preparation with a drill with a mixer attachment until the components are completely mixed.
Next, add one or two buckets of sand, if cement was used, respectively, grade M300 or M400. We select the volume of water so that the finished solution is homogeneous and has a creamy consistency. We apply this mixture in a thin layer on the first, already slightly dried one, and in one go we smooth out small defects and rub in small cracks. Until the second layer has hardened, using a rule and a level, we draw horizontal lines along the new plinth plaster with a narrow steel plate. Then, using a tape measure, we make marks for the vertical lines, which we draw using a level gauge.
What we get is, as it were, a masonry pattern that harmonizes with the seams of the brick wall. In addition, such a “mesh” serves as a compensator for sudden temperature changes, increasing the strength and service life of the plaster. If at this stage we find a place where the cement mortar does not hold well, we remove it, increase the roughness of the base, apply the mortar with a trowel and rub it in tightly. After waiting for about 20 minutes, we level the renewed area with a trowel, removing excess solution. All that remains is to use a flat strip to restore the recesses with a steel plate.
To make the outline even at the corners, we press a flat board to the adjacent side of the corner, which would protrude beyond the corner by the thickness of the plaster. After grouting and leveling the outline, draw a vertical line along the inside of the board with a trowel and remove the board. Then, using a short rule or just a flat bar, we level the solution and draw horizontal and vertical lines in accordance with the existing ones. So section by section we finish the basement around the entire perimeter of the building.
Watch the video
Methods for applying the composition to the base
If we understand the material itself, let's find out how the process of painting the surface occurs. For each paint you need to know your approach. This is why there are many application options.
Note! Exterior paint is a little thicker than regular paint to create a dense coating. For this type of work you can use various kinds of tools:
For this type of work you can use various kinds of tools:
- Construction roller. A simple and effective way to treat the surface. The work is done quickly and the cost is low.
- Brush. A traditional tool that is suitable for touching up hard-to-reach areas. It is inconvenient and time-consuming to treat the entire surface with it. At the same time, paint consumption is high.
- Spray gun. Allows you to complete work in the shortest possible time and with maximum efficiency. Material consumption is minimal, the layer is the thinnest. For reliability, you need to apply several layers.
- Trowel. Suitable for working with textured paint. You will get a thick and even layer. And in skillful hands it can create unique patterns and textures on the surface.
We have prepared a training video especially for you, from which you will learn how to paint the base yourself.
If you want your finished coating to last a long time, you should not ignore the quality of the paint. Give preference to trusted manufacturers. Over a long period of work, they have earned a reputation and positive consumer reviews
Pay attention to paints from Tikkurilla, Dufa, Snezhka, Dulux or Caparol. This is the only way you can get a good result
Should you opt for a high base?
After reviewing the information, we can conclude that a high base is a good investment in the durability, durability, strength and beauty of the future home.
The large number of existing advantages of such a design allows us to have no doubt about its importance and benefits
It combines functionality and aesthetics at the same time. Both of these factors are undoubtedly important. However, before making a specific decision on the height of the basement structure, it is worth assessing the parameters of the future house, since a high basement is not always necessary. You should focus on individual characteristics in each specific situation.
How to create masonry from different raw materials yourself?
You can make masonry for the plinth yourself from different building materials. Most often, tile adhesive, plaster or concrete with cement are used for this. Raw materials are mixed in certain proportions, tools are prepared and the basement of the house is decorated.
From tile adhesive
This is one of the simplest, least labor-intensive processes for installing masonry on a plinth. To work you will need:
- tile adhesive;
- facade paint;
- stain;
- façade varnish on acrylic.
The tools you need are a spatula, a drill, a trowel, a brush, as well as a mixer attachment on the drill for mixing the solution. You will also need a Betonokontakt polymer dispersion, which allows you to increase the adhesion of the treated surface.
Step-by-step instruction:
- Stir the concrete contact well with a drill until the lumps disappear.
- Apply Betonokontakt to a previously cleaned foundation base.
- Mix tile adhesive with water in the proportions indicated on the bag.
- Using a trowel and spatula, apply tile adhesive to the base. For 8 squares it takes about 2 bags of glue solution.
- When the top layer has already dried, and the tile adhesive inside is still wet, you need to clean off all the protrusions with a spatula.
- You can make the shape of the future stone from polystyrene foam. It can be a regular rectangle or a product of any shape.
- The form is applied to the base and traced along the contour.
- Using colored impregnation, it is necessary to rub all the seams - this will further highlight each stone.
- When the impregnation dries, the same color is used. It is used to paint “stones” by rubbing the paint into the structure with a cloth.
This type of masonry is similar to stone and is difficult to distinguish from natural raw materials. At the end of the work, you can go over all the protruding parts with sandpaper.
Plastering
To independently create masonry from plaster, prepare the following tools:
- notched spatula,
- chisel,
- Trojanka,
- bush hammer,
- scalpel.
To mix the plaster you will need water, a basin or bucket, and a drill with a mixer attachment.
Stages of work:
- Preparing the basement wall. The surface is carefully leveled and cleaned of chips. All large cracks and differences are filled with a cement-sand mixture. If the depressions are small, they are filled with putty.
- The surface of the base is primed for better adhesion to the plaster.
- Preparation of the mixture. Plaster is prepared from cement, sand and water. The proportions are calculated as follows: take 4 parts sand and water for 1 part cement. It is added so that the mixture is homogeneous and thick. The mixture should be easy to form into stones.
- The mixture is applied with a spatula to the base in small strokes. It is better not to apply a large amount of the mixture at once.
- The formation of stones occurs with gloved hands dipped in water. While the solution has not yet hardened, it is given the shape of a stone.
You can give the desired shape using a scalpel and the tools listed above. It depends on what type of stone you want to imitate.
Apply a primer to the dry coating, wait until it cools, then apply paint with a brush. To highlight the relief, you can rub in a contrasting color of paint.
Made from concrete and cement
To make individual “stones” from concrete and cement, you need to purchase silicone molds. They are sold in special construction stores. One mold contains several cells for stones of different shapes. The finished solution is poured into the mold, left to harden, then removed and used for masonry.
Using a drill with a mixer attachment, mix cement, polymer materials, and resin. The solution is poured into the prepared form. To ensure the strength of the future stone, a mesh is used - it is placed in a mold.
After pouring, it is necessary to compact the mixture to avoid the formation of bubbles. For this purpose, a vibrating plate or a manual compactor is used. If the stones are small and the shape is not heavy, then you can lift it and knock on the surface several times to release excess air. The products harden for 1 day, after which they can be taken out.
The video will show you how to make artificial stone from cement: