The interior decoration of a country house must be durable, safe and durable. And if in winter it is empty and not heated, then it is also moisture resistant, since the risk of condensation in this case is very high. Not every material can cope with such tasks, however, if you properly process and decorate natural wood lining, it will last for decades.
Depending on how you paint the lining inside your country house, it will have a different appearance: it will retain its natural pattern and shade or take on a new one. And protective compounds for impregnating wood improve its performance characteristics.
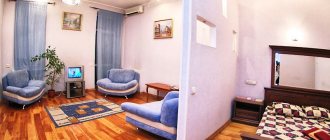
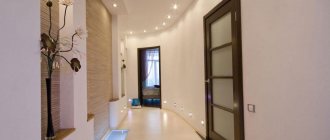
Lining in the design of a country house
Why paint the inside of a wooden building?
The main reasons for painting a wooden house from the inside:
- the desire to highlight a certain area with color or to emphasize design elements with the contrast of plain and natural wooden surfaces;
- give expressiveness to walls built from plain wood without obvious texture;
- improve the appearance of the structure, for the creation of which recycled material was used (used boards and beams);
- change the appearance of premises after long-term use.
The last point has its own nuances. Freshly processed wood has a pleasant smell, attractive appearance, is hygienic and practical to use. If immediately after construction or during the construction stage of the building the lumber was treated (antiseptic and moisture-repellent impregnation, protective coating), these characteristics are retained for 5...15 years. If not, after 2...3 years the boards and beams darken, become covered with scratches and abrasions, and are exposed to moisture and “attacks” from pests. Changing the appearance and performance characteristics of wood in this case requires re-processing (surface cleaning) and subsequent coating with protective and decorative agents.
Actively used surfaces often need reconstruction - for example, wooden stairs.
Surface preparation
To obtain a perfectly smooth wall surface, you should prepare:
- darkened boards or logs are pre-lightened with white or special compounds; damaged fragments are replaced with new ones;
- before painting the logs inside the house, they, like timber, are cleaned and sanded; You can remove loose fibers with a wire brush;
- after priming, the paint goes on more evenly, plus this coating prevents it from being absorbed too deeply, and the consumption of paints and varnishes is significantly reduced;
- applying paint over the old one is allowed if it has a similar composition; in other cases, it is completely scraped off or washed off;
- You should not trim the walls with clapboard before painting; each board must be pre-painted, otherwise the untreated joints will darken over time;
- The ends and joints of the boards should be handled especially carefully.
Painting materials
When figuring out how to paint wooden walls inside a house, it is important to remember: all types of coatings are divided into two large groups. The first is tinting, protective and other means that preserve the natural texture of the material. The second (covering) – completely paint over the wood in a single color, hiding the origin of the material.
The first group includes:
- stain (stain) – compositions on a water, alcohol, wax or other (solvent) basis. Available in powder, liquid concentrate or ready-to-drink form. They penetrate deep into the wood layers and create a color different from natural. Usually they give lumber a more “expensive” look, imitating valuable wood species. Colorless stains are produced that have only protective properties;
- impregnations - substances that penetrate deep into the material, water-based or other based (oils, waxes, solvents, alcohols), changing its properties to improve performance characteristics. There are antiseptic, fire-retardant, moisture-proof, tinting, combined options;
- varnishes are a finishing coating for wood that has been pre-treated with stain or impregnation, increasing the protection of the material and increasing its attractiveness. Varnishes are available in matte, semi-matte, semi-gloss, glossy, on different bases, for different applications. Forms a film impermeable to air.
The second group (coating paints) is divided into:
- natural (based on natural oils);
- synthetic - enamel (oil and alcohol); - acrylic; - alkyd; - polyurethane.
In addition to coatings intended for painting wood, you can use general-purpose options - water-dispersed, oil-based, and so on.
Important: painting the inside of a wooden house is carried out after preliminary surface treatment (cleaning). The primer or filler used to prepare surfaces for finishing must be compatible with the coating being used.
Types of compositions for lining
All wood treatment products are conventionally divided into protective and decorative. Some of them need to be combined, others can be used independently. Ideally, primary processing should be carried out before installing wooden lining, so the products will be protected from adverse factors from all sides. If the siding is already installed and has a coating, it will need to be removed or sanded.
Note! Eurolining, if it is manufactured according to the standard, is already covered with protective or protective-decorative compounds.
Protective means
The primary objectives of these compounds are to protect the wood from pests, mold, mildew, moisture, temperature changes and extend the service life of the lining and finishing coating.
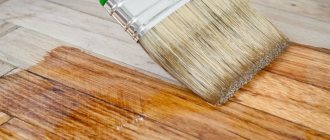
Coating the lining with a protective compound before installation
Common products for treating wooden surfaces:
- Primer. A popular base for decorative finishing. It improves adhesion, prevents moisture absorption and resin release, fills pores and hides minor irregularities. Compositions with an antiseptic additive are produced; they protect the tree from damage by mold and mildew.
- Oil-wax. Creates a surface of a dense film that perfectly repels water. This treatment is necessary for rooms with high humidity.
- Linseed oil. Penetrates wood deeply and hardens over time. Protects from moisture and gives the lining a distinct structure.
- Drying oil. Once a popular processing tool. Today it is being replaced by more advanced compounds. Improves the hydrophobicity of wood, but the coating quickly changes color and sticks.
- Bleach. The material is more often used topically, where there are defects such as blue spots or natural darkening.
- Antiseptics. Protect the surface from pests, fungus and mold. They are also used on affected areas of the finish.
- Fire retardants. Reduces the ability of wood to ignite and spread fire.
Oil-wax and linseed oil do not require additional processing, as they give the surface a pronounced pattern, and the color can be tinted. It is also permissible not to paint drying oil, but it will have to be renewed frequently. Primer and antiseptics are used as a base for finishing.
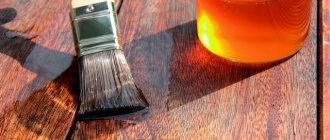
Lining coated with drying oil
Decorative coatings
These compositions must be selected taking into account the condition of the finish. There are products that preserve and emphasize the natural appearance of wood, make annual rings more pronounced, and add color. Others, on the contrary, hide the design under a thick layer of color. The first ones should be used if the lining has no defects (grades Extra, A and AB) and old paint. Second, for products with numerous damages (grades B and C) and coatings that cannot be removed.
Transparent compositions for finishing wooden lining: varnishes, stains, some paints. Opaque: acrylic and oil paint, water-based.
Lucky
Acrylic, alkyd and water-based varnishes are most suitable for interior work. Completely preserve the natural appearance of wood. You can add pigment to the composition, which will give the lining a tint. The varnished surface has a glossy or matte texture. Additionally, they protect the finish from moisture, discoloration and minor mechanical damage. May contain antiseptic additives.
Varnish coating for lining
Decorative azure
Gives wood a distinct structure and any color. It does not form a film on the surface, but penetrates deeply. The material is transparent, so the lining underneath should be without significant defects. In addition to decorative, it performs a protective function.
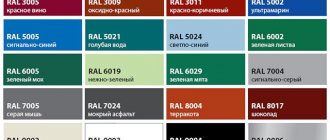
Options for shades of decorative azure
stain
It has almost the same effect as decorative azure. Paints wood a rich brown color in different shades. Stain is often used to artificially age lining. It is important to consider that it does not protect enough from moisture.
Shades of stain
Acrylic water-based translucent paint
Forms a thin layer on the surface of the wood, through which the texture and natural shade of the wood are visible. Such paints hide minor finishing defects.
Translucent paint on lining
Oil paint
Thick opaque coating. Forms a film on the surface. Can have any shade. Maintains color and integrity for a long time. This lining paint requires updating approximately every 5 years. Has a pungent odor.
Coating the lining with oil paint
Acrylic paint
A more durable opaque finish than oil paint. It has virtually no odor and dries in a short time. Can create matte and glossy finish. Its only drawback is its high cost.
Matte acrylic paint finish
Water-based
The paints are odorless and dry quickly. They form a matte or semi-matte texture. Suitable for dry rooms only.
Water-based paint for decorating a country house
The video shows an example of a competent combination of protective and decorative coatings for lining, applied at home, without the use of special tools.
Tips for choosing coverage
When planning to paint the inside of houses, it is important to decide: what is the purpose of such treatment? Depending on the idea, different options are used. For greater ease of understanding, methods of interior finishing of wooden buildings are presented in table form.
| Reason for painting the inside of a wooden house | Preliminary preparation | Type of coating, its advantages and disadvantages |
| Uninteresting texture of the material, desire to obtain a different color from the natural color of all surfaces | Sealing existing defects with special putty, sanding to a smooth surface, priming | Topcoat paints of any type. They create the necessary color effect and protect the wood from external influences. They hide the natural texture of the material and do not allow it to “breathe” (with the exception of some specific coatings) |
| Highlighting a zone with a color different from the main one | ||
| Restoring the look of old lumber | Thorough cleaning with a grinder or (in case of deep damage) with a plane, sealing defects, grinding. The type of pre-treatment depends on the chosen coating - stain and/or impregnation for varnishes, primer/drying oil for paints | Varnish with pre-impregnation or stain treatment. Highlights the natural texture of the material and protects from external influences. Requires careful surface preparation and maintenance |
| Topcoat paints of any type. Hides stains and color defects, protects the material. They hide the texture of lumber and degrade the natural properties of wood. | ||
| Protecting new wood with a decorative effect | If preparation is insufficient (smoothness, absence of defects), carry out additional procedures - sealing unevenness, grinding, degreasing, removing dust | Varnish of any type (depending on the desired effect) over impregnation (stain) in two or more layers. Highlights the texture of lumber, protects against damage, and retains the natural characteristics of the material for a long time. Reduces the “breathing” properties of wood, requires careful preparation and care |
We also allow the option of treating lumber only with natural impregnation (wax with linseed oil, pure wax, natural oils, drying oil, etc.) without painting the interior of the wooden house. However, it provides a lower level of surface protection and requires maintenance. Once every 0.5...3 years (depending on operating conditions), it is necessary to renew the impregnation after sanding and stripping the wood.
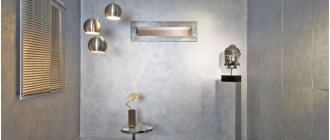
Aging effect
You can make the interior of a room attractive and original by artificially aging finishing materials. Natural lining without coating looks monotonous. You can add antique value to it in several ways:
- Brushing. Suitable for pine or oak. The top layer of the rock is removed with a coarse brush, sanded and covered with stain of any color, for example, wenge;
- Pantination. Use two colors of paint, slightly different shades. The first enamel is applied in a thick layer and allowed to dry. Then paint a thin layer of lighter paint. After complete drying, rub the surface with sandpaper. The illusion of numerous repainting of the lining is created;
- Paraffin treatment. Wax is applied unevenly to individual areas. Then the pantining process is repeated. After drying, remove it with a spatula and treat the board with stain. The result is a worn effect.
Color selection: recommendations
When choosing what color to paint walls, ceilings and other structural elements inside a wooden house, you need to consider:
- interior style. For the “Scandinavian” type, white or any light pastel colors are suitable. Modern allows for contrasting bright colors and the use of several compatible shades. Classic implies a natural light tone or color that is in harmony with the shade of wood, matching other details of the furnishings. When completely painting all surfaces of the room, the choice is arbitrary, corresponding to the style;
- harmony of the chosen color with a shade of wood, natural or tinted;
- opportunities to visually increase/decrease/divide the space of the room. To visually expand or lengthen a room, you should use light and contrasting colors.
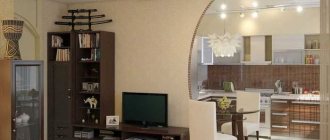
If painting the timber of a wooden house is used for zoning, it is logical to select a shade in accordance with the decor of the zone (furniture, appliances, bright decorative elements).
Step-by-step instructions: how to paint the inside of a house
After the choice has been made - what paint to paint the inside of a wooden house - the necessary purchases are made and preparatory work is carried out.
List of things needed for different options for painting a wooden house
In addition to paint and varnish coatings, primers and other basic materials, for comfortable and safe work you need:
- protective clothing and equipment. Clothing (overalls or trousers with a jacket) must be tight, protect the entire body, and allow air to pass through. Additions – household or industrial respirator, gloves, goggles. For noisy procedures (cleaning surfaces with power tools), earplugs will be useful;
- protective equipment for the premises. Even if all surfaces in the room are treated, it is necessary to protect them from paint stains (varnish, stain, etc.). For this purpose, coarse canvas fabric, dense polyethylene, and special films are used. You can ensure an even paint line and protect small elements using masking tape or tape;
- devices and tools for preparing wood. The minimum is sandpaper of different grain sizes (from 40 to 360 grid, depending on the initial condition and the desired quality). Grinding (abrasive) sponges and bars of various shapes are more convenient for complex surfaces. Processing large surfaces manually is time-consuming and ineffective; you will need a flat or vibratory grinder; it is acceptable to use an abrasive attachment on a drill. If necessary, remove a layer of material 3...10 mm using an electric planer and similar tools;
- containers and tools for surface preparation. This includes primers, impregnations, stains - depending on how you plan to paint the timber inside the house. The application tool can be a spray gun (for liquid compositions), a swab, a brush or a roller. The cracks are sealed with sealant or putty using a spatula and sanded after drying;
- containers and tools for applying the finishing coating. Topcoat paint for painting a wooden house is applied with a brush, roller or spray gun, varnish is applied with a brush or swab. For large volumes of work, a spray gun is used.
Sequence of work
The actions are performed in this order:
- the room is cleared of furniture, equipment and other things, ventilation is provided. In the cold season, natural ventilation is undesirable, so as not to reduce the room temperature to critical;
- Removes dust, old coating, and remnants of care products (polish, wax) from wooden surfaces. For high-quality dust removal, you can use a powerful household or industrial vacuum cleaner. Using a washing vacuum cleaner requires time for the wood to dry completely;
- All cladding elements are checked. If mold, mildew, damp spots, cracks and chips are detected, they are cleaned to a “clean” material and treated (antiseptic, fire protection, moisture protection, putty and/or primer). Places where defects are repaired are polished after the repair composition has cured;
- Using masking or adhesive tape, textiles or paper, protect all parts that are not planned to be painted and that need protection from dust during sanding (sockets, switches, glass, etc.). It is advisable to dismantle electrical appliances before starting work;
- cleaning the surface to the desired level of smoothness (hand or machine grinding), removing dust, drying;
- applying preparatory layers - primer (for topcoat paints), stain or impregnation for varnish;
- applying the finishing coat according to the instructions class=”aligncenter” width=”1400″ height=”1000″[/img]
Important: varnishes are often applied in two or three layers with intermediate sanding. This provides better protective properties and a more attractive surface appearance.
Mistakes when painting yourself
Beginners often neglect the preparatory stage of work when painting a house. And it is important, if the surface is not smooth and has many defects, then the paint will highlight them, and adhesion will be low. Choosing the wrong product will also be a mistake; you should not save, because a low-quality product will lead to the need to repaint too quickly.
Violation of the operating rules and manufacturer's recommendations, which are written on the label. If necessary, dilution of the composition must be carried out strictly according to the instructions.
If necessary, dilution of the composition must be carried out strictly according to the instructions.
Material calculation
Before purchasing paints and varnishes, you need to calculate the required amount of product. For ease of understanding, an example of a calculation is given based on varnishing prepared parquet.
For a room with a floor area of 15 square meters, therefore, you will need
- water-based varnish 15 x (100…120) = 1500…1800 g or
- alkyd varnish 15 x 80 = 1200 g.
Calculations will be greatly simplified using special calculators.
The amount of primer, stain, impregnation and other things is calculated in the same way. When making calculations, it is important to reserve at least 10% for unforeseen circumstances or possible problems with some of the materials.
Protective means
Wood darkens over time when exposed to ultraviolet light, so leaving it untreated is not advisable. Plus, natural material should be protected from bark beetles and longhorned beetles, which make wormholes in it.
Special compounds will help prevent the aging process of wood and the appearance of insects in it. They can be divided into:
- water-soluble with the addition of borax, sodium salts or boron compounds;
- based on shale or coal oils; Due to the pungent odor, it is not recommended to use indoors, plus they give the wood a dark tint;
- based on organic compounds: due to the characteristic grayish-greenish tint, they are used only as a base before painting;
- combined: effective, but more expensive means.
Some types of primers also have antibacterial properties. Wooden walls in the kitchen and loggia – places of high humidity – should be treated especially carefully. Condensation also forms in summer cottages that are not heated in winter due to sudden temperature changes. It is better to treat wooden surfaces in such rooms with several types of protective agents, for example, an antiseptic, and then varnish or paint.
Life hacks: the best way to paint the inside of a wooden house and how to do it with minimal labor costs
After solving the basic questions - what paint is better to paint the inside of a wooden house, what shade to choose, how to prepare the surfaces - and calculating the required amount of materials, it’s worth learning a few more “tricks”.
- After sealing defects with sealant, priming the surface is mandatory, otherwise the paint will be strongly absorbed into the sealant, creating uneven tone and increasing consumption. If the sealant is tinted (with special pigments), the color of the surface will be more even and richer.
- The masking tape must be checked for tightness before painting. If necessary, the “waves” should be pressed with a spatula.
- If a large amount of work is planned, the paint can be thinned a little. Choosing an air conditioner (thinner) should be done at the same time as deciding how to paint the lining inside the house. Thinner paint will go on smoother, without rough strokes or joints, but will dry more slowly.
- Surfaces are painted alternately. Applying paint with a brush or remote control to all surfaces and “rolling” them one by one with a roller, you may not have time to even out the layer of paint on all finishing elements.
- In one batch of paint (stains, tinting coatings) there may be slightly different colors. Before starting work, you should mix the contents of all packages to obtain a single color.
- Rollers and brushes should be washed before starting work. If the question of how to paint the lining inside a country house has been decided in favor of a water-soluble product, it is not necessary to dry the tools - you can start painting right away. To manipulate coatings on a different base, it is better to dry your brushes and rollers.
Useful recommendations for purchasing paint and painting
When choosing and purchasing paint for the interior decoration of wooden walls, it is very important to pay attention to the date of manufacture of the composition and the availability of certificates confirming its quality and sanitary compliance. If the seller cannot provide documents for the product, and the production date is not stamped on the packaging, but is written on paper and pasted on top, so to speak, interrupted, then it is recommended to immediately refuse to purchase such paint, especially if a fairly expensive version is purchased.
The fact is that if the paint is expired or frozen, then it may simply not lie on the surface, even if it is well prepared, and you can determine the quality of the composition only by opening the package and trying to apply it to the wood. For example, it will not be possible to paint anything with a frozen solution, since the paint will most likely curdle and have the consistency of liquid cottage cheese.
High-quality paint should spread easily over the surface of the wood, while having high hiding power
If the paint is of high quality, it will be easily applied to the surface, which means that painting the walls can be done by a person who has never even performed such repair work before.
Next, it is worth considering those factors that will directly affect the final finishing result.
- First thing to note. It is a common phenomenon that many homeowners, when doing their own renovations in a house or apartment, are careless about the preparatory stage of work, since they consider it unnecessary. However, if the base for the decorative coating is uneven and untreated with protective agents, you should not expect the desired result. In addition, after a short time, even defects that are invisible immediately after completion of the work will begin to appear, for example, such as blue discoloration, blackness of the wood, or “resin pockets” near knots. Therefore, the preparatory process must be considered mandatory and carried out as efficiently as possible.
- When treating wood with one of the protective compounds, it is necessary to very carefully process the end parts of logs or beams if they face the rooms. If the walls of the house are covered with clapboard, then its side surfaces should also be carefully treated with antiseptic solutions.
- All protective and coloring compounds are applied to wooden surfaces in thin layers along the grain, otherwise their absorption into the wood will be uneven, which will negatively affect the overall appearance.
This simple “improvement” from ordinary rubber rings will greatly simplify the process of applying paint with a brush from a can.
- To ensure that there is no excess paint on the brush, and that it does not flow, but lies flat, it is recommended to use a simple device consisting of two stationery or ordinary rubber bands. One of the rubber bands is put on the bottom and top of the can, and the second along its diameter. The second elastic band will hold the first one, preventing it from sliding to the side.
After dipping the brush into the paint, press it against the stretched rubber band, leaving excess solution in the container.
- When applying paint to the surface of wood, do not try to cover it with a thick layer at once, as the painting will turn out sloppy. If you plan to get an opaque surface, then you should apply the paint in several thin layers, each of which should be applied after the previous one has completely dried.
- When painting walls covered with wooden clapboards, it is best to apply the final top coat starting at the top and gradually moving down - this method will help make the surface of the wall smooth.
- Paint can look different in a can and on the wall, so it is recommended to do a test paint job, that is, apply the solution to a small section of the wall in an inconspicuous area. It is best to choose the lower corner part of the surface.
- In order for the decorative layer to lie evenly on the surface, experts recommend adding a color to the primer that is one or two tones darker or lighter than the base color.
- The optimal temperature for painting surfaces is 22÷25 degrees. You should not carry out this process in hot weather, as the paint will dry too quickly and therefore unevenly. If the temperature is too low, the fluidity and hiding power of the compositions deteriorate, and the drying period increases.