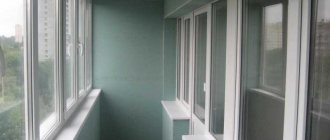
Buying your own apartment in a new building is the cherished dream of millions of our compatriots. They save for years to buy their own home and take out mortgage loans. And now, finally, all the documents are in hand. Inspecting their purchase, the owners understand that the apartment, to put it mildly, is not suitable for immediate relocation. A thorough renovation is required, and its volume depends on the degree of readiness of the housing.
Today on the real estate market apartments with rough and pre-finish finishing are sold. In addition, a lot depends on the integrity of the developers and the layout. The work is planned taking into account the condition of the apartment and the wishes of the owners. In this article we will tell you where to start renovations in a new building and how to plan the sequence of stages. And experts will share professional secrets that make life much easier.
Stages of repair work
When starting work in a new apartment, you need to change the locks on the front door. As a rule, during construction, duplicate keys are distributed to representatives of the management company, crew members, gas workers and electricians, and potential buyers who inspect apartments before purchasing. Therefore, you should worry about your own safety and the safety of purchased materials and equipment. What should you consider when planning a renovation?
- All work with the heating system - replacing the riser, moving it, installing new radiators - is easiest to do in the summer, when the heating is turned off. During the winter period, the management company may refuse to close the riser.
- Cement screeds and installation of brick partitions on loggias and in apartments with no heating are done at temperatures above zero. Otherwise, the solution freezes and loses its binding properties.
- In severe frosts, double-glazed windows cannot be installed, no matter whether they are plastic or wooden.
- Finishing work is carried out from top to bottom, from ceiling to floor, so as not to render what was previously done unusable.
Rough finishing can be carried out in the entire apartment at once or room by room, at the discretion of the team. But cleaning is done only after all dirty work is completed, one room at a time.
Floor screed
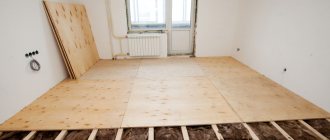
Before laying the floor covering, the floor must be leveled. There are two ways to do this.
"Wet" screed
Cost: 495 rubles per 1 m² 5 cm thick. Duration: 4–10 weeks depending on the thickness of the screed.
Usually the floor is leveled using sand concrete or self-leveling floor. With sand concrete it will be cheaper, but longer; with self-leveling floor - more expensive, but faster. Such screed options are called “wet”, because in both cases the mixture needs to be mixed, poured, leveled and waited. Sometimes they are used together: first the surface is leveled with sand concrete, then a self-leveling floor is made.
To make a floor screed 5 cm thick in an apartment of 50 m², you will need 220 bags of dry mixture, 25 kg each.
This is about 25,000 rubles. Such a floor will weigh 5 tons (a 1 cm thick screed per 1 m² of area weighs 20 kg).
The screed is poured, leveled and kept for 28 days to gain strength. It must be damp all this time: if you allow it to dry out, the floor will crack. After this, you need to wait for the screed to dry. Drying time depends on the thickness of the layer, temperature and humidity in the apartment. If you dry the screed forcibly (for example, using heat guns), it will not gain the required strength. And if you lay the flooring on a wet floor, it will deteriorate: the parquet will swell due to increased humidity, and the tiles will move away from the wall. The temperature in the room when screeding is performed should not be lower than +5 °C.
"Dry" screed
Cost: 670 rubles per 1 m², 5 cm thick. Duration: 2–3 days.
“Dry” screed is a technology for leveling the floor without sand and cement. Knauf has developed a dry prefabricated gypsum fiber floor: expanded clay backfill and small-format gypsum fiber sheets or special floor elements are used.
A “dry” prefabricated floor is more technologically advanced than a sand concrete screed. There is no need to soak it and wait for it to dry for several weeks - the topcoat can be laid a day after installing the floor.
The process is easier, faster and cleaner: you can lay such a floor on concrete and wooden bases, and hide technical and engineering communications under gypsum fiber sheets (if necessary).
If you do dry floor screed yourself, the whole process will take 2-3 days.
The cost of a dry screed 5 cm thick in an apartment of 50 m² is approximately 33.5 thousand rubles (21.5 thousand - gypsum fiber sheets, 10 thousand - expanded clay backfill, 2 thousand - glue, edge tape, plastic film and screws).
Do not skimp on expanded clay backfill. Bags with cheap backfill may contain a lot of dust or very large granules. Because of this, the floor may sag and become uneven over time. KNAUF expanded clay backfill contains only solid granules. The number of granules and their size are clearly calculated and regulated: it is this ratio that ensures a high-quality floor that will last a long time.
MVP is not the same as “draft”!
I really liked the illustration that I attached at the beginning of the article. It clearly displays the essence of development, where at each stage we already have a workable and useful product. Then it is only improved and supplemented with new functionality, rather than developing functionality that in itself does not make any sense and is not holistic.
In this short article, I shared our experience of creating an MVP and some tips that I highlighted for myself from the work done. At the moment, the MVP has successfully passed the hypothesis confirmation stage, and its further development is expected without discarding the already developed part.
Thank you for reading my article to the end. Leave useful tips about MVP development from your personal experience in the comments and ask questions if you have any.
Regulations
In recent times, the quality of work was assessed using improvised means. For example, some customers used a hundred dollar bill to evaluate the smoothness of plaster walls. The three-meter rule was applied to the wall, and a bill was used instead of a probe. The quality of work was considered low if the banknote passed through the gap.
There are situations that are the opposite. Specialists without experience try to hide or correct defects in rough finishing in the next stages of repair. There are different extremes. Therefore, it is advisable to adhere to the standards and requirements of building regulations (SNiP) when performing work, trying to maintain a balance between quality, cost, complexity and labor intensity of repairs.
Regulatory documents that you should familiarize yourself with:
- SP 71.13330.2011 controls the quality of insulating and finishing coatings.
- SP 73.13330.2016 regulates the requirements for the technology and quality of water supply, sewerage, heating, air conditioning and ventilation systems.
- SP 76.13330.2016 introduces the rules for organizing the electrical network in an apartment.
Everyone decides for themselves whether to adhere to these rules, but reading about generally accepted standards will be useful. This way you will have an idea of the requirements for the quality of work. This applies to both the customer and the contractor.
Where does the repair begin - step-by-step instructions
The step-by-step procedure for repair work in a new building apartment from the developer should start from scratch, but if any stage of work from the specified list has been completed or was not planned, proceed to the next point:
- Repairs in a new building should begin with the installation of a temporary toilet; subsequently, the product is replaced with a new one during the installation of the bathtub and sink;
- Installation of partitions. If the builders have not installed partitions in the apartment, then foam blocks or bricks can be used for their construction, followed by finishing with plasterboard;
- Organization of grooves. Using a hammer drill with a drill, the diameter of which must correspond to the width of the groove, grooves are made in the concrete for the future cable, turning on the “drill-impact” mode;
- Then they change the drill to a special peak, turn on the “blow” function, and connect the made indentations. The result of the work process in the new building can be seen in the photo;
- Electrical wiring. Electrical wires are laid throughout the apartment of the new building, where the power supply will be constantly used. After which the wiring is connected to the electrical panel;
- Organize the installation of plastic sewer pipes (bathroom, kitchen, toilet), with subsequent connection;
- To prevent the appearance of an unpleasant odor from the sewer, provided that the connection is made later, the edges of the pipes are equipped with plugs;
- Next, the sequence of repairs in a new building involves connecting the water supply system;
- You need to start with cold water for the bathroom and kitchen, after which you need to connect hot water for the bathroom and kitchen;
- Ventilation holes are equipped with special grilles;
- The walls are plastered and the rough floor surface is grouted;
- They move on to repairing the slopes of windows and doors;
- Connect the heating. Prime the surface of pipes and batteries;
- Assemble frame structures for built-in cabinets and niches. Our photo ideas will help determine the design of future structures. Carry out priming work;
- Install doorways;
- The subfloor in the bathroom is treated with waterproofing and a screed is applied on top of it;
- Finish the walls and flooring in the bathroom. Install the bathtub and sink;
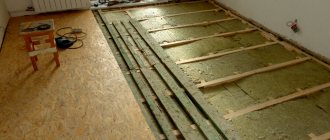
- In the remaining rooms, the subfloor is equipped with thermal insulation, after which a screed is performed;
- All existing openings in partitions and walls are sealed;
- The ceilings are finished in all rooms of the new building, after which the walls and slopes are puttied;
- Batteries and pipes are painted - this must be done in several stages;
- They arrange the finishing flooring for the floors, and lastly treat the subfloor in the hallway;
- They install interior doors, install sockets and switches;
- Finally, the necessary places are finalized and the design of the premises is improved.
This is the approximate order of work required to carry out an independent major renovation of an apartment in a new building.
Video:
What kind of results can be obtained from work done from scratch can be seen from the proposed photos.
Perhaps, after major renovations were carried out in the apartment of a new house, the expenditure from one’s own pocket would decrease, if not for the law on mandatory contributions for home repairs.
What can you save on?
Rough work is a costly process. Helps reduce costs:
- Purchasing building materials with a reserve: minimizes delivery costs).
- Finishing in winter. In summer, the demand for finishing services and building materials increases, which increases the overall cost of completing the work.
- Do some of the work yourself, but be prepared to spend personal time and effort.
Do you need repairs?
We have already renovated more than 500 apartments, we will be happy to help you too
Find out the cost of repairs
Apartment renovation cost calculator in Moscow
Discount on repairs
VIP project for free
Benefit from RUB 150,000.
When ordering repairs, you will receive a discount equal to the cost of your project!
If you already have an interior project developed by another designer, then by ordering repairs from the Fundament Group of Companies you will receive a discount on repairs equal to its cost.
100% full refund guarantee for a standard design project.
If you sign a contract for a major renovation, you are guaranteed to receive a discount equal to the full cost of a standard project, even if it was developed in another studio. In case of full prepayment, you will additionally receive a 10% discount on repair and construction work.
more details
Save up to 20%
When ordering a major overhaul, VIP interior design is FREE!
Everyone who has entered into an agreement for a design project under the VIP program will receive a full refund of the cost of design work at the final stage of repair.
100% refund guarantee of the entire cost of the interior project.
In case of concluding a contract for a comprehensive repair after completing the design project and paying for the repair upon completion of the work, the full cost of the VIP project will be returned at the end of the repair. In case of full prepayment for repairs, you will immediately receive a 10% discount on the work and a full deduction of the cost of the design project.
more details
Alignment of walls
One of the signs of high-quality repairs is the correct geometry of the walls and their surface. The walls must be smooth and meet at an angle of 90 degrees. If you violate the geometry, you will not be able to lean the cabinet tightly and glue the wallpaper evenly. If the surface of the walls is uneven, the wallpaper will highlight this.
Therefore, before wallpapering or painting the walls, they are first leveled. There are “wet” and “dry” methods for leveling walls. “Wet” - when the walls are primed, plastered and puttied. “Dry” - when covered with plasterboard.
“Wet” method of leveling walls
Cost: 550 rubles per 1 m², 5 cm thick.
Duration: 7–8 days.
There are two types of plasters used in construction: cement-based or gypsum-based. Gypsum plaster is better: it is easier to apply, process and allows you to regulate the level of humidity in the room. Gypsum plaster is used for interior work, and cement plaster is used for wet rooms or exterior surfaces.
For work, you can use KNAUF-Rotband plaster. It is easy to apply and level, and the consumption is almost half that of cement. You can apply a layer of up to 5 cm at a time without fear of it cracking or falling off. When treated with KNAUF-Rotband plaster, you can get a perfectly smooth surface that does not need to be puttied. This means you won’t have to spend extra money on putty.
“Dry” method of leveling walls
Cost: from 127 rubles per 1 m² - cladding with glue, 250 rubles per 1 m² - cladding on a metal frame.
Duration: 1–2 days.
Cladding with glue. Can be used when wall unevenness is less than 20 mm
Cladding on a metal frame. Suitable for walls with unevenness greater than 20 mm.
Instead of plastering the walls and waiting for the mixture to dry, they can be leveled using plasterboard (“KNAUF sheet”). One of the alignment options is to fix the sheets with construction adhesive: for example, KNAUF-Perfilks. If the walls are very uneven, you can use cladding on a ceiling or wall profile.
Drywall is cheaper than plaster, and you can cover walls with it in a few hours.
After installation, you need to putty the joints of the sheets and prime the surface.
If the unevenness of the walls is more than 20 mm, the surface is leveled with plasterboard cladding on a metal frame. In corridors and children's rooms, instead of plasterboard, it is better to use gypsum fiber sheet, such as KNAUF-Superlist. It is stronger and has better impact resistance. You can also use plasterboard and gypsum fiber sheets to make built-in niches in the walls and hide pipes.
For kitchens, baths and other wet areas, use moisture-resistant drywall or gypsum fiber sheeting. If the surface will be in direct contact with water, it must be additionally waterproofed.
We recommend reading:
How much electricity does a home air conditioner consume?
Didn't find an article on a topic that interests you?
Just write a few words in the form at the top of the screen, our search will automatically select suitable articles.
Partner news: All about country life and construction
Where is Moscow expanding? And what does this mean for summer residents? 586522 Will the Central Ring Road be able to relieve congestion on highways near Moscow? 328461 How to calculate acres of land? 272478 Which areas of the Moscow region are the cleanest and dirtiest in terms of ecology? 234517 Which metro stations will be built in the Moscow region? 210016
How much does it cost to connect a house and land to communications? 157596 Where is it better to live in the Moscow region? Rating of districts 127119 How many acres of land do you need to build a house? 124603 Districts of New Moscow. What are their advantages and disadvantages? 122332 What are the restrictions on construction near rivers and reservoirs? 106600 Which home heating is more profitable: gas or electric? 91610 Building codes and rules for the development of land plots 87137 What exhibitions of finished houses are there in Moscow and the Moscow region? 82492 The best cottage villages in the Moscow region 74987 What houses are currently on sale in the Moscow region? 71058 What are land plots without a contract? 63403 Are the basement and basement considered floors? 59357 Land development from scratch. Where to begin? 56364 Is it possible to leave SNT? 55216 What taxes must be paid for a house, garage, bathhouse and other buildings? 53086 How to re-register a plot? And how much does it cost? 54453 Is it profitable to build a house for sale? 49722 Where will the gas soon be? Gasification plan for villages in the Moscow region 46956 The best places for fishing in the Moscow region 45577 Pitfalls when buying a house
What should you pay attention to? 44219 How to bargain for a house? 43096 Life in a cottage community. Pros and cons 43039 Rating of Moscow region districts by quality of life 46061 Is it worth buying a house in SNT for permanent residence? 45718 Do I need to obtain permission to build a house on my site? 44080 Will a house built in SNT be considered residential? 42271 What to do after purchasing a plot? 38802 How long does it take to build private houses? 36443 The largest and most expensive cottages in Russia 35652 How much will it cost to build your own house? 34879
What is the best material to build a house for permanent residence from? 31842 How to register a rented plot under a house? 31209 Is it worth renting forest land for construction? 29013 How many floors can a cottage be built on? 28775 Ecovillages and ecovillages. What it is? 27789 What is the size of utility bills in cottage villages? 26705 How to build a house on a plot with a slope? 26152 Repair and decoration of a cottage. Work order and all stages 25583 Purchase of a plot with an unregistered house. What are the risks? 24136 Which private houses are warmer in winter? 23893 Division of a house with a plot. How to apply correctly? 23048 Gas to a private house. How to do it? 23048 How to rent out your plot? 22473 Turnkey house construction? Like this? And how much will it cost? 21681 Depreciation of the condition of the house. How to understand? How to calculate? 21108 Modular houses. What it is? 20520 How much will it cost to maintain your home? 20195 Lands of private household plots. What are their pros and cons? 19822 Forest areas (near the forest). What are their pros and cons? 19260 How to change the purpose of a site? 19127 Which is better: Cottage or Townhouse? 18830 Is it possible to turn a dacha into a residential building? 18564
Laying out water supply and sewerage pipes, installing electrical wiring
Electrical wiring installation
There are 2 types of pipe routing: tee and manifold. With a tee circuit, one pipeline departs from the manifold. Using tees, the pipeline is connected to each plumbing fixture. The advantage of this method is its low cost. The downside is low pressure.
Collector wiring is, of course, the more preferable option, since a separate pipeline is installed from the collector to each plumbing fixture.
As for electrical wiring, in rooms it can be mounted in the walls or laid along the floor. As a rule, wiring is “packaged” in iron or plastic pipes to ensure electrical safety and protect the wire from damage. Often the wiring diagram is already included in the design project.
Meticulous inspection
To begin with, we carefully examined our still uninhabited property in order to identify construction flaws in time, and at the same time estimate the scale of the upcoming repairs. Fortunately, we did not find any obvious violations, such as wet areas in the external walls, voids between the brickwork, large cracks in the ceiling and rough floor screed, and did not bother the developer.
We paid special attention to inspecting the walls: they should not contain any remains of construction waste or foreign objects. In several places we found small traces of steel wire embedded in the plaster and became concerned. However, an expert we know assured us: this is a good guarantee that the wall is strong and built to last. But, nevertheless, the ends of the wire can cause rusty spots after applying a layer of plaster, so it is better to remove them, if possible. But in our case they were almost invisible, and we didn’t do anything about them.
We were very lucky in terms of the evenness of the walls: deviations from the vertical were about 0.7 cm per floor height (as opposed to the critical 2 cm) and 0.5 from the plane of the wall (should be no more than 1 cm per 3 m of length). Visually, the flaws are almost invisible, but with the help of a building level it was possible to determine them more accurately. Due to small cracks on the surface of the concrete floor, they also did not panic. They are acceptable for better shrinkage of concrete in the warm season.
Another important inspection point is engineering equipment and pipes. We paid attention to the fastenings of radiators and the connection areas of heating systems, the tightness of the joints of water pipes, the quality of taps and welding of the gas pipeline, the presence of a switchboard with an automatic machine and metering devices (they were specified in the contract). Our windows and loggia are glazed, but the quality of the PVC windows was average: although we did not find any obvious cracks, after the rain we found small puddles of water on the windowsill, after which we decided to replace the double-glazed windows.
