How to lay a half-brick wall
The sand must be clean - river or sifted.
Cement for laying half bricks must be used at least grade M 500. All bricks must be saturated with water, placing them in a tank and completely filling them. The time spent in the water is at least an hour. A wet brick will not absorb moisture from the mortar, which will allow the cement to set evenly, providing the design strength of the wall. Beginning of installation: the corner supports are removed first. The second row is laid on the first brick row, and the process continues until the top row after the reinforcing mesh frame. Corner masonry has a height of 5 bricks, laid in such a way that the guide brick overlaps (ties) each other at an angle of 900. Each row must be checked for verticality and horizontality using a level. Bricks are pressed into the mortar only in the center of the product to prevent movement to the sides.
After laying the bricks up to the first layer of armored belt, a cord is pulled along the first row to control the laying. The mortar is applied in an even layer over the entire row and the bricks are laid. After the third row, the evenness of the wall is checked. After laying each subsequent row, the cord is raised to the height of the brick. To ensure the required strength, after the fifth row it is recommended to take a two to three hour break in work to allow the solution to set. To build a wall faster, it is allowed to use high-strength double brick M 150, which has dimensions: 120 x 138 x 250 mm.
Since double bricks are large in size, it makes sense to give the masonry greater strength by using more frequent mesh reinforcement. There are ready-made meshes on sale with a rectangular or zigzag profile, but you can make a stack with your own hands. The rectangular reinforced mesh should be laid horizontally every five rows. A mesh with a zigzag profile is laid in the attached places of the masonry, its rods are connected by welding or knitting with wire. When carrying out reinforcement, the mesh is laid so that the ends of the rods protrude 5 mm beyond the wall. This is necessary to control the presence of reinforcement. After the solution has hardened, these protruding ends can be cut off or bent.
Nuances of construction
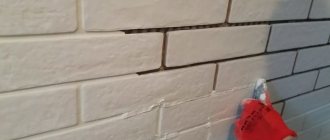
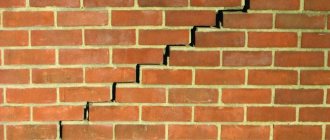
During the construction of masonry, reinforcement is required. Start it after the third row and apply it after every fifth. For reinforcement, anchors, metal mesh, and steel rods are used.
To prevent fresh masonry from accidentally deforming, the construction of a ½ brick partition is carried out in stages, four to five rows, after which a break is taken so that the masonry mixture can set.
Special attention is paid to the laying of corner sections, if any. By violating the verticality and turning degree, you will “fill up” the corner, after which certain problems will arise related to the construction of the wall or the installation of door and window blocks.
Laying fence posts: technologies
In most cases, fence posts are made of 1.5 or 2 bricks, the cross-section is 380*380 mm and 510*510 mm, respectively, and the height is up to 3 meters.
The masonry is carried out with bandaging (offset) - the seam of the bottom row is overlapped by the “body” of the brick lying on top. The standard seam is 8-10 mm. The diagram for laying columns of one and a half and two bricks is in the photo below.
Brick pillars of 1.5 and 2 bricks
Laying pillars: work order
Cut-off waterproofing is spread on the finished foundation. It can be roofing material in two layers, but it is better to use waterproofing with bitumen mastic. This layer is necessary so that the brick does not “pull” moisture from the soil. If wet brick freezes, it will quickly begin to crack and crumble. Therefore, waterproofing is necessary. Rolled waterproofing can be replaced - coat the foundation twice with bitumen mastic, and in areas with high humidity it is better to do double waterproofing - coat it with mastic, and then lay “Gidroizol” as well.
According to the size of the pillar, a layer of mortar a little more than 1 cm is applied to the waterproofing. Bricks are laid on it, according to the diagram. They are leveled in vertical and horizontal planes by tapping with a special rubber hammer. Craftsmen can use the handle of a trowel, but in this case, the remains of the mortar can fly off the surface of the trowel, staining their hands and the brick, and it is difficult to wipe off the cement.
Ceramic brick absorbs moisture very quickly, so if you hesitate a little, it will be difficult for you to “put” it in place. To ensure that the solution retains its plasticity longer, the brick is dipped in water for a few seconds before laying. The same maneuver makes it easier to wipe the solution from the surface (it is removed immediately with a dry cloth).
We hit with a hammer
The second row is laid in the same way: the mortar is spread on the bricks, the bricks are placed on it, but with a bandage - unfolded so that the seam is blocked. Level again. Then take a tape measure and check the dimensions of the laid rows. Even a small displacement of 1-2 mm is eliminated. Tap the end of the brick (called a “poke”), moving the bricks closer. Then, if the side edges were not coated, fill the vertical seams. All subsequent rows are placed similarly.
If there is a void between the inner reinforcement pipe and the brickwork, it is filled. If the distance is small, you can use masonry mortar; if the void is significant, to save space you can fill it with crushed stone, compact it, then pour it with liquid cement-sand mortar.
Masonry under the rod
The masonry of pillars described above has long been tested, but for beginners, when making it themselves, it is difficult to maintain an even seam. Another problem is that the solution comes out of the seam, staining the surface. It doesn't turn out very nice. To make the work easier, we came up with a laying under the rod. Take a square metal rod with a side of 8-10 mm, cut it into pieces, 10-15 cm longer than the dimensions of the post.
Bar layout
Having laid the first row, a rod is laid on it along the edge of the brick. Fill the area with a small amount of solution, with a larger layer being made closer to the pipe. Then, running a trowel along the rod, remove the excess, clearing the rod of the solution. But at the same time, the slope of the solution is maintained. They place a brick and level it. At the same time, the rod prevents it from settling too much, and we control the position of the other end with a level.
Apply the solution to the side edge under the rod
Then take a short piece of rod about 10 cm (for a vertical seam), place it along the butt, apply the mortar with a trowel to the side of the laid brick, also removing the excess along the rod. The second brick is placed and leveled. After the level is set, the seam is pressed from above with a trowel, and the vertical rod is removed.
We take out the rod, holding the seam with a trowel
This is how all the bricks are laid out in a row. Then the rods are removed and proceed to the next row. This technology for laying brick pillars allows you to control the seams and make them neat. Even a novice amateur mason can fold a pillar this way with his own hands.
It is only important to control the parameters of each row during the process (so that the column in the cross-section is the same size)
DIY brickwork: tools, order and features
Now that you have an idea of how to lay bricks with your own hands, you need to talk about the procedure as well as some technical nuances.
Sample list of tools for bricklaying
Let's start with the tool. You will need:
- mason's trowels - apply and level the mortar onto the bricks;
- concrete mixer or container for mixing mortar;
- mortar shovel - for kneading and periodic mixing;
- two or three buckets for the solution;
- plumb line - check the verticality of walls and corners,
- building level - to check the horizontality of the row of masonry;
- cord-mooring - for beating rows;
- jointing (for molding seams);
- hammer-pick for breaking incomplete bricks (halves, 3/4 and checks - 1/4);
- The rule is a flat metal or wooden strip to check the plane of the wall.
Next we will talk about the features of the technology. First: it is advisable to soak the brick before use. This is especially true in hot, dry weather. Then it will “pull” less moisture from the solution. If there is not enough moisture, the cement will not be able to gain the required strength, which will affect the strength of the building.
First, two corners are driven out, then they are connected with several rows of brickwork
Second: the corners are driven out first. First the first two. They are connected with 2-3 rows of bricks according to the chosen masonry pattern. Then the third corner is kicked out. The second and third are also connected in several full rows. Afterwards the fourth corner is placed and the perimeter is closed. This is how walls should be built, going around them around the perimeter, and not pushing walls out one by one. This is one of the most common mistakes.
Third: there are two row control technologies. The first is that nails are inserted into the seams of the corners, to which strings are tied. It needs to be pulled so that it marks the top edge of the brick, and also limits the outer (and, if necessary, inner) surface of the wall.
Procedure for attaching the mooring cord
The second way is to use wooden or metal orders. This is a flat strip or corner on which marks are applied every 77 mm - marks on wood or cuts on metal. They mark the required row thickness: brick height + seam. They are installed using flat mounting brackets that are inserted into the seam. If necessary, they are then simply removed and rearranged higher.
There is another way - a mason's corner. It has a slot on one side, into which there is a solution at an angle.
Breaking out a row using a mason's corner
The disadvantage of this method is the same as just using a nail in the seam: the height of the row must be controlled “manually” when drawing out the corners. If you lack experience (and where can you get it if you are doing bricklaying with your own hands for the first time), this is difficult. Having (having done it yourself) everything is easier.
Fourth: preparation of incomplete bricks. As you have seen, when laying, they use halves, three-quarter bricks and checks - 1/4 parts. To ensure that the work does not slow down, it is necessary to prepare them before starting masonry. This is done using a hammer-pick. When preparing, high precision in size is required, otherwise the dressing will go wrong. To make it easier to control the length, marks of the appropriate length are made on the handle. By placing the pen on the brick, marks are made on both sides of the spoon. Then, placing a pickaxe blade on the mark, they hit the reverse side with a hammer, making notches. Having made notches on both spoons, they break the brick with a strong blow of the pick.
Description, application
Often, when building simple structures that will not bear serious mechanical loads, people try to save money. Therefore, during construction work, cheap building materials (for example, drywall) are often used, which do not always have the necessary characteristics. A good solution for the construction of simple structures would be to build half-brick brickwork. At the same time, in the case of indoor construction, the floor does not require reinforcement - its strength is often sufficient to withstand the mass of half-brick masonry.
This type of masonry first appeared around 7000 BC. Archaeologists have discovered objects that belong to the ancient Indian culture in India and Pakistan.
Over the past time, masonry technology has remained virtually unchanged. It is carried out in such a way that the visible part will consist only of the tray parts of the brick. The laying principle is quite simple - the bricks are laid one row at a time on a layer of mortar. In this case, the masonry is carried out in a checkerboard pattern so that the vertical seams between the rows of bricks do not form one line. Failure to comply with this rule leads to deterioration in the strength of the structure. This masonry provides a wall thickness of 12 cm - the width of the brick (if there is no additional wall finishing). This thickness allows you to withstand the weight of hanging furniture, but will not be able to withstand the weight of the building structure. Therefore, such masonry cannot be carried out for the construction of load-bearing walls (after all, according to SNiP and the Construction Law, the thickness of load-bearing walls should not be less than 38 cm).
Basic tools for half-brick masonry.
Any structures (for example, roof rafters) can be supported on such walls only after an examination and a special permit (project) has been issued from the regulatory services. In this case, the load on such a wall should be limited - it can withstand a weight of about 120-130 kg. Therefore, you need to hang furniture and equipment on it based on these figures (for example, you cannot hang a 150-liter electric water heater on such a wall). In the case of the construction of walls, one side of which is outside the building, additional strengthening (reinforcement) of the masonry structure is necessary. To do this, the reinforcement is laid so that it forms a transverse “lattice”. The reinforcing grid is fastened by welding to the backfill elements in adjacent walls. The lattice pitch is 3-4 bricks (rows) thick. The reinforcement can be supplemented with metal mesh, which is placed in the seam.
You can build such walls for the following purposes:
For fencing beds. This type of masonry is especially often used for fencing flower beds on the street in front of the entrance to the yard. This will prevent accidental or intentional collisions with flower beds. For the construction of interior partitions. Such masonry will create a solid wall that will have good sound insulation, and will also allow finishing with any materials.
It is important to take into account the weight of the finish (for example, the total weight of the plaster) and not to overload the wall. Construction of auxiliary buildings. For example, dog kennels, small sheds, coal bunkers, etc.
When constructing such objects, it is strongly recommended to organize a foundation for masonry (more details will be discussed in the “preparatory work” section). Construction of various types of fences: to prevent soil sliding (if the site is on a slope), to visually separate any objects, etc. However, such masonry cannot be used when constructing full-fledged fences, since the wind load at a wall 1.5 meters high and more than 2 meters long exceeds 350 kg.
Read below about how to perform similar masonry for various needs and under various conditions.
Reference thickness parameters
The preferred thickness of brickwork depends on a complex of both interrelated and disparate factors. The parameter under consideration can be in the range between 120 and 640 millimeters (½ - 2½ length of the product).
Two-brick masonry is the most commonly used, but this applies to the temperate climate zone, while in Siberia and other zones where the climatic conditions are harsh, this will not be enough. The optimal thickness there is 640 millimeters.
The height of the building is also of great importance. SNIP recommends that the minimum thickness of a load-bearing brick wall be at least 4% of the height.
The lower threshold for external load-bearing walls is 380 millimeters.
For the internal load-bearing wall, at least one brick is used. Partitions that provide division of the space of the building into zones are allowed to be constructed in half a brick.
Below is a table containing the thickness of brick walls:
Rules for preparing masonry mortar
For laying brick stone, a mortar made from sand and cement material is used. The sand must be clean, preferably river sand, without foreign impurities. The cement used is grade m 400.
Mixing is done manually or in a concrete mixer, but the sequence of steps does not change.
The sand is sifted, mixed with the binder until homogeneous, after which water is added. As a rule, its volume is 0.4 - 0.6 of the total amount of the batch, but it is best to supply the liquid in portions in order to monitor the plasticity index of the masonry mortar.
A plastic mixture is more convenient to work with than a rigid one, but for laying hollow brick stone its consumption increases, since the mixture gets into the voids. For this case, a hard mixture is considered more practical.
For ease of use, plasticity is increased by adding lime, clay, or a liquid detergent composition to the masonry mass. The volume of any of the additives should not exceed 0.1 part, but this is quite enough to significantly improve the characteristics of the masonry mortar. It becomes more manageable when styling and does not flake for a long time.
There is no need to immediately prepare a large volume of sand-cement mortar. It’s better to prepare a batch that you can easily work with in a couple of hours. And even this volume begins to create problems by the end of the control period - moisture separates and setting begins. This state of the mixture is influenced by weather conditions and the quality of the cement material. For those new to working with brick material, you should prepare very small batches, since the work of laying the stone will progress slowly.
Many people do not know at what temperature it is allowed to lay bricks. If you do not use special components in the solution, then you can work with the masonry mixture at a temperature of at least seven degrees Celsius. This is the standard limit at which normal setting of the solution occurs. A lower temperature practically stops the hardening process, the mortar begins to crumble, and the walls receive a low margin of safety. In such cases, it is recommended to add anti-frost additives to the masonry mass, but this will entail considerable financial costs.
Laying fence posts: technologies
In most cases, fence posts are made of 1.5 or 2 bricks, the cross-section is 380*380 mm and 510*510 mm, respectively, and the height is up to 3 meters.
The masonry is carried out with bandaging (offset) - the seam of the bottom row is overlapped by the “body” of the brick lying on top. The standard seam is 8-10 mm. The diagram for laying columns of one and a half and two bricks is in the photo below.
Brick pillars of 1.5 and 2 bricks
Laying pillars: work order
Cut-off waterproofing is spread on the finished foundation. It can be roofing material in two layers, but it is better to use waterproofing with bitumen mastic. This layer is necessary so that the brick does not “pull” moisture from the soil. If wet brick freezes, it will quickly begin to crack and crumble. Therefore, waterproofing is necessary. Rolled waterproofing can be replaced - coat the foundation twice with bitumen mastic, and in areas with high humidity it is better to do double waterproofing - coat it with mastic, and then lay “Gidroizol” as well.
According to the size of the pillar, a layer of mortar a little more than 1 cm is applied to the waterproofing. Bricks are laid on it, according to the diagram. They are leveled in vertical and horizontal planes by tapping with a special rubber hammer. Craftsmen can use the handle of a trowel, but in this case, the remains of the mortar can fly off the surface of the trowel, staining their hands and the brick, and it is difficult to wipe off the cement.
Ceramic brick absorbs moisture very quickly, so if you hesitate a little, it will be difficult for you to “put” it in place. To ensure that the solution retains its plasticity longer, the brick is dipped in water for a few seconds before laying. The same maneuver makes it easier to wipe the solution from the surface (it is removed immediately with a dry cloth).
We hit with a hammer
The second row is laid in the same way: the mortar is spread on the bricks, the bricks are placed on it, but with a bandage - unfolded so that the seam is blocked. Level again. Then take a tape measure and check the dimensions of the laid rows. Even a small displacement of 1-2 mm is eliminated. Tap the end of the brick (called a “poke”), moving the bricks closer. Then, if the side edges were not coated, fill the vertical seams. All subsequent rows are placed similarly.
If there is a void between the inner reinforcement pipe and the brickwork, it is filled. If the distance is small, you can use masonry mortar; if the void is significant, to save space you can fill it with crushed stone, compact it, then pour it with liquid cement-sand mortar.
Masonry under the rod
The masonry of pillars described above has long been tested, but for beginners, when making it themselves, it is difficult to maintain an even seam. Another problem is that the solution comes out of the seam, staining the surface. It doesn't turn out very nice. To make the work easier, we came up with a laying under the rod. Take a square metal rod with a side of 8-10 mm, cut it into pieces, 10-15 cm longer than the dimensions of the post.
Bar layout
Having laid the first row, a rod is laid on it along the edge of the brick. Fill the area with a small amount of solution, with a larger layer being made closer to the pipe. Then, running a trowel along the rod, remove the excess, clearing the rod of the solution. But at the same time, the slope of the solution is maintained. They place a brick and level it. At the same time, the rod prevents it from settling too much, and we control the position of the other end with a level.
Apply the solution to the side edge under the rod
Then take a short piece of rod about 10 cm (for a vertical seam), place it along the butt, apply the mortar with a trowel to the side of the laid brick, also removing the excess along the rod. The second brick is placed and leveled. After the level is set, the seam is pressed from above with a trowel, and the vertical rod is removed.
We take out the rod, holding the seam with a trowel
This is how all the bricks are laid out in a row. Then the rods are removed and proceed to the next row. This technology for laying brick pillars allows you to control the seams and make them neat. Even a novice amateur mason can fold a pillar this way with his own hands.
It is only important to control the parameters of each row during the process (so that the column in the cross-section is the same size)
Video lessons
A more complex version of a brick pillar - twisted with a screw
Features of working with ceramic bricks
Standard masonry scheme of one and a half bricks
One of the widely used methods in the construction of buildings consisting of more than one floor is masonry with one and a half bricks, the scheme of which is widespread everywhere. This is due to the fact that such masonry increases the load-bearing capacity of the walls. Brick laid in this way looks beautiful and neat, and the appearance of the building is impressive even without additional processing. A wall laid using this method provides an excellent surface for the next stage of decorative finishing.
One of the most popular masonry methods is one and a half brick masonry.
Brick is a man-made stone that is used in construction everywhere. To create this material, all kinds of components are used to enhance one or another quality, depending on the requirements for the structure and the climatic zone where the construction takes place. Regardless of the composition, the standard dimensions of the material accepted throughout the world are as follows:
- length - 250 mm;
- width - 120 mm;
- height - 65 mm.
Brick laying technique
There are three bricklaying technologies:
- Press it in.
- Suck it.
- Half-sucked.
Press-on technology
To perform this technique, you must be able to use a trowel or trowel well. This technology requires a hard solution. It is used for laying spoon and butt rows. With this type of masonry, all seams remain filled.
The “pressing” technology begins with applying the solution with a trowel. It needs to be smoothed out to make a flat bed. It is worth remembering that the cement-sand mixture is laid out at a distance of 1 or 1.5 cm from the edge of the wall.
Then, using the edge of the tool in the right hand, part of the mortar is raked up and pressed against the side edge of the previously laid brick. With the other hand, the next brick is placed in its place and after that the trowel is removed, leaving the vertical seam between the blocks filled with a cement-sand mixture.
After this, the position of the brick is leveled in all three planes. In order for the rows of the wall to be even, it is necessary to monitor the tension of the mooring cord. If, after seating the block, excess mortar appears in the horizontal or vertical seams, it must be cut off with one movement of the trowel and moved further along the wall to lay the next blocks.
Despite the complexity of such masonry, the seams remain completely filled, so the strength of this technology is very high.
Laying "butt" and "tuck"
Butt-butt technology
A more plastic solution is used here. Seam filling is not 100%. They are partially filled when laying subsequent rows. This type of wall construction is called emptying. This method is used for spoon and butt rows.
The process of laying bricks begins with spreading and leveling the bed several blocks ahead. Then, holding the brick at an angle, part of the spread material is captured by the butt edge. The mortar should be raked at a distance of up to 12 cm from the last laid brick. If bonded brickwork is performed, the mixture is raked with a spoon edge.
As the brick approaches its place, it must be leveled to a horizontal position. So, part of the mortar that was previously located on the bed ends up in the seam between the bricks.
Then the block is leveled on all planes and aligned with the mooring cord.
This method is easier because it allows you to use both hands to line up the blocks. If, when applying the mortar, you plan to trim it with a trowel, this method will take more time than brickwork without trimming. The “pressing” method is the most time-consuming, but it ensures complete filling of vertical seams.
When laying out the bed, remember that it should be located 2-3 cm from the edge of the wall. Thanks to this, when the brick moves along the bed in the direction of the previously laid one, the mixture will not protrude outward. This is especially true for facing masonry or when insulation of a brick wall is not planned.
Half-squat technology
This method is very similar to the one described above, but is most often performed for laying backfills. Such brickwork is carried out in the presence of two external, most often spoon rows. In the middle, where the backfill row is located, a mortar bed is laid out and leveled.
Layout diagram of 2.5 bricks
The movement of the brick along the mortar bed towards the previously laid one begins 6-8 cm. At this time, part of the mortar is captured by the spoon edge. The seam remains practically unfilled. When laying the next row, the mason needs to ensure that the required amount of cement-sand mixture gets into the joint and the seam is completely filled. If the joints between the blocks are poorly filled, the thermal insulation and strength characteristics of the wall are reduced.
When laying the backfill, it is necessary to accurately maintain the level and plane with the adjacent spoon rows. The interlocking brickwork should not protrude or be recessed.
Reinforcement methods
Brickwork can be strengthened in different ways:
- reinforcing mesh. It is produced in different widths; the thickness of the steel wire is three to five millimeters. This section is excellent for laying in a masonry joint without increasing its thickness. The mesh is easily cut into strips of the required sizes;
- roll mesh. The cell sizes and strip widths may vary, but the option is considered more economical than the previous one, since it allows you to cut elements to the required dimensions;
- polymer masonry mesh. It has certain advantages over its metal counterpart. It is lightweight, does not corrode, and has a low thermal conductivity, completely eliminating the formation of “cold bridges.” As soon as the masonry mortar hardens, the polymer mesh is firmly held in the seam, as if it were a steel gasket. The main advantage is flexibility, allowing installation in corner areas and vertical joints. True, a mesh made of polymer material will have to be laid more often than its metal counterpart;
- steel rods. Their cross-section should be three to six millimeters, installation is carried out in one or two rows in the middle of the brickwork to strengthen them vertically and horizontally. At the joints, wire overlaps must be at least fifteen sizes in diameter. Wire for reinforcement is produced in coils starting from two hundred kilograms;
- flexible connections. The reinforcing material used when making brickwork strengthens such a wall. In the case when facing work is carried out on a building in use, the brick wall must be connected to the main structure to prevent deformation and collapse. To do this, use flexible connections consisting of a steel or composite rod with a length of eighteen to thirty-five centimeters. The reinforcing end is fixed in the supporting structure, the second is laid in the mortar mixture of the brick row. The grip is improved by the notches or sand coating on the rod. Flexible ties will reliably connect the facing brick finish to the main structure without increasing the thickness of the masonry joints.
Basic principles of the process
Brickwork technology is the key points that are considered common to the construction of any objects. The subtleties of the process may change when choosing one or another masonry method, but it is imperative to master the basic techniques.
First of all, it is important to decide on the type of foundation and the width of the masonry. The height is calculated using a special table, which contains information about the thickness of the brick, the corresponding thickness of the mortar and the number of blocks per 1 square meter. A foundation is required for any heavy building
For non-residential buildings of one floor, a columnar foundation is sufficient. It is better to install a reliable house on a strip or solid foundation. Brick is considered a heavy material, so it requires a strong base. The higher the number of floors of the house, the stronger the foundation should be
A foundation is required for any heavy building. For non-residential buildings of one floor, a columnar foundation is sufficient. It is better to install a reliable house on a strip or solid foundation. Brick is considered a heavy material, so it requires a strong base. The higher the number of floors of the house, the stronger the foundation should be.
The thickness of the masonry determines the thermal insulation and sound insulation qualities of the building, as well as its fireproof properties.
There are 5 types of masonry in thickness.
- Half a brick. The thickness is equal to the width of the bed - 12 cm. This option is suitable for non-residential one-story buildings.
- One brick. The thickness of the wall is equal to the length of the bed - 24–25 cm. Sufficient for a one-story house with thermal insulation.
- One and a half bricks. The thickness of the structure is formed by two rows of blocks. It is equal to 36–37 cm, respectively. Such masonry will be reliable for one-story and one-and-a-half-story buildings.
- Two bricks. This option consists of the length of two beds - 48–50 cm. You can safely build a two-story cottage on a solid foundation. The total weight and cost of such a building are quite high.
- Two and a half bricks. The thickness of the walls is 60–62 cm. Rarely used for multi-storey residential structures. In addition to the large weight, such a building will require investment in a heating system.
Having determined the required width and type of building material, you can begin to build the foundation and lay bricks. In the process, you need to follow the rules.
- Use devices to control horizontal and vertical lines to ensure that the masonry is level. The most important step is to lay out the first row correctly.
- The corners are built first, then the middle part of the wall. The corners serve as guides for laying out even horizontal rows.
- The direction of the row laying is from left to right.
- The blocks are placed on the mortar so that in horizontal rows the top brick rests on the two bottom ones. The support area is at least one quarter of each of the two lower blocks.
- The solution is placed on horizontal and vertical seams. This protects the brickwork from cracking.
- A mandatory element of masonry is dressing. It guarantees strength and protection against delamination.
- To further strengthen the building, metal reinforcement is used.
- Between the masonry and the foundation, waterproofing (roofing felt or mortar) is required.
- If the wall is planned to be plastered, the seams do not need to be filled completely. This way the plaster will adhere better.
- Facing and working bricks are laid out according to the same rules.
Types of masonry
There are several ways to lay a brick. The thickness of the wall or room partition will depend on this.
Brickwork is a structure made of bricks laid in a certain order and fastened together with mortar
Several techniques are traditionally used:
- quarter brick - the beam is installed horizontally with an axis along the wall, resting on the smaller side, while the width of the wall or partition will be minimal 65 or 88 mm, depending on the type of material;
- half a brick will provide a wall with a width of 120 mm, which is enough for summer buildings or as decoration for a cinder block wall;
- single brick masonry is used for external walls, it will be 250 mm;
- a wall width of one and a half bricks will provide better thermal insulation, as it is 340 mm;
- for a two-story building, we lay a wall at least 510 mm wide in two bricks.
Let's compare!
Facing masonry in half a brick.
In any other cases, half-brick masonry can only be used for the construction of enclosing structures that do not bear load. Let's take the construction of a garage as an example. The front and rear walls must be built with a thickness of 250-370 mm. But the side walls can be built with a thickness of 63 mm.
At the same time, there is no need to talk about the thermal characteristics of such walls at all.
Another thing is the Zigzag and Alenkina masonry technologies. The resulting internal wall voids are filled with insulation. The interior wall can be made of ordinary plasterboard or any other similar material. The conclusion of the Norilsk Institute of Heat Engineering showed the high heat transfer resistance of such walls.
The operation of residential buildings made using these technologies has shown their high efficiency and low consumption when using buildings.
Thus, during the construction of a calf barn in the Novogrudok district of the Grodno region, the use of the Zigzag technology made it possible to construct a building with heating from the breathing of animals so that the mortality of young animals during the winter period was 0%. Three residential buildings for young professionals were built from the bricks saved during the construction of the calf barn. The high seismic resistance of such walls allows switch posts built using these technologies to be used in the most severe climatic conditions of our Motherland. At the same time, heating such structures requires a significantly smaller amount of coolant.
The use of these technologies in construction forced the government of the USSR, and later Russia, to issue a new SNiP for heating engineering. The problem turned out to be in demand and relevant.
This is what made Academician Kapitsa include the topic of these technologies in his “Obvious-Incredible” programs. 7 films were made and shown on DTV on this topic. The topic of building environmentally friendly and inexpensive houses is constantly popular.
How to do it yourself?
A wall, plinth and any other structure can be made using brickwork of 1.5 bricks without the involvement of professionals. Of course, the result will largely depend on the quality of the work performed. It is necessary to rely on step-by-step instructions to achieve the desired result. Let's get acquainted with all the stages of such work using the example of making a wall of 1.5 bricks.
Preparatory stage
As with any other construction work, the manufacture of a brick structure according to the above scheme involves a number of preparatory steps. You will need to buy high-quality building materials and prepare a suitable binding solution for it. In addition, you will definitely need to purchase a number of tools and accessories:
- trowel (otherwise called a trowel);
- hammer;
- jointing;
- mopping;
- plumb line;
- level;
- square;
- cord;
- order;
- roulette;
- rule;
- pendulum.
Before proceeding with installation, you will need to familiarize yourself with a number of nuances (let's look at them using the example of wall construction):
the thickness of the specified masonry usually reaches 380 mm (this parameter is the sum of the width of one part, the width of the element attached to it and the thickness of the seam); you will need to pay special attention to the correct layout of each corner and bandaging of rows; for a sufficiently good dressing of 1.5 bricks, it is necessary to use full-size, half-size, and three-quarter products; You will first need to mark the location of row 1 (of course, after choosing the laying technology).
Dressing options
Typically, masters turn to the following types of dressings:
- single-row (or chain);
- multi-row.
Single-row dressing is considered simple. With it, they alternate between tie and spoon rows on the outside of the planned base (if it is a wall). In this case, large quantities of non-full-size bricks will be needed.
Multi-row dressing is done like this:
- the starting row is laid out “spoon-poke”;
- the second is the opposite;
- Rows 3,4,5,6 are laid out in spoons with a bunch of seams in half a brick.
Laying corners
Corners are the basis for the construction of brick structures such as walls. Even small flaws in the layout here can lead to a serious violation of the geometry. Because of this, the load-bearing capacity of the structure can be significantly reduced.
This is required so that it becomes possible to establish orders and to be able to stretch a special cord between them. It will help to monitor the evenness of the rows during the laying process. The technology of laying 1.5 bricks is more complicated when compared with the technique of 1 block. This is explained by the fact that in the first case it will be necessary to use building materials of various formats (meaning fours, three-quarters and halves).
Masonry work
First, you will need to waterproof the foundation by laying sheets of roofing felt on it. After this, using a building level, masonry is made in several rows in the corners of the future construction. Corner orders will then be attached to them using special brackets. You will need to stretch a special cord along the orders. It is recommended to place it every 5 m. If the length between the constructed corners is greater, then in order to avoid stretching the cord, a beacon made of bricks is placed in the middle. After this, it is possible to move on to arranging brick rows.
Using a trowel, lay out the prepared masonry composition. The step from the edge of the wall should be about 20 mm. If the seam begins to be filled entirely, then no more than 10-15 mm. The thickness of the layer should be maintained within 25-30 mm. Based on the consistency of the solution, you will get seams of 10-12 mm.
Masonry techniques
There are three types of masonry of 1.5 bricks. Let's get to know them.
- Press it in. This method of laying bricks is recommended if you are working with a solid binder. In this case, the seams are completely filled and jointed. The remaining mortar is moved to the vertical of the previously placed block with a trowel. Then they place the next brick that needs to be pressed against the trowel. The trowel must be pulled out sharply. The laid out part settles.
- Suck it. This method is relevant when working with a plastic composition. At the same time, the brick is slightly tilted, one of its faces touches the laid mortar, moves it towards the previously fixed part and sets it down.
- Butt with trimming. This technology differs from the above-mentioned only in that the binder must be laid at a small distance from the edge of the wall. The mortar protruding beyond the joints is then removed with a trowel.
A layout of 1.5 blocks can be done with insulation. It is simply attached to the load-bearing wall base and then covered with plaster.
What are the benefits of brick buildings?
Table of characteristics of bricks for masonry and proportions of mortars.
Brick has many advantages over other materials used to build walls. Among their advantages, as mentioned above, are low thermal conductivity and good strength. But these excellent qualities are lost if the wall does not have the optimal thickness for operating conditions.
The thickness of the wall of a building is an important indicator that affects the quality factor of the constructed structure, its load-bearing capacity, and other characteristics of the structure, such as functionality, thermal insulation and vibration insulation, and the ability to protect against noise.
If necessary, you can use small calculations to determine what thickness should be chosen for a brick wall. According to the standards accepted in construction, the thickness of a wall made of ordinary brick is equal to half the product. Depending on this parameter, the walls and the name are half a brick, 1 brick, or 2 bricks.
Of these, a wall of half a brick is 12 cm thick, 1 brick is 25 cm, one and a half bricks is 38 cm, and the so-called wall of 2 bricks is 51 cm thick. The dissimilarity of these values with numbers that are multiples of 12 is due to the fact that between the brick layers concrete can be placed.
Table of characteristics of building bricks.
Typically, all the walls of a building located outside, as well as load-bearing ones, are built with one and a half bricks or more. Partitions are built with half a brick or even a quarter; a design with 2 bricks will not work.
It is considered the most economically advantageous to make a wall with 1 brick. But it is not possible to build this way everywhere because of seasonal temperature fluctuations, which can be quite sharp. In such cases, you can make another masonry, arrange an additional layer of thermal insulation, an air cushion. Load-bearing walls are usually made with greater thickness, and in some cases additional reinforcement is created through reinforcement.
It is also permissible to erect walls whose thickness will vary. When constructing a high-rise building, after laying out the walls of 5-6 floors, the width of subsequent floors is often “cut off” by half a brick. This is done in order to reduce the load that the building puts on the foundation and lower floors.
Calculation of wall thickness
If you need to calculate the thickness for a future brick wall, take into account the dimensions of the standard product:
- width 120 mm,
- length 250 mm,
- thickness 65 mm.
Recommended thickness of solid brick walls for residential buildings.
The weight of one cubic meter of brick is approximately 1800 kg. When making calculations, it is necessary to take into account the climatic features of the area where construction is being carried out. For example, if in winter the temperature reaches -25 °C, the width of the external walls should be calculated as 51 cm (2 bricks) or 64 cm.
Given this feature of building materials, it is easy to perform calculations and find out the expected consumption of bricks to build a house. For example, construction is planned to be carried out in areas where severe frosts are common. It is planned to build the structure without installing an insulating layer. In this case, the thickness of the walls should be 51 cm. This means that the masonry should be made 2 bricks thick.
Knowing the length and height of a structural element of a building, it is not difficult to calculate the area for each individually. Next, we find out the area of the brick and calculate the amount of material that will be required to build a wall with specific parameters. Multiply the amount calculated for one of them by the weight of one brick to get the weight of the wall.
1 m³ of brick weighs 1800 kg. If we take the weight of the wall as X, we can calculate the required amount of building material (Y): X/1800=Y (m³). If you find out the price of bricks, and it can vary depending on the suppliers, then you can very simply calculate the total amount that the construction of the building will cost.
How should bricklaying be done?
Brick is a standardized building material that has been used in construction for many years. The most popular single, with dimensions 250x120x65 mm. During construction, thickened modular bricks are also used; their dimensions are slightly different and amount to 250X120X88 mm. Indicators such as length and width are the same for different types of bricks. The basic size is considered to be 250 mm long. In order to calculate the thickness of the masonry, you should start from it.
Bricklaying techniques.
The masonry, which builders call 1 brick, is 250 mm thick. Bricks in such a masonry will not be stacked next to each other. With this installation method, the wall will not be stable. The individual elements in it will be retained only by the solution, whose binding force may not be enough. The masonry is carried out in accordance with certain rules. These include ensuring proper dressing for connecting sutures that are placed vertically. It is necessary to ensure that the bricks of the top row overlap the vertical connecting seams between the bricks in the bottom row. When bandaging, not only does the strength of the walls increase, but also the loads are distributed more evenly.
When laying 1 brick, you can turn both the butt and tongue sides of the bricks outward. Compared to half-brick or quarter-brick walls, they will not be as strong. Construction is not particularly economical; more material will be consumed, and a lot of mortar will be used.
This type of masonry is mainly used for load-bearing walls. For others, you can choose one and a half or two bricks. From the point of view of heat conservation, buildings made in this way have greater inertia.
Tools for masonry
To work you will need:
- bricks,
- building level,
- plumb line,
- binding solution,
- a nylon cord, the length of which should exceed the length of the wall being built by 40 cm,
- Master OK,
- device for cutting bricks,
- order,
- jointing
Tools for masonry.
For masonry, you can use different types of dressings:
- bandaging the transverse seams does not allow the bricks to move along the wall,
- ligation of sutures located vertically,
- bandaging the transverse seams will prevent the wall from delaminating vertically. And the load along the length of the wall is more uniform.
Walls with 1 brick are laid using a single-row or multi-row system.
When choosing a single-row system, one row of bricks is laid out so that the spoon surface “looks” outward. The next row is laid out with the butt part of the bricks. Transverse seams should be shifted by ¼ of the brick, longitudinal seams by 1/2.
With a multi-row dressing system, the alternation of rows laid with the spoon part outward with those laid with the butt part outward will take place not through one, but several spoons. For such a system there are certain rules of alternation. For single-type bricks, masonry is used in 6 uniform rows, which are tied with a bonded row.
With thicker products, the number of spoon rows changes to 5, then there is a row of tying arrangement. The system, called single-row, can be used when the thickness of the walls is less than the length of the brick. Multi-row is used for walls at least one brick thick. With this connection, you can ensure the strength of the wall and evenly distribute the load inside it.
Advantages and disadvantages of brick walls
Options for dressing brickwork.
A wall, folded into 1 brick, is capable of bearing quite significant loads, provided they are evenly distributed over the surface.
Like other building materials, bricks have both advantages and disadvantages. For example, the heat-insulating qualities in comparison with wooden walls are not particularly good. A wall 16-20 cm thick, built from wooden building materials, is capable of maintaining the same temperature in the building as 64 cm brick walls.
It turns out that to ensure normal temperature conditions in the building, the walls must be laid out as thick as possible. But when they are made with a thickness of more than 1 brick, the consumption of expensive building materials is very large. An example would be laying 2 bricks. Therefore, to reduce costs, builders resort to various tricks: for example, they use hollow bricks. Another option is to make two masonry layers of 1 brick and arrange an air cushion between them, where the insulating material will be placed. In this case, the walls should be plastered with a special concrete-based composition, the so-called warm plaster. That is, a thick brick wall will be economically unprofitable only if it is solid.
When laying bricks, it is necessary to monitor the thickness of the joints, the maximum thickness of which should not exceed 15 mm.
If the walls and foundation are thicker, a stronger one will be needed, which will lead to additional costs. Therefore, when building a house, they try to turn to the production of air cushions. The space between the masonry should be at least 5 cm. With this arrangement of the wall, even if its width is small, heat is well retained inside the house, and material consumption becomes 15-25% less.
Another way to reduce the width of brickwork is to insulate it using felt. At the same time, the efficiency of the walls in terms of retaining heat will be increased by 30%. If the felt is replaced with foam, the efficiency can be increased by 2 times or more. In order to retain heat, you can use other materials: sawdust, tuff, mortar with filler in the form of slag. The use of such materials will help increase the thermal protection characteristics of the building by 15%.
The most economical design for walls is considered to be masonry made in the form of a well. It consists of 2 half-brick walls, which are located at a short distance from each other and are connected to each other in a special way. The connections are made as horizontal and vertical brick bridges that form closed wells. They will need to be filled out. Expanded clay, slag, and lightweight concrete are suitable for this.
When choosing what the thickness of a brick wall should be, it should be taken into account that this material has a high degree of thermal inertia.
That is, a wall made of ordinary material will heat up slowly, but will also cool down very slowly. Temperature changes in houses built from such bricks during the day will be insignificant. But if the wall is thick (for example, 2 bricks), a lot of fuel will be needed to warm it up, especially if the building was without heating for a long time in cold weather, as is the case with country houses.