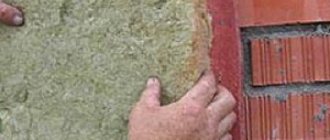
Sandblasting
Before degreasing the surface before gluing at home, sandblasting machines are often used.
Using artificial high pressure, they spray quartz sand along with water onto the surfaces to be cleaned. The abrasive structure of the mixture removes all contaminants from the parts, leaving them slightly rough, which is just good for better bonding of surfaces in the future. Most often, this method is used for cleaning metal surfaces, but can also be used to prepare durable plastic. After the surfaces have been cleaned before gluing, they are washed in clean water to remove small particles, dried thoroughly and degreasing begins.
How to degrease the surface before gluing? Typically used for this:
- alcohol;
- vodka;
- solvents;
- acetone;
- White Spirit.
The main thing is to remember that even if there are no visible grease or oil stains on the surfaces, it is necessary to carry out the degreasing procedure. This is necessary to improve adhesion and joint quality.
How to fix a leak
If you see water coming out of the shower stall, do the following:
- check all joints, seams and threaded connections to accurately determine the location of the leak. You can check the joints on the walls with a directed stream of water;
- if the seam is leaking, remove the old sealant, clean the surface well, treat it with a degreasing compound, and dry it well;
- treat the joint with sealant and let it dry;
- Check the quality of sealing of the seams in the shower stall again.
For your information! You can remove old silicone sealant with alcohol. To do this, blot the seam along the entire length with a napkin soaked in it. After 30 seconds, the composition will become soft, somewhat reminiscent of jelly, and can be easily removed from the surface of the shower. If yellow stains remain, wipe the area with a cloth soaked in the same alcohol. They can be easily washed without leaving the slightest trace.
There is no need to reseal the joints if you follow all the rules and tips when assembling the cabin. The main thing is to apply the sealant to a dry surface, then it will not peel off from it, forming a leak site.
Be sure to watch the video of how to seal a shower stall with your own hands. Pay attention to even the smallest details and all moments. Remember well which joints and which connections must be treated with a sealing compound.
Creating a beautiful bathroom is a dream for any owner. But during the work you need not only to install beautiful tiles or a shower stall. Care must be taken to ensure good insulation of seams and joints between materials.
After all, the bathtub is more susceptible than any other room to the negative effects of steam, moisture and is in constant contact with water. Bathroom sealant should be used to seal the joints.
Rules for working with degreaser
You need to work with gloves.
To degrease the acrylic bathtub and not damage its surface and the skin of your hands, you must follow safety rules.
- When working, use rubber gloves. Any degreaser or sealant is a chemically active substance that corrodes the skin.
- If the degreaser emits a strong odor, and even more so, toxins when drying, you need to carry out the cleaning while wearing a mask.
- All repair work is carried out only in a well-ventilated area. You need to open the doors and windows to the kitchen, if the bath is located next to it, turn on forced ventilation, if any.
Why do you need to degrease your nails?
For those who want to save not only time, but also money, an excellent solution is to apply gel polish yourself. But the result does not always live up to expectations. This often happens due to improper preparation of the nails before coating. The main reason for poor-quality varnish coating is insufficient or improper degreasing of nails. To get a quality manicure, you can’t do without a degreaser for gel polish.
The product is sold in a specialized store. Its purpose is to remove excess fat and moisture from the natural surface of the nails. Fat secreted by the body or that gets onto the nails along with hand creams and oils must be removed before applying shellac. After this, it is not recommended to touch the plates with your hands. Degreasing takes effect within an hour, so the procedure must be carried out during this period. If this does not happen, the nails will have to be processed again.
Preparing walls for laying tiles
To prevent renovations in the bathroom or kitchen from having to be redone soon, you need to know how to properly prepare walls for tiles. If all standards are met, the tile will be securely fixed to the surface and will last a very long time. Let's look at the main points to consider here.
Preliminary preparation is required for laying tiles on walls.
Dismantling old cladding
First of all, preparing a wall for laying tiles in a bathroom, hallway or kitchen begins with removing a layer of old coating. You need to get to a base suitable for further processing.
If the wall in the bathroom was tiled, it is removed along with the adhesive solution. To make the process easier, you need to clean the seams and soak the wall well with water for several hours. Then pick up the outer tile with a chisel and use a hammer to hammer it under the softened mortar. Gradually the tile will fall away from the wall, but it will be possible to keep it intact. If this point is not important, you can speed up the process and use an electric tool with a chisel attachment. Remains of glue are cleaned off using a grinder.
If the walls have been painted, you need to use a sanding disc to clean off the entire layer, right down to the plaster. If this is not possible, notches are made on the surface to improve adhesion to the future coating.
Dismantling the old tile covering is the dirtiest stage of the work.
In some houses there are still walls with whitewash; the solution will not stick to such a surface, so you need to thoroughly wash it off. You can use a spray bottle to soften the layer and a scraper. Then wash off any stains with a rag.
Decorative plaster, especially relief plaster, is also not suitable for tiling. It is knocked off the wall manually or using electric tools.
If the bathroom was wallpapered, remove it to the last piece of paper. Then wash off the glue from the wall. If there is the slightest residue of material, the adhesion strength decreases.
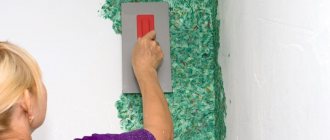
Alignment
The next step is to level the surface. This can be done in several ways, the most common is applying putty. Before this, you need to completely clean the wall of dust, degrease it and prime it. Then the beacons are installed and the approximate amount of materials needed is determined.
If the differences are less than a centimeter, you can get by with one layer of putty or without it at all.
What is the best way to plaster the walls in the bathroom for laying tiles? To do this, use either a cement-sand mortar or a special ready-made mixture. For rooms with high humidity, such as a bathroom, putty with a reduced water absorption rate is used. The finished mixture is applied to the wall with a spatula, and then it must be leveled, guided by the beacons. Since the wall is being prepared for tiles, it is not necessary to smooth the surface perfectly.
Surface imperfections can be eliminated by simple puttying.
How to align walls with significant curvatures under tiles in a bathroom? To do this, it is better to use sheets of moisture-resistant plasterboard or fiberboard. The slabs are attached to the wall using metal profiles, the joints are foamed or plastered. This way it’s quite quick and easy to level the walls with minimal consumption of materials.
Treatment
Since it is impossible to properly prepare the walls for laying tiles in the bathroom without special treatment, it is necessary to prepare several mixtures at once. A plastered and dried wall should be covered with a layer of antiseptic; this product will prevent the formation of fungus and mold, which are the most common problem in rooms with high humidity.
The wall must be treated with special agents against biological corrosion
Additional protection will be provided by a primer, which increases the adhesive properties of the surface, but at the same time prevents excessive moisture absorption; it creates a kind of protective film and increases the density of the wall. You can continue working only after it has completely dried. For greater reliability, you can cover the surface in two layers.
Sequence of work
Installation diagram of the side walls of the shower stall.
All work is carried out exclusively on a dry surface. Proceed according to the instructions: install the side walls and first secure all the guides with screws, fasten the top part and the hose.
Each stage of assembly is accompanied by careful coating of all connections and joints with sealant. At the same time, make sure that the holes for fasteners (screws, screws) remain “outside”. Thanks to this, the final assembly of the cabin will take place without damaging the sealant layer.
Seams coated with sealant are secured with screws and left to dry completely. If there is excess silicone, it must be carefully removed with a rag until it hardens completely.
Next, the shower stall is sealed from the front side. A sealing cord is used for this. It is inserted into the junction of the cabin frame and glass and is additionally treated with sealant to improve the waterproofing properties of problem areas.
After drying, check the tightness of the structure; to do this, just direct a strong pressure of water from the shower to all connections. Usually traces of small leaks are found again; before resealing, it is necessary to completely dry the cabin from moisture. Once again, carefully apply the sealant to all “problem” areas.
Sealing the shower stall is one of the most important stages of its installation. Only by performing this procedure correctly, you can be completely sure that water will not get outside, flooding your neighbors or simply spoiling the finish of the bathroom. And let us immediately note that the work can be easily done with your own hands. The main thing is to carefully study the step-by-step instructions and its features.
Pallet installation
Nowadays, when plumbing equipment is made of strong and durable material, installing a shower tray is a relatively simple job.
Assembling the shower tray
And yet, mistakes made during its installation can lead to a leak in the shower stall.
When installing a pallet, you should adhere to the following rules:
- All doors and walls of the shower cabin must be fixed strictly perpendicular
to the tray. - The pallet should fit snugly against the walls
. - The drain pan must coincide with the sewer outlet
. - When installing the pan, you must first connect the drain to the sewer drain, adjust the legs, and align it horizontally
using a special level.
Surface preparation
To thoroughly degrease the coating, you need to wipe it with a damp cloth. It is advisable to use cotton fabric. Then you need to rinse with a brush.
For greater adhesion, an activator can be applied to the surface. This is done after defatting. But it is important to remember that the layer must be thin. Otherwise, the activator will have the opposite effect. Then you need to let the product dry. Moreover, you cannot wait more than 8 hours after applying the activator. Next you should put the sealant.
Important! If not much dust accumulates in the room, the anaerobic composition can be applied after a few days. Experts recommend not waiting more than 5-6 days.
Surface preparation
What is a nail degreaser and what does it look like?
How to degrease a metal surface before painting
Nail degreaser is a liquid that contains alcohol and other drying and disinfecting components. It is necessary when performing a professional manicure in order to:
- remove dust remaining after shaping nails and polishing skin;
- rid the surfaces of natural fat and moisture, sawed-off microscopic fragments of the previous coating;
- improve the adhesion of the material to the nails;
- prevent the growth of bacteria in the sinuses in case of detachments;
- remove the sticky layer from the dried base, flower bed, top.
The product looks like water, that is, it is often transparent, but with a noticeable odor. It may also be tinted. It comes in a bottle with a regular screw cap or with a dispenser. The second is more convenient, since the pump delivers exactly the volume that is needed. But sometimes liquid remains at the bottom of the bottle and is difficult to remove.
Nail degreaser with pump
Nail degreaser is a mandatory component when applying gel polish or gel. There are several varieties of this product:
- dehydrator,
- clinser,
- actual degreasing liquid.
They differ slightly in composition and purpose; the last two can successfully replace each other. The choice of product depends on the type of nails and skin. For some people, a degreaser is better; in other cases, a dehydrator will help you wear the coating longer.
In the category of preparatory products for professional manicure, there are also primers and ultrabonds. They are also designed to dry the nails so that the coating adheres more reliably to them. But the difference is that these agents penetrate the surface layers of the plates, loosening them. An acid primer has the maximum aggressive effect on nails. The most gentle one is Ultrabond, which works like double-sided tape.
Compound
The composition of the liquid may include:
- isopropyl alcohol.
- ethyl acetate,
- acids,
- water,
- flavoring components.
Among degreasers, there are products with more and less aggressive effects, but their ingredients do not penetrate deep into the nails and do not harm the skin.
Same thing as a cleanser, a dehydrator
Cleaner and degreaser are the same product, designed to clean surfaces of anything that would interfere with the adhesion of the nail and the material. The second liquid fights fat more actively. The cleaner is designed to remove the sticky layer, but the composition of the product is such that it also cleans and dries surfaces. Tack remover and degreaser are used in the same way.
A nail dehydrator is also a type of pre-primer product, but it does a better job of removing natural moisture. They do not wipe the plates and skin with it, but apply it to the surface of the former with a brush.
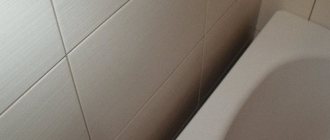
Which sealant is best for the bathroom?
A special sanitary sealant is better suited for the bathroom. These sealants contain special additives that prevent mold from appearing. They are also very moisture resistant and will withstand cleaning with household chemicals.
Among the professional ones, we recommend silicone acid sealant for the bathroom of the Tytan Professional brand - “Sanitary”.
Of the cheaper, but no less bad, an excellent alternative would be the trademark “Tytan Euro Line” - “Sanitary” - or “Soudal” - “Sanitary silicone”. If this seam needs to be painted, then “Tytan Professional” - “Rainbow Silicone” is perfect.
Sealants that are suitable for acrylic bathtubs: “Tytan Professional” - “For acrylic and PVC bathtubs” - or “Soudal” - “Neutral silicone”. They will not damage or stain the surface of the bathtub.
Checking the result
To check the result of the work, it is necessary to carry out a wettability test. To do this, drop a little water on the treated surface and monitor its behavior. If the part is completely degreased, the drop will gradually spread over the entire surface in an even layer. If it remains in the shape of a circle, it means that the metal has not been completely processed and its surface still needs additional processing before gluing. This testing method is also suitable for plastic or inorganic surfaces, but not for aluminum and magnesium.
How to glue ceramic tiles to a wall
Before gluing tiles to the walls, you should prepare the tools that will be used during the work. Then select tiles and consumables. Currently, manufacturers offer a wide range of facing materials of various colors and sizes. Ceramic tiles are selected in accordance with the functional purpose of the room in which the work will be carried out. The high quality and versatility of existing mixtures and tools allow you to glue tiles to the wall yourself.
Surface preparation
To perform work with high quality, the facing material must be glued to a flat wall. If the surface is not pre-prepared, the rows will lie unevenly and the seams will be of different widths. If you apply more than the recommended layer of glue, the tile may slip, and the glue will take a long time to dry. Therefore, preliminary preparation of the wall surface must be carried out. The walls must be plumb or level. The angles between them should be 90°. The easiest way to level the walls can be done by installing construction beacons. They are usually installed with tile adhesive, as it dries faster. The step between the beacons is 70-80 cm. If it is necessary to apply a thick layer of plaster, then use a sand-cement mortar and apply it in several stages. The next one is applied after the previous one has dried.
After finishing the plastering, there is no need to remove the beacons and putty the walls. They will be swept to remove any remaining sand. If the walls are almost smooth, but there are small defects, they are repaired with glue. After the prepared surface has completely dried, it is primed. To do this, use store-bought or homemade solutions. The simplest deep penetration primer is made using PVA glue, water and cement. To give it antiseptic properties, you can add copper sulfate. The volume ratio of the ingredients should be 1:8:1. After mixing all the components, the solution is ready for use. The prepared primer must be used throughout the day. This solution cannot be stored.
To check that the primer has been prepared correctly, it must be applied to a small area of the wall and allowed to dry. If a film does not form on the surface, then everything is done correctly, and when it appears, you need to add 1 more part of water. For weak plaster, the solution is applied in several layers. Each subsequent one is applied after the previous one has dried.
If the wall being prepared was painted with oil paint, then it must be completely removed and the defects eliminated with an adhesive mixture. After the primer has completely dried, the surface is ready for the next stage of work and you can begin gluing ceramic tiles to the wall. When laying it in the bathroom on the wall, it is necessary to apply a layer of waterproofing mastic.
Laying technology
In order to perform the installation of facing material efficiently, you need to use the following tools:
- tile cutter;
- Bulgarian;
- notched and ordinary spatula;
- building level;
- emery stone with coarse abrasive;
- rubber hammer;
- ruler or tape measure;
- tile crosses of the required size.
In order for the pasted surface to be smooth and the seams to be the same, mark the walls. These works start with the wall that is most visible from the door. The number of entire rows of tiles starting from the ceiling is calculated. In this case, it is necessary to take into account the width of the seams. The bottom row can be made of cut tiles. If work is carried out in a room in which there is only a subfloor, then the expected finishing level is marked on the wall. A plank is strengthened horizontally along the line, which will serve as a support for the bottom row of tiles.
If the 1st row is made of cut material, then start gluing from the 2nd row. It will be supported by a flat wooden strip rigidly fixed to the wall. Its length should be equal to the length of the wall. If the wall is more than 2 m, then several pieces can be used. After installing the base, you need to check with a tape measure whether the resulting wall height corresponds to the calculations made.
Craftsmen who know how to properly glue tiles advise starting work from the left front corner, most visible from the entrance, using a wall corner. It will help hide minor defects in the corners of the tiles. The adhesive mixture is prepared immediately before starting work, strictly observing the proportions and methods of its preparation.
Application of glue is possible both on the tile and on the surface. The applied composition is leveled with a notched trowel. The tile is effortlessly installed on the rail, close to the corner, pressed against the wall and pressed down with a light tap with a rubber hammer. The glue that comes out is removed immediately. The next tile must be glued with the installation of spacer crosses. Manufacturers of mixtures, as a rule, do not recommend wetting the tiles before use, as they may float.
The adhesive is applied to the tiles in a layer of 5-6 mm, but not less than 3 mm. The minimum thickness ensures adhesion of the tiles to the wall. The crosses are removed 1-2 hours after installation. The seams are immediately cleaned with a spatula or other sharp object.
Tile cutting
When carrying out finishing work, it may be necessary to glue not the whole tile, but part of it. This situation is possible when it is glued to the wall in the corner or in the bottom row. To obtain a piece of tile of the required size, use a tile cutter. This tool can only make straight cuts. The tiles, marked by size, are placed on the device table and drawn along the marked line with a cutting roller. It is necessary to cut without strong pressure on the handle of the carriage, until a characteristic squeak occurs. Then the tiles are removed and broken off on a flat surface.
In cases where it is necessary to make a figured cut or cut off a narrow strip that cannot be broken off, use a grinder with a diamond wheel. It must be remembered that the edge of the cut should be away from the line. As a rule, a diamond wheel has a thickness of 3 mm or more. After cutting, the edges of the tile are processed with an emery stone. Typically, ceramics can be processed well, and the cut edge comes out smooth, without chips.
Before gluing the tiles, they are calibrated. The device (caliber) for wall tiles is made independently from 2 slats crossed at right angles, with dimensions marked on them. Material that does not fit into the template is rejected. Pieces will subsequently be cut out of it for corner or bottom row tiles.
Sometimes it becomes necessary to lay tiles over old ones. Often this situation arises when installing a heated floor, but it happens that you need to glue the tiles to the wall. To do this, wash the surface with hot water with the addition of alkaline agents. After drying, the old tiles are primed with concrete contact (Ceresit CT-19). This primer dries to create a durable, rough surface. Then glue is applied and the tiles are laid. A tile glued in this way will not be inferior in quality to one installed on plaster, and it will take less time to prepare the wall. The time for complete drying of the glue will increase slightly, but will not exceed 4-5 days.
Sealing seams
After finishing the tile laying work, they begin to seal the seams. To do this, use a mixture of increased strength - fugu. It comes in different colors. But by taking a white fugue and adding dye, you can choose the color you need. This material is not afraid of moisture and can be successfully used when sealing seams in a bathroom or a self-made shower tray.
Before applying the fugue, the seams are thoroughly cleaned of glue residues. A rubber spatula is used to fill the seams. The mixture is prepared in small quantities, since its rapid drying makes further use impossible. The remaining mixture is removed with a wet sponge or rag immediately after sealing the seam. This work is painstaking and requires a lot of attention. A poorly filled seam will begin to crumble after a while. In order to repair the defect in the future, you will have to clean the entire seam of old putty. The fugue completely dries out after 10-12 hours.
Sanitary silicone sealant for bathroom instructions for use
The bathroom is one of the important rooms in the living space. Repair work carried out inside after installing plumbing cannot be done without the use of sealant.
What material is best for sealing the seam between the side of the bathtub and the wall? How to understand the characteristics of the composition? What should you pay attention to when choosing the type of sealant? In the article you will find answers to many questions, you will be able to choose and use the right sealant for the bathroom.
Types of bathroom sealants
Sealant or its other name - mastic - is a polymer-based composition. It serves to fill cracks and cracks, thus ensuring their impermeability. To furnish a bathroom, manufacturers offer a wide selection of materials: polyurethane, silicone, acrylic sealants.
When choosing a composition, pay attention to the following parameters: water resistance, coating strength, elasticity, adhesion to materials, shrinkage during hardening (for hardening types), elasticity, durability of indoor use. The compositions are produced for professional and household use.
Silicone sealants
Silicone sealant has excellent characteristics: sufficient adhesion to various surfaces and excellent water resistance. Silicone-based material copes well with temperature changes, which is an important factor for its use in country houses with non-permanent residence.
Silicone bathtub sealant is divided into two types: acidic (acetic, acetate) and neutral. The first type is used in contact with metals that are not subject to oxidation, for example, stainless steel. The second type is perfect for other types of metal surfaces, as well as for acrylic bathtubs.
Siliconized waterproof sealant is used for interior and exterior work. It is available in tubes of different sizes and colors (beech, larch, pine, birch, wenge, mahogany, etc.). Mastic can also be transparent or white.
The high degree of waterproofness of the composition allows it to be used in bathrooms, toilets, showers for sealing the junction of sinks and other plumbing fixtures to the walls.
Acrylic sealants
Among the advantages of acrylic mastic are: ease of use, absence of a strong odor, good resistance to environmental influences, and low cost. However, the low elasticity of the material should be taken into account. Therefore, it is recommended to use it in places that will not be subject to deformation during operation.
An acrylic-based composition is in demand when filling large holes, cracks, and crevices. Manufacturers offer moisture-resistant and non-moisture-resistant versions of acrylic sealant. For acrylic surfaces, it is preferable to use a moisture-resistant bathroom sealant.
This is due to the fact that other types of sealants may not adhere well to acrylic.
Which composition is better - silicone or acrylic based?
When comparing silicone and acrylic mastics, the advantage will be on the side of the first option. Due to its universal characteristics, silicone-based sealant is more suitable for bathtubs with high levels of humidity than acrylic ones. Providing reliability and durability of the coating, silicone sealant does not turn black over time, thanks to its antiseptic properties.
Silicone acrylic sealant
The combination of two different materials made it possible to improve the quality characteristics of the sealant. When using silicone acrylic sealant to decorate your bathroom, you are guaranteed to get a durable yet flexible coating.
Polyurethane sealants
The main characteristic of polyurethane-based mastic is the strength of the coating. And excellent elasticity and good adhesion to various materials allows the use of polyurethane bathtub sealant on a par with its silicone counterpart.
Sealing joints
When choosing a sealant for the bathroom, you should remember the high humidity inside the room. First of all, pay attention to such an essential indicator as the waterproofness of the material.
Equally important is the ability of the composition to resist the appearance and development of mold. To ensure “dryness and comfort” of sanitary equipment after use, it is best to use sanitary silicone sealant.
Manufacturers have added antifungal additives with antibacterial properties to its composition.
To apply sealant, use a special mounting gun or cartridge gun, a small rubber spatula, masking tape, soft cloth, alcohol, solvent or acetone.
The area where the new layer is applied is carefully cleaned, the surfaces are degreased, being careful not to damage the coating of the plumbing fixtures and walls, and the seam is thoroughly dried. The old layer of putty, plaster or sealant is removed from the surface of the bathtub mechanically or chemically.
Special chemical removers are sold in the form of pastes or aerosols. The composition is distributed over the entire surface of the seam, kept for the time specified by the manufacturer and then removed with a rag or napkin. If necessary, the procedure is repeated until the desired result is achieved.
When working, it is better to use rubber gloves and, if necessary, respirators.
Some types of sealant have increased strength. In such cases, a special solvent is used. It is applied for several hours and after exposure the surface is wiped and dried. To remove the old layer, you can use a spatula, a stationery knife, or a brush. Remains of plaster are removed with a vacuum cleaner or cloth.
After the surfaces are in proper condition, strips of paper tape are glued on both sides of the seam. After finishing the work it will be easier to remove excess material. A cap is twisted off the tube, a tip is screwed on, which is cut at an angle of 45° for convenience.
Next, the tube is inserted into the mounting gun and, by pressing the trigger, they begin to apply mastic to the joints in an even, continuous line. Then they begin to form the seam.
To do this, using a moistened spatula, the layer of sealant is continuously leveled in the direction from the beginning of the joint towards itself.
If the seam is long, it can be filled sequentially, in sections, in order to have time to shape the layer before the composition begins to harden. The sealant must dry completely, so it is better to provide protection from moisture and direct water ingress into the place where the fresh layer is being laid during work.
The instructions indicate the drying time for the material. Polyurethane bathtub sealant sets in 8 to 10 hours. Materials based on silicone and acrylic dry completely after 24 hours.
The rate of hardening of the coating depends on the humidity of the room, the temperature inside the bathroom, and the thickness of the laid seam.
Upon completion of all work, the tape is torn off, the spatula is wiped and washed. The gun, if there is still material left in it, is blocked. Otherwise, you can also rinse it thoroughly.
If there is a need to remove the newly applied sealing layer, it is better to use a rubber or plastic spatula and remove the residue from the prepared surface with a degreasing agent. When the composition has already hardened, you can use a stationery knife or blade to remove it.
Using mastic, you can solve problems with eliminating leaks that have arisen due to the destruction of the old layer, the formation of large cracks, holes at the junction of the bathtub and the wall. In such cases, a special profile is laid - “trim”, which covers the end of the tile. To seal a corner, a profile width of 8–10 mm is sufficient.
Surfaces are cleaned, dried, and degreased. Then apply a strip of silicone sealant to the seam, part of the wall and to the “trim” prepared according to the size of the bathtub. The profile is installed in place and fixed by pressing or weight. If the hole is large, you can use additional support.
The rail is installed from below and work is carefully done to seal the joint.
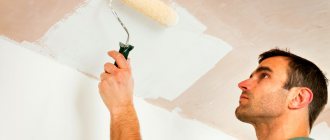
How to treat a whitewashed ceiling?
Treating the ceiling increases adhesive properties and increases the likelihood that the cladding will not fall off if the chalk layer is not washed off. Here are the stages of work:
- Wipe the ceiling, previously checked and cleaned of loose lime, with a wet rag to remove dust.
- Check for differences in ceiling height. If there are differences, smooth them out with putty.
- Treat the base with a deep penetration primer. The Betonokontakt composition is well suited for this purpose - it increases adhesion and, when dry, creates a velvety layer on the surface that perfectly holds the adhesive composition and cladding.
- Allow the primer to dry and you can begin work.
Sealing the floor - the first stage
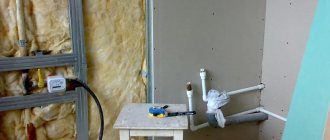
Before proceeding with the installation and sealing of the shower stall, you need to complete. This will protect the base from moisture and mold.
The area of the floor where it is planned must be perfectly flat. This will allow the installation to be carried out correctly, avoiding distortions of the structure that could lead to a violation of its tightness. If there are any unevenness on the floor, they can be eliminated by creating a sand-cement screed. Next, polystyrene foam boards should be glued onto it to avoid the formation of condensation under the cabin pan. The seams between the plates must be treated with a waterproof compound.
The next stage is preparing the base for installing the pallet. A special mounting mesh must be laid on the waterproofing layer. Pour a screed on top of it to mount the product. When the surface is dry, all seams and joints must be treated with waterproofing material. It is better to use polymer-based products. Liquid rubber is perfect for such purposes. After the processing of the seams is completed, you can begin installing the shower stall itself, after which all that remains is to treat the joints with sealant.
Important! When assembling the shower, you need to carefully monitor the assembly's compliance with the manufacturer's recommendations. The pallet must be firmly secured to the base and walls, set to the building level so that it is positioned strictly horizontally.
The best sealant manufacturing companies
The most famous company producing such materials is Ceresit
, providing its customers with the widest range of products. Such sealants are intended for sealing joints between walls and the bathroom; they can also be used as a special adhesive for ceiling tiles.
The advantages of this company's products include:
- excellent adhesion;
- safety of use;
- plasticity and lack of fear of water.
CIKI FIX sealants are popular
(Turkish production). This product has excellent quality characteristics at a minimal cost. Other advantages of this material include good adhesive properties - you can even use this sealant to glue anything in the bathroom.
Types of sealants
There are 4 types of sealants for automotive use:
- Anaerobic
- Soft
- Hardening
- Special
The last type is suitable for the valve cover - a special sealant. This type of material is made on the basis of silicone. These are easy to use and quickly curing compounds.
Silicone sealants are highly elastic and durable, they can withstand high pressures, which makes them possible to use even in the most powerful internal combustion engines. Curing occurs due to moisture contained in the air. On average, silicone sealants gain initial strength within 10-20 minutes. Such materials can be used for gaps and cracks up to 6 mm thick.
Degreasing metal parts
The surfaces of metal parts are almost always contaminated with oils, greases or paints, which must be removed as thoroughly as rust or oxides before gluing.
In industry, steam treatment is often used for this, but at home you can do everything with improvised means. Most often, the answer to the question of how to degrease the surface before gluing metal parts is a common solvent, gasoline or acetone. To do this, the liquid is applied to a rag, which is then used to thoroughly wipe the entire area. It is best to work in protective clothing and a respirator, since caustic liquids can burn the skin or cause an allergic reaction. You can also degrease metal with regular vodka or white spirit. When processing small parts, it is recommended to completely immerse them in liquid for a few minutes.
DIY pallet installation
First you need to protect the surface of the pallet from scratches and damage.
It is important to ensure that the pallet is level and the legs of the container fit snugly to the floor surface.
When purchasing a pallet, close attention should be paid to the material of the product and its design. Over time, under the pressure of weight, the pallet bends and a leak may form at the junction with the wall. Also, be careful when choosing a fixing sealant. It must be of good quality and meet operating requirements.
After you have done the installation, you need to lay the sealing cord.
Seals for shower cabins
To make sure there are no leaks at the joints, you can pour water on them.
When sealing a shower stall with your own hands, a video of which can be viewed on our website, it is best to use the sealing cord included in the kit. It is applied to the junction of the pallet and the walls of the cabin. To seal other elements, use adhesive sealant. Depending on the design of the cabin, you can use white or colorless silicone.
When sealing the pan, close attention should be paid to the drain system, since a leak of this nature will be very difficult to detect.
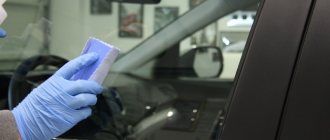
How to degrease a bathtub before covering it with acrylic
How to degrease a bathtub before covering it with acrylic. There are several options. The first method that comes to mind is to degrease with acetone, solvent, gasoline, or alcohol.
We use a different method. We wash the bathtub by hand with the addition of baking soda. Baking soda is an old detergent. They always washed dishes with it. The dishes were washed with mustard powder. It's bad that people forget simple and effective ways. Soap is very difficult to wash off the surface. There are leftovers even if you can't taste the flavor on the plate.
This happens when degreasing with a solvent. Nobody knows what is added there. The solvent may contain foreign additives that leave a harmful film on the bath. In addition to poor contact, such film also has a strong smell, spoiling the health of the master restorer.
Therefore, we use the old, proven, grandfatherly method of degreasing with baking soda .
Types of sealants according to strength level
According to the degree of tensile strength, all sealants are divided into the following categories:
- Standard strength (3 – 12 N*m). Such sealants are used in connections that are not subject to vibration. Dismantling or disassembly does not require effort or special tools.
- Average strength (12 – 28 N*m). Used in pipelines or systems operating under pressure and subject to vibration. When dismantling, it is necessary to heat the parts to a temperature of more than +100 o C and mechanical force.
- Increased strength (up to 60 N*m). Used to seal assemblies that do not require frequent unscrewing or dismantling.
- Anaerobic glue. Provides stable fixation of parts that cannot be disassembled.
The strength of the composition is always indicated on the packaging.
Sealing joints - how it is done
When assembling the shower, you can apply sealant to each of the joints during the assembly process, or you can process the seams already on the finished structure. Particular attention should be paid to areas that are sealed with rubber gaskets or cords. When processing joints, you need to pay attention to the fact that all fastenings with screws and bolts are located outside in relation to the sealant layer.
The shower must be assembled in strict accordance with the instructions provided by its manufacturer. At each stage, seams and joints need to be processed. To get a more complete understanding of the matter, watch the video of sealing a shower stall. A clear example shows which joints must be sealed.
Attention! Try to process the seams so that the sealant does not get on the inner or outer surface of the pallet. Once dry, it is quite difficult to remove. To avoid such troubles, cover the areas near the application line with masking tape.
After sealing the seams, you need to check them for leaks. This is done after drying. To do this, just close the drain and fill the pan with water, then flush it down the drain. If you find that it will have to be eliminated by repeating the sealing.
How to remove sealant from a bathtub? Cleaning and Removal Methods
Very often, to ensure the tightness of the connection between the bathtub and the adjacent surfaces, a sealant is used, which allows the joint to be completely waterproof. However, over time, this material deteriorates and then the question arises of how to remove the sealant from the bathtub in such a way as not to damage the surface. In this article we will tell you how to replace the old sealant and attach video material that will clearly show the procedure.
The question of how to remove the sealant from the bathtub arises in two cases: during repairs to the surface of the bathtub or for a planned replacement of the layer due to a leak in the seal. If the applied layer is thick enough, then you can trim it a little with a special construction knife and remove it without problems. But if the sealant between the bathtub and the wall has a thin layer, then you can’t do without special tools.
For your information. If the sealant has come off the bathtub in some places or it was applied relatively recently, then it can be removed even with your hands, and the remaining parts can simply be rolled up with your finger or a rag. But if the stone is already old and has hardened to a stone state, then you cannot roll it up with your hands, and using a knife can damage adjacent surfaces.
What else is used to degrease nails?
Dehydrator
Copes well with cleaning and drying the nail plate. But the effect is short-lived, since it contains a quickly volatile substance - butyl acetate. It does not penetrate deep into tissues and the natural pH is restored in a short time. It is advisable to use a dehydrator if you plan to do a manicure immediately after cleaning and disinfecting your nails.