Preparing walls for painting is a long and labor-intensive process. It requires great skill and deep knowledge. Paint is not able to hide visible flaws and is only a finishing decorative coating. Therefore, it is important that the base is level and smooth. True, recently designers have recommended not to attach much importance to the quality of surfaces. But this is a matter of taste and it is quite possible that in a couple of years the mood will change. If you want smooth and neat walls that will serve faithfully for decades, pay special attention to their preparation.
Advantages and disadvantages of painting
Painted walls avoid many problems. They are easy to care for - wash, repair, decorate. Defects that appear can be easily eliminated with your own hands, unlike wallpaper, which cannot be made whole again.
What is the superiority of painting over other technologies?
- During the preparation process, the walls will change qualitatively, they will become solid, smooth, and there will be no cracks on them.
- If necessary, you can repaint the room in any color, and it will cost much less than putting on new wallpaper.
- Restoring chips or scratches requires minimal investment.
- Stained areas are easy to wash, and even easier - wipe with a melamine sponge, which removes traces of ink, coffee, and tea.
- Painted walls are the best choice for cat lovers. Clawed pets are not interested in such a surface.
The disadvantages of this technology include:
- the need for preliminary preparation of walls - and this is expensive, difficult and time-consuming;
- Producing a high-quality initial painting is also not easy. To do this, you need to own special equipment;
- the paint is a real “dust collector”. Its pores become clogged with tiny particles over time, so the walls must be washed regularly;
- monochromatic colors may seem boring, and the room may resemble an office. But this effect is successfully neutralized by decorative and textile interior items.
Types of painted surfaces
The surfaces that can be painted are very diverse. In the current options for creating an interior with your own hands, you can most often find the following:
- putty or decorative relief plaster;
- smooth plastered or putty wall;
- smooth surface: panels, wallpaper, tiles;
- surface with textured elements;
- wood.
How to properly prepare walls for painting
Preliminary preparation of walls involves an impressive range of work. The result of their consistent and careful implementation will be perfectly smooth surfaces. The list includes cleaning the wall from the old coating, removing crumbled plaster and applying new one, leveling the base, filling potholes, cracks, priming, and treating with an antiseptic solution. Owners of new buildings with so-called “gray” renovations are luckier - at least they won’t have to remove the old finishing and organize garbage removal.
A new house may settle in the first few years and eventually cracks will appear in the paint. The situation will be saved by fiberglass or facade mesh for exterior use, glued to the wall at the plastering stage.
The first step is to clear the room of furniture, curtains, and hanging structures. After this, you need to carefully examine the surfaces and choose the right algorithm of action.
What tools are needed?
The set of tools required for preparatory work for painting may vary depending on what work needs to be done. However, in general, we can name the main tools that will be needed for these purposes.
Do not neglect preparing the walls for painting. If this work is not carried out, then the paint will not lie smoothly or will not adhere as firmly as we would like, and will soon peel off.
Removing old coating
Before you start preparing the wall for painting, you need to get rid of the old finish, and this is not easy. Our tips will help you do this quickly and without unnecessary labor.
Wallpaper
At first glance, removing wallpaper is not difficult, but sometimes you have to work hard to get rid of all the remnants of the coating. The base must be cleaned completely, and only then can you proceed to the next stage.
Paper sheets are quite easy to remove. Pry them from below with a spatula and they will easily come away from the surface. If the material has firmly grown into the base, arm yourself with a spray bottle. Fill it with warm water and treat the old finish. Do not skimp on water - the more the wallpaper is soaked, the better. When the paper gets wet, it can be easily removed with a trowel.
Modern options are non-woven, vinyl ones cannot be removed so easily. Such wallpaper, especially the latter, is almost impossible to get wet through. Therefore, all that remains is to literally “punch” the way for the water using a toothed roller or knife. Moisture will penetrate through the damaged surface and soak the dried glue. If the toothed roller fails, a steamer will come to the rescue, of course, if you have one at hand.
Try replacing the steamer with a powerful hairdryer. Warm the moistened problem areas with it and remove the sheets with a knife.
If your household does not have such units, you will have to prepare yourself for the long and painstaking process of scraping off wallpaper and glue. If you need to clean the wall down to the concrete or brick base, you have every right to skip this unpleasant process and remove the wallpaper along with the old plaster.
Whitewash
Cleaning walls from whitewash is an incredibly difficult and tedious task. It is necessary to get rid of even the reminder that this material was present on the walls. Remains of lime or chalk will not allow the new finishing layer to be applied evenly and efficiently. A lot of pellets will form on the walls that will need to be cleaned off.
The following will help completely remove whitewash residues:
- warm water - spray the wall with a spray bottle and remove the composition with a spatula. Water is quickly absorbed, so you need to repeat wetting from time to time. Compositions that do not contain special hardeners and other additives can simply be washed off with plenty of water;
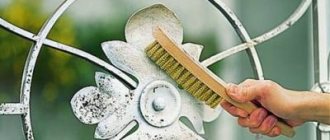
- tools that can be used to scrape off whitewash - a grinder, sandpaper, an iron brush and a spatula. During grinding, a large amount of construction dust is generated in the room. From time to time you should take breaks and leave the room until the suspension settles;
- a folk remedy consisting of soda, crushed laundry soap and water. A thoroughly mixed solution is applied to the surface, after which the finishing layer is removed using a spatula or sponge.
The main requirement is thorough cleaning of the base. If you do not pay due attention to this stage, you will have to say goodbye to the dream of beautiful walls.
Plasters and ceramic tiles
Old plaster can sometimes be left behind. If there are small defects, it is more profitable to simply repair them and thereby save a lot of money. Sometimes the putty comes off and voids form between it and the plaster. Then you can remove only this thin layer, after moistening it with water. If, after a thorough study of the formation, you find places of shedding, this is a sure sign of the presence of voids. It is better to get rid of a weak foundation. Often the problem is removing stubborn areas, but don't let that fool you. It is impossible to guarantee their reliability subsequently.
The tiles must be removed along with the tile adhesive. Cleaning the walls from ceramic cladding is done using a hammer drill equipped with a chisel-shaped attachment. First, the tile is knocked down, then the fixing material is removed. If there are defects in the exposed layer of plaster, you need to clean it down to the concrete base. There is no need to give up durable coating.
Old paint
The paint is removed using special solvents. The composition must be applied to the wall, then scraped off with a spatula. It is not recommended to cover old paint with new one, since it is impossible to guarantee a perfect result.
A hair dryer will be an excellent helper. When the painted area is heated with hot air, the paint swells with bubbles and is easily removed.
How to remove whitewash when preparing walls for painting
Whitewashed walls should be cleaned before painting, that is, all old whitewash must first be removed.
Removing old whitewash can be done in several ways:
- By wetting. Using a spray bottle, the entire surface of the whitewashed wall is generously wetted. It is necessary to achieve swelling of the lime. First, the entire area is wetted, then individual areas immediately before removal with a spatula.
- Dry method. This method takes longer than removing whitewash using wetting. In addition, while working, you must wear a respiratory mask and safety glasses to protect yourself from inhaling dust harmful to your health.
- Using a sander. When working with a sander, it is advisable to have a construction vacuum cleaner with you in order to simultaneously remove the resulting dirt, otherwise you will have to spend time cleaning after finishing removing the whitewash.
- Using a special solution. You can make a special solution yourself using laundry soap and baking soda, or buy a ready-made mixture in a store. The surface is moistened with this solution, then the whitewash is removed using a spatula or a metal brush.
Important! Remember to take precautions and use special gloves, masks and safety glasses while working.
Elimination of serious defects
The solid base does not need to be removed. Sometimes, to save the situation, it is enough to carry out a series of simple manipulations, after which you can be confident in the reliability of the intermediate layer. Most often, the integrity of the coating is compromised by cracks. How to get rid of them?
- We “expand” the crack – we increase its dimensions – width and depth. You will need a chisel, hammer and spatula.
- We clean the resulting depression from dust and pieces of plaster using a brush.
- We prime the improvised “gorge” using compounds with maximum penetration ability.
- Fill the hole with putty using a spatula.
- We glue the reinforcing material - press it into the putty layer, coat it and leave it until completely dry.
- We sand the restored area.
It makes sense to carry out spot restorations only if the amount of damage does not exceed 25% of the wall area.
Necessary tools and consumables
Using a Rule to Align Walls
Before starting construction work, you need to prepare tools and purchase the necessary dry mixtures and strengthening solutions.
- hammer drill with mixer
- spatula
- holder for construction sandpaper with consumables
- roller, brush or spray gun
- polymer or paper corner-forming tape
- fiberglass and glue for it
- primer
- dry plaster mix
- finishing putty
Before buying dry mixes, you need to know the differences and scope of application of one or another dry mix.
Plaster and putty – how to choose?
For those who have dealt with preparing walls before, there is no need to explain the differences between these two building materials, but for a beginner this is important information.
Plaster and putty are two different things. To clearly see the difference, it is enough to tactilely feel their composition - rubbing one or another dry mixture between your fingers, it is easy to notice the difference in the size of their fractions. In putty, the graininess is practically not felt, but in the plaster mixture it is obvious.
And all because plaster is designed to level walls in a thick layer in order to fill large defects and smooth out large differences. Putty has a different task - to combat such minor defects as cracks and small depressions.
Differences in the grain size of these materials lead to differences in their shrinkage. Of course, you can seal a large crack with putty, but, firstly, the putty will drain when applied, and, secondly, when it dries, it will shrink a lot and also crack.
Plaster and putty
Both plaster and putty mixtures are produced with different compositions , which affect the maximum layer thickness of a particular mixture - this characteristic is important.
So, when purchasing plaster, you need to know in advance which layer will be needed to level the walls with the first layer. If the maximum thickness is less than 3 cm, then one modification will do, and if more, then you will need to purchase a more expensive dry mixture - the difference in price is very noticeable, for example, for plaster mixtures of the KNAUF-Rotband family it is 50%.
To prepare walls, you may need two types of putty: finishing and super-finishing. From the name of the putties it is clear that the latter has minimal grain size. It is needed if perfectly smooth walls are formed. If the walls will then be painted with a specific paint (relief), then EK K200 gypsum putty will be quite sufficient.
There are numerous offers on the construction market, both for plaster and putty, of different compositions and different prices. In order not to get bogged down in the issue of choosing this or that mixture, you need to know that for interior work the most suitable mixtures are gypsum - they are comfortable to work with and they set up quickly.
Ways to level walls
Under the old finishing layer, a surprise may await you in the form of uneven walls. For high-quality painting of walls, a flat base is necessary. It is not advisable to proceed to the next steps if this condition is not met. There are various ways to level walls, each of which will be optimal in each specific case. Surfaces can be adjusted using plaster, putty or drywall.
Drywall
A great way to quickly level up. Smooth material does not require plastering. The paint can be applied directly to gypsum boards, or to a thin layer of putty. For large rooms this method is ideal. But it is worth mentioning that to cover walls with plasterboard, you need to build a frame of metal profiles. The structure will serve as a basis for sheets of material, but at the same time it will “eat up” a lot of space. It is better not to resort to this technology if every cm is important to you. The material is not strong enough, it is impossible to place heavy suspended structures on it.
Plaster
Plaster is the most successful intermediate finishing option if the walls are to be painted. It is applied directly to the wall and allows you to create a perfectly flat surface. To form a thick leveling layer, work is carried out in several stages using beacons.
Step-by-step instruction:
- Mark the wall by setting and fixing landmarks at 60 cm intervals using a plaster mixture.
- Apply a primer to improve the adhesive properties of the surface.
- Prepare the solution by combining the contents of the bag with water according to the instructions.
- Apply the mixture to the surface using sharp strokes using a trowel.
- Spread the plaster using the rule. Your movements should be short and zigzag.
- We glue strips of façade mesh or fiberglass and leave the wall until completely dry. This must be done to prevent cracks in the finish coat.
Do not try to achieve a perfect surface with plaster. This is the function of the next layer - putty.
Putty
Sometimes you can do without plaster altogether. Replace it with putty, which comes in the form of a dry mixture. On relatively flat walls it is enough to apply two layers of this material.
Before you start puttingty, you need to prime the wall. This can be done with a roller, but a spray gun can handle this task faster and better. Next, apply the putty using top-to-bottom movements. After drying, sand each layer with a spatula. It is necessary to eliminate transitions and tubercles formed during the distribution of the composition. The second layer is sanded using 150-grit sandpaper attached to a special platform. The next step is re-priming the wall and gluing the fiberglass.
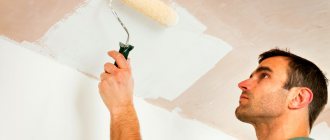
Painting indoor surfaces
Page navigation
Anyone can handle painting surfaces, since the process in question does not require specific knowledge, complex tools or materials. However, some complexity is caused by the fact that immediately before the painting process it will be necessary to properly prepare a particular surface.
Puttying with finishing putty
The finishing putty has a finely dispersed structure and forms a perfectly smooth base. It will not help to hide serious defects. Therefore, it is only good in combination with a starting mixture, provided that the base is properly prepared. If the finished material is too thick, dilute it with water. It is very convenient to work with white putty on a gray base, since areas where there is not enough material immediately become visible. It is necessary to form an opaque and dense coating. Two layers will be enough.
Last stages of preparation
Surface preparation for painting during repairs includes:
- Removing damaged fragments.
- Repair and surface restoration.
- Drying.
- Strengthening with primer.
- Final alignment.
- Dust removal, degreasing.
- Priming with opaque primer.
Paint is a rather capricious finishing material. Neglecting the preparation process for painting can lead to a complete distortion of the final result.
Sanding and priming
The final stage of work is sanding the last layer with 240-grit sandpaper. A portable light source will help you control the quality of sanding. During work, a lot of dust is generated, so you should wear a respirator and special glasses. This will protect your lungs and eyes. After sanding, carefully inspect the wall and mark any defects found with pieces of masking tape. Do not use a pencil for this purpose, as it will be difficult to paint over.
Before applying paint, it is necessary to prime the surface again with a special compound. If this is not done, you may end up with poor adhesion of the paint to the wall.
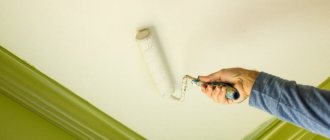
Main stages of work
One of the wall painting options
All preparation can be divided into the following stages:
- Removing the old finish coating
- Priming the walls
- Plastering the surface
- Priming plaster
- Puttying primed plaster
- Gluing fiberglass (wallpaper for painting)
- Puttying fiberglass
This list is indicative, since some surfaces do not require dismantling the old coating and plastering. Also here the steps of cleaning each applied layer with a construction spatula and sandpaper are skipped.
How to treat walls when fungus appears
Black spots on or under the wallpaper indicate the presence of a problem such as fungus. It cannot be removed using detergents. Even if you wash the stains, the fungus will appear again. If the walls are infected, it is necessary to get rid of the finishing and treat the entire surface with a special antibacterial composition. To do this, you can use a regular brush or roller. There are products on sale that come with a spray bottle for ease of application. During processing, protect your respiratory tract with a respirator. After cleaning, the walls need to be thoroughly dried, and only then can the repairs begin.
To prevent the fungus from returning, take care of high-quality ventilation of the room and refuse to install furniture close to freezing walls.
Painting sequence
The painting process must be preceded by a preparation stage, which, as a rule, is a full-fledged technology and can consist of many actions.
Preliminary work: proper preparation
Among the main stages of preparatory work are:
Depending on the characteristics of the room and the surfaces to be painted, the stages of preparatory work may be changed or supplemented. It is recommended to prudently protect other surfaces and objects located in the room by covering them with film, paper or other material.
When is putty needed?
If you plan to simply paint the wall, then putty is necessary to eliminate all kinds of irregularities and defects.
Surfaces made of plasterboard, as well as cement-sand plaster, by definition, are not suitable for painting. But after carrying out the initial putty and subsequent putty with reinforcement, you can complete the preparation with a finishing layer and make the surface finally suitable for painting.
Grout
Grouting is performed at the final stage of plastering work to ensure that the surface is well leveled. In addition, irregularities that remained after the previous finishing are eliminated. Grouting is carried out using a special tool called a “grater”, specialized mixtures and various methods of movement.
The types of graters are different and among the leading options are:
The composition of the grout mixture varies depending on what type of finish will be used in the future.
Using trowels, there are two commonly practiced methods of grouting: round and smooth. In one case, circular movements are performed, and in the other, movements are carried out vertically.
Primer
Primer is an operation that precedes painting. The purpose of the primer is to prepare the base for the subsequent application of finishing materials in order to protect the layer and improve the properties of the coating. This is one of the main points, which may consist of several stages.
What to cover if fungus occurs
The fungus should be removed in any case, since it can harm both the finishing material and the surface in question.
Initially, this is done with a spatula, and then the damaged areas are rubbed with sandpaper. After this, treatment will be required with a special solution prepared at home or purchased at a hardware store. After treating the wall or ceiling with a solution against mold and mildew, you can begin priming.
Types of wall paints
The arsenal of paints that the modern construction market offers will make any non-professional at a loss. Let's consider the proposed options and find out which of them will be optimal for use in a residential area.
Types of paints:
- Oil based – made from mineral and vegetable oils. They form an airtight film and quickly crack.
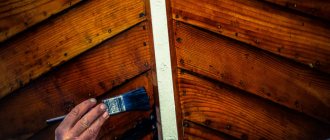
- Alkyd - the base is similar to the previous version, but here acidic and organic components are added to the composition, due to which the enamels become elastic, resistant to wear, exposure to ultraviolet radiation, moisture and temperature changes. Disadvantages - they are fire hazardous, have a strong odor and low vapor permeability. Alkyd varnishes are used when painting wood.
- Silicate – the base contains liquid glass, which ensures strength and resistance to moisture and fungus. The main disadvantage is the aggressive impact on human health during application. When staining, it is necessary to protect the mucous membranes and skin. The coating cannot be repainted; it must be completely removed.
- Water-soluble is the most suitable material for painting walls. The mixtures are diluted with water and contain components that form a dense layer. The desired color is obtained by adding pigments.
- Acrylic – the composition contains acrylic resins. The material has high elasticity, strength, resistance to moisture and sunlight, and anti-corrosion. Easily washable acrylic paints are relatively expensive, but are ideal for decorating the interiors of children's rooms. Such materials must have zero emissions.
- Latex is a washable, quick-drying material. An excellent choice for the kitchen, hallway and bathroom. Latex gives the paint a water-repellent effect. It is optimal for applying to wallpaper before painting. Easily masks small surface imperfections.
- Water-based paints are quick-drying, easy to apply, but not durable enough. Available in a wide range of colors, they can hide minor defects. Suitable for painting the ceiling in the living room or bedroom.
- Water-dispersed - form a matte surface that can be washed. The proposed base is white or black. With the help of color you can get any shades. It has excellent vapor permeability and resistance to damage. Safe for humans and the environment. Weak point is instability to frost.
- Silicone – combines the advantages of all available types of water-dispersed paints. They have high hiding power and hide defects well. When dry, a film is formed, which makes it possible to carry out wet processing. Perfect for decorating a balcony.
- Polyurethane – the composition contains polyurethane resins and hardening components. The composition is prepared immediately before painting the wall. The material is far from budget, but it can eliminate the cost of paint in the next 20 years. Resistant to any vibrations, mechanical stress, directed rays and temperature changes.
Adviсe
When decorating walls, there are a number of rules that are recommended to be followed:
- A new layer is applied only after the previous one has completely dried.
- Direct sunlight and air currents should not be allowed to hit the surface that has not yet dried.
- Preparatory mixtures must have the correct composition and proportions in order to subsequently provide the necessary properties and tenacity.
The article presents methods for painting surfaces, discusses the necessary preparatory measures and actions carried out to prepare surfaces from certain materials.
Methods of painting walls
In addition to the usual method of painting, which is understandable to everyone, there are non-standard techniques that allow you to turn a room into a work of art. Interesting textures and patterns can be created using budget materials available to everyone.
Color options:
- stippling - the effect of shabbyness. First of all, you need to paint the base. Then we apply contrasting acrylic paint. Next comes the turn of colored glaze to shade the wall. It needs to be smoothed with a brush over the entire surface. Then we give it an aged effect by touching the wall with a brush and a small round brush;
- leather - paint the wall with latex paint. After this, we prepare a mixture of the same paint of a darker shade and glaze. We apply the composition to a small area of the surface and make stains with a suede brush, partially removing the top layer;
- Venetian plaster – add dark and light pigment on both sides to a container with latex paint. Apply the light-colored mixture to the wall using a plastic spatula, similar to plaster. We select a dark shade and cover part of the wall. Spread the colors evenly to achieve a harmonious finish. After drying, sand with fine sandpaper and rub with wax;
- wrinkled skin - you need to prepare a piece of paper. We paint a section of the wall no larger in size than a leaf. We crumple the piece and apply it to the wall. Smooth out the paper, imprinting the folds on the paint;
- painting with a fabric roller - paint the wall and leave until completely dry. We make a rope of fabric and wrap it around the roller. We wet the homemade “tool” in paint of a darker shade and use it to apply a texture pattern to the first layer.
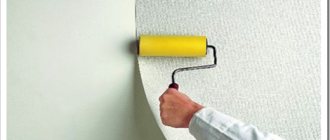
Priming wall surfaces
Once the old cladding is removed, you can begin priming. The work is performed before leveling the surface. It is enough to apply a special solution to the surface of the wall. You can cover the base with several layers. The primer allows you to make further cladding better, ensuring reliable adhesion of the base and paint.
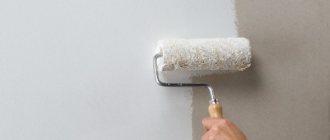
It is recommended to apply the composition with a roller equipped with a fluffy nozzle or a wide brush. This will allow you to apply the composition generously and cover a larger area of the surface. Start at the top, gradually moving down to the floor.
The primer allows you to make further cladding better, ensuring reliable adhesion of the base and paint.
Matte or glossy?
Choosing interior paint is a multifactorial process that includes several stages:
- Determining the functional purpose of the room. This is necessary in order to understand the expected degree of contamination of the walls and the requirements for the wear resistance of the coating.
- Choice of colors/gloss. Light matte paints look smoother and more uniform than darker and more glossy paints. If the paint is matte, but has a dark and bright color, then there is an increased risk of whitish spots under mechanical stress (“writing effect”).
- Determination of the room illumination level. For example, large panoramic floor-to-ceiling windows that are fashionable today, or special lighting sources that direct light along the wall, can highlight not only defects in surface preparation, but also the result of poorly performed painting work.
Most painters know about these factors, but the average buyer is usually not aware. This can cause serious disappointment and disputes about the quality of the paint job.
Depending on the ratio of the above factors, a specific brand of paint with the appropriate gloss level is selected. Why is gloss so important?
First of all, let's define what gloss is and why the glossy effect is needed. Gloss is the ability of paint to reflect light. The direct reflection of light that occurs from a very smooth surface gives a glossy effect. The reflection is diffuse, scattered, which is formed on a microporous surface - perceived as a matte effect. The degree of gloss is measured by photoelectric gloss meters; the higher the value, the more shiny the surface will be after painting.
The gloss category has a numerical value - from 1 to 100. This number means the % of glossy effect on a given surface. For example, “2%” is a very matte effect, and “20%” is a “semi-matte” effect, also known as “silky matte” or “semi-gloss”.
But gloss is not only shine. This indicator directly affects the wear resistance of the paint. The whole point is that the amount of polymer resin in glossy paints is higher than in matte paints, where pigments and fillers predominate. The high amount of resin allows the paint to shine and be resistant to moisture. The coating formed by glossy paint is easy to clean and easily withstands serious loads (washing, grinding, aggressive and heavy pollution).
In contrast to glossy paints, matte paints are not recommended for surfaces that are prone to contamination and require frequent cleaning. Therefore, they are usually used for ceilings and walls in rooms with low operational load.
The use of matte paint in situations that do not correspond to the tasks of the room can lead to such unpleasant moments as:
- A polishing effect that occurs when the surface is intensively rubbed with a cloth or sponge. At the same time, the matting fillers of the outer layer are removed and the surface becomes more glossy, which is especially noticeable in side light.
- “Writing effect”, one of the most common defects, is associated with the appearance of whitish stripes due to mechanical stress on painted surfaces. This defect is typical for matte paints when choosing bright tinting shades. Why the “writing effect”? In practice, by running your finger, nail or stick over such a surface, you seem to “write”, as if with a pen or brush.
- Pigment abrasion. As in the previous case, pigment abrasion is especially noticeable on dark color tones. The defect occurs when cleaning the surface with a damp cloth or sponge, as a result of which the coloring pigment is washed out, and after drying, the wall surface becomes stained.
However, matte paint has its own significant advantage - it is the ability to hide minor surface defects. In addition, matte paint, especially in light colors, is the optimal choice in difficult lighting conditions, when light glides over the painted surface and highlights the slightest defects. While glossy paint will only highlight small scratches or unevenness.
Using glossy paint where matte paint should have been applied is also fraught with unpleasant consequences, and here is a striking example from our forum:
kam711FORUMHOUSE user
The customer brought gloss paint. I tell him: “You can’t put it on the ceiling, it will be a disaster - we’ve already done it.” The customer replies: “I liked the attic, it looks great, paint it!” The owner is a gentleman, they painted it. He comes and yells: “You don’t know how to paint, it’s not painted over, stripes, stains!” I answer him: “Everything there is painted over, these are putty defects that were highlighted by gloss. And you also have large windows on the ground floor and the south side, the sun illuminates everything instantly, and in the attic the lighting is moderate.” We repainted it four times with both rollers and a spray gun, it got better, but not much.”
Today, modern industry produces variants of matte or semi-matte paints that combine a good surface masking effect with high wear resistance.
For example, there is such a category of paints as “Mattlatex” or “matte latex”. This type of product came to the domestic market from Germany. This is, in a way, already a classic of the genre among typical German interior coverings. And today, German painters predominantly choose coatings of this “masking” nature. The word “matte” promises the experienced consumer a flat surface in visual perception, and “latex” (that is, a kind of adhesive base) promises special strength and wear resistance. The latest trends in the development of the paint and varnish industry are associated with the introduction, in addition to the traditional latex binder, of new, innovative materials: especially resistant dispersions, waxes, fillers and pigments of an increased reliability category. Such paints may include elements of nanotechnology, industrial ceramics technologies, and microcrystalline marble filler, forming surfaces of particular durability and reliability.
Vladimir StarshovSpecialist at düfa Premium Keraline
In our product line, the level of strength and intensity of gloss are correlated with the digital indicator in the name and correspond to the percentage of gloss on the surface.
- So, for example, paint with the index “2” in its name forms a slightly structured, deeply matte surface, which is optimal for ceilings and walls during quiet use.
- Indicator “3” also means matte paint, but with high smoothness, without relief or structure. Suitable for walls and ceilings with a high level of finishing. The high strength class allows for gentle washing.
- Indicator “7” - Paint with a pronounced “polished”, velvety surface effect. This level of gloss makes the coating quite versatile, suitable for both smooth walls and embossed surfaces. This is the most popular coating, ideal for wet areas. Durability level suitable for intensive use.
- Indicator "20" is the most durable and most glossy coating. This paint is ideal for use on the most heavily loaded surfaces - kitchens, bathrooms, children's rooms, schools, hospitals, restaurants, etc. It can withstand intensive and frequent washing using mild detergents and disinfectants.
Thus, the issue of choosing paint is a complex task that includes a serious set of measures, and simply choosing a very expensive paint in itself does not guarantee an excellent result. A lot depends on the preparation of the base.