- Design
- Metal
- Creating a Project
Building a bathhouse is a responsible undertaking. The pleasure and effect of the procedures performed in it directly depends on this. In this article we will look at step-by-step instructions in which the masters answer the question of how to properly make a good steam room in a bathhouse. It brings true pleasure only with proper organization, so we recommend entrusting the construction to professionals.
What material is suitable for a steam room?
There are a lot of finishing materials for interior work. To make it easier for you to choose what kind of finishing will be done for the steam room in the bathhouse, each designer has photos and pictures of ready-made solutions. It is worth remembering that even if you made your own choice, it is better to coordinate it with a specialist, because not all materials are suitable for installation inside the hottest room.
Taking into account the specific operating conditions, the following requirements are imposed on the finishing:
- moisture resistance;
- heat resistance;
- durability;
- hygiene;
- environmental friendliness.
Important! For the interior decoration of the bathhouse, you should choose natural materials.
When the temperature rises, plastic becomes deformed and begins to emit an unpleasant odor, and ordinary tiles crack after heating. Therefore, the use of such finishing is unacceptable in the steam room.
The best option is wood. The finishing structure depends on financial capabilities. For example, lining is cheaper than timber; it is chosen if it is necessary to meet a certain budget. Basically, bathhouse owners prefer deciduous wood. Below is an example of what the interior decoration of a bathhouse might look like, a photo of the classic version.
High-quality wood for interior decoration of a bath Source stroy-block.com.ua
There is an opinion that you should not sheathe the inside with steamed coniferous wood, since it releases resin when the temperature rises. But this statement is controversial, because resin has a beneficial effect on health, cleanses the respiratory tract, and strengthens the heart.
Whether or not to sheathe the interior with coniferous wood is up to you - maybe someone in your household doesn’t like the smell of pine needles or vice versa...
If lining was chosen for cladding the bathhouse, then it must be of high quality. Particular attention must be paid to the external processing of the material - there should be no chips, knots, or cracks on its surface. The lining should not deform: swell when heated or dry out at normal temperatures.
If wood is not suitable for you as a material for interior decoration of a steam room for some reason, you can give preference to heat-resistant tiles; they have proven themselves well under significant temperature changes.
Experts recommend laying the walls of the steam room with terracotta flagstone - this material is resistant to high temperatures and humidity.
How to properly install the device, interior decoration and insulation
The safety and effectiveness of the procedures performed in the bath depends on the quality of the steam room. If you decide to entrust all the work to specialists, the device and the entire structure will be as concise as possible, and safety will be at the highest level.
Design requirements
The main rule is the development of the project. It must meet the following requirements:
- The key element is the firebox. You can't skimp on it.
- Before starting work, you need to find out the size of the oven and the number of people who can visit the steam room at the same time.
- All used space must be calculated as rationally as possible.
- The room should not be heated in vain.
Dimensions
The ideal ratio of steam room sizes is as follows: ceiling height – no more than 2.25 m, length – 2 m, width – 2.5 m. This room is designed for 3-4 guests. To be able to use the steam room at home, it is important to discuss the following questions with the installers before starting work:
- Do you need window openings?
- How do you plan to install the front door?
- What kind of ventilation system do you want to use?
- Where and how many benches will be located?
Doors and windows
According to standard designs, there are usually no window openings in steam rooms. However, if necessary, they can always be installed. The optimal window size is 0.5*0.5 m. Professionals most often use the latest generation double-glazed windows for maximum sound and heat insulation.
When installing doors, experts recommend making a high threshold (up to 35 cm) to reduce possible heat loss at the entrance. The door leaf itself should be comfortable and functional, without locks or latches. When choosing a material, it is better to give preference to glass or natural wood.
Exhaust ventilation system
As a preventive measure against mold, all kinds of fungi and reduction of humidity, it is necessary to take care of an effective exhaust ventilation system. This is done at the start of construction work at the site. Its main task is to bring clean air into the room and maintain optimal humidity in the room.
For ideal operation, it is better to choose supply and exhaust type ventilation, so that the supply channel is located near the firebox, and the exhaust is in the opposite part.
Ceiling protection
Before finishing, you should protect the ceiling from hot steam. To do this, use aluminum foil or a construction membrane.
Important ! Do not use foil with mineral wool or polypropylene foam glued on it. When heated, these materials release toxic substances.
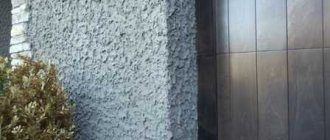
Protecting the ceiling in a bathhouse using aluminum foil Source ko.aviarydecor.com
Features of finishing the bath
A real bathhouse is a complex complex that includes:
- Steam room;
- Waiting room;
- Luggage storage.
If there is a lack of space, the first two rooms are combined into one space, but if there are no problems with the size of the building, they will equip a separate recreation room, a swimming pool and even a terrace.
But at the same time, the decoration of the bathroom in the interior must meet several requirements:
- A Turkish bath requires resistance to hot steam and long-term heat retention;
- The laundry room must be provided with an anti-slip surface, but this requirement applies to all rooms;
- It is important that a comfortable environment is created in all rooms, including to protect visitors from burns.
An important role will be played by the aesthetic properties of finishing materials, as well as:
- Easy to clean;
- Environmental friendliness;
- Duration.
Wood copes best with these tasks, although a bathroom or dressing room can be finished with other materials, such as tiles.
It should be borne in mind that a bathhouse made of beautiful rounded logs also needs interior finishing, which will increase the service life of the building.
Using lining - rational or not
Definitely yes! Lining made from linden, aspen, cedar, and abashi has become popular due to its properties. It tolerates temperature changes well, high humidity, is aesthetically pleasing, and does not absorb moisture. Cladding made of clapboard has low thermal conductivity - it does not heat up, but transfers heat to the air.
Bath lining is not covered with varnish, antiseptic, or paint; it is used in its natural form.
See also: Catalog of companies that specialize in finishing materials.
We finish the walls and ceiling - what you need to know
It is important to understand how to sheathe it correctly. Adviсe:
— porcelain stoneware is only suitable for walls;
- stone tiles do not justify the price
— artificial tiles are suitable for luxury furniture. Experts also share their secrets regarding mosaic tiles. It can be made of glass and is also suitable for a bath.
Effective wall insulation involves the use of different materials. Properly sealed, damp-proofed and insulated walls help improve comfort. It is also possible to reduce noise levels and save on energy costs.
However, walls are the most difficult component of the building envelope to insulate, seal, and control moisture. The key to creating an effective wall is an airtight design. All air leaks are sealed into the wall during construction and before insulation is installed.
View this post on Instagram
Publication from Ilya Grunenkov (@grunenkovilia)
Humidity control is also important. Before work, the frame will be improved to maximize insulation coverage and reduce thermal bridges, ensuring there are no gaps or compressed insulation.
An air seal reduces heat flow from air movement (convection) and prevents water vapor from the air from entering the wall. In a 10-square-foot wall, one cup of water can diffuse through drywall without a vapor barrier in a year, but 50 cups can penetrate through a ½-inch diameter round hole.
In fact, sealing air leaks is 10 to 100 times more important than installing a vapor barrier. Air sealing and moisture control make insulation more effective. It is a myth that installing a vapor barrier is the most important step in controlling moisture in your walls.
Insulation retains moisture only by diffusion, while most moisture enters walls either through the capillary action of a liquid or as water vapor through air leaks.
Causes of water leakage include improper installation of materials; poor quality waterproofing, sealing or sealing of seams. To enhance protection, a drainage plane is created in the bath wall system. Plus, a polyethylene covering is installed on the floor. You can take a continuous vapor barrier and use a shield, spacers or other vapor barrier membrane on the top of the wall. This will prevent moisture from entering the wall through capillary action.
Preparing the walls for finishing
When starting to finish the walls, they solve the issue of insulation and waterproofing. Without such measures, the bathhouse will not last long, and healing procedures will be reduced to simple hygienic ones. For insulation, the walls are covered with mineral or basalt wool. The second one is more resistant to high temperatures, so it lasts longer.
Insulation of walls in a steam room with mineral wool Source hvylya.net
Experts consider cork to be the best thermal insulator for bathhouse walls. This agglomerate does not burn, does not rot, and is resistant to fungi and mold.
Competent interior decoration
Decorating a steam room in a bathroom with your own hands involves several important missions, which are as follows:
- waterproofing and thermal insulation of the room was carried out;
- the service life of the premises is significantly extended;
- a therapeutic effect is provided that promotes the release of aromatic compounds when wood is exposed to high temperatures;
- visitors are protected from burns upon contact with walls;
- performs a decorative and aesthetic function.
Lathing - to do or not to do
Craftsmen prefer to install the sheathing and attach the interior trim to it. The popular base size is 50x50, less often they make 70x70. The pitch is not standard and varies depending on the size of the blocks being strengthened.
The sheathing is made of wood, less often of metal. Considering the operating conditions, the metal must be treated with moisture-resistant compounds. The lining or logs are secured with self-tapping screws and nails. They must be copper or brass. The installation of the base is done perpendicular to the sheathing.
Lathing walls in a steam room under clapboard Source seattlehelpers.org
Installation of shelves and oven
The next answer to the question of how to build a steam room concerns the firebox. It is performed in the corner closest to the front door. According to current standards, the distance between the heating device and the walls must be at least 33 cm. Previously, we have already become acquainted with the types of modern fireboxes on the market.
Heaters made of metal or powered by electricity can be purchased at the store.
To make boards, craftsmen use slats made of oak or aspen. When connecting, it is important to leave a small gap between them. This is necessary for the removal of water and the entry of air. The dimensions and number of shelves depend on the number of steamers and the size of the room itself. Optimal shelves are 1.8 m long and 0.6 m wide.
Stages of clapboard finishing
- A beam is fixed along the perimeter of the wall and ceiling . Fastenings should be every 80–100 cm.
- Cut pieces of insulating wool are placed between the wood without compacting.
- The top is covered with a waterproofing agent . The joints are sealed with aluminum tape, paying special attention to the corners.
- Provide ventilation . To do this, fill the distance rail. It will provide a small gap (2–3 cm) through which air will be vented.
- They make separate upholstery for doors and windows.
- They fasten the lining . You need to start from the corner, fixing each part vertically. This position will ensure free flow of water. If a horizontal arrangement of blocks is planned, make sure that the spikes are at the top. This will protect the lock from moisture.
- The lining located in the corners or near the walls is cut to the required size . It is especially important to cut the corner block correctly. It is necessary to accurately calculate the angle of inclination so that the adjacent block is correctly fixed.
Insulating the furnace using a metal sheet Source interistroy.ru
Next, install insulation from the furnace. For this use:
- metal - stainless steel or profiled iron is mounted on the wall behind the stove;
- red brick - placed between the wall and the fire;
- tiles resistant to high temperatures (kaolin);
- mineralite is a heat-resistant board made of cement and special components.
Russian forest in a Russian bathhouse
The domestic nature is rich and varied, so finishing a steam bath involves the use of different types of wood.
Linden
One of the most common tree species used in finishing the steam room.
Its wood is soft, viscous, homogeneous, and is perfectly processed in all directions. Prone to cracking and warping only under improper storage conditions or the use of irrational and incorrect drying conditions. Solid linden perfectly holds metal fasteners of various types. Honey plant. Creates a wonderful soft atmosphere in the steam room. For long-term use in a humid environment, it requires coating with specialized protective compounds based on vegetable oils.
Important! When in contact with iron under conditions of high humidity and elevated temperatures, linden wood is prone to developing gray stains and active corrosion of fasteners and other steel products. Therefore, when choosing hardware, it is worth choosing those whose surface is covered with a protective layer and is chemically inactive.
Birch
Heavy, durable birch wood has excellent resistance to splitting, but nevertheless can be processed quite well.
It has a white wood color with a pronounced yellowish core. Subject to destruction of the massif and rotting in a humid environment due to fungal attack. Needs treatment with special protective compounds. Birch has strong energy, and the manifestation of its qualities is, frankly, twofold. On the one hand, among the Slavs, Finno-Ugric peoples, Celts and Scandinavians, birch is a symbol of fertility, resurrection and spring, on the other hand, we should not forget that according to Slavic mythology, mermaids settle in the branches of birch trees, and witches fly on a birch broom.
Aspen
Its wood is characterized by wear resistance, relatively low weight and good workability.
Holds fasteners in its body satisfactorily. It has average resistance to moisture and high temperatures, which, however, did not prevent the use of aspen boards for covering church domes in the domestic tradition. In Germany it is considered one of the best materials for making sun loungers and benches in the local baths. Aspen wall panels can be easily processed to varying degrees of finishing, including sanding. Decorating a steam room from aspen panels is a very interesting and rational option. The wood, which is white when cut, quickly turns reddish orange due to the oxidation of tree sap by atmospheric oxygen.
Alder
Its wood does not have a clearly defined boundary between the core and sapwood and is distinguished by a uniform structure of a reddish color, which darkens quite strongly when exposed to sunlight, but in the shade, when the wood dries, the intensity of the original color decreases.
It has sufficient resistance to moisture, comparable to the resistance of oak. In general, the wood is soft, easy to process, and its properties are similar to linden. You can purchase freshly cut alder, since this tree dries well under natural conditions without signs of warping or cracking.
Larch
Very heavy, tough and durable wood with a pronounced boundary between the sapwood and the heartwood.
It has a rich reddish solid color. Endowed with outstanding qualities of resistance to rotting in a humid environment. When using lining or finishing panels, it has a specific defect called “nail knots”, dry knots with a diameter of about 10-15 mm that have grown into the massif. Among other things, larch in the massif has a pronounced characteristic aroma and a fairly low release of resins. Covering the steam room with larch requires high-quality, durable fasteners.
Oak
It has, perhaps, the most durable wood of domestic species, which increases as it dries.
Due to its high density, it is little susceptible to twisting and warping. Resistant to moisture. Prolonged exposure to water without access to atmospheric oxygen causes the oak to stain, after which the strength of the wood increases even more and the texture becomes more pronounced. Solid oak is little susceptible to damage by insects and pests. Oak has a natural surface gloss. Oak panels and lining practically do not require tinting or treatment with protective agents. However, do not forget that oak processing requires high-quality cutting tools. In addition, a significant disadvantage of oak products is its price.
Attention! We should not forget that all of the above qualities are inherent exclusively in mature oak, the supply of which on the market is limited to one degree or another. A simple rule applies to oak wood: the older the tree, the better its properties and the higher the quality of the material.
It is not easy to unequivocally answer the question of which tree is best for a steam room and must be based on the specific possibilities of the financial plan and supply on the regional market.
Making the floor in the steam room
Not only comfort, but also safety depends on the choice of raw materials for the floor. Moisture on smooth tiles or linoleum leads to falls and injuries. Installation of such materials will turn the floor into a skating rink. In addition, when heated, linoleum emits an unpleasant odor containing substances harmful to health.
The optimal choice of floor for a steam room is wood. It does not require a special coating, and with this design the room will be designed in the same style. It is worth noting that the wooden floor in the bathhouse is not made of oak. This wood becomes stronger when wet, but at the same time its surface begins to slip.
Concrete works well. A floor made of such material will be strong and durable. Tiles are laid on top of it, but the structure of the surface of such a coating is important. It should not be glossy; a pronounced relief is necessary. The floor is laid at a slight slope towards the water drainage.
Laying tiles on the floor in a bath Source seattlehelpers.org
The tiles are laid from the corner, placing crosses between the blocks, tapping with a mounting hammer. After 2-3 days, the seams between the tiles are rubbed down. Wooden grates are placed on top to prevent you from stepping on the cold floor and provide additional safety in case of possible slipping.
Oven: which one to choose and where to install it
The main element of the steam room arrangement is the stove. The modern market offers 3 types of this equipment.
Metal
Characterized by small size and high performance, it can quickly heat the required area. The heating device requires a minimum of time to heat up and cool down. However, touching its heated surface is extremely dangerous. For this reason, when choosing this equipment, it is necessary to provide reliable fencing to prevent accidents.
Brick
Installed exclusively on a pre-prepared foundation. The dimensions directly depend on the characteristics of the steam room. Disadvantages:
- difficulty in choosing a good stove installation specialist, and as a result the high cost of services;
- mandatory presence of a foundation due to the large mass of the furnace;
- long time for construction;
- slow heating.
Its advantage is long cooling, the formation of light and fine steam, which is ideal for a Russian steam room, safety (even if you accidentally touch it, there will be no burn), and the absence of infrared radiation. Based on this, a brick oven can be installed close to the shelves for long-term heat generation.
Electric
Its main advantage is the absence of hassle with kindling firewood. But it is important to consider that these heating devices are effective only for small rooms, they cool down quickly, and their cost is high. Any faults in electrical insulation can lead to serious problems and short circuits. For this reason, when choosing electric furnaces, you need to carefully check the quality of the electrical wiring.
Stone
Soapstone is a popular and in-demand material today. It is characterized by a high degree of strength, therefore it is durable. The main advantage of this material is uniform and gradual heating of the room. The stove itself is not cheap, but it allows you to significantly save on fuel: after heating for an hour, the heat will remain throughout the day. In addition, such steam has healing properties and can improve your health.
And now the shelves
A very important point is the shelves in the bathhouse. Since constant tactile contact is assumed with them, increased requirements are put forward for these elements:
- they should not get very hot ;
- it is better if they cool slowly ;
- must be environmentally friendly ;
- do not slip or be very rough;
- have no external damage ;
- easy to wash.
Again, wood is most suitable for this purpose. Carefully cleaned, without knots or nicks, it has served people in bathhouses and steam rooms for centuries. Shelves should not have sharp corners that could cause injury. They are not made solid, leaving a small distance between the wooden boards.
Tools and Supplies
The construction and arrangement of any structure requires the use of reliable tools. The quality of fastening materials is of particular importance when building a bathroom, because the durability of the finish depends on it.
List of tools and consumables:
- mechanical stapler with staples;
- roulette;
- pencil;
- building level;
- nail;
- self-tapping screws with anti-corrosion coating;
- screwdriver;
- hammer;
- hacksaw.
Tools must be prepared in advance, and fasteners must be purchased in reserve. This allows you to securely fasten all materials and elements.
Setting up a dressing room
The main function of the dressing room is to preserve heat. The temperature in the room is not high, so it is good to use coniferous trees to decorate walls in a traditional style.
Design of the waiting room and rest room “under the tree” Source koon.ru
The interior decoration of the bathhouse made of logs creates an atmosphere of antiquity and ancient fairy tales. A light aroma created by pine, fir, and spruce is appropriate here. The wood of these species resists fungus and mold well. It does not crack after drying and is durable. When heated, fir releases almost no resin.
If hardwood is preferred, experts advise finishing the room with birch. The lining can be laid out not only in even rows, but also in a pattern. It is important that the walls in the room are covered with the same type of wood.
Selection of lining material
Different types of wood have their own advantages and disadvantages. Birch is characterized by the ability to charge the human body with positive energy. Aspen is very good at drawing out negative energy along with diseases. Therefore, such materials are most often used in modern steam rooms.
However, not all so simple. If there is an alternative to birch, then it is better to choose it. Birch has a loose structure, which indicates strong drying during harvesting for construction. In contrast, it is very simply treated with special compounds that protect the wood and extend its service life.
Bathroom and washroom
These rooms do not have very high temperatures, although the humidity is as high as in a steam room. The choice of finishes in the bathroom and washroom is more extensive. Fans of bath procedures recommend using natural raw materials for such rooms - wood or stone. Among wood, pine is the leader - it is an affordable material, however, it darkens with prolonged use.
An example of a washing station design Source profstroiplotnik.ru
Plastic is acceptable since there is no high temperature, and it tolerates humid air well. You can use regular tiles for the shower.
Eternal material – larch
This lining material is the most durable, because it copes well with sudden changes in temperature, as well as with high levels of humidity.
The main advantages of larch are:
- Environmentally friendly material.
- Pleasant shine with a natural effect.
- A very large selection of all kinds of shades.
- No matter what color was chosen, you immediately get a natural atmosphere in tandem with familiar comfort.
Video description
For interesting ideas for interior decoration of a bathhouse, watch the video:
Decorating a relaxation room in a bathhouse, in addition to traditional wood, can be done:
- glass wallpaper;
- porcelain stoneware;
- natural stone;
- decorative plaster.
Important! The tree is not installed immediately after delivery to the construction site. It is brought into the room and allowed to stand for a couple of days so that it “gets comfortable” in the bathhouse. After this procedure, the wood is not subject to deformation when heated and high humidity.
What to consider when choosing a heating device
Each type described above has characteristic advantages and disadvantages. Metal furnaces cool down quickly after stopping operation and require serious protective measures and fencing. Brick ones must be laid on a separate foundation. Electric furnaces are distinguished by the absence of a chimney and easy installation, however, they require a special approach and compliance with all precautions.
Choosing a device depends on individual preferences, the size of the room and the desired result. In any case, you can always consult a professional and ask for help with your choice.
Coatings
Finnish floor oil
It is probably worthwhile to dwell in more detail on the compositions that are suitable for covering the walls, floor and ceiling of a steam room.
As already mentioned, we have impregnations and varnishes at our disposal. Paint is usually not used in a steam room. And it is advisable to use varnishes from a new generation - acrylic, for example.
The same compositions for walls are suitable for lining, and for timber, logs. The same compositions are used for walls and ceilings. Thus, we get two groups of coatings - for the floor and for the walls and ceiling. Is it worth adding about paints for stoves?
The floor only needs covering if it is not made of ceramic tiles. Wooden floors can be covered either with floor impregnations (the manufacturer must somehow state the fact that its coating will not be slippery, because we are talking about fatty compounds), or with varnishes, but in this case it is advisable to use not just acrylic varnish, but with additives that increase its abrasion resistance, as well as water resistance.
The walls were discussed in the previous chapter.
Here are examples of such compositions:
For walls and ceilings – Belinka “Sauna Interier”, Tikkurila “Supi Saunasuoja”, Senezh “Sauna”, Teknos “Sauna Natura”.
For the floor – Tikkurila “Supi Lattiaolju”, its varnish “Unica Super” (dilute varnish:white spirit in a ratio of 3:2, apply in 1 layer).
Mounting options
Next, you need to choose how the lining will be attached. The planks are connected to each other by grooves, but they must also be attached to the sheathing.
You can do this in 2 ways:
- Using a clamper. This is a mounting bracket with 2-3 holes. It is put on the lining and fixed with nails, screws or staples. Installation begins from the center of the wall. Its main advantage is that the kleimer does not damage the lining.
- Using self-tapping screws or nails: the first ones are screwed in at an angle, the second ones are driven in. To avoid rust, it is better to choose galvanized or copper nails. Unfortunately, the metal will begin to rust, and leaks may also appear at the fastening sites.
Claymer for liningSource mainavi.ru
You can easily see how to properly line a bathhouse with clapboard from the inside with your own hands. The lining can be mounted horizontally or vertically. The first method is more suitable for saunas, where the humidity is low, the second - for Russian baths, where there is high humidity.
Locker room
The materials for decorating this room can be very different. But it’s hard to come up with anything better than a tree. However, it can be supplemented with other types of finishing: decorative plaster, artificial stone tiles, various wall panels, etc.
It all depends on the size and purpose:
- If this is a small dressing room in a free-standing bathhouse, intended only for undressing and dressing, it is better to limit yourself to moisture-resistant wooden finishing. Especially if the bathhouse is heated once a week, and the rest of the time it is not heated.
Finishing the dressing room with a blockhouse with tinting
- If this is a spacious recreation room with a heating system from the house, then your desires are unlimited. Even wallpaper and painting on the walls - as long as you like it.
Examples for inspiration:
Wood finishing
Plaster, tiles and painted wood panels
Decorative plaster and stone
Blockhouse and brick
As for how to decorate the outside of the bathhouse, any façade materials can be used here. Most often, a beautiful log house is left without cladding, limited to caulking the joints, sanding and treating with decorative and protective agents.
Sanding the log house
And buildings made of brick, foam blocks and other building stones are finished in accordance with the house or imitate a log house using a wooden, plastic or metal blockhouse.
Exterior decoration with blockhouse
Methods for attaching panels to walls
Using nails or self-tapping screws is the traditional option for attaching panels to walls. A more modern method is the use of clamps. It does not damage the panels, but requires additional costs of both time and money when installing the lining.
Using nails or screws
This method will require a screwdriver or hammer, as well as special nails or self-tapping screws - galvanized or made of copper alloy. Such fittings are more expensive, but if you save on them and buy ordinary nails, they will begin to rust over time. This will lead to the appearance of red streaks on the lining, which will spoil the appearance of the finish and stain the skin and things when touched. The fasteners are driven or screwed into the lining tenon at an angle of 45 degrees. The fastening points will have to be sanded so that there are no burrs or other defects left. The disadvantage of this method is that holes will have to be created on the planks when fastening them with nails. And when you try to remove the lining, the fastening points will be further damaged, which precludes the reuse of the panels if necessary.
Fastening with clamps
Do-it-yourself installation using clamps is safe for lining strips because it does not damage them. A clamp is a special bracket that is attached to the lower half of the lining groove - a recess into which the tenon of the next plank is inserted. The fastenings of the bracket are covered with the next strip in the row. Fixing the staples to the sheathing beams is carried out with nails or self-tapping screws.
With this installation method, the lining is not damaged, and there are no nail heads or screws left on the outer surface of the cladding, which eliminates the risk of getting burned or getting a rusty drip on your clothes after visiting such a bathhouse.
It is also easier to partially replace the lining mounted in this way - just pull the boards out of the grooves and pull out the fasteners. If you do not work carefully, it will be the staples that are damaged, not the boards.
We recommend reading:
Ventilation in the bath: purpose and installation
Steam room arrangement
In order for the steam room to serve for a long time, and the bathhouse to always bring benefits, reliable materials should be used when arranging it. There are many requirements here and they must be fulfilled strictly:
- cladding - sanded boards, lining, imitation timber, it is allowed to use only wood in the bathhouse and that which can withstand the action of steam well and does not heat up too much: linden, aspen, black alder, ash; among the coniferous varieties, only cedar is suitable for a bathhouse, since the rest release resin too actively when heated;
- thermal insulation is an absolutely necessary element for a bath; mineral wool is most often used; when constructing a steam room, it is better to use foil-coated mineral wool, as it better protects the material from the action of water; it is not recommended to use polystyrene foam in a steam room, since under the influence of temperature it releases harmful substances and is quite quickly collapses;
- waterproofing - preference is given to foil materials: aluminum foil, foil foam insulation or glassine, this option not only protects against moisture, but also reflects heat back into the steam room, which allows you to heat the room at a lower cost;
- vapor barrier - allows air to escape, but prevents contact with water. For the bath, you can use polypropylene film or kraft paper. However, it is better to use modern developments: membrane variolation, foil-based on kraft paper or fiberglass;
- pipes for bath ventilation are absolutely necessary for supplying air to the stove and ensuring its circulation in the room; ventilation pipes in the steam room are installed in plastic, the main thing is to correctly calculate their dimensions.
When installing a steam room in a bathhouse, the future owner independently chooses the optimal material, taking into account the size of the room, the material of the structure and his capabilities.
Covering a log bathhouse with foil
We carry out the work in the following sequence:
- Attach the sheets of aluminum foil with the reflective coating on the inside using small galvanized nails, with a 20 cm overlap.
- Ensure that the integrity of the material is maintained. If it is damaged, you can glue these places with tape.
- We seal the joints with metallized tape, ensuring tightness.
- We fill the lathing from slats with a cross-section of 5 cm2 in the direction opposite to the installation of the lining.
- We attach finishing material to the sheathing on top of the foil.
- During the installation of the lining, we ensure that the air gap between the reflector and the finish is maintained.
How can you not decorate a steam room?
No matter how competently you finish a steam room with your own hands, you cannot use the following materials: linoleum, plastic, pine boards and wood boards. All of them are unsuitable for high temperatures: plastic and linoleum immediately release toxic substances into the air, and pine releases resin. And chipboard and fiberboard slabs cannot be used for finishing the steam room - due to their easy flammability and high hygroscopicity.
A good finishing of a bathhouse is not only a design that is pleasing to the eye, but also a manifold increase in its healing properties for humans!
Finishing around the stove
The space around the stove needs special finishing for the reason that the proximity of the hot stove to the flammable material of the walls (the same lining) can lead to a fire.
Fireproof board for finishing walls when installing a sauna stove
Therefore, a heat-insulating material, for example, mineralite or superizol (mounting on ceramic bushings is desirable). A stainless steel sheet can be attached to reflect heat.
Tiles near the stove
If the walls are not made of wood, you can protect them with heat-resistant tiles. Since tiles are used for lining stoves and fireplaces, you can find many varieties on sale, from which the seller will select the right one for you.
Of course, stove tiles are more than suitable for wall decoration, but they can be more expensive, so it’s worth measuring the heating temperature of an object located at the same distance that will separate your stove from the wall.
ATTENTION! Glazed tiles are not useful here either, because glass cannot withstand high temperatures. If you take tiles, then only matte ones.
And one more thing - you need to take into account the fact that in bathhouses on a personal plot in winter, if not used for a long time, the temperature can be below zero.
Some types of tiles are not intended for sudden changes in temperature when heating a bath - this issue should also be clarified with the seller. If you choose the wrong tile, it will crumble.
Beautiful examples
There are many interesting ideas for decorating baths, many of which can be used as inspiration for renovation or construction.
The first example is a classic bathhouse with wooden walls, floors and even a ceiling. All this is made of logs, covered only with a protective layer of varnish. Only in such a steam room can you truly relax. She looks traditional, and that is where her main charm lies. The bathhouse is divided into two main parts - a place to relax and the steam room itself. Both of them are made in the same style and decorated with brooms made of dry herbs. This decor not only looks beautiful, but also fills the room with incredible aromas. Moreover, this kind of decoration is quite inexpensive, because you can collect herbs for brooms yourself in the summer.
As for the functional content of the rooms, everything is simple. The steam room contains everything you need for proper relaxation and bathing. The dressing room can become a place for intimate gatherings with friends. There is a large table and chairs with comfortable backs. It can accommodate a traditional Russian samovar, delicious food and a little alcohol to lift your spirits.
The relaxation area in the bathhouse can be made not only in the traditional Russian style. The next example is a luxurious large room, stylized as an expensive classic. The finishing materials used here include wood, slab, and stone. Despite the fact that there are a lot of them, they all organically combine with each other.
The room is decorated in cozy brown and gray tones. Wooden walls and ceilings are combined with cozy brown armchairs, and a neat stone wall is combined with tiled floors. Since the recreation room is quite large, it can be divided into several zones at once. The main one is intended for gatherings with friends. There are chairs and several tables. The rest of the space is freer and can be used as you wish.
Decorative details deserve special attention. It is they, along with thoughtful decoration, that create an atmosphere of luxury in this room. Decorative details include paintings on the walls, forged lamps, and soft pillows.
The last room option is a steam room, decorated in a modern style. Everything here is very simple and minimalistic. The decoration of the entire room is made of light wood, as is the fence for the small stove filled with stones. It is convenient, stylish and safe. Only one of the walls is decorated with stone. It is located behind the stove, which increases its safety. Decorative details in the steam room would be superfluous, so there is only what is needed for a good rest.
Building a bathhouse and finishing all its surfaces is a responsible task. After all, not only the appearance of the room, but also how healthy the atmosphere in the rooms will depend on the choice of materials. Therefore, it is worth taking into account all the information provided about different types of finishing, and then the bathhouse will turn out exactly the way you want it to be, and it will really be pleasant to relax in it and spend free time in the company of loved ones.
For details on the intricacies of finishing a bath, watch the following video.
Rules for visual inspection of boards and assessment of their condition
The following must be taken into account:
- Pay attention to the quality of the chips. The boards must have a flat and smooth surface. This directly affects the economic benefits of finishing work. If the front side of the lining is rough, finishing will be complicated by the increased consumption of antiseptic and paint materials.
- The moisture content of the boards should not exceed 12-16% (GOST requirement). It is visually impossible to determine whether the material offered by the manufacturer meets this criterion. Therefore, it is necessary to request documents confirming compliance with GOST. If the wood is not dry enough, there is a high risk that it will suffer during the first years of operation of the finished premises.
- Pay attention to the depth and evenness of the groove. These indicators determine the quality of installation. And it doesn’t matter how it will be done: using clamps, nails or staples. If the groove is shallow, there will be nothing for the fasteners to grab onto.
An important characteristic of boards is width. Often there are lamellas on sale that are wider than standard ones (more than 88 mm) and managers assure that it is more profitable to buy such lining. This is not true, since such a finish will be less durable and there is a high risk of wide boards bending when exposed to moisture.
Step-by-step guide to covering a bathhouse with film and clapboard
Sheathing begins with calculating the amount of materials and choosing one of them. Aluminum foil is used as a vapor barrier and heat repellent. This material is not recommended for use in residential premises, as it emits substances that are unsafe for humans in large quantities. But people visit a bathhouse or sauna for several hours and not every day. Therefore, there will be no harm from such finishing. In addition, the foil section will be hidden in the wall by the final finishing - clapboard.
The creation of sheathing and installation of heat insulation begins after the installation of all communications and ventilation is completely completed.
The lining is chosen with a thickness of 12.5 mm, a working width of about ten cm. The length of the panel ranges from 2 to 6 m, depending on the width of the wall. Or its height if vertical laying of panels is planned.
Initially, a sheathing is created, insulation is laid and a vapor barrier is installed. After this, holes are cut in the insulation opposite the ventilation windows. Upon completion of these manipulations, they proceed to laying the lining in the chosen method.
We recommend reading:
How to make a ceiling in a bathhouse
Protection from moisture and heat loss
Before finishing the room, it will have to be protected from condensation and heat loss. For this:
- Film waterproofing is installed or a special composition with similar properties is applied to the wall. The vapor barrier film is fixed using nails on wooden walls or slats on stone and brick walls.
- Install the timber sheathing. The pitch between the axes should be equal to the size of the piece of heat-insulating material. The height should be equal to the thickness of the insulation.
- Place the insulation in the recesses of the sheathing with an overlap of 1 cm.
- Foil is attached to the lathing slats. Its pieces are placed overlapping, the joints are taped with aluminum tape. To fix the film, they often choose either small nails or a construction stapler.
- A counter-lattice is attached over the lathing slats and the foil fixed on them. It follows the contours of the first sheathing and creates a gap between the foil and the finishing.
At this stage, the main thing is not to confuse the aluminum film with the vapor barrier foil, which protects the insulation from the formation of condensation on the wall of the building. If you neglect this step, the insulation will become damp due to contact with cold air from outside after the walls freeze. A damp insulator will become a breeding ground for mold and harmful bacteria.
Ventilation
After installing the insulation, ventilation holes are cut in it according to the size of the ventilation windows existing in the room. Initially, it is recommended to make one hole under the ceiling of the bathhouse, and another one at the bottom. This approach ensures better air circulation and rapid removal of excess moisture after bath procedures. It is best to force air circulation in the bathhouse, that is, install not only a shaft, but also a fan on it to blow through the rooms.
Creating a sheathing
Lathing over the foil should not damage the film. Therefore, it is advisable to clean the slats in advance from burrs and knots, and also to file the corners on them at 45 degrees. When installing the lathing in a steam room or dressing room, you will have to follow a number of rules:
- The batten should not reach another wall or ceiling. Otherwise, when heated, the wood will expand, which will lead to swelling of the entire counter-lattice mesh.
- Installation of the sheathing is carried out level, if thermal insulation has not been completed before. When using insulation, a level is not needed - the bottom sheathing is already installed in compliance with the geometry of the room.
- When installing the sheathing on the ceiling, you can use hangers - metal pins that are fixed to the ceiling. Their use makes it possible to artificially lower the ceiling in the bathhouse and reduce the cost of heating the room during operation. Suspensions are also installed by level; due to the specifics of the room, you need to choose those that are not susceptible to rust - aluminum, galvanized, etc.
- The optimal lathing pitch is 50 cm, this distance is enough to fix the lining. If the previous sheathing is wider than the required distance, you will have to add additional strips. In this case, they will have to be fixed only in the corners to the previous sheathing, and not to the insulation.
- For fastening the counter-lattice, self-tapping screws or stainless steel nails 9-10 cm long are best suited. Drive them in so that the heads are flush with the board. If you ignore this step, you won’t be able to lay the lining evenly because the caps will get in the way.
It is better to drive the fasteners at an angle from top to bottom, and not perpendicular to the wall. This approach ensures that the wood remains in place even as it expands due to heat.
Fastening the lining
Before attaching to the walls and ceiling, the lining panels will need to be properly processed. Preparation includes:
- Trimming the lining to the required size. Initially, the panel length is up to 6 m; few people will need such a large panel even with horizontal installation. The planks are cut with a jigsaw, the edges are polished so that there are no burrs or nicks.
- Drilling holes for self-tapping screws or fixing clamps. During installation, this will be more difficult to do, since you will have to be distracted by processing each panel, rather than installing them on the walls using the designer’s method.
After preparation is completed, the lining is laid in the chosen method. In this case, you will have to follow a number of rules:
- The gap to the floor should be about 2 cm. When fixing the lining to the ceiling, you need the same distance from the walls.
- You will have to cut off the ridge from the first plank, which is inserted into the groove. With the cut section, it is turned towards the nearest wall, the installation of the next plank is carried out in the groove of the first. The first plank is fixed against the wall with self-tapping screws, regardless of the chosen method of fastening.
- When using clamps and fixing them to the sheathing with mounting brackets, they must be driven in at an angle.
- The groove and that part of the main width that prevents the insertion of the lining into the space remaining between the adjacent plank and the wall are cut off from the final plank.
For better fixation when working, you can use a wooden or rubber mallet. The blows of this tool will ensure better adhesion of the panels to the sheathing, but will not damage the lining, unlike metal products.
Design of a small dressing room inside a bathhouse
Visitors to the bathhouse or sauna come here first. Here they also rest between races. And in this space you can implement several interior ideas.
- A small room should not be overloaded with functions. Especially if there is a separate seating area. You can limit yourself to an area for changing clothes and storing things with hangers.
- If it is combined with a recreation room, it makes sense to place a dining area with a table, chairs and benches. A TV is often installed here. Such a dressing room should be well insulated.
And
Steam room design
A steam room is a relatively small room, usually without windows, which includes several mandatory characteristic elements:
- stove-heater - only this option allows you to get steam in the bathhouse; water, breaking on the surface of hot stones, scatters into tiny splashes, they create the so-called light steam;
- shelves are wooden platforms on which people sit and lie during the procedure; their size affects the size of the steam room;
- ventilation - air flow is ensured by ventilation holes; if the size of the steam room in the bathhouse is large, it is possible to install a hood, but such a solution is considered unprofitable.
Important! The steam room in the bathhouse is finished only with wood. Moreover, only wood that does not heat up to critical temperatures is suitable for this, for example, aspen, linden or cedar.
The optimal size of a steam room in a bathhouse
When planning a bath, first of all, determine the size of the steam room and dressing room. It is not recommended to do this “by eye”. There are a number of rules that must be followed:
- The size of the steam room in the bathhouse is determined by the maximum number of users - according to the norm, for each person in the steam room there is 0.7 square meters. m, deviation is allowed for small-sized baths if they have seating shelves;
- the optimal size of the steam room also depends on the height of the tallest member of the family; the height of the room should exceed this value by at least 20 cm; even the tallest user should not touch the ceiling with his head if he is sitting on the top shelf;
- excessive height is also unfavorable: warm air rushes upward and if the steam room is too high, then too much power will be required to warm it up; the optimal height of the steam room is 2.2–2.4 m;
- the location on the sun loungers is also important, if there are supposed to be sitting shelves, then the steam room can be made smaller, but if those steaming will lie down, then the area of the shelves should be sufficient to accommodate everyone, the minimum width of the steam room will be 20 cm greater than the height highest user;
- Another factor that determines the size of the steam room is the dimensions and nature of the stove; a metal stove is quite compact, but its body literally gets hot, so it is positioned so that a certain distance is maintained from the stove to the shelf and walls; a stone stove does not burn, but it is noticeably more size, an electric heater requires a lot of electricity - this option is not suitable for large steam rooms.
Important! In calculations of this kind, the final, custom dimensions of the premises in the bathhouse are determined. When planning, you should take into account the thickness of the finishing and thermal insulation.
Dimensions of steam room for 2 people
Based on the listed factors, you can calculate the optimal size of the steam room for 2 people:
- experts believe that at least one side of even the smallest steam room should reach 2 m, thus compensating for the impression of a cramped and uncomfortable room; the size of the second wall is determined by the owner;
- The “useful” area of the steam room, that is, the shelves, should be at least 1.4-0.7 square meters. m per person, the total area of the steam room includes free space in front of the shelves at least 50 cm wide and space for the heater, the dimensions of the latter are decisive;
- In general, the recommended size of a steam room for two people is 1.8 m by 1.4 m.
Important! You cannot place a metal stove in such a small bathhouse: it emits too much heat, and the steam room will turn into a sauna. An electric stove in a bathhouse is unprofitable because it consumes a lot of electricity. A stone stove is the best choice, but it is large, so for a steam room for two people its size is decisive.
Dimensions of the steam room for 3 people
If for 2 people the sun loungers can be placed one above the other, saving space, then for 3 people they will have to be installed in the shape of the letter “L”, which immediately increases the size of the steam room for 3 people. The configuration and dimensions of the steam room in the bathhouse are calculated taking into account the following parameters:
- It is best to install 2 shelves one above the other along 1 wall of the bathhouse and 1 shelf along the second wall;
- if the height of each user is 1.7–1.8 m, then the length of each shelf in the steam room should be at least 1 m, and the width should be at least 50 cm;
- placement in the shape of the letter “L” is very convenient because it automatically frees up space even for a brick heater in the bathhouse - at least 1 sq. m.
The optimal dimensions of the steam room are 2*2 m, that is, at least 4 square meters. m.
Dimensions of the steam room for 4 people
In this case, the shelves can be placed in different ways, which allows you to vary the size of the steam room for 4 people:
- if you mount the sunbeds also in the shape of the letter “L”, then the dimensions of the steam room in the bathhouse do not change - 2 * 2 m;
- You can place 2 shelves one above the other on opposite walls of the steam room. In this case, the heater is placed between the benches. That is, with a shelf width of 50 cm and an oven size of up to 1 sq. m, the length of the second wall of the steam room will be 2.5 m, since according to the standards the stove body should not come into contact with wooden walls and benches, in this case the optimal dimensions of the steam room are 2 * 2.5 m.
In such a steam room it is allowed to install windows. They need to be placed as low as possible so that the warm air in the bath cools less.
Important! The height of the steam room is calculated according to the height of the tallest user, but must reach at least 2.1 m. Otherwise, it becomes impossible to use the shelves located in 2 tiers.
DIY steam room: photo
The design of steam rooms is not too diverse - this is a functional bath room, always trimmed with wood, since no other material is suitable for a steam room. The difference in design is the configuration and placement of shelves, lighting fixtures, dimensions and, of course, the shape and design of the heater.
The most authentic look is a steam room in a real log house. In this case, there is no additional finishing, and the highlight of the design is the log walls themselves. The shelves and benches in the bathhouse are chosen to be deliberately rough, and the stove is built of brick.
A steam room decorated with linden or cedar smooth boards with a lounger made of the same material looks less ethnic. The design of the bathhouse is complemented by illuminated wooden decorative elements, brooms and wooden buckets. Here the heater can be either brick or metal.
A bathhouse in the Art Nouveau style includes a decorative panel made of logs, wooden bricks, and wood chips.
The most exotic look of a steam room in a bathhouse is given by lighting. By varying the color of the radiation and the location of the lamps, you can achieve amazing results.