Silicone and polymer-based sealants have good adhesion to many materials. However, to achieve better results, the surface on which the composition will be applied must be cleaned and degreased.
For this, various solvents are used - for example, isopropyl alcohol. It is not recommended to use gasoline or an alcohol-gasoline mixture, as these substances leave behind a greasy film that reduces the adhesion of the sealant.
Adhesive sealants do not stick to some plastics (polyethylene, nylon, caprolon, polypropylene, etc.) without additional preparation.
Difficult-to-glue surfaces are first “sanded” with fine-grain sandpaper, cleaned and degreased, and then coated with a special primer.
For ABS plastic, sanding and degreasing are usually sufficient.
Why degrease an acrylic bathtub?
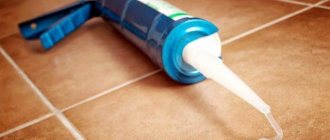
You need to degrease an acrylic hot tub before applying sealant, silicone, or gluing special tape. This is done when it is necessary to seal the gap between the bowl and the wall so that water does not flow there. If left untreated, the applied sealant or silicone will not adhere firmly and will quickly come off.
It is necessary to remove dirt before applying a new layer of acrylic, when the old one has darkened or become unusable.
It is recommended to degrease the font regularly so that it remains white and does not darken from water.
Sealants
Renovating a bathroom and installing a new bathtub is always a pleasant event, but it is not always possible to install it so that a gap does not form between the bathtub and the wall. It is obtained due to the loose connection of the tank to the finishing materials. Most often, the dimensions of the bathtub and the niche for its installation do not match. Sometimes its configuration does not coincide with the room, and the angle of the wall in the bathroom does not always form 90°. But even when everything matches perfectly, it is not possible to achieve complete tightness of the joint with the help of proper installation, especially when facing with decorative tiles. How to close the gap between the bathtub and the wall – we’ll look at it in the article.
Table of contents:
- Why do you need to close the gap between the wall and the bathroom?
- Choosing a material to eliminate the gap between the bathtub and the wall
- Basic ways to seal a gap near a wall
- Properties of silicone sealant
- What is important to know when sealing a gap between a bathroom wall
Why do you need to close the gap between the wall and the bathroom?
At any junction of surfaces in a bathroom, bathtub or swimming pool, it is important to ensure increased tightness so that water does not enter through the gaps. This results:
- to high air humidity;
- chronic dampness in the room;
- breeding mold, fungi and pathological microflora.
As you know, all this is harmful for:
- frail and elderly people;
- children;
- allergy sufferers;
- citizens sensitive to pathogenic environments.
With excess humidity, building materials and surface finishing become wet and lose their excellent consumer properties. Damp tiles become porous, expanded and more brittle, wood swells and deforms, and cracks form in some other materials. Water is known for its ability to penetrate into the smallest crack, but from there it is poorly removed by natural evaporation. This leads to rotting and destruction of not only any viscous medium, but also fairly strong solid building materials.
If mold has grown under the bathtub, where water flows through the gap, it will most likely gradually invade other spaces. For example, the seams between the tiles or the corners near the bathtub will turn black, and dark spots will appear near the ceiling, and then it will be most difficult to deal with it. If a bathtub is installed after laying tiles on the walls of the bathroom, then a large gap usually forms between the bathtub and the wall, into which water flows during bathing. This defect will have to be eliminated somehow - by sealing the gap between the bathroom and the video wall.
Choosing a material to eliminate the gap between the bathtub and the wall
There are several options for how to remove gaps between the bathtub and the wall, and this depends not only on the width of the gap, but also on the overall finish. There are also secondary factors, such as:
- capacity configuration,
- availability of ventilation,
- temperature changes,
- general design.
If the dimensions of the bathtub approximately coincide with the niche where it should be installed, then experts recommend:
- lay out the floors under the bathroom,
- install the tank,
- lay tiles or other cladding so that the tiles rest on the bathtub,
- additionally treat the joint with a special tiled plinth,
- Be sure to seal large gaps between the bathtub and the wall with any kind of border.
Also, the material from which the product is made is also taken into account. For example, an acrylic bathtub should not be treated with rough building materials, but even a small gap near the wall will still have to be foamed or filled with silicone. But this is not enough to eliminate the installation defect, since it will deform and sag under the pressure of the acrylic tank. Over time, the tightness of the silicone seal may become compromised. Special sealants are not always advisable. And the bathtub needs to be additionally attached to the wall so that it does not stand on only legs or pipes for drainage.
It is important to mount the container securely using regular hooks or anchors. It is enough to screw them in the corners and in the center of the long side of the container for hygiene procedures:
- baths,
- home mini-pool,
- shower tray.
And although all these containers require different sealing methods, the gap at the wall will have to be eliminated in any case. This is done in different ways, for example, with a special soft tape or a hard border.
Basic ways to seal a gap near a wall
You can seal a deep gap or a small gap between the bathtub and the wall in different ways, using decorative materials, regular grout or sealant. It is important that the filler underneath does not fall out into the gap when performing work. There are certain difficulties in how to seal the gap between the bathtub and the wall with a large hole. The choice of sealing method depends solely on:
- dimensions of the wall clearance,
- bath stability,
- decorative properties of the finishing and the material laid in the seam.
1. You can use a regular plastic profile (corner), which can easily cover a small gap or unevenness in the tiles at the junction of the bathtub. It can be fixed with any construction adhesive or mounting silicone. And the joint at the corner and the ends of the plastic profile must be cut correctly, accurately measuring according to the dimensions of the container. It is important to cut the angle at 45° and sand the edges so that the joint is accurate. Next, silicone is applied along the edge of the bathtub, which should flow deep into the cracks and harden a little, and only after this the seam can be closed with a corner. Remove excess silicone by lightly pressing the plastic profile. What comes out when pressed is unnecessary; it must be carefully cut off with a knife after hardening or the liquid silicone sealant can be wiped off with a damp rag.
Attention: Whatever solution, glue, foam or sealant you use when sealing the gap between the bathtub and the wall, try to lay out a little less of them than necessary, otherwise the seal will turn out sloppy. It is better to remove all traces of application before drying, so as not to spoil the surface of the wall and bathtub with remnants of the adhesive base!
Advice: Experts recommend sealing an acrylic bathtub only when it is filled to the top. It is better to keep the entire volume of water in the container until the silicone dries completely, that is, 12-15 hours.
2. Another way to seal is to use a decorative tiled corner or border of small width. In the old fashioned way, they also used narrow strips of ordinary tiles, laid at an angle of 45° relative to the bathtub. But this method is not acceptable if there is a large gap, or the gap had to be sealed with a glazing bead so that the cement mortar does not fall out of the bathtub.
3. Of the modern methods, the simplest method of sealing the gap is self-adhesive curb tape for the bathroom and a specialized plastic baseboard. It can also be mounted directly on silicone, however, if there is a large gap, this method is also unacceptable. Installation of the corner involves a reliable fastening, which requires thorough cleaning and degreasing of both surfaces.
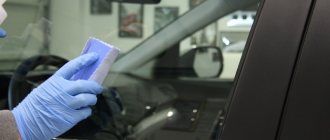
How to degrease the surface of an acrylic bathtub
To remove dirt and grease from the surface, use special products for acrylic. White spirit or apple cider vinegar will do.
Is it possible to degrease a bathroom with vinegar?
To treat the font, use apple cider vinegar. Soak a sponge in vinegar, apply it to the stained area, and remove it after 15 minutes. The bath is washed with warm water.
Is it possible to degrease an acrylic bathtub with white spirit?
White spirit is an organic solvent used before sealant and silicone. It is used at the beginning of work, after which the surface is treated with a solution of alcohol and phosphoric acid. This allows the surface to be cleaned.
White spirit does not react chemically with acrylic and protects it from chips and cracks. At the same time, it is safe for sealants.
Preparatory stage
A large gap between the side of the bathtub and the wall occurs if a plumbing fixture of standard dimensions does not fit the size of the room. Problems can also arise if the room has uneven corners and this could not be fully compensated for in the process of finishing the walls.
It is important to properly waterproof the gaps, since water will flow down the wall and get under the bathtub, resulting in:
- there will be a danger of leakage to the lower floors;
- High indoor humidity provokes the development of mold, which is harmful to human health.
How to degrease an acrylic bath using home methods
When there is no solvent at hand, the question arises of how to degrease the bathtub before sealant or silicone. In this case, you can use home cleaning methods.
Soda
Baking soda is suitable for degreasing
It is found in every home and is a universal remedy. You can use it to degrease an acrylic bathtub. This should be done carefully, applying it only to areas where there will be sealant or silicone.
Before use, soda is diluted with water to a paste, then applied to contaminated areas and left for 15-20 minutes. Then lightly rub the surface with a sponge and rinse with warm water.
Lemon acid
Removes limescale from hard water. It is used like this:
- Fill the font with hot water. The water temperature should not be less than 55 degrees, more than 60 degrees.
- Add 2 sachets of citric acid.
- Stir until the granules are completely dissolved.
- Leave the water with citric acid for 2 hours, then drain.
- Rinse the bathtub with warm clean water and wipe with a dry cloth.
When the contamination is small, before applying sealant or gluing tape, citric acid is dissolved in a glass of warm water. Using a sponge, apply to the required areas, leave for an hour, then rinse with water and wipe with a dry cloth.
Toothpaste
The product copes well with rust and removes yellowness. You can degrease the surface of the bowl in the following way:
- Apply a small amount of paste to the desired area and spread in a thin layer.
- Leave for 15 minutes.
- Rub gently with an old toothbrush. It is important that the bristles are not hard.
- Wash off any remaining residue with water.
An acrylic bathtub requires special care and the use of special degreasers. Not every product is safe for acrylic or sealant. Therefore, non-aggressive alcohol-based products are used.
When working with solvents, it is important to wear a mask and gloves to avoid exposure to respiratory tract fumes or contact with skin.
The procedure for carrying out the degreasing procedure
Inspect the surface before applying degreaser. If there is any material left on it that could crumble in the future, be sure to remove it. Sanding paper will help you with this. Remove any remaining old sealant using a knife.
Next, wipe the surface with a damp, lint-free cloth and blot with paper towels. Degrease the areas where the sealant will be applied using a clean rag and solvent.
After treatment, wait until the surface is completely dry and only then proceed with sealing.
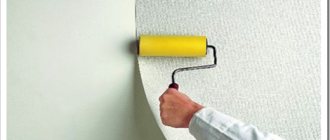
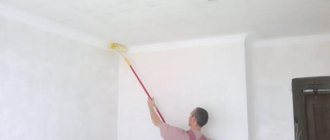
Painting decorative gypsum tiles
Painting decorative gypsum stone will not only improve aesthetics, but will also improve the service life of such cladding. The paint will protect the surface from temperature changes, ultraviolet radiation, and direct sunlight, that is, the cladding will not fade.
Painting artificial stone made of gypsum - video
How is this painting done?
Preparatory work.
- Paint should not be applied to a wet surface or old decorative stone. The old gypsum stone needs to be sanded, only then the paint will adhere well and will not crumble soon.
- You need to use only special moisture-resistant varnishes. There will be no unnecessary modifying additives such as hardeners.
- After applying a layer of paint, you can open the surface with varnish, which will serve as additional protection.
How can you paint gypsum stone?
We will focus more on possible options for painting decorative gypsum stone, because the technology does not differ from the general rules and what we described above.
Painting decorative gypsum stone, video recommendations and manufacturing demonstration
- Varnish for plaster. It fits well on the surface, dries almost instantly, and leaves no streaks. It allows you to protect the surface of gypsum tiles and create a beautiful appearance.
- Gold and silver pigments. Mixed together with plaster, they will make the walls of your home bright, festive, and the golden color will create an atmosphere of warmth and comfort.
- Acrylic paints. Mixed with the composition, if the technology is followed, a uniformly colored surface is obtained. You can also paint an already completed composition.
Bottom line: Painting gypsum tiles or simple ceramics is not the most obvious, but a practical and inexpensive option for improving the interior of a room. By following the tips from the article, you can achieve excellent results.
What can replace silicone?
Similar to silicone
You can try to make it at home using ethyl alcohol and liquid glass, which need to be mixed in equal proportions.
The difference between such silicone
and store-bought silicone will be in the hardening time.
Interesting materials:
What should you do after purchasing an Android smartphone? What needs to be done to prevent the iPhone from turning off in the cold? What needs to be done to prevent chickens from sitting on eggs? What do you need to do to find the divisor? What do you need to do to find an unknown subtrahend? What do you need to do to find the volume of a cube? What needs to be done to whiten nylon curtains? What should I do to convert docx to PDF? What do you need to do to select a line? What should you do before installing a new video card?
Restoration technology
Preparation
If you restore a bathtub with liquid acrylic, you will not have to completely dismantle it. Enameling bathtubs using this method will allow you to leave the old siphon and replace only the drain-overflow grate. The advantages of this restoration method are the preservation of a comfortable temperature for a long time, as well as the low thermal conductivity of the bath, which becomes smoother than the original one. Enameling bathtubs gives them their original appearance and helps give the structure new properties. At the same time, the coating created can not only maintain cleanliness, but also prevent contamination. Acrylic is practically resistant to wear, while having increased strength.