Savig
9317 0 6
Savig October 26, 2017Specialization: master of interior finishing works. I am well versed in power tools for repair and construction. Formerly a teacher at a radio engineering college.
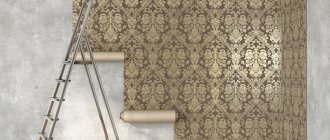
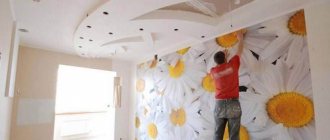
With the right approach, when combining panels with wallpaper, you can get an excellent result
Is it possible to glue wallpaper on PVC or MDF panels? In search of answers to this question, I propose to consider the features and instructions for combining these finishing materials. Visual illustrations will help you understand everything.
When to use the combination
Often, when decorating a room, we are forced to resort to using several types of finishing materials at once. In some cases, this can be explained by the design conditions and features that are inherent in a given room or apartment, and based on which we must make certain decisions on interior design. Very often, one of the optimal solutions is the use of combined types of finishing, when several decorative materials are used at once.
This approach makes it possible to focus on the obvious advantages, while hiding, at the same time, some of the disadvantages of both the room itself and each of the finishing materials. Today, one of the most popular solutions is a combination of wallpaper and panels: plastic, PVC, wood, MDF, SIP and others. By the way, this method has shown itself to be excellent when working in both residential and non-residential premises with high ceilings.
How to glue MDF - features of installation work
MDF panels are an excellent decorative finishing material, which is characterized by high installation speed and the absence of the need for “wet” work at all stages of finishing.
The panels also have their drawbacks (for example, MDF, like any wood, is afraid of water and high humidity, is less resistant to mechanical damage compared to synthetic materials, repairing damage to it involves a number of difficulties, etc.).
Fastening MDF panels depends on the type of base and the desired result. The most common type of fastening is mechanical (on the base, a frame is often equipped with wooden or metal guides, to which MDF panels are attached using nails, screws or clamps) and chemical - using adhesives.
The latter method assumes a flat monolithic base, since in this case there is no frame made of profiles or guides.
How to glue wallpaper on panels?
Many people wonder: is it possible to glue wallpaper to panels? Plastic (PVC), wood, MDF and others. In fact, to answer this question, you need to know some details about the use of this decorative material.
Please note that the market for construction and finishing materials offers a wide variety of different types of decorative wall panels.
Let's look at the most popular of them, and see if wallpapering on such surfaces is possible, and how to glue them correctly.
Pasting wallpaper onto PVC trim
A prerequisite for such gluing is the preliminary preparation of the working surface. Therefore, answering the question of whether it is possible to glue wallpaper on PVC plastic panels, we should say: yes, it is possible. However, it is necessary to remember that certain conditions must be met. So, what tools will you need and what is the sequence of your actions? Let's get a look:
- Prepare a primer for plastic and vinyl surfaces, a solvent or its equivalent, fine-grain sandpaper or its equivalent.
- First of all, treat the glossy surface, making it matte so that the wallpaper can stick to it, and wipe off all the fine dust.
- If possible, wipe the surface of the plastic with a slightly damp cloth and wait until it dries. It does not take a lot of time.
- Then you need to apply a primer designed for working with PVC and similar plastic-based materials.
- The next stage of work: surface treatment using a special adhesive primer diluted with white spirit. This is done using appropriate tools.
- After this, you can start gluing yourself and no longer worry about the question of whether it is possible to hang wallpaper on PVC plastic panels. The answer is of course positive: yes, it is possible!
Working with surfaces on wooden and combined bases
It should be remembered that today a huge number of decorative panels, which can be bought in specialized stores, as well as construction supermarkets in Russia and the CIS countries, are made from wood, or a combination of wood raw materials and other materials and elements, incl. fastening. In this case, we can mention not only wooden panels, but also the so-called SIP wall panels (OSB on both sides with a layer of insulation in the middle), which are used for the construction of prefabricated housing.
A design feature of many of these materials is that their production may not use any special fastening materials, such as glue or resin. Bonding of wood chips is made possible by the use of strong compression at elevated temperatures, as well as a special level of humidity. Thanks to an innovative approach to production, such materials are well known for their excellent performance characteristics.
Wallpaper can be glued to this type of panel, and the work itself does not differ in any special features compared to traditional wooden surfaces. Proceed by analogy. By the way, you can first read the articles on how to properly glue wallpaper onto plywood or similar surfaces.
At the same time, “liquid wallpaper”, which has already become popular, is often used to decorate SIP panels. What you need to know about their use:
- They have excellent performance characteristics and look beautiful.
- They are capable of hiding some minor imperfections of the wall on which they are applied.
- They are somewhat elastic. In other words, they are able to stretch a little, which is especially important when renovating new buildings.
- They are easy to install: even a non-professional can handle their application, subject to the instructions and recommendations.
Development of gluing of rolled products
You can only wallpaper wood panels with your own hands. In order for all procedures to be carried out correctly, you need to be careful and sequence the actions.
Materials and tools
The following materials and equipment will be useful for gluing work:
- Primer. You need to choose a composition with the deepest penetration. The best option is polymer consistency. You can also use “concrete contact”.
To treat the base, only deep-penetrating soil is used.
- Wallpaper. The variety is selected based on the wishes and style of the room. You should avoid single-layer cardboard products.
- Glue. For each type of material there is a special composition.
- Putty. It is recommended to obtain putty for chipboard on an acrylic or oil base, which has elasticity. This is especially important for recently built houses. Ready-made mixtures are desirable.
The putty must be created for wood or wood materials - Serpyanka mesh. Will be needed to reinforce slab joints.
- Brushes and roller. To apply primer and glue, a number of types and replaceable nozzles should be provided.
- Set of spatulas. You will need a small, medium and wide tool.
- Containers for mixing mixtures.
- Devices for smoothing wallpaper.
Small set of tools for puttying wallsEverything you need is purchased in advance. If used tools are used, they are previously cleaned of previous materials.
Surface preparation
The labeling of rolled products on different panels may vary slightly, so you need to proceed from a specific situation. Preparatory work includes a number of procedures specific to each species:
- Chipboard. This base needs sanding. The fact is that the upper structure is not always uniform, particles can flake off. So that they do not interfere with work in the future, they are removed with sandpaper.
Fiberboard. Wallpapering fibreboards is much more difficult. This is explained by the fact that the front side of the hardboard is impregnated with a paraffin-based composition to increase water resistance. When gluing decorative products, this makes it difficult, so the slabs are processed with a grinding machine, sparingly removing a very narrow layer.
- Chipboard. The laminated coating also makes adhesion difficult, so this surface is painstakingly sanded - as in the previous version - until a rough base is obtained.
- MDF. To hang wallpaper on an MDF panel, you will need to perform similar procedures, but be careful: the surface only needs light sanding.
All wood-based materials must be sanded before finishing.
General preliminary processes after completion of preparatory work:
Padding. The surface is covered with a roller with 2 layers of the composition, each one is dried.
The primer is applied with a brush or roller. Sealing of joints. When working with fiber boards, the edges of adjacent ends are cut at an angle with a construction knife. Chipboard walls are not subject to jointing. Then the seams are filled, the excess is removed.
The seams and fastening screws are puttied first. Laying serpyanka. It covers the front and corner joints (there is a special variety); a narrow layer of consistency is applied on top, completely covering the reinforcing mesh.
Serpyanka fiberglass mesh significantly increases the level of adhesion to the putty surface. The base should be puttyed as follows: the solution is scooped onto the blade of a wide spatula and distributed over the surface using arcuate movements from top to bottom. The function is repeated, after which the coating is primed.
The putty dries for at least 2 – 3 days
The walls are left until completely dry.
On a note! If the vertical system has a deviation, then it is first recommended to plaster the surface, after which lay the final layer of putty.
Pasting
Work begins with assessing the adhesion of the putty; for this, the surface is lightly tapped. If there are no delaminations, proceed to the process:
Wallpaper pasting tool
- The space for work is prepared in advance and all excess is removed. Wallpaper should be cut taking into account the fit of the pattern.
- It is recommended to start gluing from the window opening. The first strip is painstakingly measured, since other fragments are oriented towards it.
- Glue is applied sparingly to the underside of the wallpaper, after which the canvas is folded in half. This will avoid drying out and ensure the appropriate level of impregnation. If required, the wall is also treated with the substance.
- The strip is laid in its space, adjusted from above and pressed. For smoothing, use a rag or rubber spatula.
- Other elements are glued in a similar way.
The method of wallpapering does not change depending on the type of base
There is a recommendation that surfaces should be varnished. Indeed, this can be created, but achieving the desired decorative effect will be difficult. In addition, the front layer will become the most languid, which can lead to detachment.
Need to know! If the strips are connected end-to-end, then purposefully attach a special intermediate tape.
How to combine correctly
Well, now is the time to understand the features of using various combined materials. Let us dwell on the main options that are most widely used when decorating modern apartments and country houses.
Using Fragments
To do this, you need to make an initial sketch in which ideas for interior design are recorded. After this, you will need to thoroughly prepare the working surface of the walls, after which the standard pasting procedure follows. However, that's not all. After the walls have been glued, panel inserts are installed in some areas instead of wallpaper, thus forming unique fragments.
Advice from the designer! The edging of such inserts can be made using separate decorative elements, such as moldings.
Combinations using room dimensions
If your room has sufficient height or width, it can serve as a place for such a design technique as horizontal or vertical combination of wallpaper and panels. Thanks to its versatility, this approach is perfect for any interior style. One of the most common techniques is to alternate different surfaces with wallpaper. So, you can use plastic panels, then wood, then wallpaper, then PVC again and so on. A kind of circle is formed.
In addition, you can combine not only different types of finishes, but also different colors. As for the correct choice of shades, it is advisable to use special color compatibility tables for this. Approximately the same as those used when selecting companion wallpaper for the walls of a room. In any case, you can see various examples of using combinations in the numerous photos presented in this article. Experiment and don’t be afraid to glue wallpaper onto panels, as you can see from this material. As for the various combination options, they can only be limited by your imagination. Happy renovation!
Source: this-oboi.ru
Conclusions on the topic
Nowadays, queries in search engines are quite popular regarding whether it is possible to glue wallpaper to unprepared surfaces. Of course, any professional will tell you that it is impossible. However, we will say that it is possible, but the result most likely will not suit you. In the event that you decide to glue it to unprepared concrete walls, then it may turn out quite well, but in the case of chipboard, or other materials such as OSB, drywall, etc., all the seams will be visible through the wallpaper and soon the wallpaper may tear.
If you still have questions on the topic, you can ask them in the comments to this article and we or our readers will be happy to answer your questions.
Wallpaper panels: how to combine these coatings
The main problem of large and tall rooms is the need to fill the wall space with some content. Additional furniture or interior items are not always suitable for this, as they eat up space. The best way out in this situation is to combine finishes.
This way you will disguise the shortcomings of the room and turn them into advantages. The most popular way to do this type of finishing yourself is to combine panels and wallpaper.
Combining wallpaper and panels is one of the most popular design techniques.
Finishing stages
1. Alignment. As a result, you can get: conditionally, visually or perfectly smooth walls.
Conditionally smooth means sealing cracks, plaster up to 5 mm and putty.
Visually smooth - primer with betanokontakt, plaster on beacons, sizing with reinforcing mesh, putty, sanding and primer.
Ideally flat - the area of the object is divided into axes, the finished floor is referenced to the zero level, treated with concrete contact, installed a metal mesh, plastering along beacons, plastering to a level, gluing with reinforcing mesh and “gossamer”, putty, sanding and priming.
For curved walls, leveling the walls with plasterboard is best suited.
2. We paint the finished walls, cover them with wallpaper, cover them with siding or clapboard, finish them with plasterboard or MDF panels, cover them with artificial stone or apply decorative plaster.
Materials for interior decoration can be very diverse, as can the effect they produce.
Drywall
Lately, leveling walls with plasterboard has been in great demand. This is primarily due to the lack of waste and ease of installation.
Installation of plasterboard sheets is usually carried out before installing ceilings and laying flooring.
- First we install the frame under the drywall.
- Then we attach the sheets of drywall to the frame using reinforced steel self-tapping screws.
- And finally, we putty and sand all the seams.
- If the walls have slight curvature, we attach sheets of drywall with glue.
In the future, plasterboard walls can be painted or covered with wallpaper.
MDF panels
MDF owes its popularity primarily to the fact that it does not require preliminary surface preparation, is easy to install, and the boards are easy to maintain.
MDF wall panels allow you to hide cables and provide excellent sound and heat insulation of the room. In addition, they are made from environmentally friendly materials and can be used to decorate any premises.
One of the disadvantages is that if the room humidity is more than 70%, MDF boards can become deformed.
We install MDF boards as follows:
- First of all, we leave the panels to rest for 48 hours in the room where they will be installed.
- We cover the surface of the wall with bars perpendicular to the panel being installed at a distance of no more than 50 cm from each other.
- We install MDF panels, starting from the corner of the room.
- We carry out the final finishing: we decorate the corner joints with a corner, and hide the lower edge behind the baseboard.
By covering the panels with acrylic varnish you can significantly extend their service life.
Painting the walls
Recently, painting walls is not as popular a finishing method as it used to be. However, it looks great in combination with other finishing materials. For interior work, they mainly use acrylic, water-based or water-dispersed paints, which provide a high-quality coating and do not interfere with moisture exchange.
By adding one or another amount of color to the paint, you can get a wide variety of shades.
- We start painting the walls by removing the corners, retreating about 3 cm from the corner, then we remove the sockets and the door.
- We continue painting from top to bottom, performing W-shaped movements with a roller or brush.
- Let the first layer dry for 12 hours and apply the second layer.
You can paint the walls themselves, as well as wallpaper for painting and even decorative plaster.
Decorative plaster
Decorative plaster is a popular and relatively new finishing method. This also includes “Venetian” and structural plaster, wall decoration with artificial stone, antique coating, “flock”. The main advantages of decorative plaster are its resistance to moisture and mechanical damage, a rich range of colors and relative ease of application.
Wallpapering
One of the most traditional methods of wall decoration is wallpapering. Currently, the markets offer a wide variety of wallpapers, both in color, composition and texture. Paintable wallpaper is in demand. The main advantages of wallpaper are its low price, variety of colors, and easy application method.
Laying tiles
Laying tiles is the most suitable option for finishing a bathroom, toilet and kitchen.
The main advantages of ceramic tiles are high strength, ease of maintenance, moisture resistance, and a wide selection of textures, colors and patterns.
Cork covering
Cork wall covering is a fairly new type of finishing, made in the form of a 1 meter wide roll or tile. The color scheme is dominated by a brown tint. The main advantages of cork are ease of installation, sound and heat insulation of the room.
Combination methods
The most common is vertical and horizontal alternation of wallpaper panels.
Horizontal or vertical combination of finishes
Horizontal alternation of finishes.
Wall decoration with alternating vertical or horizontal stripes of wallpaper and panels is suitable for any room design.
- Areas can be highlighted by alternating plastic, wood, cork strips and various types of wallpaper for decoration. Thick vinyl or non-woven fabrics with relief are best suited for this.
- You can alternate stripes of both contrasting and solid colors.
- The instructions indicate that the optimal width of the strips should be selected based on the height of the ceiling or the length of the wall.
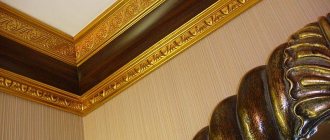
- Often, when finishing a corridor with panels and wallpaper or another room, they are separated from each other by borders, friezes, and moldings. They not only mask joints, but also serve as decorative elements.
Application of inserts
The photo shows a technique for combining finishes using inserts.
- First the walls are prepared.
- Then they are covered with wallpaper or covered with panels.
- Next, a compatible finish is installed on the pre-left areas.
- Inserts can be sections of panels or strips of various shapes and sizes.
- This design involves decorating the inserted elements with borders, thin slats or moldings.
Wallpaper inserts on large volumes
This method is optimal for finishing different semantic areas of the same room, i.e. its zoning.
- For example, a children's room is divided into sleeping, play and study areas. Install panels near the bed and desktop instead of wallpaper (calm colors), and cover the play area with canvases of bright colors. Such a semantic load will allow the child to concentrate where necessary or show his dynamics and emotionality.
- In the living room, a good option is to highlight the wall or niche with the TV with contrasting panels or wallpaper.
- In the sleeping area, it is best to highlight the head of the bed. The best way to do this is to combine canvases and wall planks that have different tones of the same color.
How to update an old polished cabinet with wallpaper sheets?
- First roughen the surface by sanding it with sandpaper. Then apply a primer to prevent the coating from coming off in the future. When the soil is dry, you can start gluing.
- Take measurements from the surface of the cabinet that you will update.
- Unscrew handles and locks. Remove, if any, decorative trims.
- Transfer the required dimensions to the back of the self-adhesive.
- Now you need to make soapy water in a flower sprayer. Spray it on the cabinet where the film will be glued.
- Separate the wallpaper from the base at one edge by 5 cm. Bend the paper slightly and apply the sticky side to the door or side wall. Take a rag or spatula in your hands. Carefully smoothing from the middle to the edges, expel the air from under the film.
We invite you to watch a video that shows how to update a polished cabinet with wallpaper:
Next in the photo you will see how cabinets covered with wallpaper look in the interior.
Wallpaper sticker on the panel
When combining finishes, the question often arises: is it possible to glue wallpaper onto MDF panels or plastic, wooden, etc. analogues. Let's figure it out.
Analogues from woodworking products
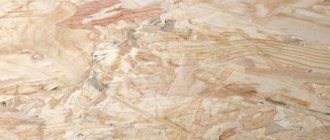
ISOTEX panels are already covered with wallpaper or textiles, which can be re-glued if necessary.
At the moment, in many large construction stores you can purchase decorative panels from woodworking products, for example Finnish “ISOTEX”.
- They consist of ground coniferous wood . Particles of material are held together by pressing at high temperatures. In other words, it does not contain “chemicals” - resins, glue, etc.
- Such panels have excellent heat and sound insulation qualities.
- Their width is 58 or 60 cm, height 2.7 or 2.55 m, thickness - 12 mm.
- Currently, a wide range of panels of various colors and textures are produced..
Note! Innovative production technology makes it possible to produce lightweight, porous slabs that at the same time have good density. This makes it possible to glue wallpaper or textiles to such acoustic panels. Moreover, panels can be used in any variety - paper, vinyl, fiberglass, etc.
How to glue panels to vinyl planks
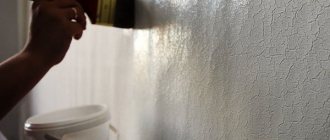
PVC panels must be treated with an abrasive sponge before wallpapering.
Is it possible to glue wallpaper on PVC panels? Yes, it's quite possible. But the base must first be sanded and primed.
You will need an abrasive pad (Scotch Brite), plastic primer, white spirit and an adhesive primer.
- First, matt the plastic covering with Scotch Brite..
- Next, remove any dust that has formed..
- Then apply two coats of plastic primer.
- Dilute the adhesive primer with a solvent and cover the panels with it using a roller or paint brush.
- When the soil dries, the question of whether it is possible to glue wallpaper onto plastic panels will be resolved. Do it boldly .
Liquid wallpaper and SIP panels
Liquid wallpaper fits well on SIP panels.
- Liquid wallpaper is a fairly popular type of finishing. They have excellent decorative and soundproofing qualities.
- They mask small and medium-sized wall irregularities well.
- Another important advantage of the coating is that it can stretch without changing the structure. This property is indispensable if finishing is carried out in a new house that has not undergone final shrinkage.
Applying liquid wallpaper to SIP panels is very convenient, because... The walls are absolutely smooth. If you use them in the kitchen or bathroom, then coat the finish with a clear varnish so that it does not absorb moisture, grease and dirt.
Solutions
So, how to glue wallpaper, taking into account the above?
Painting
The problem of excessive absorption of water from the glue, and at the same time rusting of the fasteners, would be completely solved by a layer of soil separating the wallpaper glue and the base. The “would” particle is not superfluous here: traditional deep penetration primers on hardboard should not be used in such cases.
Remember their composition. Most of the soil volume is the same water, contact with which we try to avoid.
But alkyd primer or paint (for example, inexpensive and accessible PF-115) is quite suitable for our purposes. They will cover the fiberboard and fasteners with a thin and waterproof film; The matte surface of this film, after minor adjustments we made to the adhesive composition, will ensure acceptable adhesion quality to the final coating.
Actually, the instructions consist of only two points:
- We paint the fiberboard surface with alkyd paint. It’s better to use white: we need the base not to show through the wallpaper. It is advisable to paint in two layers; Particular attention is paid to fasteners and seams.
- Add PVA glue to the wallpaper glue (CMC or starch - it doesn’t matter) at the rate of 500 milliliters per bucket.
The only unresolved problem will be the seams, the relief of which will be noticeable through the wallpaper. What to do?
Puttying on the mesh
Plan “B” – puttying the entire hardboard-covered surface. It is clear that there will be no talk about reliable adhesion of inexpensive gypsum putty to the fiberboard surface. Dead end?
Two materials will help us out:
- PVA glue that is already familiar to us.
It is more profitable to buy a large package of glue.
- Fine-mesh plaster fiberglass mesh or fiberglass.
How to prepare the surface for wallpaper with your own hands?
- We prime the surface for pasting with undiluted PVA. The price of glue is low - from 50 rubles per kilogram, so there is no need to worry about excessive costs. There is no point in diluting PVA with water: we are trying to minimize the deformation of the hardboard, and not increase it.
- We cover the surface with fiberglass mesh or fiberglass. The glue can be applied directly on top of the fiberboard material applied to the surface: through the pores it will reach the base.
- We putty on the mesh with gypsum putty (Fugenfüller, ABS Saten, etc.). The optimal coating thickness is about a millimeter; If you don’t have much experience in finishing work, it’s easier to apply two or three layers as thin as possible (“scrape off”).
Puttying with gypsum on reinforcing fiberglass mesh.
- We polish the inevitable flaws.
- We prime the base with penetrating soil.
- We glue the wallpaper using regular wallpaper glue.
Please note: as a bonus, we will be able to easily remove the wallpaper during the next renovation. It will be enough just to wet them with water - and entire canvases will separate from the base with minimal effort.
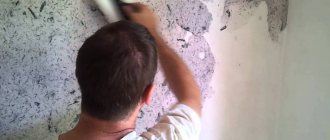
How to properly glue wallpaper onto chipboard
Chipboards are used to line walls or create partitions. The easiest option for subsequent finishing is to paint the walls. But the joints with such finishing constantly crack and are noticeable. Therefore, the way out of the situation is to paste wallpaper on the chipboard. They will hide the joints and add sophistication to the walls. How to properly glue wallpaper on chipboard to avoid difficulties and unpleasant situations? Having studied some rules and using tips, it is easy to cope with this task on your own.
Problems
As they say in Odessa, there are them.
- Fiberboard (aka hardboard) is extremely hygroscopic . It will safely absorb the glue applied to the wallpaper; If so, you can count on reliable adhesion using the traditional sticker method.
In addition: once saturated with water, hardboard is likely to warp. Uneven moisture will cause the walls and/or ceiling covered with it to become ripple.
- Seams between fiberboard sheets will be visible under thin wallpaper . The swollen ends of the sheets will be doubly noticeable: when moistened, the linear dimensions of the hygroscopic material change unevenly. Thick textured wallpaper, however, will partially hide the unevenness of the base.
- Finally, let's remember about the method of attaching hardboard . Nails or screws, right? And often non-galvanized. Each of them will, after a short time, become the center of an untidy rust stain.
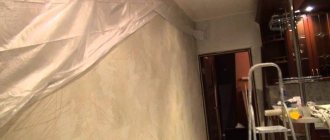
The photo very clearly demonstrates all the problems described.
Specifics of chipboard cladding
Wallpapering on chipboard is similar to gluing on a concrete wall or plasterboard. The difference is that the chipboard surface has its own characteristics and undergoes special preparation.
Characteristic features of a slab wall:
- Roughness of the plane.
- Openings between slabs.
- Open screw heads.
It will not be possible to completely seal a wall without joints, since the largest common size is 3.5 m by 1.75 m, and if you make it solid to order, there is a high probability of it breaking and inconvenient fastening.
Sealing the joints is a must before wallpapering. It is this part of the slab that can cause big trouble if it is not treated and closed. When the openings are open, swelling of the material will occur, as a result of which the canvas will tear. Large joints are foamed, but then make a strip up to 2 cm deep for caulking. Tape regular seams with a gauze strip or sickle tape. Coat with a special ready-made mixture or dilute the dry mixture according to the instructions.
If the slabs have significant unevenness, then they are completely puttied: first the joint is filled, then serpyanka is applied, a layer of putty is applied on top and cleaned after drying.
If you do not seal the heads of nails or screws, then over time they will begin to rust, showing marks through the wallpaper. To avoid this, it is necessary to hammer or screw the caps to a depth of 2 mm, and coat the recesses with drying oil or paint.
Why prime chipboard?
Priming chipboard is necessary to protect the surface from exposure to negative conditions. For example, from humidity, temperature changes, fungal formations. To do this, a special type of primer is selected to meet the requirements: moisture resistant, with antifungal components.
Non-laminated boards are best treated with an acrylic primer. It will protect against moisture absorption and remove dust. The laminated surface is coated with an alkyd solution; it will create a durable, waterproof layer.
Development of gluing of rolled products
You can only wallpaper wood panels with your own hands. In order for all procedures to be carried out correctly, you need to be careful and sequence the actions.
Materials and tools
The following materials and equipment will be useful for gluing work:
- Primer. You need to choose a composition with the deepest penetration. The best option is polymer consistency. You can also use “concrete contact”.
To treat the base, only deep-penetrating soil is used.
It is recommended to obtain putty for chipboard on an acrylic or oil base, which has elasticity. This is especially important for recently built houses. Ready-made mixtures are desirable. The putty must be created for wood or wood materials
Small set of tools for puttying walls
Everything you need is purchased in advance. If used tools are used, they are previously cleaned of previous materials.
Surface preparation
The labeling of rolled products on different panels may vary slightly, so you need to proceed from a specific situation. Preparatory work includes a number of procedures specific to each species:
- Chipboard. This base needs sanding. The fact is that the upper structure is not always uniform, particles can flake off. So that they do not interfere with work in the future, they are removed with sandpaper.
Fiberboard. Wallpapering fibreboards is much more difficult. This is explained by the fact that the front side of the hardboard is impregnated with a paraffin-based composition to increase water resistance. When gluing decorative products, this makes it difficult, so the slabs are processed with a grinding machine, sparingly removing a very narrow layer.
All wood-based materials must be sanded before finishing.
General preliminary processes after completion of preparatory work:
- Padding. The surface is covered with a roller with 2 layers of the composition, each one is dried.
The primer is applied with a brush or roller. Sealing of joints. When working with fiber boards, the edges of adjacent ends are cut at an angle with a construction knife. Chipboard walls are not subject to jointing. Then the seams are filled, the excess is removed.
The seams and fastening screws are puttied first. Laying serpyanka. It covers the front and corner joints (there is a special variety); a narrow layer of consistency is applied on top, completely covering the reinforcing mesh.
Serpyanka fiberglass mesh significantly increases the level of adhesion to the putty surface. The base should be puttyed as follows: the solution is scooped onto the blade of a wide spatula and distributed over the surface using arcuate movements from top to bottom. The function is repeated, after which the coating is primed.
The putty dries for at least 2 – 3 days
The walls are left until completely dry.
On a note! If the vertical system has a deviation, then it is first recommended to plaster the surface, after which lay the final layer of putty.
Pasting
Work begins with assessing the adhesion of the putty; for this, the surface is lightly tapped. If there are no delaminations, proceed to the process:
Wallpaper pasting tool
- The space for work is prepared in advance and all excess is removed. Wallpaper should be cut taking into account the fit of the pattern.
- It is recommended to start gluing from the window opening. The first strip is painstakingly measured, since other fragments are oriented towards it.
- Glue is applied sparingly to the underside of the wallpaper, after which the canvas is folded in half. This will avoid drying out and ensure the appropriate level of impregnation. If required, the wall is also treated with the substance.
- The strip is laid in its space, adjusted from above and pressed. For smoothing, use a rag or rubber spatula.
- Other elements are glued in a similar way.
The method of wallpapering does not change depending on the type of base
There is a recommendation that surfaces should be varnished. Indeed, this can be created, but achieving the desired decorative effect will be difficult. In addition, the front layer will become the most languid, which can lead to detachment.
Need to know! If the strips are connected end-to-end, then purposefully attach a special intermediate tape.
Preparatory process
Before the preparatory stage, wallpaper is purchased, and then, based on its quality, tools and materials are prepared:
- Glue selected specifically for this type of material and a container for it.
- Brush or paint brush for applying glue.
- Roller for smoothing fabrics.
- Scissors, ruler, pencil, rag.
For wood-based panels, it is better to purchase vinyl, non-woven materials or silk-screen printing. It is these types that will hide unevenness and some deformations of the slabs in the future.
Plane preparation process:
- Treat the chipboard and seal the heads of nails, self-tapping screws and screws with putty.
- Putty the uneven surfaces of the planes with a special mixture for wood.
- Process and seal openings using special meshes.
- If there are old paintings hanging on the walls, then they must be dismantled.
If the old materials are firmly glued, then do not clean them, but coat them with a layer of adhesive solution.
- Prime the entire surface in two layers.
Preparation for priming:
- Thoroughly clean the surface from dust using a vacuum cleaner and damp rags.
- If there are any roughness, then go over it with fine sandpaper.
- Clean the plane again.
Priming is carried out before and after puttying. Each subsequent layer of primer is applied perpendicular to the previous one.
Development of gluing of rolled products
You can only wallpaper wood panels with your own hands. In order for all procedures to be carried out correctly, you need to be careful and sequence the actions.
Materials and tools
The following materials and equipment will be useful for gluing work:
- Primer. You need to choose a composition with the deepest penetration. The best option is polymer consistency. You can also use “concrete contact”.
To treat the base, only deep-penetrating soil is used.
It is recommended to obtain putty for chipboard on an acrylic or oil base, which has elasticity. This is especially important for recently built houses. Ready-made mixtures are desirable. The putty must be created for wood or wood materials
Small set of tools for puttying walls
Everything you need is purchased in advance. If used tools are used, they are previously cleaned of previous materials.
Surface preparation
The labeling of rolled products on different panels may vary slightly, so you need to proceed from a specific situation. Preparatory work includes a number of procedures specific to each species:
- Chipboard. This base needs sanding. The fact is that the upper structure is not always uniform, particles can flake off. So that they do not interfere with work in the future, they are removed with sandpaper.
Fiberboard. Wallpapering fibreboards is much more difficult. This is explained by the fact that the front side of the hardboard is impregnated with a paraffin-based composition to increase water resistance. When gluing decorative products, this makes it difficult, so the slabs are processed with a grinding machine, sparingly removing a very narrow layer.
All wood-based materials must be sanded before finishing.
General preliminary processes after completion of preparatory work:
- Padding. The surface is covered with a roller with 2 layers of the composition, each one is dried.
The primer is applied with a brush or roller. Sealing of joints. When working with fiber boards, the edges of adjacent ends are cut at an angle with a construction knife. Chipboard walls are not subject to jointing. Then the seams are filled, the excess is removed.
The seams and fastening screws are puttied first. Laying serpyanka. It covers the front and corner joints (there is a special variety); a narrow layer of consistency is applied on top, completely covering the reinforcing mesh.
Serpyanka fiberglass mesh significantly increases the level of adhesion to the putty surface. The base should be puttyed as follows: the solution is scooped onto the blade of a wide spatula and distributed over the surface using arcuate movements from top to bottom. The function is repeated, after which the coating is primed.
The putty dries for at least 2 – 3 days
The walls are left until completely dry.
On a note! If the vertical system has a deviation, then it is first recommended to plaster the surface, after which lay the final layer of putty.
Pasting
Work begins with assessing the adhesion of the putty; for this, the surface is lightly tapped. If there are no delaminations, proceed to the process:
Wallpaper pasting tool
- The space for work is prepared in advance and all excess is removed. Wallpaper should be cut taking into account the fit of the pattern.
- It is recommended to start gluing from the window opening. The first strip is painstakingly measured, since other fragments are oriented towards it.
- Glue is applied sparingly to the underside of the wallpaper, after which the canvas is folded in half. This will avoid drying out and ensure the appropriate level of impregnation. If required, the wall is also treated with the substance.
- The strip is laid in its space, adjusted from above and pressed. For smoothing, use a rag or rubber spatula.
- Other elements are glued in a similar way.
The method of wallpapering does not change depending on the type of base
There is a recommendation that surfaces should be varnished. Indeed, this can be created, but achieving the desired decorative effect will be difficult. In addition, the front layer will become the most languid, which can lead to detachment.
Need to know! If the strips are connected end-to-end, then purposefully attach a special intermediate tape.
Wallpapering
The process of wallpapering on chipboard:
- Select the place from which the gluing will take place. Mark, using a homemade plumb line or laser, a vertical stripe.
- Start gluing strictly along the marked line. Each subsequent canvas is glued end-to-end to the previous one, selecting the desired pattern.
- Make sure that there are no discrepancies, overlaps, or irregularities.
- When gluing walls made of wood sheets, a special glue is used (PVA is suitable - an aqueous dispersion, that is, polymer undissolved particles in an aqueous environment; after drying, the polymers contribute to the formation of a film that does not dissolve in water). Be sure to read the instructions.
- The canvases are coated with an even layer, avoiding gaps.
- Wait until the wallpaper is completely saturated. If necessary, re-coat.
- Coat the walls with glue.
- Glue the wallpaper from top to bottom, smooth the layer and remove any excess glue from the edges.
- Trim off excess material.
Let's start installation
Installation of MDF panels
To glue plastic panels to the wall, you need to apply liquid nails or Moment glue to the back side. When installing MDF panels, a checkerboard method of applying adhesive is used. The distance between glue points must be at least 20 mm.
After applying glue over the entire surface of the panel, carefully attach the sheet to the wall. The panel is pressed, tapped and torn off the surface. This is necessary for easy weathering of liquid nails. After 5-7 minutes, the decorative cladding is finally fixed on the surface. We check the evenness and correctness of fastening using a building level.
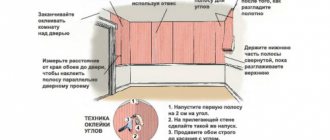
Finishing corners and rosettes
PVC panels in the interior
In order to beautifully and efficiently glue the panel in the kitchen to the wall, it is necessary to correctly line the corners and sockets in the process. For decorative finishing of corners, a separate element is used - a plastic corner. It can be purchased at a hardware store, matching the color and texture to the main finish. Plastic corners are suitable for both MDF and PVC cladding.
When finishing the wall where the switch and sockets are located, you must carefully cut a hole in the panel for the desired element. Subsequently, the cut areas can also be trimmed with plastic corners. Since these elements do not have grooves, installation can be done using silicone. At the very last moment of finishing the walls in the kitchen, the baseboards are glued or drilled.
Detailed step-by-step instructions for gluing MDF and PVC panels are presented in the video.
Eventually
The process of covering walls with plastic or wood panels is not complicated. Before finishing, be sure to clean the walls of the previous coating, remove wallpaper and plaster. If necessary, the surfaces are leveled and primed. Then the decorative panels are attached to the wall using liquid nails or Moment construction adhesive. The ease of installation work allows any home craftsman to carry out the cladding.
Useful tips
Useful tips will help you do the gluing yourself and get excellent results:
- It is better to choose white primer paint. This will help prevent the wood from showing through the thin paper wallpaper. It will also hide old materials that could not be dismantled.
- Pasting near doors and windows is done last.
- Dense material is glued end-to-end, thin material - overlapped.
- Use a thick roller at the joints.
- When bubbles form, they are cut, air is released by pressing, and smoothed with a roller.
We recommend watching the video instructions:
Glue for MDF - review of the best options
The most commonly used adhesives for MDF panels are:
- Liquid Nails . A universal adhesive characterized by high adhesion, resistance to corrosion and moisture. Liquid nails do not react with substrates, unlike deep-penetrating glue.
- Polyurethane (or construction) foam. It is characterized by various properties such as thermal insulation, sound insulation and high adhesion.
- Universal construction adhesive. A wide group of products, divided into many segments and areas of application. For MDF panels, it is necessary to use only those adhesives that provide adhesion to the base materials (brick, concrete, plasterboard, tiles, etc.) and wood (MDF consists of fine sawdust).