What is the best primer for wood?
Alkyd primers
used where high adhesion is important.
Absorbed into wood
, the adhesive composition provides strong adhesion between layers. Alkyd primer has another significant advantage - from the moment of its application to painting with the finishing layer it can take from several months to 1 year.
Interesting materials:
What kind of Priors are there? What types of traffic lights are there? Which headlights should be on when driving? What headlights can be installed on a VAZ 2114? What films can children watch? What films can you watch with a 12 year old child? What films should children watch? What films should I watch in 4k? What horror films to watch in 2022? What films will be released in the fall?
Introduction
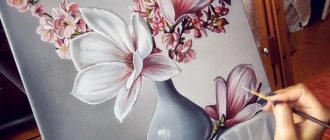
I have already talked about painting with acrylic paints several times in my other articles. Recently, for example, I published a very detailed article about how to paint with acrylic and what is needed for this - I don’t understand what article
Today we will talk to you about how you can paint with acrylic paints on paper. Due to its characteristics, acrylic paint dries quickly, which is very suitable for painting on paper. That is why, unlike oil paint, acrylic can be written on paper, in sketchbooks and other types of paper.
Acrylic is a universal paint with which you can create a wide variety of works, use it in a wide variety of circumstances and combine it with a wide variety of materials.
Before you start painting with acrylic on the first sheet of paper you come across, read this article to prepare yourself and choose the right paper that will help you realize all your creative ideas!
How to prepare a surface for painting or decoupage
Often, beginning artists and “hobbyists” pay little attention to preparing the surface for painting or decoupage, focusing on the visual, pictorial part of the work - after all, this is a much more interesting process. But in this case, you may subsequently encounter delamination and deformation of materials, cracking of the paint layer, etc. We must not forget that the preparatory stage is the key to the quality and long-term service of your future product, craft or painting.
First, some general priming tips:
• The primer can be applied in several layers until you achieve the required smoothness;
• If the surface has chips and unevenness, it is better to use the primer undiluted
and apply with a rubber spatula, covering these chips. The surface is then usually sanded with sandpaper.
• For a smooth surface the primer is usually diluted with water
and apply with a wide flat brush.
Canvas primer for painting: application
The primer must be applied in liquid form, in a fairly thin layer. You also need to clean it off with a spatula. This is easy to do, and it must be done, since the technological meaning of this action is that the oil, which is the paint layer, must fit tightly into the ground, connecting these two matters.
If it turns out that the water from the fresh soil has not evaporated, the oil simply will not enter there, there will be no place for it. Therefore, the paint layer sometimes peels off from the surface.
Do not dry the canvas on the floor, at least place it on a stool, just as you should not store painted paintings on the floor, drafts are destructive for them.
How to prime cardboard for acrylic paints. Primer for cardboard
In this article, we will talk about how to prime and thereby prepare canvas or cardboard for oil painting.
Recently, I met an acquaintance, an original artist. He paints his paintings mainly on ready-made, purchased canvases. And then he asks me: how and with what can you prime the canvas? At first, this question surprised me. After all, there are many art books on how to prime a canvas. Where everything is written out and chewed. Hundreds of recipes. And suddenly such a question! Having searched the Internet for the answer to this question, I came to the conclusion that this topic is of interest to many novice artists. Purchased canvases are quite expensive. But for beginning artists, it’s still expensive. So, let's begin, a small master class on preparing the canvas. Homemade canvases are suitable for training. The characteristics are not inferior to the factory ones, and in some cases even superior to them. But it is a fact that it will be cheaper.
The simplest, but not the most successful option is to cover the stretched canvas with PVA glue, slightly diluted with water, in several layers. This method of covering canvas is more suitable for sketches or sketches.
And now, I’ll move on to the story about the normal method of priming the canvas.
Let's take a ready-made stretcher with already stretched canvas (for student works or sketches, instead of canvas you can use a border, double-thread or even small burlap). Now, we need to take regular food gelatin. It is sold in any grocery store. I think finding it won’t be too difficult for you. Pour gelatin into a glass, half a teaspoon is enough, and then fill it with cold water and let the gelatin swell. Usually, I do this procedure in the evening, then overnight the gelatin has time to swell.
A small digression. There are different types of gelatin. There is transparent gelatin, you steam it, but it is like water, it does not thicken and does not turn into jelly. You need to put more of this gelatin in a glass. One to one and a half teaspoons. Calculated only in practice. It is advisable to buy yellow saturated gelatin. And get the jelly at room temperature.
After the gelatin has cooled and taken on a gelatinous form, take a spatula or ruler and, using rubbing movements, drive, rub, the gelatin first into the holes of the canvas. After this, we coat the entire canvas and let it dry completely.
Once completely dry, go through the entire canvas and make sure all holes are filled. Next, we repeat the procedure again. After the second time, all the holes will be filled. Coating with gelatin is necessary in order to protect the canvas itself from paints and the effects of varnishes on the canvas materials. After the second drying, you can begin applying the primer.
Once, instead of a primer, I used white facade paint. It has a snow-white color and is plastic on canvas after drying. We dilute the facade to the state of liquid sour cream, and with a simple bristle brush of the required size, paint the entire canvas, which has already been primed with two layers of gelatin. You can also make a colored canvas, just add color to the paint. (dye of the desired color). We also perform this procedure in two layers. With complete drying.
And the last, final action. Let's take a transparent facade deep impregnation. And let's go over it with a bristle brush, saturating the already primed and dry canvas. This will give the canvas an extra layer of protection. And when writing with oil paints in the future, the canvas will not draw oil out of the paints. Now, let the canvas sit. The old masters kept their canvases for 6 months or more after priming. And you see for yourself. With new technologies, all processes are accelerated. But it’s worth giving it 2-7 days to dry completely.
That's it, the canvas is ready. Feel free to start working with it. I have been using these types of canvases myself for more than 10 years.
PS Yesterday on one site I came across a note similar to mine. There, one artist advises adding chalk or dry zinc white to gelatin. This will be the primer. Yes, this is old technology. I suggest you do a little experiment. Take 3 stretchers with stretched canvases. And prime them three different ways. Given above. And feel the difference. Paint on them with oil. And then write your comments.
Paper, semi-cardboard, cardboard.
Selecting and preparing a base for oil painting is not easy, especially if you are a beginner artist. What do you need to know to choose the right materials?
You can paint in oils on anything: wood, paper, cardboard, canvas and even metal (the main thing is that the paint sticks to it). However, for beginners it is better to opt for paper, semi-cardboard and cardboard. These materials are inexpensive, so they are suitable for numerous experiments and “quick” sketches. And if you need a larger sheet, you can even glue the paper with tape.
Typically a solution of wood glue is used. This glue is sold in plates or crystals, which should be soaked overnight and then gently heated in a water bath until dissolved. There is also sizing in the form of jelly. It also needs to be melted to the desired consistency. You can paint with oil paints directly on the glued surface, but it is still better to prime it.
Adhesive solutions and primers.
Glue solution
Used very diluted to protect the base. A thin layer of adhesive solution reduces its absorbency and also prevents the process of decomposition.
Priming.
Prepares the surface for paint application. A traditional oil pound consists of an adhesive layer and one or two thin layers of the primer itself. The term “soil*” means any surface on which one writes with paints.
Recommendations from Yulia Kosheleva about oil primer.
To prime sheets of thin wood board, use wood glue. Many artists prime cardboard themselves, using the same types of primer that they use on canvas. For example, saturate the cardboard with boiled oil (linseed oil) and let the sheet dry for 2-3 weeks. Then coat with one or two layers of oil white and dry well. Lightly sand the surface with sandpaper. Cardboard treated in this way does not warp, it is pleasant to work on, the colors apply smoothly and do not fade over time.
There are many art books on how to prime a canvas. Where everything is written out and chewed.
Features when painting with acrylic on paper
How to write with acrylic on paper? Surely this type of drawing has its own characteristics, you think. And yes, you are right, drawing on paper has its own characteristics, just like drawing on canvas.
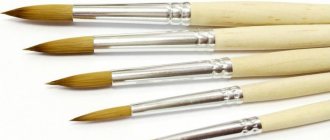
First of all, let's talk about brushes. What should they be? And are the brushes you used to paint with acrylic on canvas suitable?
Of course, acrylic brushes are suitable for painting both on paper and on canvas, cardboard, wood, etc.
You can purchase synthetic or nylon painting brushes and use them to paint with acrylic paints on paper. If you want to try different techniques and effects, I advise you to take several brushes of different shapes and sizes. This way you will diversify your painting and be able to create beautiful paintings.
Technical properties of the soil:
- Elasticity
- Softness
- Should not crack or crumble
- Have a light rough surface
- Should not darken or turn yellow
- Partially and only from the surface absorb the paint binder
- Do not keep paper
- Do not leak onto the back surface of the canvas
- Help paint layers dry out
- When applied to work, the primer should not dissolve or be washed away by water.
- Does not change color after finishing work
Sizing and primer
Sizing
under primer – a layer applied to the base. Her task:
When gluing the canvas, the task is not to wet (soak) it through, but to apply a protective film to the front side. Therefore, they use a 5% glue solution, which has the consistency of jellied meat. With such a viscosity, it will be slightly absorbed into the threads, but enough for strong adhesion to them.
Gluing on the Peredvizhniki network.
Designed for oil painting
Compound:
a mixture of gelatin glue solution with chalk/a mixture of chalk and white (1:1). Glue: carpenter's glue - more fragile, fish glue - dense and elastic. To prevent cracking of the soil, a plasticizer is introduced.
Basics
, on which the adhesive primer is applied: all bases
Advantages
adhesive primer:
Note: only gelatinous, cooled glue is applied under the adhesive primer as a sizing agent.
Adhesive primer in the Peredvizhniki network.
2. Emulsion primer
Compound
: “pigment + emulsion”. An emulsion (emulsion binder) is prepared from two immiscible LIQUIDS: a glue solution (for example, gelatin or casein) and linseed oil.
In terms of its properties, it occupies an intermediate position between adhesive primer and oil primer.
Basics
to which emulsion primer is applied: all bases
Advantages
emulsion primer:
Designed for oil painting.
Compound
: zinc white, slightly diluted with oil. Not all types of zinc white are suitable for oil-based primers.
Basics
to which oil primer is applied: all bases
Recommended
for artists who love high-gloss paint, deep-color painting and glaze writing.
Note: a weak hot solution of gelatin (1:200) is applied under the oil primer as a sizing agent. It is better to use adhesive sizing, rather than acrylic, because adhesive is pulling, so adhesion to oily soil will be better. Also, adhesive sizing gives the desired tension to the canvas.
Designed for painting with oil paints, acrylic, tempera
Compound
: “pigment + dispersion”. Dispersion: tiny transparent particles of resin (acrylic or polyvinyl acetate (PVA)) float suspended in water.
Basics
on which acrylic primer is applied: any base. Use with caution on canvas. Soft acrylic primers on fabric give the entire structure excessive flexibility, which is unacceptable for an oil film. They are more suitable for oil painting on stiffer (canvas-type) polyester fabrics.
Sizing: the first sizing (Gelatin, PVA) is required before applying to the surface of the canvas; Treatment for wood and cardboard is optional.
Advantages
: Quick-drying, Opaque, Elastic
Soil type
: medium-drawn.
When chalk or gypsum is added to acrylic or adhesive primer, Gesso
. It is characterized by strong paint absorption (strongly pulls the binder out of the paint layer). If it is necessary to create a primer with a very smooth texture, Kaolin (white clay) is mixed with chalk.
4. Gesso gesso primer
Designed for painting with oil-casein and egg tempera.
Compound:
glue solution + plaster/chalk. Gesso soil is durable due to the gypsum. Each dried layer must be moistened with water to prevent cracking. Each layer must be sanded with sandpaper.
The final coating layer is a 5% glue solution.
Gluing under gesso primer – 5% gelatin solution/fish glue/wood glue. After drying, a wire (for example, gauze) is glued on; Before use, the wire is dipped into the adhesive solution, squeezed out and glued.
Tip: when working with oil-casein tempera, you should use low-fat milk rather than water to thin the paints, because it contains casein, which promotes good adhesion of paints to gesso soil.
Soil type
: strong pulling.
5. Gesso acrylic primer
Designed for painting with oil, acrylic, tempera, gouache.
Compound:
acrylic dispersion + gypsum/chalk.
Basics:
all the basics. Use with caution on canvas.
Sizing under primer – for canvas: gelatin or PVA. For other bases, sizing is not necessary.
Soil type:
strong-pulling
GESSO soil in the Peredvizhniki network.
The less binder in the soil, the more “pulling” it is.
"Pulling" soils
(adhesive and emulsion/acrylic based on chalk) – they take a lot of oil from the paints, thereby giving the paint layer a matte tint. Before starting work on such soils, they must be wiped with an oiled swab.
"Medium-tensile" soils
(emulsion/acrylic based on white) before work are glued with a weak solution of gelatin (1:100)
"Low-tensile" soils
(oil-based) - practically do not remove oil from paints, but the adhesion of oil paints to the soil is weak, the paints crumble
PREPARE THE SOIL YOURSELF
You can prepare the soil yourself:
1. Binder for adhesive primer:
Binder for oil primer:
2. Primer pigments
— Is it possible to use regular paint as a primer?
— How many layers of primer should be applied?
The number of coats of primer applied is a matter of personal preference; however, it should create a smooth, even finish. Typically, artists apply three to seven coats of primer. The degree of its absorption, as well as the tension created by the binder, increases depending on the thickness of the layer. Experts advise applying the top layers of primer less thick than the bottom layers to avoid the worst effects inherent in film tension. To minimize the risk of board deformation, primer should be applied to both sides of the board as well as the edges (the back of the board does not require the same attention as the front).
— What is the best tool to apply primer?
— Is it possible to paint on oil primer with acrylic and vice versa?
1. Acrylic on oil
: oil primer must dry out well (at least one year). Next, you need to clean the surface with a swab containing pure pinene or mineral spirits (No. 2) and let it dry thoroughly. If liquid acrylic rolls into droplets on an oil surface, then dilute the acrylic with water with the addition of ox bile (the ratio of water and bile using a test method) until the paint stops rolling into droplets and begins to lay down in an even stroke.
2. Oil on acrylic primer
. The acrylic primer must dry well. Further, no problems arise.
Priming canvas for oil: how to do it
Before priming the canvas, it is stretched onto a stretcher and secured with a construction stapler or furniture nails. The canvas must be stretched tightly, without allowing any sagging. Masters advise stretching the canvas while it is wet so that the canvas gains additional tension.
Next, the canvas is glued before priming. The glue prevents the development of soil and the same paints on the back side of the canvas. Initially, you can treat the canvas with ordinary PVA glue. If you have a large knitted fabric, apply the glue in a thick layer with a rubber spatula or palette knife.
If your canvas is canvas or tarpaulin, treat it with a paste that you can make at home. Take a saucepan with water, add starch until a viscous mass is obtained, and then cook this mixture until transparent.
After the glue has been applied and has dried, the surface of the canvas must be sanded with fine-grained sandpaper.
Canvas primer:
Oil primer is applied with a thin spatula, adhesive and emulsion primer with a wide brush. The movements are standard - along and across the paper.
Why glue and prime the surface?
Sizing is necessary to protect the surface from components contained in the soil and dyes that negatively affect its structure. If the base is not glued, it will begin to deteriorate, which will lead to peeling of the paint. In addition, by filling the pores, the glue makes the surface even and smooth, thereby providing comfortable conditions for working in any technique. If the work is carried out on canvas, then after gluing it becomes harder and does not fall through.
The primer, in turn, acts as a link between the surface and the paints, ensuring their good adhesion. Restorers can confirm that if you refuse priming, you can lose the painting, because the paint will harden and crumble over time.
Primer for papier-mâché at home
Papier-mâché is a technique for creating three-dimensional paper products, known to everyone since school. Several layers of paper that repeat the shape of the object, and the miracle craft is ready. And this product cannot do without a primer!
If you are going to paint the future papier-mâché paper product with oil paints, then you need to prime it with drying oil. Before this, you need to heat it to a boil, and lower the product there for a few minutes. Then remove the product, let the drying oil drain, and let the future craft dry for 3 days.
If you use nitro paints or nitro enamels to finish a product using the papier-mâché technique, the primer will be covering it with nitro varnish. Usually the first three layers are varnish diluted in a ratio of 10 to 1 with solvent. Dry each layer thoroughly.
Sometimes latex-based or water-based putty is used as a primer.
Features of gluing fabric
The purpose of this operation is to apply a protective layer, and not to saturate the base through and through, so the glue should have a jelly-like consistency. As practice shows, such viscosity provides easy impregnation, reliably protects the base and creates favorable conditions for applying primer. You can buy a ready-made composition for sizing, or you can prepare it yourself using specialized glue or gelatin. It is better to buy industrial gelatin, not food grade, and the glue must contain a percentage of dry matter (see composition on the package). You can also use PVA (with a water content of no more than 10%), but it is better not in its pure form, but in combination with acrylic.
If you decide to use gelatin for gluing the fabric, it must be prepared correctly. Pour the mixture (25-30 g) into an empty container, pour a glass of warm water and leave for an hour. After the gelatin swells, pour 2 more glasses of hot (not boiling water!) water into the container and leave it to harden. Once the substance reaches room temperature, it will turn into jelly and can be used for sizing.
The first sizing is cold. Using a wide brush, a table knife with a rounded end, or a palette knife, rub the jelly-like gelatin evenly into the surface to form an even layer. At room temperature, dry the surface until completely dry and sand it with fine-grained sandpaper for better adhesion to the next layer. Melt the remaining gelatin (not to a boil!), let it cool to a temperature of 30-35°C, apply to the surface with a wide bristle brush, leave to dry, and then sand. The third – final sizing – is performed using the same scheme. If you use a ready-made composition, sizing is carried out in the same way. The canvas can be placed both vertically and horizontally, the main thing is that air flows from all sides.
Primer Tools
It must be applied in one motion, i.e. You cannot brush the brush several times over one place, as the primer may come off and you won’t get an even layer. For uniform coverage, it is advisable to apply more layers of liquid primer rather than a couple of layers of thick primer. The soil must be mixed well before use. Be sure to dry the first layer well and only after that apply the second layer.
We apply the primer using the following tools:
- palette knife
- with a wide and flat nylon or synthetic brush, the larger the brush, the easier it is to apply the primer
- spatula
- roller
- sponge for washing dishes
- foam roller
After work, be sure to wash all tools in warm water and soap.
There are two types of primer used in scrapbooking: acrylic primer and Gesso. And today we will talk about these two.
What is an oil primer, ready to use?
And this material comes in two types - a ready-made composition for working on wood, and a composition for working on metal.
Types of oil primer:
Oil primer is sold in 900 gram containers. Previously, it was sold only in metal cans. It dries in one day, and a second layer is applied the same day later.
When choosing a primer, read reviews and consult with sales consultants. For example, Vac oil primer and its analogues have good reviews.