Recycled cardboard makes a good and, importantly, cheap mass for papier-mâché. Once dry, it does not fade or crumble, and after proper processing it can easily withstand high humidity.
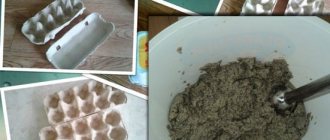
The easiest way to prepare mass for modeling:
- Use your hands to tear the tray as finely as possible. At this stage, it is better to involve your family, so the process will be faster and more fun.
- Load into a linen bag without holes and tie tightly with thread. It's better to make several small bags.
- Place in the washing machine. Settings: 90 degrees, spin 400 rpm.
- If the mixture is too wet, place it on cheesecloth and let it dry.
- Most likely, the mass will be moist, but not wet. Take this one out and chop it into an electric chopper. This is done simultaneously and does not take much time.
- Grind.
- Pour the finished mass with PVA glue in a ratio of 10:9 or 1:1. The result should be a plastic dough that does not spread and is easy to mold.
Tip It’s more convenient when you have paper crumbs on hand, which can be diluted with glue. Therefore, it is worth crushing and spinning more egg trays in the chopper. Then fill some with glue, and spread the rest on a baking sheet and let dry.
Egg Tray Stones
A mass of papier-mâché produces a spectacular and fairly light imitation of stone. For construction, the mass will have to be prepared in large quantities, so we recommend changing the technology slightly:
- Tear the trays into large pieces and place them in a 10-20 liter pan. The container must be high.
- Fill with hot water to cover the scraps.
- Leave it overnight.
- In the morning, chop and mix using a construction mixer or drill with the desired attachment. The procedure will take about 5 minutes.
- Add PVA glue to make a very soft mass, like good plaster.
- Drop clumps onto the wall and shape the rocks to your liking. Feel free to fill the gaps between the stones with your fingers.
- Leave until completely dry, and then go over the top with liquid putty. It will smooth out the grooves and roughness of the “stones”.
Advice: Use PVA. As the experiments of the craftsmen have shown, with wallpaper glue the mass turns out to be more convenient for modeling, but as it dries, it compresses the material, so that the stones turn out to be concave.
Decorative brick
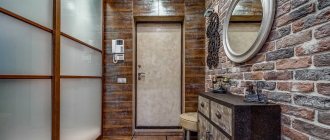
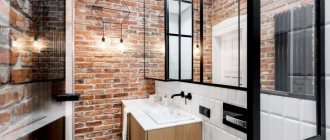
The imitation of light and light brick looks impressive and does not require large expenses for production.
Required:
- 3 cardboard cassettes for eggs;
- water;
- a large piece of plastic film;
- paper towels;
- 3 tbsp. l. gypsum mixture;
- putty for finishing work;
- any color of acrylic paint.
Step-by-step algorithm of actions:
- Mark the size of future bricks on the film with a ruler and draw with a marker.
- Tear the trays into pieces, put them in a bucket, add warm water to soak for 2-3 hours.
- After the water is absorbed into the mass, add gypsum and mix until smooth.
- Turn the film over with the markings facing down and attach it to the surface with tape.
- Form bricks according to the size of the cells using a spatula, wipe off any remaining water from the surface of future bricks with paper napkins.
- Leave the workpieces to dry for 4 hours at room temperature, apply a thin layer of putty diluted in water on top.
- Dry the workpieces for 12 hours, cover with acrylic paint for brightness.
Bricks can be made in portions, and after preparing the required quantity, begin installing the products on the wall with a glue gun.
Bricks from egg trays
You don't have to buy wall panels to decorate your wall with a trendy design. If you have time, we recommend taking up sculpting: methodical work is calming, and the result will be just as good.
We recommend: Review of cookware: which is better to cook meat in, and which is better for porridge?
Craftsmen use two ways to make brick imitation:
- similar to "masonry", where paper plaster is thrown over the wall, then "bricks" are formed by hand or a suitable box;
- assemble a box with partitions and make full-fledged flat tiles in it and attach them to the wall with Moment glue.
How to fix such brickwork on the wall
It is very easy to attach such masonry to the wall. The main thing is to properly prepare the wall surface. So, first of all you need to prime it well and let the primer layer dry. The bricks need to be attached to a bare wall - not to wallpaper or other coverings. PVA construction adhesive can be used as a primer.
Try to attach the bricks evenly and neatly
Then you can take the finishing putty - it should have the consistency of sour cream. Next, using a spatula, the putty is applied to the back side of the bricks, and the brick itself is glued to the wall. The space between the bricks must be sealed after drying. If the bricks are not painted before they are glued to the wall, now is the time to give them the desired color.
Advice! To make it easier to form a pattern on the wall, lightly mark the location of the bricks on it using a pencil.
Egg trays will help you create not only an imitation of brickwork, but also all kinds of other decor in your home - for example, stucco molding under the ceiling or the same vine on the wall. Everything will depend on your imagination and your desire. The only resource you waste is your time. But you can create a unique and inimitable decor for your apartment using waste materials.
Did you like the article? Save so you don't lose!
Source
3D walls made from egg trays
It is not necessary to make papier-mâché for decoration. The craftsmen discovered that egg cassettes themselves look great on the walls, like factory-made 3D panels:
- Select cassettes made of relatively thick cardboard, the reverse side of which is uneven and rough.
- Prime the cleaned wall and glue the cassettes with the rough side out (the rims at the edges need to be cut off). Use PVA, wallpaper or instant glue for wall panels.
- Cover the outer corners with the finished mixture or a mass of papier-mâché from egg trays.
- Prime with a liquid PVA solution, spraying it with a spray bottle.
- Strengthen the cardboard with 1-2 layers of undiluted construction PVA.
- Paint with waterproof paint.
The effect will amaze you. And an important plus is that such wallpaper is easy to restore. And the material can be bought very cheaply by negotiating with a kiosk where they sell eggs.
Decorative plaster
Egg packaging is an excellent material for interior decoration. It is easy to install, paint and mount on the wall.
Ingredients for a 2 meter wall:
- 7 pcs. egg packaging;
- several colors of acrylic paint;
- acrylic glue in aerosol;
- packaging of PVA glue.
Wall finishing:
- Moisten the egg cassette with a spray bottle, place it on a flat surface, press it with your hands or any heavy weight so that the tray becomes flat.
- You can place the tray under the press, wrapping it in newspaper to absorb excess liquid.
- Clean the wall and coat it with several layers of primer.
- Cut the wet flat egg cassette along the width of the wall, liberally coat both surfaces with PVA glue.
- Glue the trays to the wall without adhering to the pattern of the cells.
- After final drying, coat the wall with a white primer or paint, working out all the recesses.
- Shade the texture with acrylic color, paint only the bulges of the trays with silver paint, lightly touching the surface with color.
Finish the treatment with a coat of clear acrylic varnish.
Egg Tray Mouse
You can make a funny mouse from a cardboard or foam egg carton. If you glue a “dress” made of a fabric napkin or a sewn mitten with two toes to it, you will get a pearl doll.
Instructions:
- Using a pen, draw the silhouette of a mouse’s head around the first “pin”: circle it, this will be the nose, and two circles at the top on the sides (ears).
- Trace and cut out the corner wall of the box with an indentation to create the back of the mouse's head/back.
- Use a glue gun to connect the two halves.
- Thread a fishing line through a thick needle and sew through the nose to create a mustache.
- Thread the string and tie it in a knot to give the mouse a tail. Or glue the body from a ring (a piece of toilet paper spool) and a napkin.
Homemade liquid wallpaper
Ready-made liquid wallpaper is expensive, but using cardboard trays you can prepare such a mixture yourself. To do this, the trays are crushed and soaked for several hours. The mixture is constantly stirred by hand or with a construction mixer. Next, glue, antiseptic components and decor are added to the mixture: glitter, thread trimmings.
If necessary, tint with acrylic color. The finished mass settles for 10-15 hours, and before application, dry putty or plaster is added to the composition.
Flowers from egg trays
The shape of the recesses of the egg cassette resembles the cup of a flower, this was noticed and applied by needlewomen.
Poppies from egg trays:
- Cut two nests from the second row.
- Trim the corners to create a cup with a smooth edge.
- Cut the walls into 2 halves, bend them to make it easier to work with.
- Trim the edges to create two wide, round petals.
- Insert the petal cups into each other and secure with wire or a glue gun.
- Color, form a pestle from plasticine or other material and place in the center.
- The stem is usually made of wire wrapped in fabric, corrugated, velvet or regular colored paper.
We recommend: Does a bath help with coronavirus, what happens to the virus in a steam room?
Roses from egg trays:
- Cut out 7 nests and trim away any rough edges to create a smooth edge.
- Make 4 cuts and form 4 elongated petals with a round edge. Use 6 cups out of 7.
- Warm up the glue gun.
- Glue 2 opposite petals in the first “rosette”.
- Glue the remaining 2 petals tightly to the resulting core.
- Glue the second rosette to the first one and also tightly glue the petals to the central part. Leave the very ends free and bend them slightly.
- Glue the petals of the third rosette on a line just above the middle.
- The fourth one is in the middle of each petal.
- The fifth one is just below the midline of the bud.
- For the sixth one, glue only the base of the petals.
- Let it set well and bend the edges of the petals, like a real rose.
- Spray paint it scarlet. Shade the ends with a brush.
- From the 7th nest, similarly to the petals, make sepals (they are elongated and pointed), paint them green, attach a wire stem and glue the green part with the rose.
Advice: Spray paint is not always available, so it is logical to paint and dry the petals before gluing them together. The paint must be absorbed into the cardboard, otherwise the gluing will be weak (a thin layer of paint will come off and the petals will separate).
Ottomans for the kitchen and more
From several dozen square egg trays you can make a compact seat. You just need to stack them to the required height. To prevent individual layers from shifting, the edges of the improvised pouf are secured with tape, or you can glue each tray when assembling.
To increase the area, the seat is assembled from several cubes from trays. For comfort, the seat is covered with a soft cushion. You can also sew a removable fabric cover that can be washed.
Egg Tray Lamp
You can glue a lamp from strips cut from egg cartons. It is recommended to cut out the bottoms of the nests for ventilation. A spectacular lamp is made from flowers cut from an egg cassette, painted and glued together:
- Form flowers like poppies, daisies, etc., with an open center.
- Make holes in the hearts.
- Glue together or stick to a base of cardboard, egg sections or mesh, forming a ball, cylinder or other shape that is pleasing to the eye.
- Glue the top edge to a circle made from an egg cassette or attach it with wire / string to a wire ring with diametric crossbars.
- Thread grains of rice (lights from an inexpensive garland) into the hearts and secure from the inside with pieces of electrical tape.
- Suspend or install on the “leg” like a regular lamp.
Egg trays are an excellent raw material for crafts and even construction. When frozen, the mass of trays and glue is strong, moisture-resistant, and durable. In terms of price, the raw materials cost pennies, but the working technique is not much different from purchased materials.
Container for seedlings and forcing greenery
Egg trays with compartments are convenient to use for sowing vegetable seedlings and forcing young onions instead of peat cups. Soil is poured into the depressions and several seeds are planted. The tray is placed on the windowsill and covered with a lid or film. For onions on the feather, instead of a substrate, place a little cotton wool or a folded paper napkin in each compartment to retain moisture.
Before planting on the site or in a balcony box, the tray is cut into pieces. Mature plants can be planted along with part of the tray. Cardboard is destroyed in the ground and does not pollute the environment.
Crafts for children
It will be fun and useful for your child to make colorful toys from the tray. Joint creativity is not only an opportunity to be together, but also a way to teach a growing person the basics of recycling waste and to foster a responsible attitude towards the environment.
Again, we cut off a three-dimensional spherical cell; for one craft, you will need two of these, that is, you can make a whole zoo from one package. The point is that we connect the halves and get a base to which we attach hands, ears, eyes and everything that comes to mind. The joint can be sealed as in papier-mâché: with small pieces of paper on PVA; or secure with hot glue.
IMPORTANT! The tip of a hot glue gun becomes very hot and can cause significant burns. You will also be careful when working with a stationery knife and scissors.
Chickens, owls, rabbits, fish are made using this technique, but you can come up with many more options. Often the joint between the cups is not completely sealed, resulting in a hiding place for sweets.
From the tray itself you can make a crocodile's mouth: paint the base green. Both halves of the box are needed for the mouth, and the body consists of a part with cells and legs, which are made from cardboard cylinders. Don't forget to add a red tongue and kind eyes.
Common errors
The technology for finishing walls with silk plaster is so simple that usually no problems arise with creating a “liquid robe”.
The main errors occur when technology violations of this type:
- An insufficient amount of liquid wallpaper is purchased, as a result it is necessary to take a break from work, and it is difficult to choose new wallpaper to match the applied one.
- When using a colored primer instead of a white one (this can lead to the color of the base showing through, in the form of spots), the color of the primer should be white or similar to the color of the wallpaper.
- We missed the step of applying the primer, as a result the mass does not apply well or falls off.
- When preparing the walls, they make them too smooth, which reduces the adhesion of the finishing layer to the base.
- Apply too thin a layer of solution (as the wallpaper dries, it becomes thinner and tears appear).
Decor items
Soft, voluminous cardboard, from which egg trays are usually made, can be painted well with regular gouache or acrylic paints. You can play with the unusual shape of the cells.
Paintings and applications
The material adheres well to PVA and glue sticks, so it can inspire volumetric applique. If you cut the semicircular cups and attach them to the base, you can, for example, make a voluminous dog’s nose, a hip-hip dancer’s cap, mountains and much more. In this case, the area of contact between the packaging and the base paper is small; for reliability it is better to use hot glue.
Ball-shaped cells can not only complement the composition, but also create it: from such “pimples” a word or symbol can be formed. One package is enough for a heart or a letter. It is better to cover paintings with acrylic paint; it does not stain everything around and does not leak from water.
ATTENTION! Acrylic paint cannot be washed off after drying; if it drips, you need to wipe it off immediately. The same applies to brushes, which can be damaged by dried acrylic.
Flowers
It’s easy to make flowers from the egg cells themselves: cut off the volumetric elements and form the petals. You can make both four-leaved arabises and lush roses. We cut the cup from the edge to the round center, how many cuts you make, the number of petals you will get (4-6). Do not cut half a centimeter to the base, the bud will be more voluminous.
The shape of the petals can also be chosen arbitrarily; it is not necessary to make them perfectly round. Use scissors to shape the petals; this will make them thinner and neater.
All that remains is to paint it in your favorite color: for naturalness, use several shades, do not be afraid to mix different paints, add spots or patterns. You can create lush buds by combining several of these blanks: put them one inside the other.
The center of the flower does not need to be decorated in any way; you can make pistils from the same egg cells, or glue in a button. If you attach flowers to thick wire, you can collect a whole one and weave a wreath.
Photo frame or mirror
Egg carton flowers are ideal for decorating frames. The petals can be made shorter or longer and the final size of the bud can be changed, so it is possible to create interesting compositions. If you glue flowers onto a cardboard circle, you can make a spring wreath for a door or wall.
A former tray can become an unusual board for notes. It is convenient to pin your plans for the day or memorable photographs to the cardboard, and the unusual shape will refresh the interior. If you cover the entire wall, sound insulation will improve, which is a good bonus, especially for beginning musicians.
Chandelier, lamp
Cardboard flowers will update the interior with a cute lamp: cut a small hole in the center of the bud for a light bulb to fit through. If the garland is LED, then the flowers can be made from a plastic box; they are more difficult to paint, but they will transmit more light and scatter it. Permanent markers are suitable for painting plastic, or you can make openwork perforations on the petals.
Making a chandelier can be much easier. To do this, you just need to make slits for light in a large tray and connect the two side parts of the tray. If desired, you can paint and decorate it to your taste.
LiveInternetLiveInternet
- Registration
- Entrance
—Categories
- RECIPES (605)
- -baking (218)
- -snack (111)
- -lenten recipes (78)
- - from meat (67)
- -second courses (48)
- -cakes (44)
- -chicken (36)
- -salads (29)
- -recipes for Easter (18)
- - from fish (12)
- -cooking in a slow cooker (8)
- -tinctures (1)
- EMBROIDERY (583)
- -flowers (157)
- -magazines (131)
- -for the kitchen (77)
- -landscapes (70)
- -people (25)
- -monochrome (23)
- -children's (17)
- -birds (16)
- -houses (15)
- -miscellaneous (14)
- -amulets (13)
- -butterflies (11)
- -metrics (9)
- -transport (8)
- -New Year's (4)
- -cats (3)
- -shoes (3)
- -canvas and threads (1)
- -work registration (1)
- DECOUPAGE (218)
- -pictures (66)
- HANDMADE (189)
- -frames (7)
- KNITTING (86)
- -knitting lessons (12)
- - knitting patterns (12)
- GARDEN AND VEGETABLE VEGETABLE (77)
- HOLIDAYS (69)
- REPAIR (65)
- HEALTH (46)
- CRAFTS WITH CHILDREN (44)
- USEFUL TIPS (42)
- FOR CHILDREN (28)
- NEWSPAPER TUBES (28)
- INTERIOR (27)
- NATURAL FARMING (26)
- BEAUTY (23)
- CURTAINS (14)
- SEWING (9)
- (6)
- HOUSEKEEPING (3)
- SLAVS (3)
- Dr. Komarovsky's school (0)
-Music
—Search by diary
—Subscription by e-mail
—Interests
— Regular readers
—Communities
—Broadcasts
-Statistics
Garbage bin for household waste
From several trays you can assemble a cubic or cylindrical trash can for small waste, which can be placed near your desktop. The bottom is cut out of cardboard and the walls of the trays are glued to it. It will be easier to throw away trash if you add a suitable size cardboard box inside the container. The bottom can be cut out of plywood and furniture wheels can be attached to it.
Paper flowers
The shape and density of the egg trays is suitable for cutting flowers of various shapes. You don't need a template to work with. You just need to cut or carefully tear off one section and form a flower. With small cuts you will get a bell, if you separate the petals and round the edges you will get a poppy.
Blanks can be painted well with gouache or acrylic. After drying, the flowers are attached to the stems or assembled into a wreath. They can be used to decorate frames, compositions of dry branches or gift wrapping.
Organizer for small items
A small egg tray for 6 or 10 eggs is a ready-made basis for the organizer. It can accommodate sewing accessories, accessories or small office supplies. Used as a box with a lid or unfolded to organize space in desk drawers. A pincushion, loops for small tools or pockets are glued to the flat part inside. The outside of the organizer is decorated with clippings, braid and other little things as desired.
Installation procedure
Installation will also be very simple and quick if everything you need is at hand. You need to immediately prepare the following tools and materials:
- The same glue that was used in the manufacture of false brick blanks;
- Grout for tile joints;
- Rubber spatula.
In this case, the glue is not applied to the wall, but directly to the adhesive surface. This way you can save consumables and achieve greater effect. You can apply glue not evenly over the entire plane, but only on the middle and edges of the brick workpiece. Now it will be enough to firmly press the workpiece to the desired part of the wall and hold it for a while. The glue hardens almost instantly, and due to the low weight of the workpiece, it will not move under its weight.
This procedure should be done with all the workpieces, but they should not be laid close to each other, but with a small gap along all edges, approximately 0.8 centimeters. This part will remain for grout or cement mortar.
Now you need to fill all the cracks between the so-called bricks with the prepared mortar and smooth it evenly to achieve the most beautiful effect.
Many craftsmen prefer to paint the brick only after the final installation work, so as not to spoil the painted surface with fresh mortar. But if it is more convenient for the master to do the opposite, then you can simply remove the excess solution with a damp sponge.
