Treating the ceiling before painting
In order for the paint to lay flat on the ceiling and adhere securely, it is necessary to thoroughly prepare the surface in advance. Preparation is as important and responsible as the painting itself, so it should be treated accordingly.
In this article we will talk about how to prepare a ceiling for painting - the video lesson with thematic content on this page will be no less useful for a novice repairman (see How to paint a ceiling plinth - the finishing touches of a renovation).
Preparing a concrete ceiling
At first glance, it seems that painting the ceiling is simple and quick - no significant effort is required. Many people do just that - they start painting over the paint that has already been applied, ignoring the preparatory stage. The result is a white painted ceiling.
However, the quality of such work negates the cost of replacing flooring and re-wallpapering - it's like a woman in a beautiful dress with perfect makeup, but no hairstyle.
Why preparatory work is necessary
Violation of the order of painting the ceiling occurs for several reasons:
- lack of knowledge of work technology;
- saving time;
- reluctance to stir up dirt;
- basic laziness.
Painting the ceiling over the old paintwork wets the existing paint layer, as a result of which it loses its integrity and comes off the ceiling in different places. Somewhere there are large spots, and somewhere the size of a penny. All this has to be removed: repainted or puttied and also repainted.
No matter how the owners try to hide this defect, it will still be visible either against the background of a window or under electric light for several years, until the paint turns yellow. In addition, we should not forget that volatile fats from the kitchen settle on the ceiling. Applying paint over them leads to the fact that the ceiling quickly darkens, and the paint soon begins to crumble in some places.
Painting over dark or rusty spots requires applying several layers of paint, which is also easily visible in daylight. Therefore, if the owners are not confused by the different layers of paint that stand out at the top of the room, they can paint without any preparatory work.
If you want to complete the repair work with a beautiful ceiling, you should follow the instructions. How to prepare a ceiling for painting with water-based paint?
Types of water-based paint
Water-based paint is a water-based emulsion that contains polymer particles undissolved in water. The composition also includes pigments and various additives that change the characteristics of the final product. After applying the paint, active evaporation of water occurs and a thin polymer film remains on the surface.
Painting the ceiling with water-based paint begins with choosing the composition. They use four types of polymers:
- Acrylic. An aqueous emulsion based on acrylic resins allows you to obtain a smooth surface, has good hiding power, and hides small surface defects, even cracks up to 1 mm wide. Its disadvantage is its high price, but it is easier to work with. In their pure form, acrylic compositions are hygroscopic and can only be used in dry rooms, but they do not interfere with the passage of steam. To create a waterproof film, latex is added to the acrylic water-based emulsion. The same additive increases the elasticity of the dried film. Such compositions can be used in damp areas.
Acrylic-based water emulsion - a smart choice - Silicates. This type of water-based paint is based on liquid glass. The coating is resistant to precipitation and does not interfere with the release of vapors, has a long service life (10 years or more), and can be used for outdoor work.
Silicate paints are vapor-tight - Minerals - lime or cement. Mineral water-based emulsions have good adhesion to any surface, but are quickly washed off. As a result, they are gradually losing popularity.
Water-based paints based on minerals (lime) are the cheapest - Silicone. Silicone-based water emulsions are the latest achievement in the industry. These compositions are good because they “tighten” cracks up to 2 mm thick. As a result, the surface painted with them, even without excellent preparation, turns out to be even and smooth. The film turns out dense, but vapor-permeable. Silicone water-based emulsion can be used to paint ceilings in bathrooms and other wet areas. The disadvantage of this type of paint is its high price.
Silicone water-based paints can even paint over cracks
Latex can be added to any of the compositions. Latex water-based paint is water-repellent. It is not afraid of moisture and can be used in damp rooms.
Based on the main characteristics of these compositions, you can choose the best type of water-based paint for yourself. Each case requires its own properties and the “best water emulsion” is different each time.
Stages of preparatory work
In the structure of labor costs for painting the ceiling, preparation takes the lion's share of time. Its quantity, as well as the effort, depend on where the painting is carried out:
- in a new building with a virgin concrete floor and a finger-sized seam between the panels;
- in a lived-in apartment, where it is necessary to remove the old layer of paint or wallpaper, as well as remove all kinds of stains;
- in a wooden house with a whitewashed ceiling;
- in an apartment or house with a plasterboard ceiling.
Regardless of the conditions in which you have to work, preparing the ceiling for painting with water-based paint has a strict sequence of work:
- the old layer of paint (wallpaper) is removed, traces of rust and discoloration are removed;
- the floors are inspected and defects are identified;
- chips and peeling are removed, small cracks are repaired;
- problem areas are repaired;
- the ceiling is primed;
- the surface is completely putty (when using universal putty, once is enough, specialized putty - starting and finishing - twice);
- the dried putty is sanded;
- in places where the putty has shrinked, the process is repeated.
Attention: in case of large deviations from the horizontal, the ceiling is plastered or suspended (suspended) ceiling systems made of plasterboard (GCR) are used.
Sanding walls and ceilings after puttying
Sometimes builders claim that sanding the wall after puttying is not necessary, but you don’t need to listen to these “masters.”
This procedure may not be necessary in several cases:
- If the surfaces are smooth or a dense finish will be used. So, for example, thick wallpaper, tiles and other materials do not need sanding.
- Preparatory work in warehouses. It is not advisable to spend money on materials; you can just leave the finishing rough.
In other cases, these works must be performed. This way, when wallpapering, they will stick more securely, the outer parts of the canvases will not move away from the wall. Sanding before painting is mandatory. Paint will not mask defects; they can be seen with the naked eye. Sanding should not be neglected, even if the surface is smooth.
Attention! Walls to be painted must be smooth. In this case, they are polished twice.
Required materials and tools
Preparing the ceiling for painting with your own hands begins with purchasing the necessary materials and providing the technological process with tools and devices.
Materials. To carry out preparatory work you need to buy:
- any deep penetration primer for concrete under gypsum (Betonokontakt, Ceresit ST 17, etc.);
- repair mortar for concrete (purchased if necessary to repair floor defects), you can use the cement remaining after plastering;
- any ready-made starting gypsum putty, “Vetonit”, “Ceresit”);
- ready-made finishing putty from the same manufacturers;
Attention: the starting and finishing putty can be replaced with a universal gypsum mixture.
- painting canvas “gossamer” based on fiberglass;
- serpyanka for sealing the joint between panels in a new building;
- glue for fiberglass (wallpaper glue for fiberglass holds well, for example, QUELYD, Bostik-70, GOLDBASTIK, etc.);
- sandpaper or a special sponge with sandpaper for sanding putty;
- plastic film or special construction tarpaulin to protect the floor, walls and windows from dust, dirt and paint during painting.
In addition, there must be access to water - this will be needed when removing old paint or wallpaper.
Tools and accessories. You don't have to buy the entire set of tools to get the job done. Some are in the pantry or at the dacha, some can be found from friends, some can simply be rented, which will save the family budget. The set should contain:
- a stepladder, but if possible, it is better to use a sawhorse or a strong table - it is much more convenient to work with them;
- a set of spatulas (necessarily wide, 15-20 cm, and narrow, 5-7 cm);
- construction ditch (bath) for primer;
- paint roller (brush, spray) for soaking the old layer of paint or wallpaper and applying a primer;
- electric drill with a set of attachments (perforator);
- metal brush;
- hammer;
- chisel;
- construction knife;
- flashlight - ideally highlights all the unevenness of the ceiling.
In addition, you need work clothes (an old T-shirt and jeans) and glasses. When working with a grinder, you must wear a respirator.
How to clean the base of an old coating
- Methods for removing old whitewash: cleaning the ceiling before painting
Cleaning the ceiling is one of the stages of preparation...To watch photos "
This is a dirty and unpleasant stage of work. Before leveling the surface for painting, it must be cleaned down to the concrete base. For this work you will need a strong metal scraper (an old spatula can be used), a sharp hatchet and a brush. When cleaning, it is advisable to protect your hands with gloves and your respiratory organs with a respirator. Work must be carried out from scaffolding of a suitable height (so that your head does not rest, you can freely reach the ceiling).
The technology for implementing the process depends on what exactly needs to be removed:
- Wallpaper. It’s easiest with old wallpaper - they are usually removed immediately, or after pre-wetting;
- Whitewash. The same can be said about whitewashing: although a lot of dirt arises when cleaning it, this procedure generally does not encounter any particular difficulties. The whitewash is first soaked in warm water, then cleaned off with a sharp scraper.
- Dye. The most inconvenient type of finish to clean, as it does not get wet from water. Only diligence, a scraper or a sharp hatchet will help here. Although there are recommendations for the use of special liquids for removing paint, however, due to the toxicity inside the home, it is better not to use them.
- Putty. Old putty exists under any of the above finishes and must also be removed. Sometimes it seems that the old putty layer is very strong and can be left. But such a solution is accompanied by the risk of swelling (often at the last stage of repairing the ceiling, during its painting).
- Frame systems, panels. Here, dismantling is the easiest, since it is not accompanied by the appearance of dirt.
To make the work faster, it is recommended to sharpen the scraper from time to time using sandpaper.
When cleaning the concrete surface, all discovered seams and cracks deserve special attention. They must be carefully opened, removing all the solution inside.
Preparing the premises
According to building regulations, renovation work is carried out from top to bottom: from the ceiling to the walls, finishing with the floor. According to Russian tradition, renovations in apartments proceed in reverse: half-wall-ceiling. Therefore, before painting the ceiling, you should remove the lamps, turn off the power to the room, and remove the furniture.
If for some reason it is not possible to move the sofa or wardrobe to another room, they are tightly covered with plastic wrap and sealed with tape. In new houses, the installation of doors and windows is being completed.
Since the work of cleaning the ceiling is dirty and dusty, you should protect the walls, floor, windows and neighboring rooms from the results of cleaning the ceilings from old paint (wallpaper) and putty particles during sanding.
To do this, the floor is covered with cardboard from packaging boxes or construction tarpaulin, and the walls, windows and doors are covered with plastic film. Along the top and bottom, the film is attached to the wall with construction tape (plain tape can damage the wallpaper).
The doorway is curtained so that there is a passage, but dust does not seep into the corridor.
Surface cleaning
In new apartments (houses) there is no first stage of preparatory work; here work begins immediately with the second - identifying defects and eliminating them. During renovation work, the most unpleasant process is cleaning the ceiling surface from the previous finish: water-based or acrylic paint, lime whitewash, wallpaper, polystyrene tiles.
Water-based paint. The old layer of paint is moistened generously with warm soapy water, using a roller (spray), twice, at intervals of half an hour. After re-wetting, some experts create a draft for 10-15 minutes, as a result of which the paint will fall off on its own in many places. Residues are removed with a spatula.
If there is no ventilation, then the removal of the water-based layer begins 5-10 minutes after re-wetting. If the paint does not lend itself or is difficult to remove, such places are additionally moistened with a sponge. The work is continued in another place, and difficult places are returned to after they have swollen.
You can also remove the paint layer mechanically, using special attachments on a drill, grinder or hammer drill. However, in this case, personal protective equipment is needed, and you should be prepared to encounter dust in places where, by definition, it should not have been. After treating the surface with a power tool, you need to manually go over the ceiling again with a wire brush.
The ceiling, cleared of paint, is washed thoroughly, and the water must be constantly changed.
Acrylic paint. One of the most unpleasant types of coatings to remove:
- with the mechanical method, using electrical devices, there is a lot of dust;
- using special removers for acrylic paint (Aqua-Color, VX-90000) is harmful to health - they are very toxic.
When using chemicals, the paint is removed with a spatula, after which the ceiling, as in the first case, is treated with a metal brush and washed.
There is a third way to remove acrylic paint - with a hammer and chisel. But this is very labor-intensive and time-consuming. If you have the time and desire, then this method is the cleanest and safest.
For reference: regulatory and reference literature in recent years gives preference to the mechanical method - there are many cases of poisoning with washes.
Lime whitewash. Lime can be removed for a long time using water, or you can use the old, proven method: spread the entire surface of the ceiling with homemade paste. The recipe is simple: a couple of tablespoons of potato starch (can be replaced with flour) are stirred in cold water and then poured into boiling water (1 liter).
Stir with special care so that there are no lumps and leave to cool. After this, apply it to the ceiling with a brush - the hardened glue can be easily removed with a spatula along with the lime. As in previous cases, the ceiling surface is washed.
Wallpaper. As a rule, paper wallpaper is glued to the ceiling. Removing such finishing is not difficult - the ceiling is wetted, and the wallpaper is removed by hand using a spatula. The remaining pieces of trellis are scraped off with a spatula or wire brush.
The glue is washed off with a damp sponge. The process will go faster if the water is heated to 40-50 degrees. The water must be changed frequently.
Plastic tiles. This type of decorative ceiling covering is removed with a spatula. The process is labor intensive and requires patience. In places where the tiles do not lend themselves to a thin spatula, a hammer and chisel (chisel) come to the rescue. Remaining glue is removed mechanically - with an electric drill with a special attachment. After this, the ceiling is manually wiped with a wire brush and, as in previous cases, washed.
Removing dirty stains and rust. The process of removing any type of contamination is not very complicated:
- oily stains are removed with a 2-3% solution of hydrochloric acid - applied with a brush several times to the stain, after which it is washed off generously;
- rusty stains can be removed: copper sulfate (10%); a slurry of lime, denatured alcohol (alcohol) and water; a mixture of lime and drying oil; sodium hypochlorite (the well-known cleaning agent “Belizna”);
- The efflorescence is cleaned with a metal brush.
How to level a ceiling with plaster
How to level and paint a ceiling with your own hands.
Applying plaster is an option for “wet” finishing of ceilings. The ceiling surface is thoroughly cleaned and coated with primer. For better adhesion of the plaster to the ceiling surface and to avoid further cracking of the plaster coating, a reinforcing mesh is used, which is secured with an adhesive or using special staples.
Next, a layer of plaster no more than 15 mm thick is applied to the ceiling.
In places where a thicker layer is needed, the plaster is “combed”, the coating is allowed to dry, the surface is primed again and the next layer of plaster is applied. After the plaster has dried, the ceiling is puttied. A video on how to level a ceiling using this method will help you visualize the entire finishing process.
Ceiling repair
In a new apartment, the first thing to seal is the joint between the floor panels. Serpyanka is glued onto it, and then the gap is sealed with putty using a narrow spatula (the gypsum solution easily passes through the mesh). After drying, with large shrinkage, again with a small spatula, apply another layer of putty.
If the shrinkage is small, use a wide spatula to cover the serpyanka with a thin layer of gypsum. Considering that the surface of the ceiling will be completely puttied, after passing a wide spatula, it is allowed to show through the fiberglass (serpyanka).
Important: gypsum-based putty should not be used in the bathroom. The right choice here is cement or polymer mortar.
Then the concrete floors are inspected to identify chips, shells, peeling, and microcracks. This is where the repair of floors in residential apartments begins.
All damage to concrete with peeling of cement stone is cleaned with a hammer and chisel. Microcracks expand, otherwise the repair solution cannot be rubbed into them, and large ones are reinforced with self-tapping screws. To do this, grooves about 10 cm long and 15-20 mm deep are cut across them at a distance of 3-5 cm from each other with a grinder.
If there is cement, “cement laitance” is made. The solution consists of water and M400 cement in a ratio of 2:1. All damaged areas are treated with this mixture in order to saturate the concrete with moisture and create an adhesive film. The treatment must be repeated several times until the ceiling is completely saturated with moisture.
If the wetting process goes poorly, rub the milk into the surface with a brush. This is especially important for microcracks. Then “wet on wet” (on undried cement laitance) a repair mortar of cement, sand and PVA glue is applied in a ratio of 1:3:1 and 3 parts of water.
When using deep penetration primers, they are also rubbed into microcracks, but repairs are carried out “wet on dry”, i.e. over a completely dry primer layer. You can use a cement-sand mortar, or you can buy a ready-made mortar in tubes.
Subtleties of the process
There is nothing fundamentally difficult about grinding. This is a simple, but labor-intensive and long process. Your main task is not to rush anywhere and not to try to get an excellent result immediately after the first pass along the plane with the tool. Everything has its time - some areas will definitely need to be processed several times to achieve perfect smoothness.
It is important to note that before starting sanding you do not need to treat the walls with a primer. You just need to let the applied layer of putty mixture dry thoroughly.
Do not start work before the entire wall is completely dry. Otherwise, the result of your mistake will be the need to putty everything again.
You need to start working from the top edge of the wall, gradually going down. You cover about a meter of surface at a time - you can make the area less wide if it’s more convenient for you. You should not take a wide strip right away, as this leads to errors and, as a result, unevenness.
First, to sand the walls for painting, use coarse sandpaper, which has a lower number in the grain size designation. It is necessary to completely process the entire wall area, and only then move on to finer grains. This way you will get a uniformly polished plane, without sharp transitions and waves.
There is no need to try to smooth out recesses, depressions and other similar defects with the rest of the surface by rubbing the areas around them. This will lead to abrasion of the putty layer. It is better to re-putty these areas after the main grinding work is completed and re-polish the surface after the applied mixture has dried.
Once the surface treatment is completely completed, any remaining construction dust should always be removed. Even when using a power tool with the ability to suck up the resulting dust, it remains in small quantities on the surface being processed. Subsequently, if it is not removed, the dust will greatly affect the quality of painting for the worse.
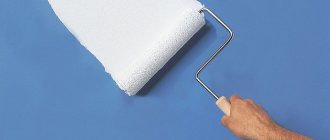
Primer
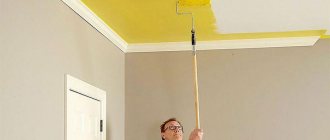
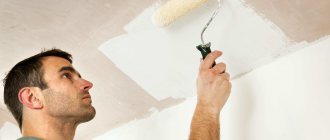
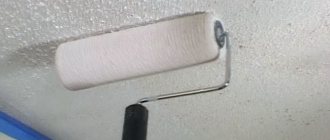
The next stage of preparatory work is priming the surface. The operation is mandatory. It is on the floor or on the walls that you can think about the feasibility of this work; on the ceiling, the putty will stick very poorly, and under the influence of moisture from the water-based emulsion, it may even begin to fall off immediately.
Work begins after the repair solution has completely dried. Using a roller on an extended handle, the primer is evenly applied to the entire surface of the ceiling. The junctions between the ceiling and the walls and the areas where the heating pipes pass are treated with a brush.
The second layer can be applied after about half an hour, without waiting for the first layer to dry. And they putty on a completely dry surface.
Professionals mainly use the following primers:
- Ceresit ST 17 is a deep penetration primer. Located in the highest price segment. However, the price matches the quality. It provides the best adhesion between dissimilar materials: concrete and gypsum;
- GF-012. General purpose primer. Binds dust, increases adhesion between the base of the ceiling and the putty, reduces the suction of moisture from the putty solution by concrete;
- Hydroscope concentrate. Used in the bathroom, kitchen and toilet - it has waterproofing properties.
Why do you need to sand walls?
All the procedures that we did before: plaster, putty - these are all procedures for leveling the wall. Plastering is rough, puttying is fine. And now the process of sanding or polishing the walls begins.
Even after applying a thin layer of putty, in any case, small irregularities and tubercles remain on the wall, formed mainly by the sharp ends of the spatula, which remain when we disperse the putty and connect one part of the putty wall to another.
That is why when putting putty it is better to use a large spatula so that the area of leveling the wall is maximized. But the joints, no matter how hard we try, can still be traced. Therefore, after you have puttyed the wall, you need to let it dry (at least a day) and you can start sanding the walls.
Don’t try to accidentally prime the wall after puttying! Sanding begins immediately after puttying!
Surface reinforcement
If there are a large number of microcracks on the surface of the ceiling, the ceiling is reinforced. Note that under normal conditions such work, as a rule, is not performed. But this is the case when “you can’t spoil the porridge with butter.” It's not very expensive and it's quick.
How to prepare a ceiling for painting if it needs to be strengthened? The instructions provide for the following procedure for performing work:
- Using a roller with an elongated handle, so as not to climb a stepladder, glue for glass wallpaper is applied in an even layer to the size of the fiberglass (in extreme cases, special glue can be replaced with PVA);
- The “web” is applied to the glue and pressed tightly against the surface of the ceiling in several places;
- Using a wide spatula, moving along and across the canvas, it is pressed into the glue over the entire surface of the ceiling (no swelling or bubbles should remain);
- The next area is smeared;
- Fiberglass is glued with an overlap of 2-3 cm with the previous canvas;
- The second web of the “web” is also pressed tightly against the ceiling;
- Take a rule or a long metal ruler and apply it in the middle of the overlap. Using a construction knife, both canvases are carefully cut along the entire length, resulting in a perfect seam between the two “webs” (the trimmings are removed, and the joint is again pressed against the ceiling with a spatula);
- Another layer of glue is applied to the pasted surface.
Washing off the old water-based layer
How to wash the ceiling before painting with water-based paint? To do this, use ordinary soapy water. The procedure for cleaning the ceiling surface from old water-based coating consists of several stages:
- It is necessary to cover the furniture with plastic film and spread it over the entire surface of the floor.
- Prepare a warm soapy solution.
- Moisten small areas of the ceiling surface with a sponge or brush. You can use a small volume sprayer.
- Scrape off the wet layer with a spatula while simultaneously cleaning the surface to be treated with a brush.
- Finally, wash off the remaining fragments of the whitewash layer with a soap solution.
To wash off whitewash, you can use 3% acetic or hydrochloric acid. It is used to treat the ceiling surface to swell the whitewash layer, which is then easily cleaned off with a spatula.
Putty
For putty, you can use a ready-made solution in buckets, or you can buy a dry mixture. In this case, you will have to prepare the putty yourself using a mixer in a bucket (drill or hammer drill with a special attachment). Compliance with the instructions printed on the packaging is mandatory.
Important: since the solution sets quickly, kneading should be done in small portions first. As skills develop, the amount of solution prepared increases.
The small difference in price between the ready-made solution and the dry mixture has led to the fact that for small spaces, such as an apartment, ready-to-use putty is purchased, and for large areas of processing, a dry mixture is purchased.
The speed and quality of work largely depend on the platform from which the work will be carried out. If it is a stepladder, then inconvenience is guaranteed - you will have to go down and rearrange it very often. In addition, it is very inconvenient to control the quality of the applied layer of putty. The exit is by constructing a temporary portable platform or using a table.
When doing the work yourself, it is better to use a universal solution. In this case, the ceiling is putty only once (there is no need to apply the starting putty first and then the finishing putty). Naturally, you will only need to sand it once.
Properly organized work is performed in the following sequence:
- the voids and cavities that remain after the repair are sealed (if this is done in one pass, the solution will shrink) and only after drying the main work is carried out;
- use a narrow spatula to apply the solution onto a wide one and bring it to the ceiling at an angle;
- by moving towards you, the mixture is applied to its surface, while the layer of putty being laid must be perpendicular to the primer;
- after the first pass, the solution is fed with a narrow spatula to the edge of a wide tool and the operation is repeated, while the forces on the spatula must be controlled and not allowed to fluctuate significantly;
For information: each master has his own approach to applying putty to the ceiling. Some do this with a wide spatula, others with a narrow one, and still others with other tools altogether.
- after laying a portion of the mortar, the quality of the work is checked; to do this, you need to look at the putty area against the light, but it is even more effective if the newly putty area is illuminated with a flashlight - in this case, the smallest errors are clearly visible;
- If clumps of the mixture or differences in height are detected, everything is leveled with a spatula.
The thickness of the applied layer should not exceed 2 mm. Corners are sealed separately, after completion of work on the main surface.
Variety of finishing mixtures
There are a large number of putties on the construction market that can be used to perform high-quality finishing.
Types of putty for leveling the ceiling:
- Starting. The mixture is used to level the surface.
- Finish. Used to add color and smoothness to the ceiling.
- Universal. Used both for leveling and at the final stage.
- Specific. Applies only to certain types of rough work.
Depending on the composition of the putty, there are cement-lime, sand-cement, gypsum and polymer.
- Cement-lime. This putty is used in rooms where there is constant high humidity. Due to the fact that the product is inelastic, small cracks may appear on the surface after it has completely dried. Therefore, such a ceiling will need to be refinished to cover up the defects.
- Sand-cement. Used for ceilings that have slight differences. Mixtures of this type have good water resistance.
- Plaster. The product is intended for final finishing of the ceiling. The peculiarity of this putty is that it does not shrink like other types.
- Polymer. High quality putty, with which you can quickly and easily achieve perfect evenness. The disadvantage of this product is its high price.
A dry and ready-made composition is available for sale. Each of them has its own pros and cons. Dry mixtures are easy to transport, but they need to be prepared before application. To do this, you will need to mix the powder with water according to the proportion indicated on the label.
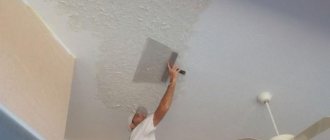
Grinding
The final stage of work is grinding the putty, which allows you to create a perfectly smooth surface for painting. Performed manually or with a grinder.
Experts manually grind “to look like a light bulb” (you can also use a simple flashlight with the same effect). By highlighting, it allows you to see the smallest defects, which are eliminated during grinding. Small defects are removed with zero-grade sandpaper, large ones - with a grater with a mesh.
Grinding scheme.
The work is carried out in a circular motion from wall to wall, which is clearly visible in the diagram. It is important to constantly monitor the quality of work. The machine method greatly simplifies the process. Otherwise, everything is done in the same way as with manual grinding.
Before painting, the ceiling is primed again.
Return to contents
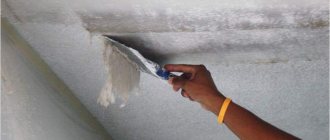
After you get rid of the whitewash, you will immediately be able to detect problem areas on the ceiling that have small cracks. Under no circumstances should they be left; they can ruin the appearance of the ceiling, since the paint will not be able to mask these flaws. But putty can handle this very easily; you just need to fill the cracks with it.
So, your task should be as follows:
- using the edge of a spatula, you need to process the existing cracks in such a way as to remove all weak layers;
- then you need to dilute a small amount of putty to fill the cracks;
- After it dries, you need to sand it with fine sandpaper.
After all the above procedures, your ceiling will look like a single whole.
Preparing a gypsum board ceiling
Preparation for painting a suspended ceiling made of gypsum plasterboard differs significantly from work on a concrete floor. How to properly prepare a gypsum ceiling for painting? It all depends on whether the dye will be applied to a newly installed ceiling or whether an existing suspended structure is being repaired.
The following work is performed on the new suspended ceiling:
- Use a construction knife to open the joints of plasterboard sheets (3-4 mm of plasterboard is cut from each edge at an angle of 45 degrees);
- the seams and screw heads are puttied (the work is performed in the same sequence as sealing the joint between concrete floors, which can be seen above);
- the surface of the drywall is primed;
- after the primer dries, it is puttied;
- Finally, it is sanded and primed again.
Preparing a plasterboard ceiling for painting during renovation work includes cleaning the ceiling from water-based paint, sanding and priming. Here, the step of applying putty is eliminated, since it was applied under the previous topcoat, and sanding only removes the old adhesive mass.
You can remove old paint using the same methods as from a concrete base - mechanically or using a wash. The main thing is not to put too much pressure on the ceiling, so as not to damage the drywall. But you can’t wet the wallpaper - the cardboard holding the plaster will get wet. Here they do things differently: they buy cheap wallpaper glue, dilute it to a creamy consistency and spread it on the ceiling.
After some time, the wallpaper will swell and be easily removed from the drywall. Before painting, the ceiling is primed.
What to consider when choosing a whetstone and grinding material: sandpaper, mesh
There is no ironclad recommendation. Some people use a sanding mesh, others use sandpaper.
Sanding mesh
The advantage of the sanding mesh is that it does not become clogged with putty dust during operation. The mesh itself is perforated and all sanded off putty will pass through the mesh. It must be replaced during normal wear and tear, which is determined by the appearance of the mesh used. If the mesh is torn in places or you already feel that sanding is not as effective, replace the mesh with a new one.
Usually the mesh is sold in ready-made pieces directly to the size of the block and all you have to do is install it on the block and work. But, you need to remember that the size of the bars is also different, as shown in the picture. Therefore, when taking a mesh, immediately select a block to match its size. Mesh is more expensive than sandpaper.
Sandpaper
During operation, the sandpaper will become clogged with sanded off dust and the sandpaper will have to be changed more often than the mesh. You need to be aware that sandpaper, although cheaper than mesh, is also not a cheap material. It is sold in completely different versions: large rolls, small rollers, rectangular pieces.
If you decide to sand with sandpaper, then you need to figure out how you will cut it, taking into account the size of the block, so that there is as little waste as possible. You, of course, can refuse to cut the sandpaper and buy pre-cut pieces ready for bars, but this will be more expensive! There is a concept of sandpaper grit (paper with different grains).
In order not to blow your mind on this topic, buy paper with grain 60, 80 and 100 in small quantities at the store and try to work with it. There is no exact recommendation on what grain to take. But it’s better not to take less than 60 for sure, because it will be very rough sandpaper. More than 100 is also not very good, because it will become very clogged with dust during processing and will have to be changed very often.
There is one more recommendation. If you have sandpaper with a suitable grain from old stock, then of course use it. No need to run to the store for a sanding mesh.
IMPORTANT! The walls that you will sand usually go on to either wallpapering or painting. In case of painting, the wall should be absolutely smooth, I would even say polished
In this case, the craftsmen sand the wall 2 times. The first time, for example, with 60-grit sandpaper, to remove obvious large frozen pieces of putty, and the second time, take even finer sandpaper, for example, with 120-grit sandpaper and polish the wall with it. But in the case of wallpaper, this is clearly a redundant operation. For wallpaper, just go over the wall once.