What is it for?
Boxes can be used for the following purposes:
- as organizers (for example, sort documents and so on);
- put things in them that are not used every day (for example, New Year's toys);
- as gift packaging (to give gifts in them for which factory packaging is not provided).
Most often, hard packaging is used for shoes that have already been worn out and disposed of, household appliances, and so on. By and large, any packaging can be used. But to make everything look neat and orderly, the box should be decorated.
The simplest and most budget-friendly way to decorate is to cover the box with paper. And there are a lot of options and methods.
Gift bag with bow
What do you need
- Paper;
- glue;
- ribbon.
How to do
Fold the piece of paper in half crosswise so that a mark appears in the top center for clarity. Fold both sides of the sheet to this mark, slightly overlapping one another, and glue them together.
Fold and glue the bottom of the bag as shown in the video. Fold the long sides over so that the bottom touches the seam at the bottom of the bag. Open the bag and fold it again along the side lines so that it is straighter and more beautiful.
Place the gift inside and fold the top of the package into an accordion shape. Press it in the middle and straighten the edges of the resulting bow. Tie the bag with a ribbon.
If it is more convenient for you to make boxes using ready-made templates, use the website templatemaker.nl. There are many boxes of different shapes collected there. Moreover, their parameters can be calculated automatically. Promo You will find even more interesting ideas for New Year's gifts on the marketplace of the Multibonus loyalty program for VTB Bank clients. There are more than 240 thousand products for every taste: books, gadgets, household appliances, certificates from popular stores and much more. Connect the loyalty program to your bank card in VTB Online and select the appropriate option for accumulating rewards. Now “Multibonus” is holding a holiday sale with discounts of up to 50% on products of popular brands, and for purchases from program partners in the “Accumulate” section you can get cashback of up to 30%. If there are not enough bonus rewards, just pay extra for the order in rubles. Find gifts for loved ones
What paper is suitable for lining a box?
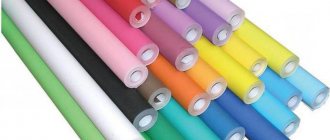
To transform a cardboard box, you can take absolutely any paper. Anything suitable for this purpose:
- colored paper;
- gift;
- paper for decoupage and crafting;
- self-adhesive paper;
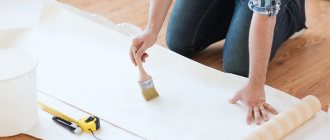
- wallpaper (vinyl, paper, non-woven, textile, etc.);
- napkins and much more.
In the form of candies
An excellent gift packaging option without a box.
Even a child can do this method:
- Take the required sheet of gift paper, the width of which is equal to the gift paper, adding a margin of 2 cm, and the length exceeds 1/3 of it.
- Wrap the gift and tie the side tails with ribbon or twine.
What tools and materials are still needed?
In addition to paper and the cardboard box itself, you need the following tools and materials:
- scissors and/or stationery knife;
- ruler;
- pencil.
Depending on the type of paper you will use to decorate the boxes, you will need to stock up on:
- double tape;
- PVA glue;
- glue gun;
- wallpaper glue (sometimes depending on the type);
- glue brush.
Features of application
Absolutely anyone can master decoupage. And as an object to which efforts will be directed, you can use any, even used, box. It could be a shoebox or even a drawer. If you need something special, you can make it from cardboard with your own hands. It's better to start with a small box. Having mastered the technique well, you can subsequently design large boxes for storing bulky items.
The main requirement for the workpiece is the absence of dents, folds and other damage - it will not be easy to hide them.
Design can occur in several ways, using certain devices, as well as a variety of adhesives and paints. Some products are not suitable for cardboard (it can get wet and deformed), so you can take a box made of wood or plywood.
This is interesting: What to Say at an Interview
In this article we will look at the simplest options, most suitable for beginners. Even a small project requires time, so you need to be patient. But decoupage also has advantages. By activating all your creative abilities, you can create a truly unique thing.
This activity is suitable for people who love to draw, as the final effect will be very close, but no special skills are required.
Decoupage is ideal as a hobby - as it allows you to unleash your creative potential and has a beneficial effect on your psychological state. And the resulting boxes can be not only beautiful, but also practical.
The easiest way
A master class showing how to cover a box with paper can be seen in the photo provided.
- Unroll the paper roll and place your box on it.
- Measure how much material you need so that it completely covers the bottom of the box, its walls and bends slightly inward (Illustration 1). This can also be done using a ruler. To do this, measure the height and width of the box and measure on the sheet a length equal to these parameters plus another width and plus six to ten centimeters for the bend.
- Cut out the desired piece of paper (Illustration 2).
- Place the box in the center of the cut out piece of paper and cut out the excess pieces at the corners (Illustration 3).
- Cut four small pieces of paper and glue them to the corners of the box (Illustration 4).
- Now coat the walls with glue and glue the paper (Illustration 5).
- Coat the inside of the box and wrap the paper (Illustration 6).
- Cover the lid in the same way.
- Let the box dry.
All is ready! Now you can use the box as you wish.
Tip: Don't use too much glue or the paper may warp and ruin the whole look.
Common Mistakes
So, you already know how to apply self-adhesive film to a door. However, in order for you to be completely satisfied with the result, you should avoid the following mistakes:
- The film should be applied to a perfectly clean surface;
- when cutting material, it is always necessary to take a small reserve so that the film is enough to cover the board;
- In order for the pattern to match, the film should be cut exclusively at the seams;
- so that after applying the film to any surface no defects are visible, it should first be properly prepared.
Follow these recommendations, and you will certainly succeed.
(2 ratings, average 5 out of 5)
The second way to decorate with paper
Here is another instruction on how to cover a box with paper:
- Place the bottom of the box on the selected paper and trace it (Illustration 1).
- Cut out the bottom piece so that there is a margin of two to three centimeters on each side (Illustration 2).
- Glue the part to the bottom of the box and fold up the protruding edges (illustrations 3 and 4).
- Place one side on the paper and outline it. Cut out the part with a margin of a few centimeters on all sides. Glue the paper to one of the sides (illustrations 5 and 6).
- Carefully fold the edges of the paper (to the bottom, to the sides and inward). If necessary, make small cuts (Figure 7).
- Cover all sides of the box in the same way (Illustrations 8 and 9).
- You can paint the inside of the boxes with a suitable color paint. It is better to use acrylic (Illustration 10).
- Let the glue and paint dry completely.
The decorated box is ready!
Envelope
Sometimes it's enough to wrap a surprise in a decorated envelope made of gift paper.
To do this you need to follow a few basic steps:
- Unfold the paper and fold it in half.
- Place the gift on top, but there should be a 3 cm margin on all sides.
- Cut according to the received parameters.
- Roll out the paper into one layer and place it face down.
- Fold the sides inward by 1 cm and the top edge by 2 cm.
- Glue the sides together, leaving the top fold unchanged.
- Place the gift and use a hole punch to make a hole on the side.
- Thread the ribbon through and tie a bow in the center of the envelope.
Decoupage technique for decorating cardboard packaging
Some people are in a hurry to throw away not only shoes, boots and other footwear that they have taken down, but also the box from under it. But if you cover a shoebox with paper, it will be transformed and become an irreplaceable thing. It can be used as a box or a place to store various little things that tend to get lost.
The master class will show you how to cover a box with paper using the decoupage technique:
- Take a clean shoebox and remove tape and other stickers from it.
- Take two shades of paint (preferably acrylic) and cover the sides and lid of your box. Paint the sides black and the top white.
- Make a frame on the lid using the same color as the sides of the box. To do this, step back a few centimeters from the edge of the top and stick on a square of masking tape. Cover the indents with black. After this, remove the tape. As a result, you have a frame for a white square in the middle with smooth edges.
- Choose a suitable picture. It can be depicted on a napkin, plain paper, wallpaper, and so on.
- Cut out the picture and put it in the water.
- Then take the picture out of the water, place it on a piece of oilcloth (an A4 file is perfect for this purpose) face down, and blot the top several times with a cotton or paper towel to remove excess moisture.
- Cover the picture with PVA glue or decoupage glue.
- Also coat the lid where the picture will be glued with glue.
- Transfer the oilcloth with the image to the lid. To do this, simply turn the picture over and straighten it with your fingers.
- Carefully remove the oilcloth.
- When the picture is dry, the entire cover should be coated with acrylic varnish.
- To prevent the borders of the picture from being too prominent and conspicuous, apply white paint to the edges of the image and gently blend it with a large brush or sponge (you can take a piece of foam rubber).
- To make the picture look harmonious, you can additionally add some touches with acrylic paint (for example, shadows and highlights, background).
- When you are done with the background and image, coat the entire surface of the box lid with varnish.
- Decorate the walls if desired.
When everything is dry, the box can be used.
How to glue a background to an aquarium with glycerin
There are several ways to attach film to the back wall at home. Experience shows that ordinary medical glycerin copes best with the task. It is absolutely colorless and non-toxic. Unlike soap solution, it does not leave annoying streaks.
Required material and tools
To glue the film to the aquarium, you need to prepare the following material and tools:
- a bottle of glycerin;
- background film;
- 5-10 napkins;
- stationery knife;
- silicone spatula.
On a note! The spatula successfully replaces an out-of-use plastic card. If you have a hard piece of cardboard at home, you can use that.
Stages of work
Before gluing the background to the back wall of the aquarium, you need to free it from aquatic inhabitants, drain the water, wash, clean and dry. The size of the film must be adjusted to the dimensions of the rear window minus 3-5 mm. If the edges of the film protrude, this will affect not only the aesthetics, the film will quickly peel off. The excess must be cut off immediately, before the film is glued. It will not be possible to do this exactly on the spot.
Next we proceed as follows:
- Place the aquarium on a flat surface (table, floor) with the back wall facing up. You must make sure that the surface is clean, free of dust and lint. It's better to play it safe and clean it with glass cleaner.
- Apply glycerin drops evenly onto the surface of the glass. 50 ml of product is enough to glue the wall of a 50 liter aquarium. Brushes should not be used as they may leave lint.
- Carefully glue the film on top, gently pressing it to the surface.
- Now you need to slowly scrape the glycerin to the center of the film using a silicone spatula.
- After the glycerin is collected in one place, we begin to distribute it evenly over the surface. It is necessary to move the spatula in all directions, from the center to the edges of the aquarium.
- Glycerin protruding from the edge should be immediately removed with a napkin. To prevent the spatula from getting dirty with glycerin, you can wrap it in a napkin.
- After the work is completed, you need to carefully inspect the surface again for the absence of folds and bubbles.
You can paste the film within 15-20 minutes. Unlike water or soap solution, glycerin hardly forms bubbles. Therefore, all that is required from the aquarist is to straighten all the folds and expel excess glycerin to the edges. The glycerin film holds very tightly. If necessary, it can be removed and replaced with another one.
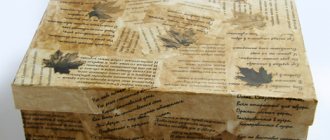
Sheets with mulberry fibers: how to cover a box with paper?
Master class on gluing a box with mulberry leaves:
- Mulberry paper has a number of features that should be taken into account when working with it. The most important thing is that the material is very thin. Therefore, if you are decorating not a single-color surface, but with different images, then you need to cover it all with paint.
- When the paint is dry, cover the surface with PVA or decoupage glue.
- Tear the mulberry paper into pieces of different sizes and cover the box with them.
- If you want, additionally decorate the surface using the decoupage technique with napkins or other pictures. This should be done after the mulberry paper layer is completely dry.
- Finally, you need to cover the box with a layer of varnish.
This box looks antique and will fit perfectly into any interior.
How to glue self-adhesive film to the wall
Of course, it may be somewhat inferior to wallpaper in terms of decorative properties, however, with a wide variety of colors and patterns on the material, this problem can be avoided. Its only visible drawback is that the material must be glued to the wall or furniture completely evenly, so that there are no bubbles or irregularities, i.e. Because this will not only make its appearance unattractive, but will also worsen its adhesion to the surface, and soon it will begin to come off.Removing dirt from the film is very simple: you can use any detergent and warm water, and if the contamination is severe, ethyl alcohol will help. Stained glass film can only be applied to glass or metal moistened with water.
You can also add a soap solution to the water - this will make it easier for you to properly adjust the film to the surface. Of course, the degree of darkness varies, so everyone can choose their own. This item also includes self-adhesive film for window sills.
The same thing - the film prevents the window sill paint from cracking and crumbling, and this frees the user from constant maintenance of the surface, which results in very good savings. Before gluing self-adhesive film to furniture, walls or other surfaces, you need to carefully prepare them for work, and also become familiar with the basic gluing technology.
- Self-adhesive film will be an excellent protective coating for any home furniture, be it cabinets, furniture, tables, chairs, chests of drawers, cabinets, bedside tables and much more. A protective smooth layer will allow the material to last longer and update the interior of the home, and may even radically change its style.
Is it possible to decorate a box of a different shape?
How to cover a round box with paper:
- Place the box on a piece of paper and outline its bottom.
- Cut out two of these circles.
- Then cut a rectangular strip. Its height should be equal to the height of the sides of the box plus four extra centimeters.
- Cover a rectangular piece of paper and the sides of the box with glue.
- Step by step glue the rectangle to the side so that it extends beyond the edges from the bottom and top.
- Make cuts all the way around the exposed edges of the paper and fold them over the box.
- Glue the cut out circles to the bottom and lid of the round box.
The decor is complete.
Original ideas on how to make a gift with your own hands
When deciding to decorate a gift yourself, the giver wants to emphasize his imagination and special attitude towards the recipient. To do this, you need to pack the prepared surprise in an unusual and bright way. Here are some ideas:
Shirt
An original option to give a gift to a man or on February 23rd to boys at school. You will need to cut a rectangle from a sheet of white paper, the width and length of which is twice the size of the gift itself. Be sure to make allowances of 3 cm. The sides are folded exactly towards the center - the front side of the shirt is ready.
Turn the workpiece face down and fold the top edge towards you. Turn it back and bend the corners, making it look like a collar. The lower edges of the halves are turned out so that they extend beyond the edges of the “shirt”. Bend the workpiece in half, placing it behind the “collar”. You can add decorative elements.
Stencil for gift wrapping in the form of a shirt
Packaging - shirt
Candy
This method is suitable if the gift does not have original packaging. You will need to take a sheet of paper with a width equal to the object and a length 1/3 greater. Wrap it around and tie the loose ends with twine or tape.
Packaging in the form of candy
I also offer interesting ideas for wrapping your gifts.
I hope you were able to choose the best way to wrap gifts for the holiday. I personally like it in the form of candies for children, and shirts for my sons, husband and grandfathers on February 23rd. But my favorite way of packaging is New Year’s using craft paper.
Write in the comments - which method did you like? Or maybe there is a favorite of yours, but not included in today’s article?
Tips and tricks for covering boxes with paper
- How to cover a box with colored paper if there is no other paper? These sheets can be used to decorate cardboard packaging in two ways: as usual or using the decoupage technique.
- To cover a box with wallpaper, use special wallpaper glue. This way you will be sure that the paper will not move away from the walls over time.
- How to cover a box with gift paper or corrugated paper? Such leaves are very thin, and tearing them, as is the case with mulberries, is not recommended. This decor does not look very nice and neat. In this case, it is better to take thin double-sided tape and stick it around the entire perimeter of the box. Then the protective layer is removed from it, on which the paper is applied. This way the entire box is gradually covered.
- How to properly cover a box with paper so that it does not delaminate? To do this, you need to select the appropriate glue and carefully glue the sheets to the surface. Then the craft must be dried well.
What is the background for?
An aquarium background is an attractive decorative element that can be purchased at any aquarium store.
It performs several important functions:
- The wall behind the aquarium, which “interrupts” the seascape, is hidden from view. When “diamonds” and “stripes” are visible through the water column, the reservoir looks unnatural.
- Hides electrical wires, sockets, parts of equipment that are located behind the aquarium.
- A correctly selected panorama creates a sense of perspective inside the water tank, visually expanding the space.
- Absorbs light glare, thanks to which the inhabitants of the reservoir feel in an environment close to natural conditions.
- A beautiful background makes the aquarium landscape rich and rich, without taking away space from the fish.
All these functions will work if the background is in harmony with the aquatic environment, and its execution is neat and durable. It is advisable to stick to a marine theme, which depicts aquatic plants, corals and fish. If the aquarium is oversaturated with plants and other decor, it makes sense to choose a monochromatic option.
Decoupage spice box using printout method
For this method, it is better to use plywood blanks, since during the implantation process the cardboard base may delaminate. However, if you work very carefully, you can also decorate a shoe box with decoupage and implantation of a printout.
In addition to the technique given here for implanting a printout “with its face into the varnish,” there is another method: transferring the design to the product using a hot iron.
This technique may seem too complicated for beginner decoupage artists, but if you follow all the steps carefully, you will be pleased with the result.
Master class for beginners on decorating a box using the technique of implanting printouts:
- Sand the box with sandpaper.
- Apply a thin layer of primer, white acrylic paint or stain to its surface and let it dry.
- On top of the primer we apply several layers of acrylic paint of the main color. Let the boxes dry thoroughly. This step does not need to be completed if you used stain to decorate the box.
- We apply several layers of acrylic varnish or special adhesive varnish to the printed motif. We cover the places where the design will be implanted with a thin layer of the same composition and until it dries, we lower the varnished image with its face into the varnish. Leave this structure in this position until completely dry.
- The next day, generously moisten the printout with water and begin to roll all the paper off the product. When you think there is no more paper on the image, dry it with a hairdryer and you will see a white coating, you need to get rid of that too.
- When only a bright image remains on the product, fill in the missing details with acrylic paint.
- Open the box with several layers of varnish and leave it until completely dry.
Despite the apparent complexity of this technique, even a beginner can handle it, the main thing is to follow the described sequence of actions exactly.
