Many people like to use beautiful boxes in their interiors as storage systems for things. But it’s not always possible to find a basket that matches the color of the room’s design. Today I will show you how quickly and easily you can line a box with fabric with your own hands. This does not require special sewing skills; if you have a sewing machine at home, then you can easily repeat my master class.
I will be covering a box from Ikea with fabric. I like everything about it except the colors, which is why I can’t put it in my office. I'm also a meticulous person when it comes to design.
The main advantage of this fabric cover is that it will be removable, which means that when it gets dirty you can easily take it off and wash it. Secondly, it will be on an elastic band, so it will not slip, even if you constantly move the box
How to cover a box with fabric with your own hands in a step-by-step lesson
With a set of tools for such a simple task, everything is quite simple. Ruler, chalk or fabric marker, scissors. It is advisable to take scissors that are used to cut only fabric - then the cutting of parts will be quick and accurate.
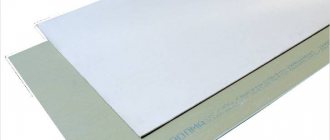
There shouldn’t be any difficulties with materials either. The best glue to use is Moment “Crystal” or “Gel”. This is a transparent, non-toxic glue that turns into rubber when hardened. It does not deform either the box or the fabric, does not leave stains, and the fixation is more than reliable. If the work involves thick cardboard - for example, a shoebox or similar goods, then it is quite possible to use PVA glue, but you need to apply a lot of it, and it will bleed through the fabric. After drying, this will not be visible, but the fabric will look as if it is starched.
The choice of fabric directly depends on the purpose of the box that you will decorate. The easiest and most accessible material to work with is denim. Of course, you also need to know how to handle stretch denim, but even stretchy material is much easier to work with than satin. Satin and similar fabrics are very beautiful materials, but they are very inconvenient to work with.
Another suitable material option is burlap. The combination of this material with jute, lace and other natural materials will allow you to create a very specific style, or simply a cozy atmosphere.
Application options.
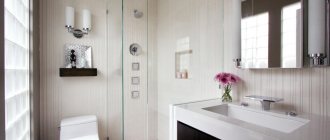
Where and in what capacity will boxes covered with fabric be appropriate and useful? First of all, in everyday life, for example, as organizers. Especially where a box covered with paper will not last long, for example, in the bathroom.
As an organizer for needlewomen who constantly deal with ribbons. Holes are made in the box covered with fabric and eyelets are inserted. The ends of the tapes are pulled out into the resulting holes, the reels with which lie inside the box. Thus, the necessary tape is always at hand, but the tapes themselves do not get tangled.
A box for storing memorabilia or jewelry - especially if it is covered with fabric not only on the outside, but also on the inside.
It is also better to cover an organizer for underwear, socks and small towels with fabric, since even dense and thick cardboard will quickly become unusable from constant use.
To summarize, we can safely say that the option of decorating a box with fabric is best suited in cases where the use of the box will be long and intensive. The fabric is less susceptible to moisture and sunlight, therefore, it will last longer.
It’s quite simple to cover a box with fabric, but it’s better to proceed step by step and be guided by the corresponding photos.
To work you will need:
- Box
- Ruler, fabric chalk or felt-tip pen, scissors, paper clips
- Glue
- Textile
First step. Cut out the fabrics. A box is placed in the center of the piece of material, the bottom is outlined along the contour. Use a ruler to measure the height of the walls of the box, and set aside the same distance along the fabric, plus 5 cm for the inner fold.
Second step. The bottom of the box is coated with glue and glued to the fabric. Carefully smooth the fabric from the center to the edges, but do not need to stretch it.
Third step. Draw a line from each corner, and another one after two centimeters - as in the photo.
Fourth step. Cut out the resulting outer square and make a cut along the diagonal line.
Fifth step. Fold the resulting allowances on the first side onto the adjacent sides of the box and glue them. On the next two sides, one edge is folded inward and glued, and the second is glued to the next side with an overlap. This distribution of fabric will give smooth and neat edges and corners. Working with each side, not only the corner allowances are sealed, but also those allowances that were left along the height of the box. For convenience, you can make cuts with scissors.
The last side is glued a little differently. The allowances are folded inward, and the side is covered with fabric flush with the corners. Ready!
The inside of the box can also be covered with fabric. This is done according to a similar principle as with the external part. A layout is drawn on the fabric - the bottom and walls, allowances for folding on the vertical sides, but the allowance for horizontal folding will be an order of magnitude smaller - after all, the upper edges are already decorated. The pattern is cut out, the same is done with the corners as with the pattern of the outer part. First, the fabric is glued to the bottom of the box, then one by one - the sides. The top allowances are folded inward and glued last. To secure the fabric there more tightly, you can use paper clips.
Second way
In the given master class, we will consider another possible option, how to beautifully cover a cardboard box with fabric.
For a rectangular box, cutting out the fabric is quite simple: measure the sides and add it to the sides and hem. Round and oval boxes are quite difficult to decorate.
We begin the work by gluing the bottom of the box. Apply double-sided tape evenly to the corners. At the same time, we grab both sides of the corner.
We place the box in the center of the fabric. At the same time, we take into account that you need to leave more fabric for the lid.
Read this: Do-it-yourself stained glass windows using stencils: painting and its history
Gradually fold the fabric on all sides. We make sure that the fabric fits very tightly. If necessary, add symmetrical folds. We grab the bottom of the box inside with a cloth. Carefully trim off excess material. We left a long strip of fabric on one side and glued the lid onto it. If necessary, use glue.
Let's start finishing the interior of the box. We cut out the parts according to the size of the lid and bottom. We glue the fabric.
Now you need to make a handle for the box. We pierce the box lid in two places and pull through the decorative cord.
Having practiced in this way in gluing simple-shaped boxes with fabric, you can begin to develop more complex shapes. The photo shows possible options.
Place in the interior
There are several ways to use textile-lined boxes. With their help, you can organize space in pantries and cabinets on the balcony. In this case, it is better to make all the drawers in the same style, covering them with the same fabric. The decor on them will be superfluous, but signs for inscriptions will not hurt.
“Room” boxes can be made in any way you like. If they are placed in a nursery, they will be decorated with bright fabric and beautiful appliqués. There is no need to waste time on trifles - for toys and books you need large boxes that can be placed directly on the floor. Smaller drawers look great on open shelving. In general purpose rooms, it is also better to install drawers on racks, choosing their size so that they do not protrude beyond the shelves. Boxes that will be used only as decoration can be placed one on top of the other, making them into kind of turrets. It is not necessary to achieve perfect symmetry of the drawers. They may differ from each other in height and even upholstery.
Knitted box
To make a decorative box for storing things with your own hands, you can use a flexible tube and cord. Crochet the craft with a large plastic or wooden hook.
View gallery
For those who know how to use a crochet hook at least at a basic level, completing such a craft will not be difficult. It will be enough to make the same movements with the crochet hook, threading it through the cast-on loops and pulling the cord through the resulting loop. This is an initial pattern for those just starting to learn crochet techniques. A plastic tube is formed inside the knitted fabric and holds the box in a standing position.
Video selection of materials on the topic
In the videos attached below you can watch how masters of their craft decorate boxes with fabric. By repeating them, you will achieve excellent results.
With a little fabric and glue, old but still good boxes can be turned into stylish little things.
Choose a fabric that matches the color scheme of your interior and you will have an elegant box for all sorts of things. You can make several boxes of different sizes using matching fabrics. Display them on shelves to add a fresh touch to your room's decor.
Square or rectangular boxes with lids will do, as long as they are durable. Choose thin or medium-thick fabrics - fabric that is too thick will drape poorly at the corners or bulge at the folds. If the fabric is thin, make sure that the images or writing on the boxes do not show through.
You will need: a square or rectangular box; Textile; Cardboard; Glue (preferably in aerosol); fabric glue.
Cut the outer side of the side: Measure the height of the box and add 5 cm to it. Measure the perimeter of the box from the outside and add 5 cm. Using the measurements obtained, cut out one piece from the fabric. Outside Bottom: Measure the length and width of the box bottom from the outside. Cut a rectangle from the fabric, reducing it on each side by 0.6 cm. Outer side of the lid: Measure the length and width of the lid, including the height of the sides inside and outside, add 4 cm to both measurements. Cut out a rectangle from fabric along them. Inner side: Measure the depth of the box and its perimeter from the inside. Add 2 cm to each measurement. Cut out a rectangle of the appropriate size. Inside Bottom: Measure the length and width of the bottom inside the box. Using these measurements, cut a piece of cardboard, retreating 0.6 cm inward on each side. Round the corners. Cut out a rectangle from fabric 5 cm longer and wider than the cardboard piece. Inner side of the lid: Measure the length and width of the lid inside without sides. Cut out a piece from the fabric, reducing its size by 0.6 cm on each side.
Manufacturing
Apply glue to the short side of the box. Attach it, centered in height, to the fabric part for the outer side of the sidewall, folding it along the edge 2 cm to the long side. Glue this side, and then the other sides one by one. On the last side, fold the cut of the fabric so that it does not reach the corner of the box a little, and glue it too. Fold the fabric protruding along the top edge of the box inside and glue it with fabric glue. Along the bottom edge, fold the excess fabric to the bottom, making neat diagonal folds in the corners, and glue. Apply spray adhesive from the inside to the fabric piece for the outside of the bottom. Glue it to the center of the outside bottom of the box. Apply glue to the inside of the box. Glue the inside of the side panel, stepping back slightly from the top edge and overlapping the edges at the corners. Make neat diagonal folds in the bottom corners where the fabric meets the bottom. Apply glue to one side of the cardboard bottom part, place it in the center (glue side down) from the wrong side on the fabric part for the inside of the bottom. Fold and glue the raised edges to the back of the cardboard, cutting the fabric at the corners. Place the cardboard into the box, fabric side up. Apply glue to the entire surface of the lid and center the fabric piece for its outer side. Glue the fabric to the border, smoothing it out and making neat folds at the corners. Fold the edges of the fabric over the inside edges of the lid and trim off the excess. Glue the corresponding piece of fabric to the inside of the lid to prevent wrinkles.
How to cover a box with fabric and create a new original storage box.
First glue the outer side of the box.
Then tape the outside of the bottom of the box
Then the inner surface of the walls of the box
Take the cardboard cut out for the bottom and cover it with fabric on one side
And finally tighten the lid of the box
Beautiful storage boxes: what can be made from
Agree, opening the closet doors, where everything is neatly laid out in beautiful drawers and boxes, we get aesthetic pleasure. But shelling out money for branded ready-made storage systems means significantly cutting the family budget.
How can you organize the storage of the necessary small things yourself, so that the boxes you make yourself will last long after they take up the space allotted to them on the shelf?
Waste material box
A thrifty housewife does not throw used milk bottles, containers of canned exotic fruits and seasonal vegetables into the trash.
All these seemingly unnecessary containers in skillful hands will turn over the evening into an original organizer, a jar for storing various small things that you cannot do without, containers for seeds, spices, ribbons, beads, threads, lace and more.
You can decorate storage boxes to your liking, using available materials.
Chargers: Convenient storage
Each cell of the small items storage system can be signed
Ordinary cardboard boxes can be turned into a practical item and decorative item
Storing jewelry in cardboard boxes
Storing the necessary small things in the nursery
What can storage boxes be made from?
- Tin can wrapped in textured rope, decorated with wooden ladybugs, beads, ribbons.
- A tin can with white acrylic primer applied to its surface and a design (to apply it, it is recommended to use acrylic paint and a stencil or decorate using the decoupage technique).
Organizers from unnecessary containers
How to make an organizer from a tin can
- Boxes with lids will be transformed beyond recognition if you decorate them using the decoupage technique. White primer is applied to the front sides of the box until a uniform white color is obtained. The top layer of decoupage napkins, cut or torn into pieces, is applied to the walls of the box until the surface is completely covered with the decoupage layer. Slightly diluted PVA glue is applied on top. For a more impressive look, after the decoupage layer has dried, the surface is treated with acrylic varnish.
Cardboard boxes are easily transformed into beautiful and useful things in the home
- It won’t be difficult for a needlewoman to make a compact textile shelf in an evening. This device will allow you to quickly put things in order in your closet, pantry, or nursery (the shelf can be hung on the wall and toys can be stored on it). To make the pattern more convenient to use, it is better to make it from thick cardboard. You also need to look in your bins for two rectangular pieces of fabric.
- We cut the fabric into squares and stitch around the perimeter, leaving a hole equal to one side of the square for turning it inside out. You will need to insert cardboard into this hole to give the shelf a square appearance. The remaining shelves are sewn together in the same way.
Fabric shelves
- Beautiful boxes are made from newspaper tubes. You just need to first twist a lot of tubes from ordinary newspapers and stain them with stain. To make the box, a weaving method is used with posts attached to the base (bottom). Between the racks (sometimes in front, sometimes behind) tubes are laid in dense layers. The finished box is coated with waterproof varnish in two layers.
The use of newspaper tubes in the manufacture of storage containers
By using one of the above options for making storage boxes, you will kill two birds with one stone: you will save the family budget from unnecessary expenses and forget about the clutter on the shelves and in the closet.
The advantages of making storage boxes yourself are obvious: you can use those materials that fit perfectly into the interior, or make real masterpieces that will be in harmony in style and color with the decor in the house. Glamorous and strict boxes, romantic and elegant, vintage and made in the “oriental style” - with your own hands you will breathe into old simple boxes, taking care of order and comfort.
Labeling storage boxes
Ideas for decorating storage boxes:
Felt storage containers
Storage box decorated with decoupage napkins
Using a cardboard box to store office supplies
Original design of storage boxes
Now you need to glue this part onto the lid
First, we put the main part on glue, put it under a press, and let it dry; then we bend the rays of the cross inside the lid, glue it, it can be secured from the inside with tape for strength. Next, we make a “pattern” for the box: mark it on the wallpaper, leave allowances, and cut it out. We start pasting from the “outer bottom”. We try to keep the inside edges of the wallpaper even.
After the glue has dried, carefully secure the outer corners of the box with transparent tape.
You can do without glue, use only tape - this significantly speeds up the process, but the wallpaper may begin to bubble. It is advisable to use glue for ceiling tiles - it does not deform the cardboard.
How to make a work of art from an ordinary hanger?
Tips and tricks for covering boxes with paper
- How to cover a box with colored paper if there is no other paper? These sheets can be used to decorate cardboard packaging in two ways: as usual or using the decoupage technique.
- To cover a box with wallpaper, use special wallpaper glue. This way you will be sure that the paper will not move away from the walls over time.
- How to cover a box with gift paper or corrugated paper? Such leaves are very thin, and tearing them, as is the case with mulberries, is not recommended. This decor does not look very nice and neat. In this case, it is better to take thin double-sided tape and stick it around the entire perimeter of the box. Then the protective layer is removed from it, on which the paper is applied. This way the entire box is gradually covered.
- How to properly cover a box with paper so that it does not delaminate? To do this, you need to select the appropriate glue and carefully glue the sheets to the surface. Then the craft must be dried well.
How to wallpaper a box, cover it and cover it with fabric and paper (master class)
Each of us loves a beautifully decorated interior. This commitment becomes especially in demand in cases where interior solutions affect the good mood and joy of our loved ones.
With the proper ingenuity, you can create any design options with your own hands.
This joy can also be caused by the gifts that we love to give each other. But how can you make sure that the gift is not just ordinary, but something unique and memorable for a long time?
There are several different solutions for this, and today we will talk about one of them: decorating the box using wallpaper, paper, fabric and other similar materials.
Covering a box with wallpaper or covering it beautifully with fabric is not as difficult as it might seem at first.
Let's look at a short master class that contains step-by-step instructions on how to do it yourself by decorating a cardboard shoe box both inside and outside.
If you do not have experience in such work, there is no need to despair and worry.
The scheme of work is quite simple, since it allows you to do the decoration yourself by completing the design according to the pattern.
As for choosing a gift box, it can be either with or without a lid: decoration does not depend on its shape. It can be square, rectangular and even round.
Working with paper and wallpaper
Before learning about the process of decorating a box with wallpaper, it is necessary to say a few words about what materials and tools will be necessary and may be needed when performing the work.
Box selection
It would seem that any toy storage box, shoe box, etc. can be suitable for decoration or decoupage. However, this is not entirely true, since an important criterion is not only the appropriate size, but also sufficient strength of the material. In addition, it is important to pay attention to how durable the lid is.
Remember! Packaging from small household appliances and various devices may also be quite suitable. As a rule, packaging containers are made of corrugated cardboard.
Corrugated cardboard (corrugated packaging) is durable packaging that is, in fact, free. The fact is that after purchasing the product you will no longer need it, except for those cases when it can be used for long-term storage or transportation of things, dishes, and so on. An example of such material would be packaging from:
- Electric kettle.
- Thermos.
- Shoes - sneakers, shoes, boots.
By the way, it would be advisable to pay attention to the fact that, despite the fairly strong material, the edges of the box itself may diverge somewhat. It is for this reason that it is advisable to additionally glue them. This will help avoid possible problems associated with deformation in the future.
What tools should you use?
Overall, you won't need many tools. All of them are the most common ones, widely used in everyday life. As a rule, we are talking about ordinary scissors, as well as a stationery knife.
At the same time, for greater convenience, you can use some additional devices, such as a ruler, a special clamp that will be used for fixation, and a set of brushes.
How to choose materials
In order to wrap the box, you can use small scraps of leftover wallpaper. In addition, the decor can be made with the following materials:
- Newspapers (this will look very stylish, including in some modern interior styles).
- Film (including self-adhesive) made from a variety of materials.
- Napkins, preferably thick ones.
- Paper, especially colored or intended specifically for gift decoration.
The composition of the wallpaper that will be used for decoration can be very different: vinyl, paper, non-woven and even fabric (textile). How to decorate a shoebox using fabric will be discussed below.
Different finishing options offer a lot of possibilities to create any design you like.
You can decorate in one style or another, using different patterns, colors and shades: red, brown, blue, yellow, grey, green, turquoise, beige and many other “representatives” of the color scheme.
When combined with original patterns and ornaments, they can produce truly beautiful results. No one will believe that you did all this with your own hands.
Advice! For the final finishing of your decorative “box,” you can use a protective clear varnish. Its role is to create a special layer that will clean the surface to be decorated in case of possible ingress of water and other liquids.
In addition to materials, you need to take care of the correct choice of glue. Selecting it is not so difficult: you can use the same adhesive compositions that are used when gluing ordinary wallpaper of one type or another, be it paper, vinyl or non-woven fabrics.
When working with paper coverings, time-tested PVA glue, which can be bought at almost any hardware store, will also work well.
Its favorable price and excellent characteristics speak in its favor, since it glues paper, cardboard and many other materials well.
Main stages of work
In the practice of home design and decor, there are several ways to cover a box with wallpaper. Some of them are quite complex. Therefore, as an instruction for beginners, it is advisable to focus on the simplest method. So, here is the sequence of necessary actions:
- First of all, we need to take the proper amount of material. Please note that a few extra centimeters will not hurt, so you need to take a certain margin (overlap). We straighten the wallpaper, leveling it on a table or other similar surface.
- Then, using a pencil, we mark out a pattern for decorating a shoe box or other product, depending on what exactly you are using.
- The next step: you need to carefully wrap the box (both its bottom and side parts) with paper, turning it inside and pressing it tightly. Thus, we prepare the wallpaper for gluing. We take them off and put them aside for now.
- Using a cutting tool, we get rid of unnecessary pieces.
- Now you can move on to pasting. We apply glue to the bottom of the box (from the outside, of course), and place it on the place outlined with a pencil. Press tightly. Using the same pattern, we glue the paper to the sides, and then to the inside (those areas that were folded.
- But that is not all. Everything inside also needs to be glued so that the overall appearance is attractive not only from the outside. Contrasting paper colors are perfect for interior lining. You can use checkered or velvet paper. By the way, some types of fabric are also suitable.
So, after the adhesive composition has completely dried, we can assume that our decorative gift box is ready. On the other hand, you can go even further and continue decorating it. We'll talk about this below.
How to make decoupage
In addition to simple pasting, we can also talk about such processing technology as decoupage. In order to complete it, it is necessary, first of all, to select a drawing that would act as a plot. As for the material, a fairly popular solution is to use two-layer paper wallpaper, which is also known as “duplex”.
However, the best solution in such matters is to watch a video tutorial on how to decorate using this method of decorating boxes. Therefore, we recommend that you familiarize yourself with a more detailed master class:
Great storage ideas
Simple and inconspicuous cardboard boxes for shoes, sets of dishes and small household appliances can be transformed into a masterpiece, you just need to use your imagination. The main criterion for selecting a suitable box is its sufficient density and strength. The shape also plays an important role - rectangular cardboard boxes are much more convenient.
Cardboard shoe boxes can be covered with gift paper
The most suitable option is to use shoe boxes. Depending on the size, they can be used to store a variety of things: jewelry, accessories, stationery, cosmetics, tools, children's toys, medicines, books, magazines, some food, industrial products, clothing, shoes, and much more. In addition to the main function - storage, decorated cardboard boxes will become an integral part of the interior, and, undoubtedly, a source of pride for the owner.
Selecting a base
Before you figure out how to cover a box with fabric, you need to choose the box itself. Not every one of them is suitable for this. It should be quite rigid and dense, made of good, high-quality cardboard. It is ideal to use shoe boxes for this purpose. Their walls are quite thin, but they are made from high-quality pressed cardboard, which does not deform even if it is accidentally crushed.
If you don’t have a box of the required size at home, you can go look for it at the nearest post office - they have containers of any caliber for sale. Store drawers in which food was stored can also be taken, but first you need to make sure that they are clean and dry, and that there are no oily stains on the cardboard. Even minimal contamination will lead to the fact that the craft will subsequently have an unpleasant odor, or even become completely covered with mold.
A round box covered with fabric looks even more impressive in the interior than a rectangular one. But buying such a base is much more difficult. You will probably have to make it yourself. Our article contains a small master class not only on how to cover a box with fabric, but also how to make it from thick corrugated cardboard.
Packaging box design requirements
- Correct color scheme. Many manufacturers believe that the main thing is more bright colors on the packaging. However, it is not. The packaging design should be made in two or three colors. An excellent solution would be to combine bright colors with calmer ones. Do not use contrasting or aggressive colors.
- A little creativity. Not much, because the main purpose of the packaging box is to inform the consumer about the product. You can add some unusual element in the design, use a non-standard font.
- History on the packaging box. How to win someone over? Tell him a story. The same thing happens with the buyer. For him to gain confidence in the product, it is enough to place on the packaging a mini-story about the creation of the brand or simply a wish for a good day. These methods perfectly lift your mood and, accordingly, increase the level of loyalty.
- Uniqueness of style. Rule one: the design of the packaging must correspond to the corporate style of the company. Rule two: the packaging style must be unique. It is the designer’s task to create a high-quality design without violating these rules. However, facts prove that manufacturers who adhere to their own special style in packaging design always win.
Sweater box
You can use not only pieces of fabric, but also things as upholstery for the box. Old sweaters are ideal for this purpose. The knitwear fits the box beautifully and also has a very interesting texture. It is only important to choose the right size clothes. If the sweater is smaller than the box, it will be too tight, and if it is larger, the fabric will wrinkle.
Before covering the box with fabric, you need to prepare it: cut off unnecessary parts from the item - collar and sleeves.
It is better to leave the bottom cut with an elastic band so that the knitwear does not unravel, and this way it will look neater. The inside of the box can be left as is, especially if the outer layer covers most of it. The edge is decorated with lace, braid or ribbon. Additionally, you can glue external handles to the box by choosing a cord to match the braid. They will become not so much a functional part of the box as a decorative one; you should not move the box with their help, especially if something heavy is stored in it.
Fleece or terry cloth basket
The most suitable material is polyester, as it does not deform, is resistant to dirt and fading, does not absorb moisture and dries quickly.
To understand how to sew a fabric basket, you should follow the procedure:
- A template is made from cardboard or linoleum; you also need to cut a slightly larger pattern from the fabric, with an allowance to secure the fabric.
- The fabric needs to be glued to a solid base, the edges are folded and glued in the same way.
- The desired shape is assembled, then you need to sew or glue the edges.
- Next, the basket is decorated with decorative materials.
We suggest you familiarize yourself with Insect bites in the apartment
Fabric baskets
Using the same technique, you can make a tube basket for laundry with your own hands from fabric.
Denim basket A basket made of yarn is increasingly gaining popularity in the modern world. It is not only beautiful, but also comfortable, and also quite soft. It is made in exactly the same way as a crocheted jute basket, except for thickening the threads and securing them. You need to tie the remaining threads together or glue them together. Since jute is much thicker than regular yarn, you need to take several strands of yarn for knitting.
To make such a basket, you can also use available materials - knitted ribbons from old T-shirts, strips of old towels, in theory, any fabric ribbons will do, the main thing is to choose the size of the hook.
Yarn basket
There are also options for creating themed baskets, for example, an Easter bag with a suitable design, or a Christmas trumpet with an imitation of a real trumpet.
Basket shapes
Easter bag More information! If you don’t like clear contours, you can fill the walls of the basket with foam rubber, this will give the product external and internal softness.
How to select the desired cart options:
The child should be able to easily put toys there and take them out. Also, if necessary, move the basket without much effort. You shouldn’t make one big basket and shove absolutely everything into it. Sorting toys by type or texture will develop attentiveness and intelligence in the child. You need to make several baskets of different sizes. Large - for large and soft toys, small - for small ones
For a basket with small and hard toys, it is worth softening the edges with foam rubber, otherwise the child risks injury from the edges. Do not forget that the design of the basket fits into the interior of the room. The most important thing to consider is the safety of the materials. Therefore, it is worth consulting with the seller when purchasing or independently studying the origin of the product.
Subtleties of choice Don't forget about decoration. A basket made of any material can be decorated with appliqués, pockets, lace, ruffles, ribbons, and so on. You need to build on the child’s preferences. Nowadays, there are a huge variety of products for decoration, it is worth taking this into account, selecting them harmoniously, by color, texture and size.
Decoration
At the moment, it is much more financially profitable to make such a device yourself. The simplest basket models cost about 700-1000 rubles, which is significantly more expensive than purchasing materials.*
Materials
So, if the task is how to make a basket with your own hands, then this article is an excellent guide to the steps and selection of materials. You need to approach the choice of idea responsibly so as not to waste materials and time. It is best to make such a basket together with your child, it will teach him order, develop hand motor skills, attentiveness, and also provide unforgettable pleasure.
*Prices are current as of August 2022.
There are other options for making accessories for storing toys. They can be made, for example, from fleece. Any other fabric will do. You will need a lot of material for the work, about 4 meters. Additional materials and tools you need are eyelets, a hammer for them, denim thread and 2 pins.
Let's start creating a basket for toys with our own hands:
- We cut the fabric into strips 15 cm wide and stretch them so that the edge turns inward, winding each strip into a separate ball for convenience.
- We secure the ends of the three strips with a pin and begin to weave a tight braid, sewing pieces of fabric to the ended edges.
- We fold the finished braid into a spiral, forming the bottom of the basket, and then sew it together with denim threads. We move from the center in a circle, collecting the edges.
- Having formed the bottom, it rises to the side, adjusting the bend of the braid manually, creating a smooth transition.
- By sewing the braid in height, we make a side panel. We hide the edges. We make handles separately.
- Using eyelets, we make holes for the handles, insert them, securing them with a knot. You can make a lid in exactly the same way.
Decoupage technique for decoration
Many people are in a hurry to throw out not only shoes, boots and other shoes that were taken down, but also the box from under them. But if you cover a shoebox with some material, it will change and become a beautiful thing.
It can be used as a box, a first aid kit, or a place to store various small items that can easily get lost. The master class will show you how to cover a product with paper using the decoupage technique:
Take your shoe item and remove any tape or stickers from it.- Choose two colors of paint and decorate the walls and lid of your product with it.
- Paint the sides black and the top white. Create a border on the lid using the same shade as the sides of the box. To do this, step back a couple of centimeters from the edge of the top and stick on a square of masking tape. Cover the indents with black.
- Next, remove the tape. As a result, you will have a frame for a white square in the center with smooth edges. Choose a suitable picture. It can be depicted on a napkin, plain paper, wallpaper and much more. Cut out the picture and put it in the water. Then remove the picture from the water, place it face down on a piece of oilcloth, and blot the top a couple of times with a simple or paper towel to remove any remaining water.
- Cover the product with regular glue or decoupage glue. Also apply glue to the lid where the product will be glued. Transfer the oilcloth with the pattern to the lid. To do this, simply turn the image over and straighten it with your fingers. Slowly remove the oilcloth. When the picture dries, the entire lid should be coated with a special varnish.
- So that the borders of the picture do not stand out too much, it is worth applying white paint to the edges of the picture and slowly smearing it with a large brush or sponge. To make the picture look harmonious, you can also add some touches with acrylic paint. When you are done with the background and image, coat the entire surface of the box lid with varnish. Decorate the walls as desired. Once everything is dry, the shoebox can be used.
Many more people decoupage a cardboard box with napkins, but it is much more complicated. Beginners should do an easy design. For example, a box made from a shoe box is easy to make, but it requires certain skills. If you want to decorate a product with film or fabric, remember that it is very difficult, and before doing so, you should read about the features of working with such materials.
Smart organizer idea
For a bathroom or toilet, not only comfort, but also hygiene is important. Combining beauty and purity is not easy. A step-by-step master class on making a stylish towel organizer will help you cope with this task.
Paint the base with acrylic paints in the desired color.
It is better to choose pastel shades - the design will look more delicate on them.
We cut out the elements we like from decoupage fabric and glue them to the jar. Instead of special fabric, you can use regular napkins.
Using special stencils for decoupage, we complete the missing elements.
We decorate the top of the tube with edging tape or fabric that matches the style.
Article on the topic: How to sew a hat for a newborn: a pattern with a description of cutting and sewing
We attach the finished cans to a pre-painted sheet of plywood or chipboard using small decorative nails, screws or liquid nails.
We fix the structure in the bathroom and lay out towels in it.
If there is no small child in the house, then preparing the required number of tin cans can be extremely problematic. Don't despair. No less elegant and stylish is a fabric towel holder for the wall. The idea for such a craft is shown in the photo.
As can be seen from the above examples, organizing order in the house may not be a tedious routine task, but a creative, exciting process. The main thing is to arm yourself with ingenuity, imagination and a good mood.
Let's get started
To work you will need:
- any box;
- textile;
- brush (preferably 2: wide for coating large parts with glue and small with dense bristles for corners and hard-to-reach places);
- PVA glue (must be thick enough);
- pencil;
- scissors;
- ruler;
- A3 sheet.
Before you start work, you should consider the design of the future interior box. The fabric should be chosen not too thick and not too thin, not translucent. It is better to give preference to natural materials: cotton, chintz, linen, silk.
It is important to remember that when gluing parts, all sections of the fabric must be closed, then the product will turn out neat and beautiful.
Decorating a box with fabric can be divided into two stages:
- Pasting the outer part of the product;
- Gluing the inside of the product.
First stage.
- First, the box needs to be strengthened by gluing all its parts well together. If the color of the box is dark and the fabric is light enough, then it would be a good idea to cover the box with white paper.
- Cut out the following paper and fabric parts:
- a strip of paper, the length of which will be equal to the sum of the lengths of all sides of the box, the height will be equal to the height of the box minus 1 mm;
- a fabric strip, the length of which will be equal to the length of the paper strip plus 4 cm, the height is also calculated - plus 4 cm to the height of the paper strip;
- fabric part for the bottom - add 4 cm to the dimensions of the length and height of the box itself.
- Cover the bottom from the outside of the box. Apply an even layer of glue with a brush to the entire outer surface of the bottom of the box, attach the fabric bottom element to it, smooth it from the center to the edge so that wrinkles do not form. Then glue the folds to the walls of the box.
- Prepare the part for gluing the outer walls. Apply glue over the entire surface of the paper strip with a brush and glue it in the center of the fabric strip on the wrong side. Fold and glue one of the free long pieces of the fabric part to the paper first, and then glue one of the short sections, carefully folding the corner. The part is ready.
- Cover the outer walls of the box with the finished part.
- You should start gluing this strip from an uncovered short piece of fabric, and the folded and glued long section will be adjacent to the bottom of the box. Next, glue the folds, having previously made vertical cuts on them in the corners, not reaching the box a couple of millimeters.
The first stage is completed.
Second phase.
- Prepare and cut out paper and fabric parts. Paper bottom, paper strip, fabric bottom, fabric strip. Calculate dimensions.
Paper bottom = bottom length and width – 2 mm. from each side. Calculate the size of the paper strip, taking into account the length and height of the walls. Length = the sum of the lengths of all the inner walls of the box - 8 mm. Height = height of the box wall inside – 2 mm. Fabric bottom length = paper strip length + 4 cm Fabric bottom width = paper strip width + 4 cm Fabric strip height = paper strip height + 4 cm Fabric strip length = paper strip length + 4 cm
- Glue the bottom. To do this, apply an even amount of glue over the entire surface of the paper bottom and glue it to the wrong side of the fabric bottom in the center. After this, trim all the fabric corners on the bias, not reaching a couple of millimeters to the paper. Glue the bottom into the box and carefully glue the side folds.
- Glue the inner walls. Apply an even amount of glue over the entire surface of the paper strip and glue it to the wrong side of the fabric strip in the center. Then fold and glue to the paper first two long fabric sides, and then one short one. Leave the second short cut untreated. Glue the resulting part to the inner walls of the box.
- The result was an excellent designer box, decorated with fabric. It must be dried for at least a day. It is best to dry it as shown in the photo below.
As decorations for such boxes, you can use beautiful beads and buttons, interesting embroidery, regular rope or braid, or lace.
Types of decorative paper for decorating boxes
The disadvantage of this type of raw material is its fragility. It is possible to create a beautiful floral decor from such paper fabric. The gift can be carefully wrapped in light brown material, and decorations made of natural or artificial flowers are placed in the middle.
- Corrugated paper is distinguished by its plasticity and unusual texture.
- Thanks to the volumetric base, it is possible to create convex elements.
- For example, you can create beautiful details from corrugated fabric.
Gift paper is distinguished by its availability and different designs. A smooth coating combined with an unusual ornament can emphasize refined taste.
When choosing a consumable, you need to consider its width and density. In combination with a bright braid, the gift will sparkle with new colors.
Option #1
Decorating boxes with fabric is a wonderful way to create original things from completely simple items. Let's look at step-by-step instructions for one of the possible options.
Please note that we will need a sewing machine for this work.
We take a box and two pieces of fabric: for interior and exterior decoration.
Cut the sides of the box. We get a pattern for the fabric.
On the outer fabric we trace the cut box and cut it out with a small allowance. We repeat the operation with the inner tissue.
We sew the corners of the main fabric and try them on the box.
We make the lining. We leave a larger allowance to form the drawstring and insert the elastic.
We collect the box. We glue the sides with adhesive tape.
Place the box in the case and glue it with a glue gun.
We insert the lining inside, securing it with glue. The edge with the elastic should be outward.
We customize the exterior design to our own taste. As a result, we got a wonderful box for the closet.
Decor
The decor of finished products should be based on the following basic principles:
- the style of the room for which the box is intended;
- purpose of the box;
- container manufacturing material.
Decor helps complete the box design and increases its appeal. A variety of materials can be used for decoration - cardboard, ribbons, fabric, beads, etc.
Simple budget options for decorating cardboard boxes - in the video:
Chic design of a craft box literally “out of nothing” - in the video:
Even wallpaper will come in handy
Wallpaper is great for decorating shoe boxes with your own hands, the remains of which can be found in every home. To cover a box with vinyl or non-woven wallpaper, you will need wallpaper glue, and if the selected wallpaper is paper, then PVA glue will do. First of all, you need to measure a piece of wallpaper of a suitable size, taking into account the margin for overlap, and attach the box itself to it.
Use a pencil to trace the outline of the bottom, then fold the wallpaper from the parallel sides of the box, pressing it tightly against the walls, and smooth the folds with your fingers. Unfold and do the same on other sides. After trying on, you need to cut off the excess pieces and you can start gluing. First you need to coat the bottom, apply it to the pattern, then the sides, carefully pressing and straightening the canvas, and then inside.
In the same way, the boxes can be covered with fabric. In this case, it is good to use double-sided tape as an adhesive element, since the glue can saturate the fabric, leaving streaks on it.
Before learning about the process of decorating a box with wallpaper, it is necessary to say a few words about what materials and tools will be necessary and may be needed when performing the work.
Box selection
It would seem that any toy storage box, shoe box, etc. can be suitable for decoration or decoupage. However, this is not entirely true, since an important criterion is not only the appropriate size, but also sufficient strength of the material. In addition, it is important to pay attention to how durable the lid is.
Corrugated cardboard (corrugated packaging) is durable packaging that is, in fact, free. The fact is that after purchasing the product you will no longer need it, except for those cases when it can be used for long-term storage or transportation of things, dishes, and so on. An example of such material would be packaging from:
- Electric kettle.
- Thermos.
- Shoes - sneakers, shoes, boots.
By the way, it would be advisable to pay attention to the fact that, despite the fairly strong material, the edges of the box itself may diverge somewhat. It is for this reason that it is advisable to additionally glue them. This will help avoid possible problems associated with deformation in the future.
Overall, you won't need many tools. All of them are the most common ones, widely used in everyday life. As a rule, we are talking about ordinary scissors, as well as a stationery knife. At the same time, for greater convenience, you can use some additional devices, such as a ruler, a special clamp that will be used for fixation, and a set of brushes.
In order to wrap the box, you can use small scraps of leftover wallpaper. In addition, the decor can be made with the following materials:
- Newspapers (this will look very stylish, including in some modern interior styles).
- Film (including self-adhesive) made from a variety of materials.
- Napkins, preferably thick ones.
- Paper, especially colored or intended specifically for gift decoration.
The composition of the wallpaper that will be used for decoration can be very different: vinyl, paper, non-woven and even fabric (textile). How to decorate a shoebox using fabric will be discussed below.
Different finishing options offer a lot of possibilities to create any design you like. You can decorate in one style or another, using different patterns, colors and shades: red, brown, blue, yellow, grey, green, turquoise, beige and many other “representatives” of the color scheme.
What are plastic containers for?
Over time, a lot of little things accumulate in the house that need to be somehow systematized. These include:
- fasteners;
- tools;
- cosmetics;
- medicines;
- office;
- handicraft items;
- decorations and more.
When everything is scattered in different places, chaos reigns in the room. One of the universal options for cleaning up your home or car is plastic boxes.
They will help:
- Keep things from dust, moisture, insects.
- Find what you need quickly.
- Organize the space.
- Free up extra space.
- Decorate the interior.
When there are small children in a family, their safety is one of the problems for parents. It is convenient to put everything that poses a danger (small parts, cosmetics, medicines) into plastic boxes, close it with a strong lock and put it away higher.
We select materials
A box covered with fabric looks much better than paper. In addition, the fabric is much more practical, stronger and more durable. Here's what you need for this type of work:
- various boxes;
- fabric that will be used to cover the box. It is desirable that it be dense enough and not crumble. You will need at least two colors;
- glue and double-sided tape;
- glue gun;
- sharp scissors;
- awl;
- durable cord. The shade of the cord should either match or contrast with the fabric base.
From plastic bottles
Plastic bottles and plastic candy boxes, if beautifully decorated, will become a container for various things, decorating the living room or bedroom. They are suitable for beads, earrings, rings, buttons, rivets, beads, paper clips, as well as other costume jewelry and sewing items. In the kitchen, cereals, seeds, spices, dried vegetables are poured there, cutlery is placed there.
Five-liter bottles will make large boxes that are not afraid of moisture, so they can be used in damp rooms. The upper edge is decorated with fabric, knitted lace, the base is decorated with self-adhesive film and painted with spray paint. A cap is made from a piece of another similar bottle - it is attached to the base using a “zipper” sewn into the upper part. This design is suitable for styles:
- pop Art;
- industrial;
- loft;
- art-believe;
- modern
Finishing with paper
For work, you can take packaging from any object or thing. The main thing is that the size fits. If there is no box of the required size, then it can be adjusted to the required parameters. The container can be covered with old wallpaper, pages of a glossy magazine or large posters. Anything that has a presentable appearance and looks interesting will go into use.
To work you will need:
- scissors;
- roulette;
- stationery knife;
- wide brush;
- protractor;
- pencil;
- compass;
- ruler;
- clamps;
- liquid primer;
- PVA glue;
- furniture varnish.
As a rule, such tools and materials are found in every home. All family members can be involved in creativity. Children will find this process especially interesting.
Let's start a master class on finishing a box with paper:
- We glue the corners of the container with thick paper.
- We treat all external surfaces with liquid primer. This will make the cardboard more durable and increase its adhesion to the glue.
- We straighten the paper. We install the box on it.
- We mark on all sides of the cube. Leave room for folds.
- Cut out the workpiece. Press down the paper at the folds.
- Apply glue to the bottom of the container. We put it in the intended place. We wait until the glue sets.
- We glue the sides of the cladding to the box one by one. Pay attention to the joints of the fragments.
- Glue the folds to the inside of the package.
- We cover the inside of the box with velvet paper or bright fabric.
- We coat the paper with varnish. We are waiting for it to dry.
As an additional decoration, you can apply beads, ribbons, glitter or tinsel to the paper.
You learned how to cover a box with paper. Next, we offer a master class on finishing containers with various types of fabrics.
Each decoration method has its own nuances
Working with different materials always has its pros and cons (see table)
| Decoration method | Auxiliary tools and materials | Features of work | |
| Covering a box with paper products | scissors, pencil, ruler, brush, varnish, | PVA glue, stationery knife | make quickly and easily, materials are available |
| Covering with fabric, ribbons, etc. | marking soap, glue or double-sided tape | Rich appearance, good for making jewelry boxes | |
| Decoupage | acrylic paints, sandpaper, cut out designs, | painstaking work requiring skill and patience | |
| Painting with acrylic paints | paints, brushes, varnish, pencil, | sandpaper | the manufacturing process is delayed due to the need to wait until each layer of paint and varnish dries |
| Use of buttons, sequins, coins, rhinestones and similar materials | transparent glue-moment, paper or fabric for the base | the original appearance of the finished product, the work will require diligence, since gluing small parts will take a lot of time | |
The exciting process of turning a nondescript box into a work of art can be a very rewarding hobby for anyone. It’s better not to settle on just one, but to try different methods of decoration. This will require a lot of time and patience, but the end result is undoubtedly worth the effort.
Box decor: interesting ideas
Covering the box with fabric is only half the battle. The final result depends on what fabric is used to cover it and how beautifully the box is decorated. The style of the product is determined by the interior in which it will be placed. There are several universal solutions, for example, burlap boxes. This rough material goes well with delicate lace and ikebana made from dried flowers.
Another win-win option is boxes in a romantic style, made in an antique style. Lace, delicate flowers, pearls - it always looks beautiful and appropriate. You can also use jute rope to decorate the box rather than fabric. You need to wrap it around the walls of the box, treating them with glue. A cover made of rough fabric is inserted inside the box.
Holiday boxes
On the eve of the holidays, the next step to an unforgettable gift is original design. New Year's box decor is selected from fashion trends, but you can use traditional options that will always be relevant.
Inexpensive boxes can be purchased at confectionery stores. Full-length decorative shiny tape is glued to the lid. Cut out snowflakes are placed nearby and secured with a second decorative tape of a different color.
Those who appreciate a small amount of detail can choose this option. And you can add more elements.
Use a low-temperature glue gun to add decorative flowers, beads, sequins or paper tubes. All the beautiful little things can come in handy when decorating, the main thing is that they are combined with decorative tape.
Features of the decor of New Year's packaging
One of the special features is that when designing, the craftsman takes into account who the box is intended for. If these are children, then they choose images of cartoon characters and colorful pictures. For adults, a more strict, but at the same time festive design is used.
It also takes into account what year is coming, often an animal is depicted on the box, which symbolizes the coming period.
Large rectangular box for things or toys
Now let's move directly to the question of how to cover a box with fabric with your own hands:
- Having chosen a box that is suitable in shape and size, you need to prepare two pieces of fabric - for the inside and outside. It may be the same material, but the combined boxes look more beautiful. The size of the cuts is quite simple to calculate - their width is equal to the width of the bottom and two side heights plus 2.5-5 cm for the hem of the cut; cut length – bottom length plus two side heights plus 2.5-5 cm.
- Next, you need to decorate the corners of the fabric, cutting out square-shaped flaps from them, so that later you can beautifully lay the sides of the upholstery on top of each other. To do this, the box is installed in the center; using a long ruler, you need to continue the edge line of the box, drawing it to the edge of the material. From this strip, another 1-1.5 cm is set aside for allowances, then squares are cut out (photo 2).
- We begin to cover the box from the inside by inserting the inner upholstery piece into it. First you need to glue the bottom, then the long walls, placing their allowances on the adjacent edges of the box. The short walls are glued on top, with allowances hemmed. The upper sections of the fabric are folded outward and also stick well to the cardboard.
- The outer side is made in the same way as the inner one. To make the craft look neat, you should carefully iron the material to remove air bubbles from under it. This is convenient to do with a small spatula or ruler.
- The final touch is to decorate the edge of the box using an edge. It can be made from the same fabric as the entire box, or from a beautiful braid.
If the goal of the work is to create a box with a lid, then its upper element is made similarly to the lower one.