Wooden bases do not lose their popularity for a long time, but the material has a disadvantage - it is not resistant to many external factors, which requires the creation of a protective layer; people often want to preserve the natural grain of the wood. Varnish coating is regularly chosen for different types of wood products; although the process seems simple, it requires certain knowledge to obtain a durable and high-quality result. The types of varnish impregnations and operating rules will be discussed in detail below.
Why do you need to varnish wood?
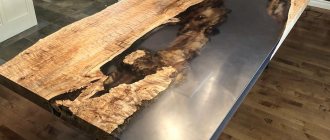
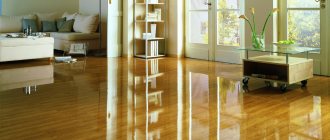
Before you varnish a wooden surface, you need to understand what problems the application of varnish material solves. The technique is used for a variety of objects: wall coverings, furniture, parquet, countertops, slabs and other wooden structures. Thanks to varnishing wood you can get the following advantages:
- Creating protection from external influences;
- After treatment with the material, the base will retain heat longer;
- The wooden base will remain with the same brightness of color and pattern texture longer;
- You can change the shade of the base to a suitable option if necessary.
The wood base will remain with the same color vibrancy and pattern texture longer.
Which varnish is best for applying to wood surfaces?
Varnishing of wooden surfaces can be carried out with a variety of compositions; a wide range of products is presented on the construction market. When choosing, it is important to consider the operating conditions in order to get a good result. And also you won’t have to redo all the work, for example, due to the appearance of bubbles on the base.
So we can distinguish the following types of varnishes that can be applied to wood; they differ in their constituent substances and technical characteristics:
- Oil-based, wood varnishing imparts a thick layer that has a yellow tint; most often the composition is chosen for processing products inside a building for floor and ceiling coverings, including in the case of brushing the material;
- Alkyd, distinguished by its resistance to moisture and mechanical stress. Therefore, it is used for painting surfaces outside the building, for yachts and ships. Can be used indoors, has no pungent odor, and can be cleaned with detergents after drying. A wet base stands out, which is why it is easy to notice areas that are left unpainted. After drying, the layer will be smooth and shiny;
- Nitrocellulose, creates a durable layer to get better protection, requires a multi-layer coating, withstands moisture, suitable for external work;
- Polyurethane, the composition includes polymer substances that make it possible to create a thin coating that still has strength properties. Typically selected for surfaces of musical instruments;
- Based on acrylic, after application the product remains a colorless layer; some varnishes can be tinted. The protection will be durable and harmless to health; a water base is often used. Designed for interior decoration; you can paint furniture, walls, and floors in residential areas without fear;
- Alcohol, synthetic and natural resins are introduced into alcohol, which creates a product with the property of creating a barrier against moisture; you can even limit yourself to a single-layer application. But they are not durable, so they are often chosen as a primer layer for wood.
When choosing, it is important to consider the operating conditions in order to get a good result.
What paint to paint furniture: recommendations for choosing
You can paint wooden furniture with any paints and enamels, but give preference to water-based paints, as they are environmentally friendly and quick and easy to work with.
Such paints can be tinted yourself using “artistic acrylic” paint and colorful pigments - liquid or powder. But you also always have the opportunity to choose any color you like from the catalog at a hardware store and get recommendations on the choice from a specialist.
You need to determine not only what paint to paint the furniture with, but also choose a good primer for painting. Often, modern wooden products and furniture are initially well sanded and do not require additional processing, so you can immediately start by priming the surface, after first removing the dust with a damp cloth.
The primer provides better adhesion of wood to the bleaching material, closes the pores of the wood and levels the surface of the product. This reduces paint consumption and increases the durability of the coating. The primer is applied in one or two layers.
You can use acrylic artistic primer. It is sold in specialized art stores or online stores in containers of various sizes. Manufacturers of wood paints offer their own primers. They can be purchased at the same time as paint in construction or specialty stores. This is very convenient when you need to paint a large volume of surfaces.
Wood varnishing methods that can be used
When deciding how to apply varnish to wood, they are guided by the size of the surface being treated, as well as the chosen design option. You can coat wood with varnish using a brush, roller or spray gun. Each tool has its pros and cons, so you should study these points carefully:
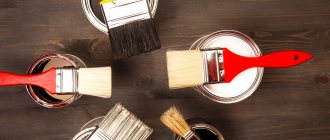
- Brushes. A popular option, it is easy to use and makes it possible to paint the base with a variety of colors and apply patterns, for example, when painting wooden utensils with gouache, which is secured with a layer of varnish. And also to paint all the elements on the object with high quality, convenient for processing hard-to-reach places. It is important to choose the right tool for the base: a flat brush is convenient for covering wood; a small round brush will help paint items with small details; if the objects are small, then they are simply completely immersed in varnish. But the bristles of the brush can remain on the surface, so they monitor the quality of their adhesion;
- The roller facilitates and shortens the process of painting large surfaces. Also convenient for applying varnish on high bases, due to the retractable long handle. For wood, you can choose a roller coat made of foam rubber and velor. But the tool can apply a varnish coating and not bubble only if a defoamer is present in the compound;
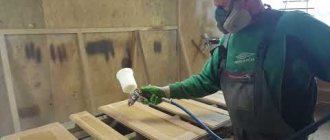
- The sprayer makes it possible to significantly reduce the time of varnishing the base. However, the cost of the tool is high, for this reason it is purchased more often by professionals who cover large areas and then the price is justified. Also, use requires the ability to correctly configure the device before operation.
To work with a spray gun, the master must use protective equipment - a mask, gloves, and good ventilation must be provided in the room. In most cases, such measures are necessary; many varnishes contain toxic substances.
The roller facilitates and shortens the process of painting large surfaces.
Primer
It is necessary to prime wooden and veneered surfaces so that the varnish lays more evenly. When sanding, we opened most of the pores and released some of the fibers. If you immediately coat them with varnish, it will be absorbed unevenly, causing the surface to become stained. The primer closes most of the pores, so the varnish will lay more evenly.
Priming veneered furniture can be done in two ways. The first is quick, but accompanied by a strong odor. You need to take nitro varnish or polyurethane varnish, dilute it by 10-20% (depending on the initial thickness), and cover the surface.
A primer is necessary so that the varnish goes on more evenly.
The second method of priming is long, but correct and almost odorless. We take epoxy glue and a soft cloth swab. It’s better to use flannel, preferably white, so that it doesn’t fade or change the color of the furniture. Use this swab to rub the epoxy into the veneer.
While everything is drying, dust will definitely stick to the surface. It needs to be removed. This again can be done in two ways: scraping and grinding. If using a scraper, take a sharp blade (you can use a wallpaper knife) and use it to clean off all the excess. To avoid damaging the veneer, move the blade along the grain. With sanding everything is known: sandpaper with 320 grit and water. The prepared surface is cleaned of dust, washed with water, and dried. After drying, you can apply varnish.
In fact, further polishing of the furniture may not be necessary. Already at this stage the product looks decent.
Preparing the wood surface for varnishing
Before coating the wood with varnish, it is necessary to carefully prepare the material for work, then the layer will be beautiful and smooth, and no flaws will be visible. They start with preparing tools and materials. The wooden surface is cleaned; it is important to remove all previous coatings.
It will not be possible to restore wood in separate areas; full coverage is carried out.
The following equipment will be required:
- Brushes for hard-to-reach areas and rollers if the area is large;
- Sandpaper or sander to remove old coatings and level the base;
- Brush or vacuum cleaner to get rid of accumulated dust.
The following options are available for cleaning the surface from previous materials:
- Chemical, special chemicals are used;
- Mechanical, performed with sandpaper or a grinding device;
- Thermal, together with mechanical, after heating the surface, mechanical devices are used.
The wooden surface is cleaned; it is important to remove all previous coatings.
Tools and materials
See also
Round transformable sofa: review of models, photos in the interior
To carry out restoration work, you will first need to not only select a varnish, but also prepare some necessary materials and tools.
Of the main consumables you need to take:
- nail polish remover (solution);
- masking tape;
- tassels;
- sandpaper of different grain sizes;
- metal scraper;
- spatulas;
- wood putty;
- rags and brushes for cleaning dirt;
- soft sponges;
- cardboard or film to protect adjacent surfaces;
- regular solvent such as White Spirit.
All work is divided into several stages. This includes preparation, application and sanding.
Preparatory activities
At the first stage, you need to prepare all the materials and conveniently place the tools around you.
Before painting the furniture, it must be brought into appropriate condition. For this:
- the varnished surface is washed with a solution to remove varnish;
- then washed with plain warm water;
- peeled off areas of varnish are removed with a scraper;
- The surfaces are sanded with sandpaper until they become matte;
- dust is removed;
- the furniture is thoroughly dried.
This completes the preparation.
How to varnish wood at home, step-by-step instructions
Knowing how to properly varnish wood will help you carry out repairs at home without involving specialists, which will save money. In general, the process is simple, it just requires step-by-step adherence to the steps, then the result will be attractive and the protective layer will last a long time. After preparation, it is necessary to grind, apply a primer solution and proceed to varnishing.
Knowing how to properly varnish wood will help you carry out repairs at home without the involvement of specialists.
Grinding
Working with a new clean planed base will require the use of sandpaper or a sander attachment with a grit level of 80-100. If the surface has previously been coated with paints and varnishes, then to remove these layers you can choose the 40-60 grain size option.
If the base is large, and in principle, working with wood and removing previous materials from it is a labor-intensive process, so the manual method is undesirable, it is better to use mechanized devices, choosing the tape type.
Afterwards, the vibrating type of sander is selected; it is necessary to grind in the direction of the fibers of the material, then it will be possible to avoid the appearance of scratches that will be noticeable later.
Next, dust formations are removed, which will also disturb the beauty of the varnished wood and interfere with obtaining a high level of adhesion.
Sanding is required in the direction of the grain of the material.
Padding
Applying a primer solution to a wooden surface makes it possible to close small pores in the material, which reduces the consumption of varnish and also increases the protection of wood from external influences. You can choose a liquid wax substance sold in aerosols, or regular type primers.
Any type of primer solution must completely cover the base; when the layer dries, then the treatment is carried out with a fine-grained type of sandpaper. The application tool is usually a roller, or a brush for small parts.
Applying a primer solution to a wooden surface makes it possible to close small pores in the material, which reduces the consumption of varnish.
Varnishing
How to properly varnish wood depends on the application tool you choose. We talked above about choosing a tool; you can also add tampons to the list, which make it possible to unusually cover small surfaces. Features of working with different devices:
- The tampon is completely immersed in varnish so that it is thoroughly saturated. Test the application in advance to understand how hard to apply pressure to distribute the varnish. They move quickly along the growth of the fibers, each strip should go without connecting with the previous one, then the shade will be even. A multi-layer coating is made - 2-3 layers, each should dry well;
- You can cover any surface with a brush, it is important to make smooth movements to prevent bubbles from appearing. Periodically it is necessary to squeeze out excess varnish from the tool; the layer should be thin. A 2-3 layer application will be required, with each layer drying. The same technology is used when working with a roller; the roller is rolled in a special ditch;
- When varnishing, it is important to keep the spray gun at the same distance, adjust the flow of the product, and also regulate the pace of movement, which should be the same.
After drying the last layer, sand it and wipe the base from dust. And start polishing. For this stage you will need a specialized paste called polish, as well as tampons. Moving in a zigzag pattern with a swab soaked in paste, treat the surface, obtaining a smooth base and drying the layer. Re-polishing is done after 12 hours. To obtain a mirror-like shine of the base, three layers of polishing will be required.
You can cover any surface with a brush, it is important to make smooth movements to prevent bubbles from appearing.
We fix minor defects
No matter how carefully the furniture is handled, scuffs, scratches, stains and other minor defects occur during its use. In this case, the owners have a question about how to update the furniture with their own hands. There are many ways to restore varnish:
- When a polished surface loses its shine or small stains appear, you should use any wood care product that contains orange oil. For uniform application, use a spray bottle. Then rub the product evenly over the surface with a cotton rag.
- Another way to remove stains is to use a special touch-up marker, denatured alcohol and wax. First, the surface is degreased with a weak solution of dishwashing detergent. When the moisture dries, moisten the swab with alcohol and rub the stains. If the scratch is deep, the varnish will not restore its color. In this case, use a marker. To add shine, the surface is coated with wax and rubbed with a cloth.
- If small scratches form uneven surfaces, it is better to clean them with a nail file. It allows you to do the job more delicately compared to sandpaper.
- When the wood swells from moisture that has reached it, you need to mix salt with olive oil and rub the problem area. Leave the mixture on the damaged area for half an hour. Salt absorbs moisture, and olive will give elasticity to the fibers. After drying, the paste is removed, covered with wax and rubbed with polish.
- If furniture with chips is to be restored, use wood putty. It is better to choose the color on the spot by buying a light product and adding color to it. The chipped area and adjacent surface are covered. When the putty has dried, it is sanded with fine-grained sandpaper.
You can refresh the polish on old furniture using the following mixtures:
- 2 parts of turpentine, 2 parts of linseed oil, 1 part of vinegar are mixed and applied with a swab to defects or abrasions.
- 25 parts of turpentine, 15 parts of alcohol, 1 part of a 10% soap solution, 5 parts of drying oil, 4 parts of shellac and 45 parts of water are thoroughly mixed. Use the product cold. It is best to apply the mixture with a flannel cloth.
How many layers should I apply?
How many layers to make when varnishing wooden objects worries many novice craftsmen. In this matter, it is important to recommend the manufacturer of the selected varnish. You won’t be able to get by with a single-layer coating, otherwise the protection will not be reliable.
A three-layer application is standard; it is important to wait for each layer to dry completely so that there are no streaks or uneven spots. The first coat is usually considered a primer.
A three-layer application is standard; it is important to wait for each layer to dry completely so that there are no streaks or uneven spots.
Purpose
Furniture varnish is a film-forming composition intended for the treatment of wooden bases. It is designed to perform the following tasks:
- protect surfaces from mechanical influences;
- make wooden products glossy (shiny) or matte;
- emphasize the natural beauty of wood (especially valuable species);
- create an impenetrable barrier to moisture, which can cause the wood to dry out or swell;
- protect from biological influences (fungus or harmful insects);
- increase the service life of expensive wooden furniture.
Varnishes for wooden furniture can be slightly tinted by adding pigment, or a transparent version can be used. They must be applied in several layers to ensure reliable protection.
How long does it take to dry
When the layer has been applied, sanding is carried out, but sandpaper can only be used on a dry base. The drying period depends on the brand of varnish and is determined by the ingredients used; this information is indicated on the packaging.
The drying period depends on the brand of varnish and is determined by the constituent substances that were used.
Aerosols
An aerosol varnish composition can be applied to a cleaned and primed surface. Using a spray speeds up the varnishing process, but you need to practice on a test surface first, especially if you need to apply craquelure varnish. The spray must be applied following the following recommendations:
- Shake the can vigorously several times;
- during processing, keep it at a distance of approximately 20-30 centimeters from the base, apply first in horizontal, wide stripes;
- if drips appear, then you need to move the can away from the surface;
- after applying the first layer, you must wait about 48 hours (this time may vary, depending on the composition of the spray; the drying time will be indicated on the packaging);
- after drying, the first layer is treated with fine-grained sandpaper, after which the dust is removed using a napkin;
- a second layer of varnish is applied, which must also dry, and, if necessary, the furniture is treated with a third layer.
There is no need to purchase cheap, low-quality varnish, which will not last long, and the furniture will soon lose its attractiveness. If children's furniture sets are to be processed, it is important to purchase a high-quality and environmentally friendly product, without chemical solvents and additives.
Source: nakrasku.ru
Typical mistakes in varnishing wood
When working with your own hands, it is easy to make mistakes, so it is advisable to study the typical ones in advance. Experts highlight the following points:
- Poor drying of the layer, usually due to a violation of the temperature regime, or when the product was chosen incorrectly. For two-component varnishes, this result is explained by the addition of an insufficient amount of hardener;
- If white stains remain, then the humidity in the room was increased, which caused a similar effect;
- The appearance of bubbles and swelling of the layer is due to improper distribution of the varnish over the wooden surface;
- Uneven coverage and uneven shade. The result is associated with the lack of skills of the master. If the varnish is quick-drying, then you may not have time to apply the layer on time.
Uneven coverage and uneven shade. The result is associated with the lack of skills of the master.
Varnishing wood helps create an attractive shade, as well as a barrier from negative factors and preserve the natural pattern of the material. You need to choose the right varnish that suits the working conditions. The technology of the process includes nuances, ignorance of which can lead to negative consequences; careful reading of the article will help to avoid mistakes.
What is moisture-resistant varnish. Do I need to pay extra for it?
Moisture-resistant wood varnish does not allow moisture to pass through and does not release it back, as a result of which water does not accumulate under the film and does not destroy the paint layer. However, moisture-resistant varnish is more expensive, so it is advisable to use it in conditions with high humidity - a street where rain and snow have a detrimental effect on wood, a bathroom, a kitchen, a sauna. If the room is dry, there is no point in overpaying for moisture resistance.
Main varieties depending on the effect
Furniture varnish for wood is classified according to a number of characteristics. The first of these is the effect imparted to the treated surface. According to this criterion, glossy, matte, colored and transparent varieties of material can be distinguished.
A feature of a glossy or semi-gloss finish is its special shine and highlighting of the wood structure. This finish lasts a very long time, but does not mask flaws in the base well. Recommended for use in gloomy, shaded rooms to optimize the atmosphere.
If the purpose of finishing is to create an emphasis on the naturalness of wooden furniture, it is recommended to use matte or semi-matte varnish. Before varnishing, the base must be thoroughly sanded. This type of finish hides surface defects well and is easy to maintain.
The most common type of varnish for wooden furniture is a transparent substance. Most often it is used for processing valuable wood species (protection from moisture and other harmful influences).
The colored composition is used for varnishing inexpensive types of wood (pine, linden, birch), helping to increase the contrast of their structure. An excellent option for those cases when it is necessary to update furniture by creating a protective film on its surface. Colored varnishes are available for sale in a wide range of colors, so there are usually no problems with choosing the appropriate shade.
Craquelure varnish helps to simulate decorative aging with the appearance of cracks. Furniture items with a craquelure effect look best in retro and Provence interior styles.
Before you start
In most cases, oil-based varnishes dry slowly, creating a sticky surface on which dust settles. When it gets cold, the drying time is delayed several times, so in the room where the finishing , the temperature should be maintained at least +20°C. The surrounding air must be clean, so it is better to do finishing away from a dusty workshop (if possible).
Wipe the floor with a damp cloth, lay down paper and remove dust from the product using a vacuum cleaner, a sticky swab or a cloth moistened with white spirit. When working with any solvents, wear suitable gloves and ensure the work area is well ventilated.
Choose high-quality natural bristle brushes with split tips that increase the number of contact points, allowing you to apply polish more evenly. When looking at the brush from the side, its tip should look pointed.
You need to have a clear view of what you are doing. Is it possible to apply acrylic varnish over gouache? Place a bright light source nearby at a slight angle to the surface. First, apply two or three coats of gloss varnish. For the final coat, select a varnish of the desired gloss level, glossy or matte.
By following this rule, you will be able to avoid the clouding characteristic of a multilayer film of matte varnish.
If you're applying varnish in normal studio lighting, it's easy to miss an area or miss a puddle. Correct the situation by placing a lamp nearby and pointing it in your direction. Light reflected by a wet surface will reveal all streaks, dust particles and other defects.
Place a lamp nearby and point it in your direction
Aerosol-type compositions
As a rule, furniture varnishes require additional dilution before use. To facilitate the work of paint and varnish manufacturers, a special line of materials in the form of a spray has been developed. The substance is poured into sealed cans under factory conditions, from where it is subsequently sprayed by aerosol. This saves time on preparing the composition and money on purchasing the necessary tools (brushes, rollers).
Furniture varnish in cans is characterized by very economical consumption. In this case, the layer turns out to be uniform, without gaps or smudges. Spray varnishes usually dry much faster than conventional canned materials. The aerosol is well suited for varnishing both straight and hard-to-reach areas of wood furniture. Similar packaging can be found at any point of sale of building materials. Such compositions are especially convenient for restoration work on antique furniture (carved tables, chairs, chests of drawers).
