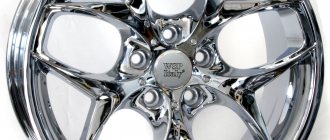
Painting headlight reflectors is a responsible undertaking. The main thing is not beauty and protection of the reflector body from destruction. We are talking about high-quality lighting of the highway during a trip. And this is an element of road safety. The reason for the destruction of the coating may be temperature changes or air penetration into the cavity of the headlight. Bright light is also a destructive force, because it represents a stream of photons. Heating occurs inside the headlight, which affects the surface of the reflector. The destruction is accelerated by the light of more powerful lamps, which are installed by the owners themselves in order to add brightness.
Materials
Many car enthusiasts have a question: “How to paint a headlight reflector?” This job involves removing a headlight from a car. This process is not easy, it requires little skills and abilities. After all, electrical wires are connected to the headlight. It happens that the difficulty of disassembling a lighting device discourages this undertaking. This operation requires certain consumables, devices and tools:
- Paint (alkyd or acrylic), varnish. They will be needed specifically for painting.
- Construction hairdryer. It will help separate the glass and the headlight.
- Primer for plastic.
- Utility knife, screwdriver, degreaser, tape for painting purposes.
- Several types of sandpaper for surface preparation.
- Sealant. It will help connect the updated device.
Reflector paint is a separate issue. You will need a coloring agent that can hold powerful heat: up to 125 degrees. Chrome heat-resistant paint is sold in many specialized stores. It easily resists heat up to 320 degrees. An acceptable solution is acrylic or alkyd paint with a high heat resistance threshold. When you have doubts about what to paint, then use a specialized dye for the headlight reflector. It costs more, but its consumption will leave no chance for doubts and worries. The right to choose belongs to the car owner.
Types of chrome paints
The main types of chrome paints: one-component and two-component paints. The basis of both is metal powder. These types of paints and varnishes differ in composition, properties and application technique.
One-component compositions
One-component formulations are available in cans. The metal particles in them are combined with alkyd or nitrocellulose varnish. The spray can is convenient for those who want to paint small objects silver at home and do not strive to achieve a perfect mirror shine. At the same time, the dye dries quickly and is durable.
Two-component paints
Two-component formulations are available in cans. The kit includes acrylic or epoxy hardener. Such coatings are more resistant to moisture, ultraviolet radiation, and chemicals. They not only make the surface silver, but give it a pronounced mirror shine.
Variety of colors
To change the silver tint or achieve original effects, manufacturers add dyes to chrome paint.
Unusual Effects
Thermochromic effect is a change in paint color under the influence of temperature. The effect can be reversible or one-time. This “chameleon paint” is not widespread in everyday life; it is more often used in industrial settings.
Black chrome
Silver metal powder in the paint is mixed with black dye. This paint and varnish material gives objects a mirror-like black shine. It is often used to decorate individual elements of a car.
Colored chrome plating
A popular color paint option with a chrome plating effect is gold. To make it, yellow metal powder is used. Such coloring compositions are often used for painting interior items.
Progress of the procedure
Work begins with dismantling the headlight. For this process, the most important thing is to know the structure of the lighting fixture. Assembling and disassembling is much more difficult and complex than painting. As for electricians, first disconnect the negative terminals. The front bumper may need to be removed. Then loosen the retaining clip and disconnect the wiring harnesses from the headlight unit. The next step is removing the casing. It is advisable to write down the entire sequence - it will not be superfluous.
The headlight glass is protected with masking tape, and then the glass itself is disconnected. It may be sealed on. Then it is heated, a hair dryer will help with this. Using a knife, carefully remove the glass from the base. It's bad when it's connected with glue. Then the glass will need to be cut with a utility knife. The reflector is removed and the next stage of work begins.
The surface of the reflector that needs to be painted is subjected to a sanding procedure. For this you need sandpaper. You will need to remove the entire layer of chrome. The entire surface must be cleaned and wiped with a degreaser. Do not use solvent. Then primer for plastic is applied. This is followed by a gentle sanding procedure until the surface is smooth and perfect. The cleaning and degreaser treatment is repeated.
The painting process takes place in two steps. First paint the base layer, and then the main one. Between approaches you should take a pause to dry. The description for the specialized reflector paint contains information about this time. Painting headlights with varnish is done for a better effect. The varnish must be heat-resistant. After each layer has dried, the surface is wiped to remove dust, debris, and insects that may accidentally get there.
Assembling the headlight takes place in stages, in the reverse order. Diffusers and reflectors are installed in their place. The glass is “set on a sealant”, which needs time to harden. The installed updated headlight looks better. And lighting at night will be more effective.
Briefly about chrome paint
Chrome paint includes microscopic metal particles that give the painted object a mirror shine, allowing you to imitate a silver chrome coating on a variety of textures (wood, metal, plastic). The paint is sold both in regular cans and in aerosol cans. If you follow the application technology, you can get a perfectly smooth mirror surface in the color of silver metal.
Composition characteristics
Chromium effect dyes vary in composition.
The component that unites all the compositions is metal ground into powder (for example, aluminum gives a silvery tint). The base is added to it:
- alkyd;
- acrylic;
- resinous;
- nitrocellulose.
When dry, the base becomes transparent. Metal microparticles are evenly distributed over the surface, giving it a silvery tint and a mirror shine.
Application
Modern compositions of chrome dyes make it possible to paint a wide variety of materials, which has significantly expanded the range of applications of this paint and varnish.
However, most often mirror chrome paint is used for painting metal objects. This allows you to protect the metal from:
- exposure to ultraviolet radiation and overheating;
- corrosion;
- exposure to moisture.
In addition, silver chrome dyes dry quickly and are non-toxic, which is why they are often used as metal paint - for painting radiators and home heating pipes.
Painting the lighting fixture mask
The fashionable word tuning involves painting the reflector masks black. Naturally, the paint should not get on the reflector itself. Painting of headlight masks follows the same principles. The dye must withstand heating of 300-400 degrees. You will need black sealant and masking tape. After washing, it is advisable to apply a primer. The paint is applied in thin layers in 2-3 passes. Unpainted areas are sealed. The room must be warm, clean and ventilated. This procedure does not affect the quality of lighting and is carried out solely for aesthetic reasons.
Staining order
To paint a reflector with chrome paint, first turn off the power to your car by disconnecting the “+” terminal from the battery. After that, get to work, namely:
- after removing the glass by heating it with a hairdryer, wrap it with tape to prevent scratching;
- Remove the reflector and sand it first with coarse sandpaper. This will remove its entire mirror surface;
- degrease the polished reflector and apply a primer coat to it;
- After the primer has dried (up to half an hour), apply a second layer. This will ensure perfect surface leveling;
- after the second layer has dried, treat the surface with fine-grained (grain size P400-P600) sandpaper, and then degrease;
- Apply 2 coats of chrome paint. Let the first layer dry for 20-30 minutes, and the second for up to an hour.
Painting car headlight reflectors
The painted reflector should dry at a temperature of +20 to +35 degrees (it all depends on the manufacturer’s recommendations).
The substance to ensure its shine often contains aluminum powder. Therefore, it needs to be shaken frequently during use. It is not required to dilute it with a solvent, like many other types of paints. Can be applied using a spray gun. If desired, dyes are added to the chrome paint to provide a chrome effect in different colors. After application, some car enthusiasts coat it with varnish. However, this is not necessary, since if the headlights are sealed, they will not be exposed to moisture.
Read also: Brands of left-hand drive cars
other methods
An interesting method is spraying reflectors. To do this you will need to buy a can of white chrome. First, the reflector is washed and degreased. The paint is applied in a thin layer. After a few hours, the paint will dry and the headlight can be assembled. You can try the method of gluing the surface with metallized tape. The reflector is washed and degreased. Then they cover the surface with it. The final job is to coat the outside of the corrugated part with chrome. Using a similar method, you can glue the reflector with foil or mirror film.
Optics assembly
Once the painting is complete and the surface has dried, begin assembling the optics system. You will need:
- install the diffuser, reflector and light bulb in their places;
- To secure the headlight glass, cover it with sealant (after removing the glass, before painting, it is important to wash the surface to remove any remaining sealant). Apply the material around the perimeter in those places where the glass comes into contact with the surface of the car. It is important not to interrupt the strip of material. However, do not overdo it with the thickness of the strip - if it exceeds 3 mm, the sealant will simply spread inside the headlight, and it can only be removed by performing the operation again;
- After gluing the glass, secure it with tape. The process of polymerization of the substance takes a long time - about 24 hours at room temperature.
So, due to the bummer and impossibility of installing BOSCH lenses in the headlights, I began to look for options for restoring standard VALEO OLD lenses.
The first and most correct option is to give the lenses for restoration using the galvanic method. I found such a place, called and was immediately shocked by the conditions; they told me the price was 2,500 rubles for one lens and a period of 1 week.
I began to consider other possible options.
There are several other methods, vacuum deposition, some kind of chemical painting, which is not friendly to high temperatures, people also post photo reports about pasting reflectors with metallized ORACAL film, it is impossible to paste a lens of a complex shape evenly with such a film, so people glue it in pieces, there are rumors, that after this their headlights shine normally and do not even become unusable for a long time.
I decided to test an unknown technology for painting lens reflectors using chrome effect paint.
Here is a video that inspired me to take this option
Thermo-chrome varnish is also on sale, which after application is processed with a gas burner to obtain a mirror effect (fun process :-))
But this varnish, unfortunately, does not withstand further heating above 80 degrees, and is not suitable for my purposes (I read somewhere that a xenon lamp, when burning, gives a temperature of about 300-400 degrees)
Read also: Toyota Mark 2 1993
In the end, I settled on chrome effect paint; the manufacturer claims a temperature threshold of 300 degrees.
The technology for applying this paint involves several stages.
First, a black base is made; you can paint the black “base” as when painting cars. We dry it for 24 hours. Then you need to apply car varnish to the black base (the seller uses some kind of ceramic varnish) and dry it completely (this is another 24 hours). The next stage is applying the silver paint itself. The paint contains aluminum powder, so it must be constantly “boosted” while working with it so that the powder does not settle down. The paint is sold ready for application and does not require dilution. The paint is applied with a spray gun with a nozzle of 1.2 to 1.7 mm; it is most convenient to use an airbrush gun to apply this paint. So the paint is applied in thin layers, the amount of paint in the torch is set on the gun to a minimum, the air to a maximum, and in such layers in several layers (no more than 6 are recommended) the paint is applied to the part, the number of layers is determined visually, depending on the specific part and what is desired effect. If you cover the black substrate with a semi-transparent layer, you get a coating with a black chrome effect. Dyes can also be added to the paint to achieve the effect of chrome in different colors. After applying the paint, it must also dry for 24 hours and then it can still be covered with varnish to protect it from mechanical damage. The paint itself is not very durable, it can be rubbed off with your finger if you use it too much now. But you don’t have to cover the paint with varnish if the part is not exposed to the external environment and water is not pouring onto it in streams. It is also written in the instructions that applying varnish over the chrome effect paint slightly conceals the mirror effect.
In the end, I fell for all this and decided to experiment.
Financial side
This process is not too complicated, it is easy to do it yourself. During a crisis, you have a lot of free time, and saving becomes the best investment. An additional bonus is new knowledge and skills! The cost of this work depends on the prestige of the car brand, the profitability of the service station, and the level of the technician. The price of work at home consists only of materials, consumables and electricity. But the downside is that you will be left with excess material, which may simply deteriorate over time (if you rarely do repairs and other similar things). The average price for one lighting device in a car service is $7. The cost of painting is always lower than the cost of a new reflector.
Advantages and disadvantages of spray cans
The advantages of spray cans are obvious:
- No long preparation required. Just shake the can for 1 minute and you can apply paint.
- No additional tools required (brushes, spray gun, etc.).
- Hard-to-reach places and complex textures can be easily painted.
- The remaining paint can be used in the future - it will not dry out in the container.
- Many colors except silver.
But painting with spray cans also has its disadvantages:
- Before painting, the surface must be thoroughly cleaned to remove even the smallest particles of dust.
- Painting conditions must be observed: cleanliness, warmth and absence of drafts in the room.
- Not suitable for painting large areas.
- Applying the dye in an even layer can be difficult, especially for a beginner.
- The effect of mirror chrome plating is not always possible - more often the surface acquires only a silvery tint.
- The price of a can is higher than the price of a can of the same volume.
Review of popular manufacturers
Considering the variety of chrome aerosol paints on the market, when choosing paint, it is easy to make a mistake and buy low-quality ones.
As a result, in the best case, the painted object will acquire a faint silvery tint (there is no need to talk about a mirror shine); in the worst case, the dye will quickly peel off. The guaranteed effect of mirror chrome plating will only be achieved by using paintwork materials from well-known brands. Representatives of the inexpensive segment on the Russian market are: RUSH Power and Bosny CHROME. The dyes from these manufacturers are inexpensive and spray well. But they are fragile, and the painted surface barely resembles chrome-plated metal.
The Chrome Effect brand offers the optimal price-quality ratio. The silver coating obtained with its help is as close as possible to chrome-plated metal with a mirror finish.
Required tools and supplies
So, the decision has been made - we will paint. To do this, you need to prepare the following tools and materials:
- a set of open-end wrenches or wrenches with heads;
- screwdriver;
- industrial dryer;
- coarse and fine grit sandpaper;
- primer for plastic;
- chrome paint for reflector;
- mask paint;
- degreasing agent (it is not recommended to use solvent);
- sealant;
- construction knife with replaceable blades;
- hacksaw for metal;
- masking tape.
