Cooking method
1. Prepare a dry, clean container of suitable volume. It is preferable to use plastic containers, since metal ones are very difficult to clean after use.
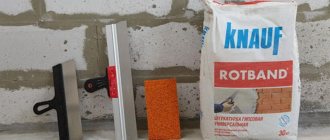
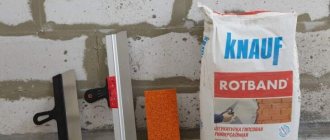
2. Take the Rotband plaster mixture and water in the quantitative ratio: 1 bag (30.0 kg) per 18 liters of water.
3. The dishes are filled with water and the plaster mixture is poured into it - 5-7 full trowels.
Attention! The water, tools and utensils used must be absolutely clean, since dirt particles will significantly reduce the setting time of the mixture. It will set before use or midway through the finishing process!
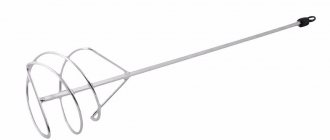
4. The composition is thoroughly mixed manually with a trowel or using an automated method (drill, mixer).
5. Add the remaining Rotband powder in the package to the solution and stir again until the lumps and clots completely disappear.
Important! If you leave lumps, even small ones, the dry matter in them will actively absorb water, which will lead to premature setting of the mass!
6. Let the solution sit for 3-4 minutes and repeat mixing again.
7. Upon completion of the last manipulation, the solution is ready for use. The mass must be used within 19–24 minutes immediately after preparation.
How to remove construction dust
The renovation is complete, but the apartment or house is covered with a layer of fine and ubiquitous dust. This image is familiar to many. How to remove construction dust? Let's say right away that you will have to clean it more than once. You will need a good spray bottle, a powerful vacuum cleaner, a bucket and lots and lots of rags. It is best to use a construction vacuum cleaner with a long hose and a telescopic nozzle. It is possible for families, but most likely it will not withstand such a load. Once cleaned, it may need to be thrown away as fine dust will clog the engine and burn it.
It's nice to have helpers
If you have a humidifier with an ionizer, you can use it instead of a spray gun. But it needs to be left in each room for a couple of hours. Too long if there are several toilets.
Cleaning the floor from dust
Close the windows/doors in the apartment, then you can start cleaning up construction dust. If the ventilation is working properly, you can cover it while cleaning. Let's say right away that you will have to repeat everything more than once; you will have to clean all the rooms, moving from one to another. The technique is as follows:
- We set the sprayer to the finest water powder and spray a certain amount higher in the air. The fog settles, trapping dust particles in the air. A wet crust forms on the floor. If there is a significant layer of dust on the floor, it is better to wait until it dries and vacuum it.
You need a good vacuum cleaner - We leave the room for at least an hour to let the water dry. We make sure that there are no drafts that can raise dust accumulated in the air.
- The vacuum cleaner is in the next room and we bring a hose with a nozzle into the room and collect the dust with a vacuum cleaner.
- We repeat the “event” until the air becomes relatively clean and there is a minimum of dust left on the floor.
Next you need to wash the floor. If the air was clean enough that the next vacuuming didn't blow dust devils into the air, you can't spray. We take a lot of water, a lot of rags. Clean the floor. The rag and water should be changed as often as possible. If possible, it is better to rinse the rag under running water every time. Of course, you run to the bathroom, but cleaning is more efficient this way. Don't try to wash it off completely just yet. The main task is to remove flying fines. It can only be removed with water and a cloth. If you have a cyclone washer vacuum cleaner (with a water tank through which air passes and the sucked dust settles in the water), you can adapt it. We cope with the task perfectly, quickly and efficiently.
We remove residues from walls, windows, doors
Then we clean the vacuum cleaner, wash the brush or put in a clean/new one. The second option is preferable. We remove dust from the ceiling and walls with a vacuum cleaner. You can walk several times. Then - the floor again, then - windows and doors. Don't forget to clean the top of the door. There's a lot of dust there. When the doors are closed, it is sprayed into the room.
You don't need expensive cleaning products to clean the floor after renovation.
Having removed dust from all vertical surfaces, clean the floor again, often wiping with a cloth. If there are white spots on the doors and windows, add vinegar or citric acid to the water. You can add a little dish soap. After treatment with this composition there should be fewer stains.
How to clean the floor after renovation
While you are simply washing the floor with water, it seems that the dust is simply smeared. White streaks remain on the floor. When the walls and ceiling have already been washed, you can try cleaning the floor better. You need to add to the water:
- A little vinegar. Regular food alcohol is 6-8%. Half a glass per bucket of water.
- Table salt. In a bucket of hot water about 1/3 cup or so. Stir until completely dissolved.
- A couple of tablespoons of vegetable oil.
Water with vinegar and/or salt is quite effective in combating white stains from construction dust.
To get rid of white stains on the floor, you can try all three remedies in turn. Every “additive”—salt and vinegar—works, but in some places it turns out to be more effective, in others. It depends on the composition of the powder (more precisely, on its source). For faster results, you can immediately use salt and vinegar. They don't interfere with each other. Vinegar has an unpleasant odor; it can be replaced with citric acid.
These simple home remedies will help you quickly remove dust from your floor after renovation and get rid of stains. In practice, as soon as the layer of dust on the floor has become very small, you can add salt and vinegar. There will be fewer streaks, but the water will need to be changed frequently. Finally, water with vegetable oil will help remove white deposits from the floor: linoleum, laminate, tile. It's so strange, but it works. Check it out. And the floor is non-greasy and non-slip. So, to wash the floor after renovation, you don’t need any miracle products that cost a lot of money.
Current recommendations
To ensure that the plaster solution turns out to be of high quality and there are no problems with its use, it is recommended to adhere to the following current tips:
— you cannot add water or powder concentrate to the prepared mixture during plastering work;
— leaving the solution “for later” is prohibited. It will quickly harden or begin to clump - both processes make the mass unsuitable for further use;
— it is necessary to follow safety precautions and precautions when using electrical appliances (mixer, hair dryer, drill) when working with plaster;
— you need to wear protective equipment: gloves, thick clothing, goggles, a respirator, appropriate shoes.
Good luck with your work and ideal results on plastered surfaces!
Expert advice
Adviсe:
- Before mixing the solution, it is necessary to prepare the surface. It is recommended to thoroughly wash the walls with water, dry them, then treat the surface with deep penetration primer to prevent the appearance of fungus and mold and increase the level of adhesion.
- The quality of work with dry mixtures is also affected by weather conditions. It is not recommended to plaster in hot weather, during bright sunshine (the plaster dries too quickly), or during rain (due to humidity, the plaster dries too slowly). Wind is also bad, as it can raise dust.
- For different layers (there can be 1, 2 or more) a solution of different consistency is needed. For example, for casting you need a thicker mass, so less water is added here. The base layer will be a little thinner. And the finishing coat is applied in a very thin layer, so it should be liquid, but not spread over the base.
The quality of the solution and the outcome of the finishing work depend on how correctly the composition for plastering walls is mixed. An incorrectly mixed solution will cause the dried layer to quickly become cracked or crumble. To prepare plaster with your own hands, craftsmen advise using universal calculations, but to prepare a ready-made store-bought mixture, it is best to follow the manufacturer’s instructions.
Procedure for diluting plaster
The purpose of plaster is to give the walls a smooth surface for subsequent finishing work. Plaster also acts as a protective coating for facade walls from atmospheric influences. A solution with a solid filler is poured onto the surface of the external walls and a surface in the form of a “fur coat” is obtained.
Indoors, plaster is used as a preliminary rough layer. Special dry mixtures are stirred with water to achieve the desired consistency. We will tell you how to mix gypsum plaster, as well as similar solutions, in this article.
How to breed rotband in small quantities
If you only need to dilute a small solution, be aware of HCV (see above). We measure the calculated volume of water (based on the proportion). For balance, we prepare the amount of CC that will be enough. The cooking process is similar to that described. The container can be taken in a smaller volume.
Example:
You need to plaster an area of 2 square meters, 1.5 cm thick. On the packaging (30 kg) we read that the yield of the finished product is 40 liters. Consumption of SS Rotband per square meter is 8.5 kg. This is with a layer thickness of 10 mm. Therefore, to cover 1.5 cm per square you need 8.5 x 1.5 = 12.75 kg, and for two squares - 25.5 kg. Including HCV: 25.5 x 0.64 = 16.32 liters of water (remember you need to add some reserve water).
There is a small nuance. The container must contain the required amount of solution. Taking into account the fact that the gypsum mass increases in size during mixing, the container is selected so that the poured water does not occupy more than half of the internal volume. Preferably a third party.
Alternatively (at a low cost) the gypsum plaster can also be thinned with half a rubber ball.
Main types of plaster
Different types of coatings are designed for plastering walls in certain conditions (exterior finishing of facades or covering walls indoors). We list the main types of dry mixtures:
- cement-sand;
- plaster;
- clay-sand;
- limestone;
- cement clay-lime.
Cement-sand
The walls are prepared with this mixture before finishing with the finishing coat.
This type of plaster is simple in composition. Finishing walls with such material can be called cementing surfaces. Cementation is mainly used to level out minor surface defects. This also helps strengthen the base for the finishing coating of the walls.
We prepare a cement-sand mixture simply: pour cement and sand into a container in a ratio of 1:3, add water. Using a mixer, shovel or other device, stir the solution until a homogeneous creamy mixture is obtained.
Plaster
The dry mixture is prepared from gypsum with the addition of various components. Each manufacturer creates its own powder composition. Mix gypsum plaster, strictly following the instructions.
Gypsum plaster is used to line interior walls. Small areas with complex surface topography are finished with plaster.
A little history
Until the 1960s, all gypsum solutions were mixed on site in proportions determined by the craftsmen “by eye” based on their experience. In addition, due to the properties of gypsum, the mixtures were prepared almost instantly, in very small batches, in order to have time to process them in a short time. This affected both the speed of work and its quality, since the mixture quickly lost its plasticity and was poorly distributed over the surface.
The situation changed after the invention of a substance that, when added to the gypsum mixture, slows down its setting. It was named Alenal after its inventor.
And in 1962, the Knauf company, at its production located in West Germany, began producing Rotband dry mixes, the consumption of which per batch increased significantly compared to the previous technology and it became easier to use a ready-made solution. The company's engineers have developed a precise recipe for mixing the mixture with precise proportions of dry matter and water, holding time and application.
Technology for mixing plaster mortar
Stir the mixture with a construction mixer
Mixing the plaster mortar is simple:
- Prepare the container for mixing. The volume of the dishes must correspond to the volume of one batch of solution. The inner surface of the container must be clean and free of any deposits.
- Dry ingredients are poured into the dishes. The entire poured volume is thoroughly mixed, removing solid inclusions.
- While mixing the mixture, water is gradually added to it.
- The process is interrupted for 10-15 minutes, and then stirring is continued until the solution is completely ready.
- To make sure that the solution is at normal thickness, place a 1 cm thick mixture on the trowel. The solution should not flow down and not be too dense.
The dry mixture should be poured with warm water at a temperature of 20-250C. This is especially true for working outdoors at low above-zero air temperatures.
Tools needed for mixing plaster
First of all, the container itself for mixing the solution is important. Determine the volume of work, daily output and number of batches. Based on this data, builders can choose a trough, an old bathtub, or some kind of tank as a container.
It’s another matter when the volume of finishing work reaches large sizes. In this case, you cannot do without a concrete mixer. It is profitable to rent a mortar mixer.
To mix the solution you will need buckets and shovels.
If there is no central water supply in the accessible vicinity, care must be taken to have a large container filled with water.
Strict compliance with safety regulations is mandatory.
Gypsum plaster walls
Plastering walls with gypsum plaster is necessary for high-quality and quick leveling of the surface. Similar preparation is ideal for subsequent application of paint or wallpaper. This is the best option for treating the walls of hallways, kitchens and other living spaces.
It is made from environmentally friendly material, has excellent heat-insulating and noise-absorbing properties, has good vapor permeability, does not shrink, hardens quickly and is quite easy to use. All these arguments distinguish work with gypsum plaster walls from similar ones using cement mixtures.
Characteristics and place of use
Most often, gypsum mixtures are applied to a concrete base.
Before plastering walls with gypsum plaster, you need to take into account that it is applied to concrete, foam and aerated concrete, brick and gypsum bases.
However, it should be taken into account that the surface must be protected from deformation under the influence of temperature and humidity changes in the environment.
| Specifications | Unit | Magnitude |
| Working temperature | ⁰С | 5 — 30 |
| Minimum thickness of applied layer | mm | 5 |
| Maximum applied layer thickness | mm | 50 |
| Recommended layer thickness | mm | 10 |
Technical characteristics are given as average data, based on information provided by the manufacturer of Rotband gypsum wall plaster.
Advantages and disadvantages
The surface of gypsum plaster is even and smooth
Why do most citizens prefer to plaster with gypsum plaster when doing their own repairs? The wide popularity of the material is explained not only by the simplicity and ease of use, but also by a number of distinctive characteristics inherent in the composition. Here are the main ones:
- Applying gypsum plaster allows you to get a flat and smooth base of the wall, which is considered the most important argument for subsequent painting or wallpapering.
- The material is applied in a thin layer, which allows us to talk about its economical consumption.
- The low thermal conductivity of the composition plays the role of additional thermal insulation of the room.
- A characteristic feature of gypsum is that it absorbs moisture into its pores when there is an excess of it and releases it when the air dries out significantly, allowing you to create and maintain an optimal microclimate in the room.
- Plastering walls is considered an environmentally friendly way to decorate a living space, since gypsum does not cause an allergic reaction and does not have an unpleasant odor.
- The resulting durable surface allows you to safely drive nails into it or screw in dowels.
- Immunity to heat and open fire is another advantage that plastered walls receive.
It is better not to use such mixtures in damp rooms.
One of the disadvantages of gypsum compositions is their high hygroscopicity. This does not allow the use of the mixture for finishing rooms with high levels of humidity and for outdoor work.
But, despite this, the material is widely used not only for leveling the walls of residential premises, but also of offices, shops, shopping centers, banks, and hairdressers.
Review of famous brands
The modern market of finishing materials offers consumers various types of gypsum plaster.
The most popular and proven ones:
Ascolit M35
It is a high-quality white gypsum plaster mixture for mechanical application. Made according to a special recipe. Fits perfectly on vertical and horizontal surfaces, providing increased productivity. The solution has high adhesion to mineral substrates.
Eunice Ecolayer
A universal mixture with increased plasticity. It can be applied manually or mechanically. Recommended for interior decoration of walls, preparing them for tiling, painting, wallpapering.
Prospectors
A mixture of gypsum, light filler and modifying substances. After hardening, it can be rubbed into a gloss or the surface that has not yet completely hardened can be made into various reliefs with a notched trowel.
Founds Gipswell T-25
A mixture of gypsum and modified additives for dry rooms with normal humidity. Economical and environmentally friendly plaster, does not emit harmful substances and is vapor permeable.
EK TG 40 WHITE
Universal finely dispersed mixture of white color. Provides an ideal coating for gluing even the thinnest wallpaper.
Axolit A 1
Premium blend. The composition includes mineral fillers and polymers.
Volma Plast
Light mixture with high quality chemical and mineral additives.
Rotband Knauf
Mixture with polymers. Suitable for finishing wet rooms.
Timmaxplastt 25
A quality product for work in dry, warm rooms.
Wall application
The thicker the layer, the more liquid the plaster should be.
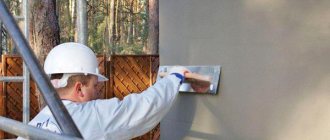
Despite the widespread popularity of using the composition, many do not know how to properly plaster walls with gypsum plaster. The question is important, since if the installation technology is violated, the work will not be enjoyable, and the result will not be achieved. First of all, you need to take into account the following nuances, which can be called basic:
- Gypsum plaster should be applied to a previously prepared surface. It must be cleaned of dust and dirt and treated with a primer. This will ensure optimal adhesion of the composition to the surface and create improved adhesion;
- Before applying the composition, you need to decide on the thickness of the layer. The thinner it is, the more liquid the resulting composition should be; in the opposite situation, on the contrary, it should be thick;
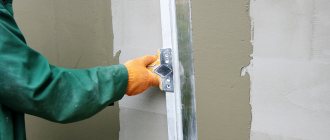
- it is advisable to distribute it over the wall with a thin spatula, level it as a rule;
- the first layer is distributed and leveled in the horizontal direction, the second layer in the vertical direction;
- the next layer is applied only after the previous one has dried, at least 3 hours.
As mentioned earlier, the life span of the finished solution is short, so it is recommended to mix a small amount at a time.
Finishing without beacons
In case of minor defects, you can plaster the walls without the use of additional means.
Plastering can be done using beacons, without them, with or without reinforcing mesh. Application without the use of additional elements is used when there is a need to make a top decorative layer and slightly level the surface. First of all, you need to use the rule to determine the deviations of the plane. This can be done by pressing it against the wall or ceiling.
The depressions are filled with a small amount of working solution, which will then need to be stretched over the entire uneven area. Having found protruding places, you can cut them off using a grinder, a hammer drill, or (if the plane is very distorted and has a large number of irregularities) apply the composition to the depressions using the previously described method.
Use the rule to check if the surface is level
Having finished the alignment and applying the rule, you need to make sure that there are no gaps between it and the wall. After this, you can move on to the next section.
After the surface has completely hardened, it should be sanded. Thus, the wall will be ready for wallpapering or other type of subsequent finishing.
When preparing the surface and finding cracks on it, it is advisable to treat them separately and then putty them, only after that a layer of primer is applied.
With beacons
Guides will help maintain the thickness of the finish
The method of applying gypsum plaster on beacons is somewhat different from the previously described method. In this case, guides are installed on the wall, along which further alignment occurs. It is necessary to carefully check their placement in a plane relative to the horizontal.
In addition, it is advisable to distribute them in such a way that the thickness of the applied composition is minimal; this will lead to the least consumption of the mixture, faster completion of work and quick drying.
Consumer Reviews
Owners of apartments and houses, as well as specialists, attribute, first of all, good performance qualities to the advantages of Forman plasters. Judging by the reviews, the products of this brand are durable and stay on the walls for a long time.
Experts also attribute the advantage of Forman plasters to the fact that they practically do not shrink. And of course, the great advantage of the products from this manufacturer, both painters and simply apartment owners who decide to make repairs, consider their rather low cost with excellent quality.
