Painting walls to look like marble for decorating rooms, as well as painting objects made from artificial stone to look like marble, will allow you to get even closer to naturalness.
Content
- Marble painting - basic approaches.
- Materials and devices for marble imitation.
- Preparing the base for marble decoration.
- Marble surface painting technology.
Marble painting - basic approaches
Professional interior designers use technologies that allow them to transform the appearance of walls beyond recognition.
One of them offers to create a realistic marble texture, painted in a variety of shades.
This coating is formed with three or more colors, a matte or glossy finish and an oil glaze. The latter material is based on glaze: a mixture of oil varnish, turpentine and linseed oil. Turpentine is added to speed up the drying of the applied layer, since oil paints take a very long time to dry. The glaze itself is used to add greater depth to the colored surface. An oil glaze is used over an acrylic coating and can be tinted to create a translucent color.
The shade of the glaze when adding pigment should harmoniously complement the palette of colors in the room or the primary colors on the product. When applying several colors of glaze, they do not mix, since each new layer is applied to the dried previous one.
In order for the surface to obtain a realistic imitation of marble, you need to use three shades of acrylic paint. First you need to carefully familiarize yourself with the configuration of the natural stone pattern.
The main color becomes the background of the composition and is chosen taking into account the overall color palette, and two or three additional shades have the same range, but do not have similar lightened tones. The options can be completely different - it's a matter of taste.
Final step
This stage is also influenced by the tastes of the owner of the premises. The walls are varnished to give a glossy shine. In addition to shine, the varnish will also increase the strength of the material and prevent the penetration of moisture, mold and the influence of various chemicals. The choice of material for coating the putty depends on whether it is an interior or exterior finish.
Indoors, you need to use compositions that are safe for humans and environmentally friendly, while outdoors, those based on organic solvents are better suited. Thus, marble putty becomes more resistant to weather conditions. Performing this type of work with a mixture containing marble chips is much easier than using putty.
The walls are not required to be level. In this case, the surface acquires a structure that perfectly hides any imperfections in the walls. The price of the work in this case becomes several times higher, but no additional finishing is required, as in the case of applying paint or creating a texture reminiscent of marble.
Materials and devices for imitation marble
Marble painting will require several devices and tools.
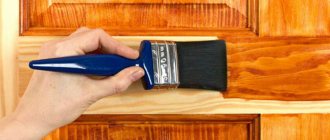
Brushes are represented by a set of thin soft artistic, as well as wide flat (for stripes) and round (for padding) painting tools. In addition to the latter, you can use a sponge or faux fur. Thin brushes can be replaced with a large bird feather. With its help you can get even more beautiful stains. A paint roller is necessary for priming and applying the base color coat.
Among craftsmen, many have a palette knife in their tool kit, which is a small metal trowel for artistic work. Palette knives come in various shapes and sizes.
Tools for working with Venetian plaster
To perform this type of finishing work, you can save money and completely do without hiring a specialist, because these services are expensive.
This requires a painter with artistic skills. If you have creative abilities, you can handle this work yourself.
To make high-quality marble Venetian plaster with your own hands, you will need to follow all technological processes, prepare the necessary tools that are convenient for work, and also select suitable finishing materials from well-known manufacturers.
Choose a trowel with round edges to avoid scratching the wall.
You will need the following tools for work:
- trowel - for uniform distribution and leveling on the surface of a regular plaster mixture (or with fine filler), as well as for drawing veins
- rubber spatula - for applying the final wax coating;
- metal brush or grater - if you need to apply plaster with coarse filler;
- narrow spatula - for applying finishing material from the container to the trowel;
- roller and wide spatula - for applying primer;
- several containers of suitable size for stirring and storing plaster of various shades;
- sandpaper for leveling the surfaces being treated, because they must be perfectly flat;
- a drill with a mixer attachment - to stir plaster with added colors in containers;
- grinder with a polishing attachment - to get a mirror-smooth marble surface;
- dry, clean rags - for sanding the finished surface in hard-to-reach places;
- rags - for wiping tools.
To clean, use fine sandpaper so that the drawing does not leave deep scratches, for example No. 320
Depending on the decorative type of coating, the technique for applying plaster may differ, so the list shows only the basic materials that will be required for the work:
- primer filled with fine-grained quartz;
- plaster mixture;
- several colors to create mixtures of different shades;
- water;
- wax - paste or liquid.
Preparing the base for marble decoration
Marble painting requires preliminary leveling of the main surface. First, old decorative coatings are removed using a spatula, a stiff brush and a grinding device.
Then the fat is removed using specialized chemicals, and the spread of pathogenic bacteria is prevented by applying antiseptic drugs.
The exposed relief is smoothed with several layers of cement plaster, after which the surface dries and is sanded.
Next, the surface is treated with a putty solution made from a gypsum or cement component. To prevent cracking of the drying layers of material, the room being finished must be protected from sudden changes in temperature.
The putty surface is treated with an acrylic primer, which can be applied to brick and concrete bases, and then the surface is thoroughly dried.
Marble finishing
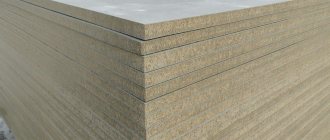
Imitating marble with your own hands is not only about painting surfaces: plaster with the effect of marble chips is used for exterior and interior decoration. After hardening, the material acquires a textured relief that can hide various surface defects and protects it from destruction. Due to its high wear resistance and attractive appearance, plaster made from marble chips is used for finishing residential buildings, commercial real estate, and fences.
Marble plaster is an environmentally friendly material. It contains stone chips or flour, polymer resins, lime, pigment, and antifungal additives. The material is classified according to particle fraction, color and additional components that determine its functional characteristics (resistance to fire, for example). For exterior work, it is recommended to buy coarse material, and for interior decoration - fine material.
Working with marble plaster is easy:
- Pre-prepare the wall: remove any uneven surfaces and apply a layer of primer:
- dilute the finished mixture with water as indicated in the instructions;
- Apply the plaster with a wide flexible spatula.
It is important to use the entire batch in one day, otherwise joints will form. With simple tools, time and perseverance, you can easily imitate marble with your own hands.
San Marco plaster comes in many varieties. If imitation marble is not to your taste, a huge assortment will allow you to choose a material for a different purpose. Interesting options include: Marmo Antico to imitate travertine, Cadoro - silk effect, Easy art - paint with a metallic effect, Forma - a base for creating rust-like surfaces, Concret Art - concrete-like plaster. All these coatings are easy to apply, attractively priced and have a long service life.
Marble wall painting technology
Marble painting is divided into several stages.
First, paint material with a main shade is applied with a paint roller, evenly covering the entire wall to be finished (for example, white). Its fully dried layer becomes suitable for the formation of additional colors, allowing you to obtain a marble texture.
The surface is treated with dyes with two or three tones, which are applied in chaotic movements with a wide brush. These colors can be applied to the brush in varying quantities at the same time. This will allow you to get a few more additional shades.
Then, using a sponge or fur swab, preliminary shading of the applied dye is carried out, creating smooth lines and soft transitions between shades.
When performing this work, paint and varnish materials can be mixed while moistened and then left until completely dry.
Paint application instructions
- Preparing the foundation. To do this, apply a couple of layers of white semi-matte alkyd paint to a wood panel cleaned of dirt and dust. The paint and varnish material must be distributed in even and smooth layers. Let the paint dry (waiting time for the first layer - 12 hours, for the second - 24 hours).
- To make the glaze, take one part linseed oil and three parts turpentine (can be replaced with white spirit) and add 2-3% drier.
- Using a round bristled brush (width - 25 millimeters), apply glaze in two colors. We do this with arbitrary movements, but directed in one direction. Level the surface with a flat paint brush.
- While the paint has not dried, we treat the surface with a texturing brush. To create texture, press the tips of the brush against the glaze, mixing the colors together. Spread the colors over all areas not covered with glaze.
- Take a brush with soft bristles and carefully brush it over the glazed surface. Moreover, first of all, we go perpendicular to the applied glaze, and then in the same direction.
- We draw thin veins on the glazed surface with a painting brush. In this case, the hand is wrapped between the index finger and thumb. It is recommended to make veins in the same direction as the direction of the glaze.
- Next, again take a brush with soft bristles and run it along the veins (you need to mix them with the general color background). First, we move the brush perpendicular to the veins, and then along the direction of the veins.
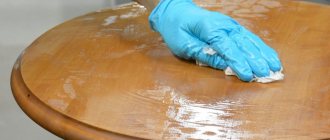
- When the surface is dry, carefully clean the surface with fine-grain sandpaper. It is important not to leave scratches or other defects. After cleaning, the surface will acquire a matte tint.
- A light layer of dust will also improve the look. Apply varnish to the dusty layer and let it dry. Now you can clean the surface and treat it with another layer of varnish. Alternate application of varnish and cleaning gives the panel a marbled appearance.
There is another way of marbling. You will need a raw or primed surface and three colors of paint. We pour the paint and varnish material into separate containers. Using a damp sponge, take a small amount of paint from each container. Lightly blot the sponge and apply the material to the surface in random order.
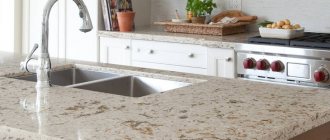
How to choose a stone shade
The excellent decorative properties of marble have determined its use in the bathroom, while the tone of the material determines its characteristics. The most popular colors of the product:
- White marble. This is the most luxurious and majestic shade. May contain gray or beige impurities. This tone will suit any room, but it is especially good to use in small bathrooms.
- Gray color characterizes classic interiors. This is a calm, cool shade that looks really expensive and noble. Can be combined with white color and wooden furniture.
- Dark tones add contrast and expressiveness to the room. You can select several zones as an accent, and in a large room a wall completely decorated in dark shades would look good. If you choose a chocolate color, the overall appearance of the interior will become much warmer and more comfortable.
Bright combined bathroom Source me-house.ru/