Decoration options
Gypsum stone provides ample opportunities for decoration. By painting with this material, it is easy to imitate white or red brickwork and any types of natural stone, from the simplest to the more expensive and luxurious, such as marble. With the help of small tricks and tricks you can even create the effect of antiquity, and no one will say that this finish is only a matter of days or months old.
Imitation of red brick from gypsum decorative stone Source sense-life.com
Artificial gypsum stone in the interior of a bathroom Source rehouz.info
When choosing how to paint a decorative gypsum stone, remember that color affects visual perception. Light shades and small patterns will visually make the room larger and more spacious. Dark colors, on the contrary, seem to compress the space. Therefore, in small rooms, especially if there is little natural light and dim artificial lighting, dark coloring of gypsum stone should only be used spot-on.
Painting in bulk
There is nothing easier than painting artificial stone using this method. We take the pigment, dissolve it in water, then add plaster and make a solution. Then pour it into the molds.
Pros:
- Fast painting method;
- All tiles are painted (inside and outside);
- No fading.
Cons: You can only get 1 color.
After drying the stone, the color will fade, so only testing can determine the final color of the stone. I mixed 1 kg of gypsum and added different amounts of pigment: 3, 6, 10, 15 grams. The main thing is to write everything down so that you don’t forget later how much pigment you added to which stone.
How to paint gypsum decorative stone
There are several options for painting gypsum stone, and each will allow you to achieve different effects.
Applying paint to artificial gypsum stone Source roomester.ru
Varnish
Semi-matte varnish for coating decorative gypsum stone Source cs.petrovich.ru
To emphasize the natural color and texture of the material, use a simple transparent varnish.
- Semi-matte or matte varnishes will set off the color of gypsum tiles and restore its richness.
- If you use a glossy varnish, you get the effect of a wet stone. It looks interesting, but less natural.
Dye
To achieve a more even and smooth surface and/or to change its tone more radically, you will need paint. You can get absolutely any color. There is a wide range of ready-made paints in different tones on sale. But if there is no suitable shade, you can make it yourself by mixing two or more colors, or adding a suitable dye.
White paint for decorative gypsum stone Source altusa.ru
Color schemes for later color painting of gypsum decorative stone Source gidpokraske.ru
The latter are produced in the form of dry powder or liquid. Dry formulations must first be diluted (usually with water), but liquid ones are ready for use; just shake or stir them.
Different types of paints are suitable for painting decorative stone, but acrylic paints on water are best. It easily adheres to the plaster texture, provides a rich color and dries quickly enough. A separate plus is that there will be no specific smell inside the room.
Silicone-based paint for decorative gypsum stone Source 2proraba.com
If the gypsum stone will be used in conditions of relatively high humidity, for example, in the kitchen, on the veranda or on an unglazed balcony, it is recommended to use silicate and silicone-based paints. They will significantly reduce the water permeability of this finishing material.
Paint for decorative gypsum stone laid on the street Source kapitel38.ru
We remind you that it is precisely because of this high water permeability, that is, the ability to absorb moisture and be saturated with it, that artificial gypsum stone is not used for outdoor decoration. To do this, decorative bricks with the desired finish and a hydrophobic layer are used.
If desired, the two painting options can be combined: first apply the required number of layers of suitable paint, and then fix it and emphasize the brightness of the tone with matte or glossy varnish.
Techniques for applying paint compositions
Plaster has been painted in interiors and exteriors for thousands of years, so many techniques have been developed. Let's look at the main ones:
- Simple coloring;
- Multi-layer painting;
- Gilding, silvering, bronze plating;
- Creation of relief;
- Patination;
- Application of a coating that imitates natural materials - marble, granite, wood, brick;
- Finishing with decorative plaster.
Before starting work, you need to make sure that the paint has the correct consistency: not too liquid, otherwise drips will appear, not too thick - this will lead to an increase in the thickness of the layer and overspending. When painting with brushes, it is necessary to apply not too much composition so that there are no drips or splashes. The brush should be cleaned of excess paint on the edge of the can. Stray hair that has fallen from the brush should be immediately removed with a flute or pad before it has time to dry to the surface.
The second mandatory condition is that the gypsum product must be dry and clean; the purchased decor must be kept for 2 days at room temperature before painting. Before changing color, the plaster must be sanded - a very difficult task, especially with deep relief.
Begin applying the paint layer from the deepest areas of the relief, painting small details with thin soft brushes. The range of brush numbers is 1-24, depending on the size.
The process of painting stucco
Paints that are too thick are diluted up to 10% with water or up to 5% with solvent, depending on the composition. Work with paints and varnishes is carried out according to the manufacturer's instructions. The primer and paint must be compatible in composition; it is advisable to purchase them from the same company.
The paint is applied in 2-3 layers, drying every 3-6 hours. Application of the composition, drying time, compatibility of paint and primer is always determined according to the manufacturer's instructions.
Let's take a closer look at the techniques.
Simple basic coloring
For simple painting in one tone, take acrylic, lime or water-based paint of the desired color, a primer of the appropriate composition, and, if desired, varnish. When drying, gypsum loses its color intensity, therefore, and also to protect the surface from damage, it is coated with varnish. It is better to use water-soluble varnish - it has almost no odor and dries quickly.
It is better to do the work not with a brush, but with a spray gun or an airbrush - this way the primer and coating will form a more even layer, reducing consumption, but it is difficult to paint over deep depressions; they will have to be finished with a brush.
Painted plaster products
How to paint decorative plaster tiles:
- The dry surface, free of dust and dirt, is primed. The primer reduces absorption, reducing the consumption of the base compound, while at the same time ensuring adhesion of the layers. It is advisable to tint the primer - this will also reduce the consumption of the base paint and increase the brightness of the color.
- The soil has dried - apply a layer of paint; on an untinted base you will have to repeat the operation 2-3 times.
- Dried plaster is coated with varnish.
When using new generation acrylic paints we obtain the following coating:
- with lotus effect (contains wax) - resistant to dirt;
- the glow effect is provided by the content of marble dust or finely ground quartz sand;
- colored and shiny inclusions - with fiber or chips.
The latest technologies make it possible to achieve original effects on the surface.
Multilayer painting
Painting decorative gypsum stone in several layers is used if the product needs to achieve a smooth transition from one color to another, for example, painting tiles with a voluminous decor in the form of an autumn maple leaf or flower. We take paint of 3-4 shades:
- yellow;
- orange;
- crimson;
- terracotta.
Painting gypsum stucco begins with the lightest tone; apply a layer of yellow paint over the primed base. After it dries, apply the orange tint closer to the edges. We smooth out the border of the flowers with a pad made from a soft cloth or sponge. Along the edge of the leaf there is a section of crimson coloring. We also smooth out the border, achieving a smooth transition from one color to another. We paint the background with terracotta and draw veins on the leaf.
Painting stucco
Gilding, silvering, bronzed
Painting plaster stucco with gold, silver or bronze paint gives the interior solemnity and aristocracy. This technique is typical for classical styles of architecture from Renaissance to Empire. In the classical technique, gilding was done with thin leaves of gold leaf or gold leaf; now they often use metallic paint in aerosols. Traditional gilding is performed as follows:
- The surface is prepared - all chips and cracks are repaired, sanded with a special machine or sandpaper manually, dust is brushed off with a brush or vacuumed, the surface is primed with an industrial compound or glue;
- A layer of gold plating paste mixed with glue is applied over the dried primer;
- Next, apply gold leaf or gold leaf with a soft bristle brush and carefully, so as not to tear, smooth it to the base, repeating the relief of the stucco.
Painting plaster gold
It is much easier and cheaper to use acrylic compositions with a metallic effect in aerosol packaging: they dry quickly, have almost no smell, and apply well. Primer and varnish are selected according to the recommendation of the manufacturer.
Painting gypsum bronze is done over a primer with heated drying oil. Powdered bronze is diluted with varnish and applied with a brush.
Process sequence:
- Preparation of the base - cleaning, dust removal, priming;
- The surfaces are painted 3 times - 1 layer is the lightest, the entire product is covered with liquid paint, after drying, the convex areas are processed with a grinding machine or sandpaper, the dust is brushed off; 2nd layer is thicker, paint the recesses using paint with the addition of bronze powder; 3rd layer - paint thinned with turpentine, with the addition of beeswax to give a metallic shine. In order to imitate patina, some convex areas are painted with the addition of chromium oxide, or a mixture of bronze and graphite is used. Another option is to apply a solution from a mixture containing silver nitrate (10 g), vinegar (100 g), water (300 g) over the painted layer of bronze powder in varnish. Due to oxidation, bronze develops a patina.
- The painted and patinated surface is saturated with a solution of wax in turpentine until absorption stops, and wiped with velvet cloth.
Bronze painting of plaster
Painting plaster like silver
Now the process is significantly simplified: metallic paint is sprayed from a can on the primed surface, and areas of unpainted paint are corrected with a thin squirrel brush. Often, individual elements or edges of protruding parts in a pattern are trimmed with gilding. In this case, it is important to first protect areas that do not need finishing. This can be done using masking tape or a portable cardboard screen.
Creating relief
You can emphasize the reliefs of stucco decoration or plaster tiles using paint of 2-3 shades of saturation. They start with the lightest tone, covering the decor completely, paying special attention to the convex parts - there should be no unpainted areas here.
Then they take a darker shade, cover the buried parts of the relief with it, smoothing out the transition of tones with a brush with stiff bristles without paint: from light to dark. Accidental splashes or incorrectly applied color are immediately removed with a dry brush or rag.
Stucco relief
Lastly, the background or the deepest depressions are covered with the darkest colors, also achieving a gradual color transition with a hard brush.
Patination
If we want to achieve the look of an ancient, authentic finish, we paint the gypsum stucco molding with an aging effect: the base is tinted with primer or natural drying oil to a yellowish tint, then the main coloring composition is applied with fillet brushes. To paint sunken areas, we use thin brushes with soft bristles. You can achieve transparency of the paint layer by changing the thickness of the paint layer in different areas: a thicker layer is applied with a swab (rag or sponge), a thin layer is shaded with a brush with short, stiff bristles.
Intermediate gypsum patination process
The product can be patinated using a grinding machine, sandpaper or a metal brush: the painted, dried surface on the relief convexities is sanded, depicting abrasions. This technique looks great on stucco painted to look like wood (brushing effect) or coated with metallic compounds.
Plaster patination
Plaster patination
Application of a coating that imitates natural materials - marble, granite, wood, brick
Painting gypsum tiles to look like stone - this design technique for decorating gypsum is used to achieve an imitation of natural stone. Painting plaster to look like marble using a traditional technique involves using heated drying oil on a well-dried stone. Uneven absorption of oil by plaster produces stains reminiscent of marble veins. The dry product is coated with varnish to protect it and obtain shine.
Painting plaster to look like marble
To give gypsum tiles the appearance of granite, they use the spraying technique: the tile is primed, painted in the main background, then several brushes of varying degrees of hardness are taken and paint in colors different from the main background. Apply excess paint to the brush and use your fingers or a special tablet to ensure that the paint splashes onto the decor. Brushes of different hardness and bristle lengths, shades of paint produce splashes of different sizes and colors, resulting in a texture reminiscent of granite grains. To perform this technique well, you will first have to practice on an unnecessary sheet of cardboard.
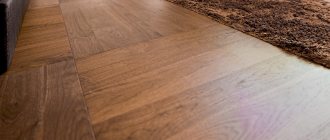
Painting plaster to look like wood is done with a stain that imitates the colors of different valuable types of wood. You can get a characteristic wood pattern by making longitudinal movements with a rigid flute with different pressure; this results in uneven thickness of the layer of paint composition.
Painting to look like terracotta is done with rosin and varnish diluted in industrial alcohol.
How to paint decorative bricks made of plaster: cladding with decorative bricks looks completely different in different interior styles; the painting method is simple or multilayer.
Painting plaster to look like granite
Painting decorative gypsum bricks
Country styles are characterized by painting gypsum tiles to imitate brick in white, cream, or grayish colors with a varnish coating that imitates glaze. Gypsum tiles are dipped in paint of the desired tone, dried and varnished.
Painting gypsum tiles for a loft style, when the look of clinker brick is required, requires multi-color painting: terracotta, ocher and blue-black pigments will create a color transition characteristic of hand-made clinker tiles. To imitate hand-made clinker, the surface of the ingot is pre-treated with sandpaper and a brush with metal teeth, adding irregularities characteristic of hand-made products.
Finishing with decorative plaster
The latest technologies provide paints and varnishes that imitate any surface. Now you can buy ready-to-use decorative mineral plaster with quartz grain or crushed marble of different fractions, which will give the tiles the appearance of natural stone with a wild, ground or polished surface.
Silicone and latese paints replicate the texture of Venetian plaster, patina, velor or velvet. Without multi-layer painting, you can achieve many unique color and texture effects with just a spray gun. The same compositions will give the gypsum moisture resistance.
Painting 3D gypsum panels is done using a variety of techniques, but since their pattern is very active, you should be wary of the idea of bright tinting. Basic painting in one color with light accent tinting of individual parts is best. The easiest way to decorate is with a spray gun.
Painted 3D panels in the interior
Painted 3D panels in the interior
Unusual dyeing products
Drying oil for impregnation of gypsum coating Source kraski-net.ru
Coloring gypsum stone with rosin Source ozone.ru
Colored stain for decorating artificial gypsum stone Source insales.ru
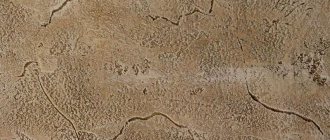
- Drying oil. The main areas of its use are the base for paints and wood impregnation. When applied to a plaster coating, it creates an unusual effect of aged stone in warm beige-brown tones.
- Rosin and varnish. These two substances, when mixed with technical alcohol, can color light plaster into a brownish-red color, reminiscent of old ceramics.
- Stain. This compound is also commonly used on wood, but can be used just as well on plaster. The stain is available in various shades of red-brown colors.
Why paint a brick wall?
Artificial ceramic stone is a popular material for construction work. For the construction of walls, ordinary brick is used, the surface of which is rough and unattractive. When choosing masonry as a decorative element, it is necessary to improve the aesthetic perception of the surface. Painting brick white looks great in rooms decorated in loft, modern, and high-tech styles. The characteristic relief of the walls is preserved, but its presentability is enhanced.
Photo 1. Painting bricks white makes the room brighter
Brick facades of buildings are painted for various reasons:
- As a result of long-term use, the original appearance has been lost.
- The masonry has partially collapsed; repairs require plastering and color restoration.
- Construction of extensions where the creation of an overall harmonious composition is required.
- The desire to change the decorative appearance of the structure is also a powerful argument (photo 2).
Photo 2. Changing the decorative appearance of the facade by painting
Technology of applying paint to gypsum stone, preparing the stone for painting
Tinting gypsum stone before installation Source ytimg.com
Painting gypsum stone after its installation Source ogorodsadovod.com
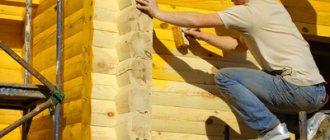
Painting of decorative gypsum stone can be carried out both before and after its installation on the walls. There will be no significant differences in the technology of work; it is a matter of convenience in each specific situation.
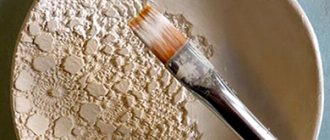
Removing dust with a brush from plaster finish before painting Source laminatepol.ru
In order for the paint to adhere as desired, the decorative stone must be clean. Wipe it clean and remove any other unwanted dirt, including any glue residue. If there are chips or scratches that you want to get rid of, this should also be done before painting.
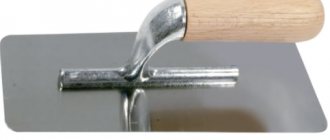
Dilute the gypsum mixture according to the instructions on the package and cover the problem areas with a spatula, finger or other tool convenient in this situation. Be sure to let these patches dry thoroughly before painting.
Primer for gypsum coating for pre-treatment before painting Source formako.ru
An optional, but desirable step is applying a primer. It will provide stronger, more reliable and durable adhesion of the dye and the surface of the stone. Two important points: the primer must be compatible with the paint, and it must be allowed to dry before painting.
Hard tile bricks
An imitation of a brick wall can be successfully achieved using hard tiles. There are various options for hard tiles; as a rule, they are all installed using identical technology.
Types of hard tiles
The following types of decorative bricks are considered the most popular:
- Gypsum tiles. Such tiles are most common among consumers. Due to the plasticity of gypsum mortar, bricks of various textures are produced. The disadvantages include the fragility of the material, as well as the inability to use in rooms with high humidity.
- Cement tiles. This material will be more expensive than gypsum tiles, but this type has a number of advantages, such as high strength, the possibility of installation in wet rooms, and susceptibility to care and washing.
- Clinker tiles. The most similar imitation of brick will be on the wall when using the clinker variety. The price tag for this tile is significantly higher than other options, but the difference in cost is offset by the following advantages: the possibility of cladding facades, high strength, resistance to abrasion and ultraviolet radiation.
Gypsum brick tiles
Tile installation technology
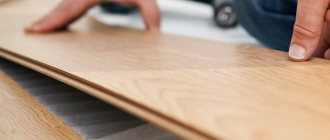
The rules and technology for facing a wall with hard tiles differ little from the technology for laying soft material. The difference will be hidden behind the thickness of the glue and the process of cutting the material. According to the first point, the thickness should not exceed 0.5 millimeters, and hard tiles can only be cut with diamond-coated circles. The exception is gypsum tiles - they are easy to cut with a knife.
Installation of rigid brick tiles
How to make a mold for casting plaster tiles
Brick finishes can be made from homemade tiles. To do this, you need to take an impression from several individual bricks, thereby preparing the mold for casting. A gypsum solution will be poured into the resulting form, after which the finished decorative stone can be mounted on the wall.
The side of the brick that is taken as a sample is covered with grease or heated wax mixed with kerosene. This is necessary in order to prevent the silicone from sticking to the surface. As soon as the layout dries, the treated side is covered with a layer of silicone sealant, 1-1.5 mm thick. The mold is set aside until the silicone has completely polymerized.
After the silicone has hardened, the mold is coated with polyurethane foam. After the foam has hardened, the sample is removed and the bottom of the mold is leveled.
A gypsum solution is poured into ready-made molds, which sets very quickly and takes on the appearance of a finished finishing material. If you have 10 molds, you can make several square meters of decorative stone in a couple of days.
Brick tile mold
How to prepare paint
After standing on a shelf for a long time, any paint begins to flake a little - it becomes thinner at the top and thicker at the bottom. If you apply it in this form, the color will turn out uneven. Therefore, the paint must be mixed before use.
Mixer attachment for convenient dilution of building mixtures Source saratov24.tv
It is best to do this using a special attachment on a drill or hammer drill, especially when it comes to large volumes. In principle, paint in a small jar of a couple of liters can be mixed manually with a brush or wooden stick.
You should act in the same way when combining several colors of paint or adding a colored pigment. It’s not enough to just pour them into one container, you need to mix them well.
Old marble
If you like the effect of aging, you can treat the product so that the material becomes similar to old marble.
The work is carried out in a certain order:
The purchased stone will need to be kept for two days in a dark room. If you created the product yourself, dry it thoroughly (maximum at 55 degrees). Warm up the drying oil
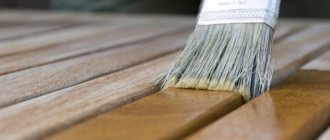
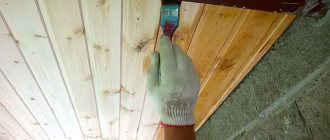
This should be done very carefully and you will need to use gloves when working. The material is applied using a flute brush. It is recommended to apply it in 2 layers
Try not to leave unimpregnated areas: the product should be processed evenly. After some time, the surface will look like old marble.
Dyeing process
A set of brushes of different sizes for painting gypsum stone Source zubr-vrn.ru
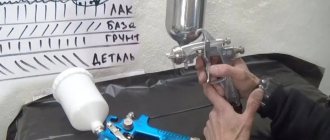
Spray gun for painting gypsum decorative stone Source gidpokraske.ru
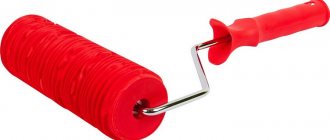
To apply paint, you can use brushes or a spray gun or an airbrush. A roller is not suitable for such surfaces, especially if the stone is already painted on the walls. This tool will not be able to achieve a smooth and uniform coating, and unsightly streaks will form in the spaces between the tiles.
Applying paint to gypsum decorative stone using an airbrush Source gidpokraske.ru
The dyeing technology itself does not differ significantly from that for other types of finishing materials:
- The paint is applied gradually, from bottom to top, with a convenient brush of suitable width. It is important to add neither too much nor too little mixture so that you get an even layer of color without drips.
- Using a spray gun, paint is also applied from bottom to top, from a distance of 30-50 cm from the wall. Remember that the closer you hold the device, and the longer you hold it in one place, the thicker and brighter the color the paint layer will be.
- The varnish can be purchased already in a spray can or also poured into a spray gun. Or you can use a brush, preferably a fairly wide one.
- Stain, drying oil and rosin are more convenient and easier to apply with a brush.
Applying pigment to molds
The essence of this method is that you need to dilute the pigment so that it is not too liquid. Apply it with a brush to some areas of the mold and pour in the gypsum solution. The disadvantage of this method is that the molds will need to be washed if you want to make other colors; they say 1-2 pours of cement will remove the pigment completely. I also didn’t like the fact that when pouring plaster, the paint (pigments) can spread.
Instead of pigment, you can use regular grout for ceramic tiles, which you can see in the video below. Grout is much cheaper than pigments, so it turns out very profitable.
What glue is used when working with gypsum-based decorative stone?
Glue for installing decorative gypsum stone on walls Source stroy-podskazka.ru
Gypsum stone for decorative wall decoration is a very light material. It is installed using the following compounds:
- Putty with an admixture of gypsum.
- Tile adhesive with a mixture of gypsum.
- Acrylic putty.
- Special PVA.
- Gypsum mastic.
- Sealants for installation.
- Glue of the “Liquid Nails” or “Velcro” type.
You should choose a suitable glue based on its ease of use, availability in suitable packaging and your own financial capabilities.
What about other ways to decorate brick walls?
On the modern building materials market there are many other finishing materials with which you can decorate the interior walls of a room with brickwork. Thus, flexible tiles made to resemble bricks are produced from polyvinyl chloride. Sometimes you can find collections of decorative panels made of MDV/PVC. These types of panels and tiles are characterized by the fact that they are not separate elements, but a kind of panel, the area of which reaches several square meters. All this can be mounted either directly on the wall or on a metal/wood sheathing. The cost of such panels is lower than the same decorative brick, and they are definitely easier to work with.
Tips for painting decorative gypsum stone
- If you made the gypsum tiles yourself, let them not only harden, but also dry completely. This will provide it and the color coating with strength and durability.
- If the decorative stone was purchased ready-made, leave it indoors for 2-3 days so that it adapts to the existing temperature and humidity conditions. This measure will protect the material and its coating from shrinkage or, conversely, expansion after installation.
- If you are not sure that the chosen paint will apply as it should, test it somewhere in an inconspicuous place in the masonry or on a spare element of the stone.
- Remember that in liquid form the paint looks much darker than it will after application and drying. The actual color (or colors depending on the proportions when mixing when talking about color) is usually printed on the label.
- Gypsum stone can be repainted several times. But to ensure that the new paint applies evenly, it is better to sand the surface with sandpaper or something similar.
Be sure to carefully read the instructions for all paints, tints, glue, primer and other products used. There may be features and nuances in their use that are important to observe in order to obtain the desired result.
How to paint with your own hands?
Painting consists of several stages. The preparation stage includes :
- Cleaning . It is necessary to remove dust, debris, and old finishes from the surface. Inspect all seams to avoid fraying later. All falling out elements are removed, and their place is filled with silicone sealant or sand-cement mortar. The restored area is cleaned with sandpaper.
- Removing efflorescence . This can be done using a stiff brush and a solution of bleach and water (1:3); after treatment, rinse the area with clean water. The opinion that this defect is painted over with paint is erroneous. After some time, efflorescence will appear on the decorative coating.
- Prevention and control of mold and mildew . You can use special antiseptics or regular “Whiteness” diluted in half with water. All affected areas are treated with the solution and left for 15-20 minutes. for disinfection. After disinfection, the wall must be washed with water.
- Getting rid of greasy stains . In those places where there is an accumulation of fat, the paint will not adhere and will peel off over time. To neutralize this effect, you need a special construction degreaser.
- Washing the surface with a soap solution . This stage completes all previous ones. After it, you need to wait until it dries completely (about 5-7 days), then start priming.
- Priming . The choice of product depends on the purpose of using the surface and the specifics of the material. The primer is applied in two layers, always with drying between them.
Stone impregnation
Make sure the surface of the stone is clean and dry. You can start hydrophobic impregnation.
Impregnation of artificial stone prevents chipping, protects against excessive moisture, premature abrasion, closes pores and strengthens the structure of the stone. Without soaking, the paint will lie unevenly, with “camouflage” spots, and its consumption will also increase significantly.
Hydrophobic compounds come in different forms. It is better to select the most suitable composition for your stone model, for example, choose latex impregnation.
Impregnate the stone at least twice, in as uniform a layer as possible, using brushes, a roller, a sponge or a spray gun for this purpose. After processing, while any of the layers dry, do not allow water to come into contact with the stone.
How and with what to process gypsum
Over time, this material loses its ability to retain moisture. Paint does not adhere well to such surfaces, so it is better to paint the plaster right away.
When working with a product that has lost its water-retaining properties, before painting it is necessary:
- Clean the surface and coat with primer. This can be a ready-made solution, purchased in a store, or prepared independently from PVA glue and water in a ratio of 1:4.
- Protect the product and give it strength by varnishing or painting the figurine with paints in accordance with the intended plan. If the image consists of a large number of details, it is recommended to first draw them with a simple pencil.
- Cover the painted plaster with a double layer of any varnish suitable for such work.
- It is necessary to paint in a room with good ventilation, where the finished product is left for a day until completely dry.
To make painting gypsum products easier, you can use:
- spray gun for large surfaces;
- brushes for drawing details;
- cotton swabs or a sponge to obtain a stone texture on the surface.
Tools and materials
After you have decided on the painting material, you need to prepare your working tools. Usually a brush or an airbrush is chosen. Painting can be done with any tool, for example, to create a coating, some use an ordinary sponge. But the advantage is on the side of the airbrush:
- creates a thin and neat layer of paint;
- does not smear surfaces during operation;
- when adjusting the spraying distance, one and the same paint looks different on gypsum stone;
- The surface color is even and uniform.
So, for painting you will need:
- dye;
- containers for water and mixing paint;
- gloves;
- rags;
- brushes and sponges (for decoration);
- airbrush (if the work will be done by him).
Tip: Construction stores offer a wide selection of airbrushes. They are suitable for painting almost any surface. You can also choose a cheap option - a spray gun, it will cope with painting artificial stone
The main thing when buying is to pay attention to the following: the strength and power of the compressor.
A brush is not the best option for painting for the following reasons:
- leaves streaks and drops;
- professionals don't use it;
- a thick layer of paint remains;
- individual gypsum elements may not be saturated with the next layer.
It is better to use a brush when it is necessary to treat torn areas.
How to make plaster stronger
For all its advantages, this material has one significant drawback - low strength.
To eliminate this defect, various additives and substances are used. You can make gypsum stronger in industrial conditions using plasticizer additives and gypsum hardening activators.
At home, you can use PVA glue for these purposes. For 1 kg of dry gypsum mixture you will need 50 g of glue and 0.5 liters of water. Dissolve the glue in water and add gypsum powder to the solution. To give additional hardness, coat the finished figurine with an acrylic primer.
We paint the product “to look like stone”
A short lesson in painting like a stone.
We are not interested in painting to look like brick or just rubble stone. The question is how to paint specifically for decorative stone, marble, jasper, malachite, and so on. This algorithm and sequence is the basis of the direction. By understanding and trying, you can learn to imitate different options and textures.
What we need for painting: 1) Brushes 001, 1,2 2) A sponge, or a piece of foam rubber, or a toothbrush 3) Acrylic or oil paints, whichever you prefer. Oil paints allow for deep, layered textures and require more experience working with paints. For a beginner, you can start with acrylic or practice on paper with simple watercolors. 4) Well, actually, what are we going to describe?
1) Step one
We apply matte white primer to the product we need. Then we apply the first primary color, which we will use for painting. In our case it is black.
2) Step two
Using a sponge, a piece of foam rubber or a toothbrush, apply the first texture. The color of the texture depends on what we want to get in the end. To imitate jasper, you can use white, gray and purple colors, applying them one after another. In our case, we will use two colors: light green (pale green) and light green (variations and color shades of green can be any, do not be afraid to experiment with color). Apply the first layer and let it dry. When using acrylic paints, this will take 10-15 minutes.
3) Step three
After the prepared base has dried, we begin to draw lines. It is advisable to draw lines with brushes of varying fineness from 001 to 2 (brush size). Direction, discontinuity, thickness of lines - it all depends on your imagination. To make it easier, imagine that you are drawing lightning breaks
The color of the lines also depends on what stone you are imitating. In our case, we mix a little green into the white color and draw lightning.
After complete drying, we apply a layer of glossy varnish.
An example of painting under “gray marble”.
A small, as they say now, life hack
If you have no desire to paint the surface like a stone, then you can create an imitation of the structure of an ornamental stone by simply mixing two different colors of polymer clay
I hope the lesson was interesting and instructive. I invite you to visit my page and see my work.
Preparation
Before painting, you need to prepare the stone . To do this you need to do the following:
- remove the old layer of paint (if not a new stone is used);
- sand the surface;
- blow with a compressor or walk with a rag;
- soak with primer 2-3 times.
For convenience, you can buy and paint a new stone rather than messing with the old one. The new one is just washed and soaked 2 times, this will be enough before painting.
How to paint plaster
Gypsum products must be painted, because... Over time, moisture evaporates from the surface and the plaster becomes yellow, stains remain on it after touching.
To color the gypsum mass, a coloring pigment is added to it during mixing. It must be added slowly, stirring the composition until a uniform color is obtained.
After drying, the product will have a lighter shade. In order to achieve a bright color, additional coating is used.
To paint a frozen product you will need:
- brushes of different diameters and shapes;
- sponge or cotton swab;
- sandpaper to give an aging effect;
- varnish;
- paints and other means to obtain the intended result;
- acrylic primer;
- a solution of wax with gasoline or turpentine to make the surface glossy.