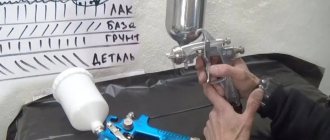
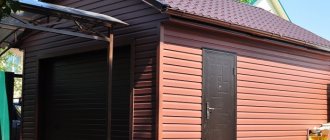
Artificial stone is often used in finishing works. It is much cheaper than natural, but also durable and beautiful. Manufacturers have learned to make not only a complete imitation of the material, but can also offer unusual and interesting solutions. Before sawing a countertop made of artificial stone, it is worth understanding what the main difficulty is and how to solve it. It is also worth listening to the advice of experienced craftsmen - they will help you get the job done quickly and efficiently.
Source for-mo.ca
How to paste on wallpaper
Despite its relative lightness, decorative stone
is a heavy wall covering. Therefore, it is not recommended to mount it on top of wallpaper. Otherwise, there is a high risk that the gypsum panels will separate from the wall and collapse.
If the design includes a combination of wallpaper and decorative stone, it will be necessary to leave bare areas under the panels. It is recommended to mark the walls in advance so that when installing wallpaper you do not cover the places where the decorative stone will be attached.
The surface must be prepared for wallpapering and stone installation: it is leveled and treated with a primer. The artificial stone is attached only after the wallpaper has been pasted, not on top of it, but on the remaining free areas of the wall.
If you need to install decorative panels on a wall whose surface is 100% covered with wallpaper, follow the instructions:
- Mark with a pencil on the surface of the wall the places where you plan to install the stone, retreat 1-3 cm and outline the border. The indentation is needed so that the wallpaper extends slightly under the gypsum panels and there is no ugly gap left between the two types of cladding.
- Using a sharp knife or blade, cut out the outlined pieces and remove the wallpaper in these areas.
- Prepare an adhesive solution and fix the slabs to the wall in accordance with the instructions.
- Treat the paneled surface with a special varnish.
If for some reason you need to first install decorative
stone, and only later wallpaper, use one of two methods:
- Attach all the slabs to the wall, not counting the last, top row. Then stick the wallpaper, making a spade on the area under the stone. Finally, install the last row of gypsum boards.
- Lay all the slabs, without exception. Glue the wallpaper with a margin of 5-7 cm (depending on the type of trellis). Once completely dry, use a sharp knife to cut off the excess by running along the joint. Cover the resulting seam with a decorative plinth (baguette).
How to care for stone
Caring for gypsum stone will not require much effort on the part of the housewife.
All that is required is to periodically wipe off the dust from the varnish base. It is worth noting that if bricks with an aging effect were used in the interior, then the dust on them is not visible as on dark varnished bricks. The varnish, in turn, protects the plaster from moisture. Gypsum bricks for decorating a room are the best budget solution. With the help of such inexpensive materials, you can create a cozy interior in any corner of the house, and all that is required to design an interior solution is imagination, time and compliance with installation technology.
vote
Article rating
Adhesive compositions
The quality of adhesion of surfaces and the service life of the cladding will depend on how the glue is selected correctly.
Installation of artificial stone can be created using the following types of compositions:
- PVA;
- dry cement mixture;
- acrylic;
- "liquid Nails";
- "Bustilat";
- thick rubbed paint;
- tile adhesive;
- putty;
- mastic
- polymer assembly sealant;
- CMC (CarboxyMethyl Cellulose).
More popular brands of adhesive compositions used for cladding surfaces with artificial decorative boards:
- Ceresit;
- "Unice Plus";
- "Creps";
- "Acrylic";
- Confiad;
- Litokol;
- Corian.
Surface and Material Preparation
Gypsum tiles can be fixed to virtually any surface: brick, concrete or wood walls, metal, plaster and glass. The main requirement that will ensure a high-quality installation is the strength, dryness and cleanliness of the base.
Surface preparation:
- Remove the remains of the old cladding. You will need to remove the glue and plaster.
- Clean the surface of the base using a wire brush.
- Apply a primer on an acrylic base with deep penetration to the surface. Then leave the wall to dry in accordance with the instructions for the primer.
The next step will be preparing the material for cladding. First you will need to calculate the area of the cladding. The standard overconsumption of material is 10%, which must be taken into account when calculating the required amount of material.
Preparation of material:
- Cut the artificial stone into pieces of a suitable configuration and size using a saw or hacksaw.
- Clean the cut areas with ratfil or sandpaper to give them a natural look.
- Lubricate the back side of the stone slabs with the same primer that was used to treat the walls. Leave to dry.
- Apply paint to the facing material and let it dry. It will be necessary to introduce several colors.
Advantages and disadvantages of each method
Each of the tools has its own characteristics. So, when cutting tckb gypsum tiles using a hand wood saw, the ends will have a low grade of surface finish (roughness) and sometimes roughness. The reason for this is the large teeth of the blade.
In terms of cut quality, it is better to use a hacksaw - the blades will be smoother, so the need for further processing is minimal. But this process takes much longer.
How to cut plaster if speed is important? For cutting, it is more advisable to use a grinding machine with a diamond disc. But this also has its drawback - increased dust due to the processing of gypsum polymer tiles with high-speed power tools.
When using hand cutting methods, it is recommended to use an additional box edge - a rectangular, usually wooden tray with special cuts (straight and 45°) on the sides for a straighter cut.
Cutting complex elements and further processing of edges
If it is necessary to bypass an outlet, switch or other protruding elements on the tile, an additional segment is marked, easily chipped off with a regular chisel, and the edges are smoothed with fine-grain sandpaper. Shaped cutting of the ends is carried out along the contour of the texture.
Gypsum tiles also drill well with standard metal or wood drills. But for better performance, it is better to use carbide tools. And you can change the size or shape of the hole using a hand cutter.
Gypsum tiles do not always have perfectly straight edges, which affects the quality of installation and significantly complicates it. To quickly attach one element to another, you will need to remove a layer of a certain thickness. This is done with a chisel, and the place from which it was removed is thoroughly cleaned with sandpaper.
How to get a custom size or incorrect brick
Not so long ago, professional builders and amateurs did not even wonder how to see bricks. They used the conventional selection and grinding method, which does not have a high level of complexity.
The process of cutting bricks with a pick or shovel is as follows:
- You must take a unit of building material in your left hand;
- Then you need to apply the adjusting line with the tool on all sides of the product;
- Finally, apply a sharp sharp blow to the edge of the product, while the timber and the surface of the brick should form a right angle.
Manual brick cutting
This method has a number of disadvantages:
- Low accuracy;
- The surface of the formed face is uneven, so it must be hidden in the masonry, and in some cases this is impossible;
- Do not crack the brick at an angle other than straight.
But time has passed and now there are new construction tools that can be used for this purpose. They make the process more convenient and accurate, and also significantly reduce time costs. In addition, the formed edges of the products have a flat surface.
Now a fair question arises about how to cut sand-lime or fireclay bricks. Modern construction industry specialists use the following tools:
- Brick processing machine;
- Special saw (gas cutter);
- Bulgarian.
Getting started with tiles
Again, I will repeat the hackneyed truth that before starting work, the surface on which you plan to work must first be primed. On my loggia, I glued the tiles onto extruded polystyrene foam and used a special primer for this material. In ordinary cases (brick, concrete, drywall) a standard deep penetration primer will usually suit you. One way or another, when purchasing a primer, consult the seller. Tell him what kind of wall you have and he will advise you on the necessary primer.
As for expanded polystyrene and plasterboard, here is a very clear example of how everything can be done - “Decorating the inside of the balcony with decorative tiles + mirror slopes.”
Be sure to prepare your work area, cover the floor and anything valuable nearby that can get dirty. It is not known where the flight of your imagination may take you.
THE PRICE FOR LAYING DECORATIVE TILES CAN BE FOUND ON THIS PAGE
Gypsum tile sizes
Gypsum is the lightest base for simulating the texture of stone. Approximately weight 1 sq.m. decorative coating no more than 10 kg. Volumetric slabs imitating torn stone weigh slightly more than their ceramic counterparts, but differ in design and size.
Gypsum tiles come in many variations of shapes, sizes and colors.
Catalogs and construction supermarkets offer a wide range of tile-type coverings. Gypsum “stone” is produced in a standard format (dimensions are given in mm):
- length – 148, 200, 210, 240, 300 and 330;
- height – 65, 70, 85, 100, 200 and 300;
- thickness – 8, 10, 15, 22, 30, 40 and 45.
It makes no sense to produce thinner ones; the slabs will be fragile. Too thick - also no point, they weigh down the finish and complicate installation.
Each specialist knows how to independently choose the thickness and size of gypsum tiles, focusing on the properties of the wall and other factors.
Physical properties of decorative stone
Four types of artificial stone are used in interior design:
- cement-based;
- from gypsum as the main component;
- porcelain stoneware;
- acrylic stone.
Decorative stone on cement and gypsum bases have a simple manufacturing process. It is not difficult to organize it on a construction site or in a small handicraft workshop. It boils down to mixing the prepared components, mixing the mixture with water and pouring it into molds, followed by drying. By introducing the appropriate dyes, the required shades of the material are obtained. Decorative stone made from cement is moisture resistant, durable and not afraid of moisture.
A continuation of the listed advantages is a relative disadvantage - the specific gravity is close to the corresponding parameter of natural finishing materials. It is used for external work: finishing the walls of a house with stone, laying paths, in small architectural forms and sculptures. Decorative stone made of gypsum has less weight than cement, is easier to install on the walls of a house, but does not have high strength and moisture resistance. For indoor use.
Porcelain tiles and acrylic stone are materials whose production is possible only in a large enterprise. The implementation of the corresponding technological processes requires the presence of complex expensive equipment, qualified personnel, a large supply of initial components and, as a consequence, a well-functioning sales system for finished products. For the consumer, this is a positive point in the relatively guaranteed quality of the product. Large production is forced to strictly control the compliance of their products with GOSTs and TUs.
Porcelain tile, although it does not contain a single grain of natural granite, has properties very similar to it. It is made from a homogenized, i.e. homogeneous mixture of white-burning clay, fireclay (kaolins), sand, flux - feldspars, pegmatids and water. The material is molded and takes the required shape by semi-dry pressing followed by firing. Firing temperature 1200-1300°C. It is mainly used where it would be appropriate to use natural stone.
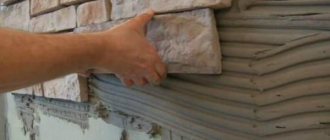
Technology of decorating walls with stone inside the house
A smooth, ideal wall is the best surface for decorating with artificial plaster stone. The tiles, having an average size of no more than a standard brick, when laid out on the wall, create a holistic image, a single canvas without seams or gaps.
Thus, make the design of a brick wall from gypsum in the quantity in which it is necessary.
Bricks can be cut, combined, matched and broken to create an uneven edge on the wall. After the wall is completely decorated and frozen, you can begin decorative work to give integrity to the canvas.
To prevent gaps between the bricks from being visible from different angles, it is worth using grout for the seams. There is a huge amount of colored grout in the store, but if there is any glue left that was used for installation, you can use it. To prevent the adhesive solution from standing out and hardening into white spots, you can add the color of the required shade to it. In this case, it is worth remembering that the color when drying will be several tones lighter than that of the wet mixture.
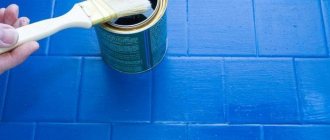
Coloring rules
Coating of products with coloring compounds is carried out according to certain rules:
- The parts must be well dried according to the manufacturing technology.
- After purchase, the elements must be aged at home. It takes at least 1–2 days for the stone to reach a balance of temperature and humidity.
- If previously treated products are painted, they are pre-polished. This is very difficult to do, especially when the products are already on the walls.
- Impregnations are used according to the recommendations that each manufacturer indicates on the label. Some are applied before painting, others after. Some options are not compatible with coloring compounds.
You should know! There is often advice about using varnish to make the coating shine, but this is not always appropriate. This effect can weaken the feeling of naturalness.
Under terracotta
The technology is almost identical to the previous version, but the coating composition is shellac varnish and rosin, which are diluted in industrial alcohol.
After a certain period of time after applying the composition, the surface becomes similar to terracotta.
How to give a slab the desired size and shape
At enterprises, artificial stone is cut on stone-cutting machines with coolant supplied to the cutting site, and laser or waterjet cutting is also performed. The last two methods allow you to give the stone the most amazing, even curvilinear shape.
At home, the choice is not so great. This problem can be solved using a hand-held circular saw or plunge-cut saw, selecting a blade that matches the material being cut. An electric tile cutter will also do the job well.
Electric tile cutters are equipped with a small coolant bath located under the cutting table. Based on their operating principle, there are two types of tile cutters. In one case, the disk is installed motionless, and its work table with a stone attached to it moves. In the other, the disk, together with the drive, moves along guides above the cutting plane.
All of these devices work with diamond blades of various configurations, solid and segmented.
If the relief and thickness of the stone tile allows, it can also be cut using a manual tile cutter.
But the most universal tool for cutting stone is considered to be a grinder with a diamond blade. It is advisable to choose a disk of large diameter. Different discs are available for different materials.
To cut cuts in stone, they sometimes use a jigsaw or a diamond string. There are also special stone blades for a regular hacksaw for metal.
How to cut decorative stone without a grinder (also called a tile cutter)
How easy it is to cut decorative tiles from Chateau Ours without dust and quickly without the help of a tile cutter, or grinder.
First level
Models 9925D and 9125 from the manufacturer KEN are optimal for non-professional use on stone. Their potential, necessary for difficult working conditions, is due to high-quality protection from dust (implemented through powerful insulation of engine elements and the use of sealed bearings).
- in power consumption (9925D – 1240 W; 9125 – 860 W);
- in differences in form factor (9925D - rear handle with a non-fixed trigger; 9125 - with a shorter length and girth, the start button is located closer to the gearbox, fixed in the on position),
determines the possibility of choosing a relatively inexpensive tool, taking into account the expected intensity and load. The affordable cost, in the case of these models, is explained by the simplicity of the design and the lack of auxiliary electronic systems.
DIY making
Having special molds for casting, you can make decorative bricks yourself. To fill, you need to prepare a solution of gypsum, water, and additives to increase strength.
You will need:
- Gypsum or gypsum putty;
- clean cold water;
- Homemade plasticizers: lime, PVA glue or purchased ones;
- Polyurethane or silicone molds for casting;
- Vibrating table Used to remove air bubbles from a solution. This increases the strength of the tile. You can do without it, but the quality will be worse;
- Container for preparing the solution;
- putty knife.
These materials are publicly available and can be found in any hardware store. To color plaster, colored pigments are added to the mixture or to the bottom of the mold.
The prepared gypsum solution is poured into molds and left until completely set. After 3-4 hours, the bricks can be removed, laid out on a flat surface and left to dry for two days.
How to make tiles from leftover drywall
There is an easier way to make false bricks without pouring them into a mold. They can be cut from drywall. Any gypsum board trim will do. You will also need gypsum plaster or putty.
The video tutorial shows how a textured layer of plaster is applied to cut rectangles. After drying, the tiles are lightly sanded and covered with decorative tinted wax. It turns out great!
Lubricating the plaster mold
Gypsum practically does not adhere to glass and wood coated with varnish. But since we add PVA to the composition, it’s worth being on the safe side and ensuring reliable release of the finished casting and the mold. To do this, treat the sides of the mold and the surface of the glass with lubricant.
In its simplest form, it can be soap suds or mineral oil.
But if the amount of work to be done is significant, we recommend preparing a special emulsion. It has the following composition:
- 25 parts 72% laundry soap;
- 15 parts butter;
- 60 parts water.
The soap is grated on a coarse grater and dissolved in hot water. The resulting “jelly” is filtered through a sieve to separate undissolved pieces of soap and oil is added.
Main qualities and advantages
Decorative tiles have unique properties and characteristics:
- Light weight - it is lighter than cement tiles; installation does not require strengthening the base with reinforcement; the elements can even be mounted on drywall.
- Thin layers - allows you to save precious centimeters of typical small apartments, plus there is no need to adjust individual elements to each other.
- Easy to install and use - you can install it yourself without practical experience or special skills.
- Ecological purity - gypsum is a natural mineral.
- Safety for health and the environment.
- Has no smell.
- Aesthetic appeal.
- A wide decorative line - produced to match any stone, brick, various textures, patterns and colors.
- Possibility of homemade production.
- Low cost - accessibility and practicality.
- Light fastness – gypsum binder ingredients contain modified additives with pigments.
- Hygroscopicity - allows you to regulate the humidity in the room.
- High noise absorption and thermal insulation characteristics.
- Fire resistance – used for finishing fireplaces and stoves.
- Provides a favorable, comfortable indoor microclimate.
- Interiors decorated with gypsum tiles are always trendy, luxurious and beautiful.
- A wide range of applications are home interiors, cafes, offices, shops.
- Decorative tiles, thanks to their features and qualities, allow designers to create exclusive collections imitated with leather, metal, and elements with rhinestones.
- The coating is easy to cut.
Coziness and comfort
Disadvantages of gypsum products and ways to solve the problem:
Water absorption - when exposed to moisture, the material is deformed. To mitigate the risk, the decorative surface is coated with a specialized water-repellent compound.
Reception is acceptable for interior decoration. Fragility, softness and ductility - they work with tiles carefully, carefully and carefully. Low frost resistance - use is limited to dry and indoor areas. Difficult to maintain - the textured surface promotes the accumulation of dust; for protection they are coated with varnish.
Gypsum products are easy to cut and machine. Cut the tiles with a hacksaw using a miter box or square, and drill the necessary holes with a drill.
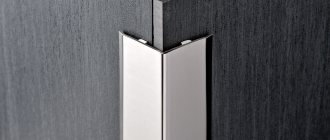
When laying gypsum tiles, the most problematic is the joining of external corners. To ensure a perfect fit, the material is cut with a grinder at an angle of 45 degrees. The resulting edge of the artificial stone is polished. The downside of the technology is noise and large dust formation.
You also have to cut the plaster finish at the junction of walls and floors, at the places where sockets and switches are installed. Curvilinear structures (for example, an arched opening) require shaped trimming. If necessary, the edge is painted.
To reduce costs and the number of cut tiles, before laying:
- mark the surface to be treated;
- unpack the products and sort them by shade, thickness, size.
Making homemade tiles
Features of cladding
The basis for making tiles is gypsum powder. Before mixing, it is mixed with polymers. These are plasticizers that give flexibility to the plates, hardening accelerators and tint mineral pigments. With their help, the decor acquires the desired color. The dry mixture is poured with water, kneaded and sent into molds. The manufacturing technology involves vibration casting or vibration pressing of blanks.
In any case, the result is a facing material with good performance characteristics. It is lightweight, which greatly simplifies installation and transportation. The plates can even be attached to drywall.
The finished canvas is fire-resistant, “warm” to the touch, the porous surface retains heat and noise well. The price of gypsum cladding is low; cheap raw materials are used for its production. At the same time, it is environmentally friendly and recommended for finishing any premises. The exception is rooms with high humidity, since the decor is hygroscopic and is destroyed by exposure to water. For the same reason, it is used only for interior work.
Dust accumulates on a textured surface over time. It is quite difficult to clean it, especially if other contaminants have appeared. To make cleaning easier, it is recommended to coat the finish with a protective layer of varnish. Despite minor shortcomings, the cladding is considered a successful imitation of brick or stone. It is chosen for decorating a wide variety of interiors.
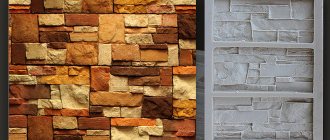
How to cut artificial stone?
Artificial stone has gained wide fame and popularity in the world. And all because it is similar to natural, but costs less and has enormous strength. Artificial stone is used to decorate the interior of a home (in most cases in kitchens and bathrooms) and to improve garden paths. Many people are interested in the question: how can you cut artificial stone, and we will now try to answer it.
Artificial stone is made from materials of varying hardness, and production development is not the only one used. The cutting method is selected depending on the type of stone.
- The agglomerate consists of huge pieces of quartz, granite, lime and marble, which are mixed with polyester resin, making the stone very strong.
- Stone on a concrete base is similar to concrete, as it consists of sand and cement (from time to time, gypsum is added instead of cement). Cheaper than agglomerate, but less strong, susceptible to moisture and low temperatures.
- Porcelain dishes are made from compressed kaolin clay, making them very hard and durable.
- Acrylic stone is made from a fine filler impregnated with acrylic resin. Plastic when heated, sensitive to high temperatures and scratches.
Artificial stone cutting
In general, artificial stone is cut using the same tools as concrete. True, some types are very durable and require a different effect, but more on that later. Now let's look at how you can cut an artificial stone of medium strength.
If you need to make holes in the stone, use a screwdriver, drill or hammer drill. The latter tool is more effective and convenient. Artificial stone should be cut with a grinding machine. It is important to choose the right mounts for the tools so that the hole drilled turns out to be very small or huge, but a cut piece of stone. The right size for you. It's even easier to cut along the mowing strip, marked with a pencil or construction tape.
How to cut porcelain stoneware
Porcelain stone products are much more difficult to process than other types of artificial stone. In order to cut or drill correctly, this must be done in front. If the stone is not fixed, then you need to put a board on the floor to cut it out. If you need to drill a hole in porcelain pottery larger than eight mm in size, it is better to make the hole smaller at first and then ream it at the same point. A rotating hammer of medium or high power is completely suitable for this. It is best to use a diamond tool for this material.
How to cut acrylic and plaster
Acrylic stone, as mentioned above, is quite plastic, so you don’t need to use very massive tools for it; even drills for metal and wood are suitable. Gypsum is also not particularly fussy. If you have a hacksaw or sandpaper, this will be enough.
Cutting bricks with a gas cutter
Cutting bricks with a gas cutter
If you have a question about how to cut bricks without a sander, you can use a gas cutter. This device is a special saw. The tool is quite inconvenient for cutting building materials, as it is bulky and heavy.
When the disc is used as a cutting element in a gas cutter, it looks like a grinder, with the difference that it runs on gasoline. The chain can also be used as a cutting element. In this case, the chainsaw looks a bit like a chainsaw. The cutting elements for the gas cutter are made using special technology and coated with diamond shavings.
READ How to Cut Porcelain Tile Without a Tile Cutter
This device is convenient to use when arranging window or door openings in brickwork. The main advantage of gas cutters is the availability of water supply to the working area of the tool.
Advantages and disadvantages of each method
Each of the tools has its own characteristics. So, tckb sawing gypsum tiles with a hand saw for wood, its ends will have a small class of surface cleanliness (roughness), and from time to time, convexities. The prerequisite for this is the huge teeth of the blade. In terms of cutting properties, it is better to use a hacksaw for metal - the edges will be smoother, so the need for further processing is small. But this process takes much more time.
How to cut gypsum tiles if speed is of the essence? For cutting, it is more advisable to use a grinder with a diamond blade. Yes, and it has its own drawback - increased dust content due to the processing of gypsum polymer tiles with power tools at high speeds.
When using manual cutting methods, it is recommended to additionally use a miter box - a rectangular, usually wooden tray with special slots (straight and at an angle of 45°) along the edges for a more even cut.
Choosing the required grinder
When we have decided on the disk, we need to choose the most suitable angle grinder.
By power
The first thing you should pay attention to when choosing an angle grinder is power. The main thing to understand here is that the rule “the more, the better” does not work for this tool. Increased power leads to an increase in the price and weight of the angle grinder. Therefore, before choosing an angle grinder, you need to decide on the appropriate diameter of the cutting disc.
- 115 mm – 750 W;
- 125 mm – 1100 W;
- 180 mm – 2000 W;
- 230 mm – 2200 W.
Because When working with stone, heavy metal discs are used; you can take an angle grinder with a small power reserve. For example, for a diameter of 230 mm, an angle grinder with a power of up to 2500 W is suitable.
By number of revolutions
- 115 mm – 12000 rpm;
- 125 mm – 11000 rpm;
- 180 mm – 8000 rpm;
- 230 mm – 6000 rpm.
The above parameters are optimal for cutting work. For grinding work, 2–6 thousand revolutions are required. If you need a universal tool, you can purchase an angle grinder with adjustable speed.
How to choose the right material for making gypsum tiles?
Advantages of gypsum as a finishing material:
- does not emit harmful substances;
- has an affordable price;
- does not burn or even collapse in the presence of fire;
- has good sound and heat insulation properties;
- takes every form.
Packages of powder have markings indicating the properties of a particular product. The degree of grinding is indicated in Roman numerals:
- hard grinding – I;
- medium – II;
- small – III.
The most durable and high-quality castings are obtained from finely ground varieties, but such material is more difficult to mix. Harder grinding is easier to work with, but products using it are inferior in strength to those cast from fine gypsum. For the production of tiles, it is recommended to use either a small powder or a medium grind.
Compressive strength is displayed in numbers from 3.5 to 25. What is more than just a number, the stronger the material. The best option is gypsum with a strength of 10 or higher.
Based on the speed of hardening, gypsum is divided into class A (sets in 6 minutes), B (from 6 to 20 minutes) and C (above 20 minutes). The hardening speed can be adjusted by adding various plasticizers during mixing. The hardening process slows down when adding lime, wallpaper glue, or washing powder. If you add table salt, the solution hardens faster.
How and with what you can make a hole
For processing materials such as artificial stone
, you can use the same tools as when working with concrete products. The tool used for drilling harder materials can be successfully used for drilling all its varieties. Typically this is done by one of the following:
- perforator;
- drill;
- screwdriver;
- Bulgarian.
The grinder is used for drilling using special diamond bits, the design of which allows them to be used by screwing onto a shaft to secure the disc. The crown is installed at right angles to the body of the angle grinder.
Drills or crowns are selected taking into account the size of the required hole and the hardness of the material used. Typically, they have a carbide tip with pobedite brazing, diamond coating or brazing of diamond parts.
Clamps are used to secure the material. Use dry drilling and water drilling to cool the cutting edge of the tool and the stone itself. In addition, water cleans the drill from sludge, and the edge of the drilled hole remains smoother. There is significantly less dust during wet drilling.
In order to drill with water at home, make a plasticine bath around the drilling site or place a rubber ring into which water is added. When using a template, water can be poured directly into it by sealing the cracks with regular tape. From time to time, water is simply added little by little from a plastic bottle.
Fake diamond
from time to time it may have a polished surface on which the markings of the mowing line are difficult to see. In this case, cardboard construction tape glued to its surface will help. The mowing lines are clearly visible on it, even if you draw them with a pencil.
Grouting joints
Grouting seams is necessary in order to improve:
- Appearance. After grouting, the brick wall will have a complete look.
- Protection. The grout layer prevents the formation of mold, moisture, dirt and dust between the finishes.
- Strength. The grout additionally holds the gypsum bricks together, preventing the formation of chips and cracks on the edges of the bricks.
A few examples of mixtures for grouting tiles:
- Ceresite. It sets quickly, does not stain the edges of the bricks, contains substances that prevent the formation of fungus and mold, has good adhesion, and is safe for human health.
- Kiilto. Can be used for grouting large (up to 0.8 cm) joints. Endowed with high resistance to temperature changes and strong mechanical loads. It has good moisture resistance, does not fade, and prevents the formation of condensation.
- Mapei. Easily adjusts to seams, has a wide range of colors, including translucent color. This grout lasts a long time, is elastic, has good adhesion, and is water-repellent.
Grouting technology:
- stir the solution in a bucket of clean cold water;
- Apply into the joints between false bricks. You can do this with a small spatula. A faster way is to squeeze out the grout from a syringe gun or a thick bag with the tip cut off;
- smooth the mixture over the entire seam with a spatula, a thin spatula, or just a gloved finger;
- leave until dry;
- Remove any remaining residue with a dry cloth.
Installation of gypsum tiles
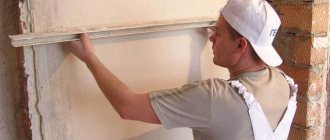
Before installation begins, you must remove the tiles from the packaging and lay them on the floor to select the appropriate color and size pieces. It is also advisable to pre-mark the surface for installation. For convenience, the wall should be divided into working areas with five rows of tiles in each. For best results, it is helpful to use a level during installation.
Gypsum tiles. This is a material that is easily subjected to mechanical stress. If necessary, the elements can be given the desired shape and size. You can handle this with a regular drill or hacksaw
If you pay proper attention to how the folded row will sit on the wall, you can avoid a lot of cuts.
You can install gypsum tiles with or without joints. If seams are provided, then first calculate the distance under them. At the same time, if the installation involves the presence of seams, you should start from the top edge of the wall. If not, then vice versa. From below. If a tile joint is not provided, do not place vertical joints between pieces on top of each other. This will disrupt the decorative purpose of imitating natural stone. It would be optimal to observe a displacement of the seams by 5 cm from each other. How to glue gypsum tiles. With or without seams, it depends on the overall appearance of the interior and general finishing solutions.
Laying decorative gypsum tiles. This is a creative process. Reminiscent of the stone cladding process. The overall appearance should be harmonious and aesthetic. Avoid high concentrations of the same areas in one area.
Choosing a disk for cutting stone
The right disc is the key to a quality result. No matter how perfect the technology, without a correctly armored cutting disc, you can’t hope for a high-quality result.
Therefore, you should pay attention to the following indicators:
Dimensions From the point of view of ensuring accurate operation of manual equipment, the size of the disk cannot exceed 230 mm. The potential of a stone-cutting machine allows the use of cutting wheels with more impressive diameters.
working conditions If a diamond disc for dry cutting can be used on natural stone with virtually no restrictions (a direct result of the technology for applying diamond abrasive), then a “wet” disc (due to the lack of its own sufficient capabilities for effective heat removal) does not imply this.
However, cooling is not the only function of water in the disk operating area. Solid fine dust mixes with water to form a suspension. Thanks to which, the cut is polished during the cutting process. Working with a “wet” disk in dry mode greatly reduces its service life.
- Perforated diamond blade - its solid cutting edge is covered on both sides with a continuous layer of diamond chips and dust. For effective heat removal, holes are made along the remaining surface of the disk.
- The “turbo” type has impressive potential for “dry” operation – models with additional diamond coating on top of the main non-solid stripes on a solid or segmented disk.
- Solid discs with minimal perforation near the diamond layer, as well as similar models without holes, work only in wet mode.
- Segmented cutting wheels provide better removal of sawing products from the working area, and thanks to the “wet” technology, they polish the cut with high quality and work for a long time.
The simplest way to select discs is possible only with a clear idea of the material that will be processed. Thus, solid (TNK crown LINE M) and segmented (EURO Marble) are optimal exclusively for cutting marble. Their main feature is the “wet” cut.
There are much more worthy options for cutting composite porcelain stoneware and natural granite (you can find them in our catalog), and the technology of applying diamond abrasive makes them truly universal.
Our specialists will help you choose a truly high-quality and professional tool for cutting marble and granite. Contact us by phone: 8 (800) 550-65-05.
Gypsum cladding cutting technology
It is important not only to choose how to cut gypsum tiles to look like stone or other imitation, but also to do it correctly
We list the points that people pay attention to when slicing
Correct sequence of work
It is easiest to cut the material in a straight line, but sometimes curved or circular notches are required. They are more difficult to make.
Thank you, I’ll take everything into account... practical advice. I'll add them to my notes. I’m laying gypsum tiles under a stone chimney, wish me luck..
August 12, 2016
Won't it crackle from the temperature?
August 12, 2016
Won't it crackle from the temperature? Still a chimney.
August 12, 2016
This is not a chimney, but a ventilation duct. This is what the architect intended.
Thanks to the author! I refinished the fireplace (false wall) with plasterboard in the middle of the fireplace, natural stone (sausage of different lengths) and put it on ceresite glue - for 10 years everything holds up like a dragon around the firebox too / despite the high temperature!
December 27, 2020
Please tell me, is it possible to lay gypsum tiles on the stove and the stove wall in the room?
I think it's possible. Only on the stove you need to use good glue (class C 2)
Add a comment Cancel reply
This site uses Akismet to reduce spam. Find out how your comment data is processed.