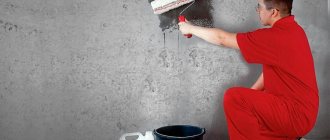
Not having enough experience to carry out high-quality repairs and wanting to save money on specialists, we independently level the walls of old Khrushchev-era buildings, glue tiles or expensive wallpaper, while missing the most important thing - preliminary preparation of the surface. As a result, all efforts go down the drain: over time, the wallpaper begins to peel off, the paint peels off, and there’s nothing to say about the tiles.
Only with the use of primers can a gypsum plaster layer be properly prepared for subsequent application of finishing materials to the walls. What compositions there are, as well as what should be used in this or that case, will be discussed in this article.
No. 2. Types of primers for walls by composition
Depending on the characteristics of the composition, the following main types of primers are distinguished:
- acrylic primer is the most versatile composition that can be used to coat wood, concrete, chipboard, brick, old and new plaster. Acrylic primer can be used to treat porous substrates, is odorless, dries quickly (about 5 hours), and forms a “breathable” surface. The only negative is that it is not suitable for priming metal surfaces;
- alkyd primer is an ideal option for treating wooden surfaces, which under the influence of such a primer acquire a slightly swollen structure, which ensures excellent adhesion to any finishing materials: from wallpaper and painting to cement-sand coatings. One layer of this primer takes about 15 hours to dry. Substances that prevent the development of corrosion and mold may be added to the composition;
- Glypthal primer is one of the few compounds that can be used to treat metal surfaces. It is also sometimes used on wooden walls. The primer dries within 24 hours, but has a limitation - it is only suitable for relatively dry rooms, since it loses its properties with constant exposure to high humidity;
- perchlorovinyl primer is a universal composition that can be used to process wood, brick, plaster and even metal. It dries quickly, and in summer at high temperatures one layer dries in 1 hour. This primer is not used inside residential premises due to its toxicity, but it may be suitable for external work;
- polyvinyl acetate primer consists of polyvinyl acetate dispersion and latex, can be applied to any surface and is used only as a base for polyvinyl acetate paint. Dries quickly, up to 30 minutes;
- Phenolic primer is used as the first layer when processing metal and wooden structures. The composition dries up to 15 hours, is used for outdoor work only;
- polystyrene primer also cannot be used for interior work; plastered and wooden surfaces are treated with it;
- aluminum plasters, as a rule, are used to treat wooden surfaces and can additionally protect them from fungal attack;
- Epoxy primers are suitable for metal and concrete. They protect metal from corrosion, and allow concrete to better adhere to the finish;
- shellac primers are used to treat wooden surfaces and prevent the release of resins;
- mineral primers are produced on the basis of gypsum, lime and cement, and are used to treat the surface of concrete and brick walls. Such soil dries from 3 to 24 hours, which depends on the thickness of the layer and the nature of the surface material.
You can also find universal primers on sale. The very name of these compositions suggests that they can be used for application to any surface. They are used to carry out minor construction and repair work, when the required composition with specific qualities is not at hand, and also sometimes for treating surfaces consisting of different materials.
How to properly apply deep impregnation to plaster
The substance is applied to the cleaned surface in 1-2 layers. Recommended operating temperature is from 10 to 30 degrees.
Working tools: brush, sprayer.
Do not apply to a dry layer. The “wet on wet” principle should be followed.
At +20°C, the composition dries in 60 minutes, but complete hydrophobization may require much more time.
Within 24 hours, it is important to protect the treated surface from water and precipitation.
All work is carried out wearing gloves and protective clothing. If the composition gets into your eyes, you must immediately rinse them with plenty of water.
As a rule, the consumption of water repellent is small, varying from 0.1 to 0.5 l/m2.
Types of primers
Today you can find the following types of material on sale.
Acrylic primer
The polymer composition provides high adhesion, strengthens well, and protects substrates from water and chlorine-containing compounds. It is applied to ordinary concrete coated with plaster or paint. The finished layer is able to successfully withstand external negative influences, has a stable shade, and has antiseptic properties.
It dries quickly - up to 5 hours, so it can be used when work is under tight deadlines. Easy to apply, improves adhesion. As a result, the pores are reliably sealed, there is no concrete dust, and steam and air circulate freely through the finished layer. Safe for health. It is not advisable to use it for processing the facades of buildings.
Strengthening primer
Refers to a type of soil intended for surfaces with weak absorbency. The composition contains quartz sand. As a result, the surface turns out to be slightly rough, which ensures the best application of a decorative coating or installation of a self-leveling floor.
Forms a waterproof layer with waterproofing properties. Quickly penetrates into walls, ceilings, floors, closing small pores, strengthening and removing dust from the concrete surface, increasing the quality of adhesion to decorative materials.
For outdoor use
Frost-resistant compounds with deep penetration do not form cracks and do not contribute to the peeling of finishing materials at low temperatures. They are usually made on the basis of silicate or acrylic and are intended for mineral surfaces.
Primers penetrate into the base, reliably seal the pores, preventing the penetration and absorption of moisture. So even with a sharp onset of cold weather, ice does not form in the thickness of the walls, which means that destruction does not occur.
Depending on the type of surface being treated, the following concrete primer for exterior use is offered:
Retail chains offer compositions for creating smooth, well-protected surfaces from moisture for finishing work: laying ceramic tiles, painting, plastering. There are soils with silicate filler for processing foam concrete and cinder blocks with a cellular structure. The mixture penetrates deeply into the smallest pores and closes them.
Trusted brands: Reesa Tiefgrund, Weber, Tikkurila, Caparol.
For interior work
This soil is usually odorless. Latex, alkyd or universal acrylic varieties are suitable for the work. If you plan to decorate rooms with high humidity, then it is worth purchasing special compounds with antiseptic characteristics. A primer for absorbent surfaces increases the quality of adhesion of the surface to mortar, glue, and paint.
For concrete floor
A deep penetration primer is the best option for this type of floor. It is absorbed into the concrete base, making it durable, while leaving the structure of the building material porous. A one-component polyurethane primer mixture for concrete helps reduce surface looseness.
Today, two types of floor primers are produced, differing in the method of application: universal and specialized, which in turn are divided into mixtures for external or internal use. The former are in high demand, but are inferior in their properties and quality to the second type.
Some special solutions provide an increased degree of protection against loads, mechanical influences and aggressive external environments.
Types of solutions according to purpose and requirements for future coating:
- strengthening;
- acrylic;
- polyurethane;
- epoxy.
If there is looseness or damage to the surface of the concrete base, the mixture should be applied until its absorption stops. The resulting film will indicate that the problem concrete area is well saturated.
https://youtube.com/watch?v=fm8sZaHiZio%3F
Types of primers for mineral materials
Acrylic primers are used to process these materials. They dry in 2-3 hours and do not have a strong odor. Polyvinyl acetate solutions dry for half an hour and can be used for interior work. Then a PVA composition is applied to the surface.
To finish plastered external substrates, you can use polystyrene compounds containing toxic solvents.
The primer penetrates deeply into the concrete structure and strengthens porous materials, but is not suitable for loose surfaces. Adhesion is enhanced by the small latex segments included in the composition.
Plaster primer before wallpapering
acrylic-based deep penetration compounds . They bind the smallest particles of dust, forming a protective film on the surface.
Before applying impregnation, the plaster should also be pre-cleaned. If traces of mold or mildew are found, the surface must be treated with an antiseptic.
It is necessary to prime the walls not only immediately before wallpapering, but also before puttying, and twice. Before applying each layer, allow time for the previous one to dry. Since gypsum intensively absorbs moisture, this is the only way to achieve reliable adhesion to the wallpaper.
Sometimes soils with different properties are combined, for example, water-repellent and adhesive.
How to do the job correctly with your own hands?
You must first take care of your inventory. To prime the walls you will need: a roller or brush, a spatula, paper or sanding machine, a chemical solution and the primer mixture itself.
You need to completely get rid of the old coating, otherwise the primer will have no effect.
To do this, use a grinding machine or sandpaper; in some situations it is impossible to do without chemical solutions.
If there are any unevenness on the treated surface, be sure to correct them. Depending on the size of the wall defects, either putty or a thick primer is used (recesses no more than 15 mm). The second option is bad because you will have to wait about a week for drying.
Most often, the product is already ready for use after purchase; otherwise, you must follow the instructions included with the product.
The primer is applied over the entire surface with a roller; if the consistency is thick, you can use a spatula. After applying the first layer, you will need to take a break while the wall dries.
The question immediately arises: after how long can work be continued? The answer depends on what kind of coating was used; deep-penetrating primers dry in 24 hours, in the case of acrylic coatings - up to 10 hours.
Priming ends when the finishing layer dries. Afterwards you can begin finishing work.
Some people ignore the priming stage when carrying out finishing work, but this is a mistaken position. So that the new walls last a long time, and the owners do not have to start repeated repairs soon, the primer is an integral component.
How to prime walls: video tutorial.
Do-it-yourself priming of walls before plastering: step-by-step technology for application and use
To get a good result, you need to properly prepare the walls and treat them with a primer. Before starting work, it is recommended to read the manufacturer's instructions, which are located on the product packaging.
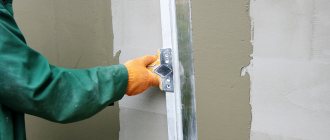
Preparing the surface for applying primer - what is it?
The old coating is removed from the walls, and then all existing defects are eliminated. It is necessary to widen the cracks, i.e. remove that part of the material that does not adhere well, and then cover them with plaster. If there are stains on the wall, they are removed using solvents, degreasers or other compounds (they are selected depending on the stain). If mold is detected, cleaning and disinfection are carried out.
To improve the adhesion of the putty to the concrete surface, notches can be made on the latter. Preparation includes protecting windows, doors, furniture or other items that may come into contact with the primer. They are sealed or covered with thick fabric or polyethylene. You can begin priming when the preparatory work is completed and the wall is completely dry.
Tools for work: how to apply primer under plaster
Walls can be primed using:
- roller with a long handle;
- spray bottle;
- brushes
In most cases, a roller is used. A brush is necessary for treating hard-to-reach places, such as corners. They rarely resort to using a spray bottle.
Additionally, you will need a container into which the primer will be poured (cuvette).
How to prime correctly
The priming process can be divided into preparatory and main stages:
When preparing, it is necessary to sand the surface, remove dust, dirt, and mold from it. If necessary, dictated by the instructions for the primer composition, the wall must be degreased: for this use acetone or similar solvents
During preparatory work, it is important to maintain proper ventilation of the room and temperature conditions within the range of 5-25°C. The main stage of priming is to dilute the required amount of the composition and apply it to the walls.
How many times
The primer is usually applied in two layers, the first of which is thicker, and the second is necessary to better strengthen the surface
It is important to dry each layer of primer for the time recommended on the packaging (usually several hours)
What to prime
Depending on the porosity of the wall, you can prime it with a brush or roller.
Each method has its own advantages.
A brush allows you to work on unplastered surfaces, while a roller gives a uniform, smudge-free layer, which requires less primer.
How long after can I paint?
The minimum time for drying the primer should be found in the instructions for the specific composition; it usually ranges from 4 hours.
If repair work allows, then it would not be superfluous to let the primer soak in during the day.
In addition, if the primer composition was applied to plaster or putty, then subsequent painting should be carried out only after all layers of finishing have completely dried.
Drying of the primer can be slowed down by open containers filled with water in the room, so it is better to remove buckets of water, remnants of diluted primer and other liquids from the room.
Preparing the primer
To prepare the mixture for application, you should follow the instructions that are available on any packaging of the composition.
- Ready-to-use mixtures just need to be mixed and poured into a convenient container.
- The dry mixture is diluted with water in the proportions specified by the manufacturer and mixed thoroughly.
- The concentrate should also be diluted, following the instructions on the packaging.
It is important that the mixture is homogeneous, without lumps, and not too liquid, otherwise the result will be unsatisfactory.
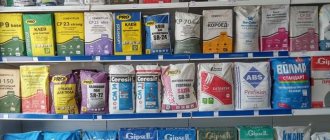
Types of soil
The modern construction market offers a wide range of primer materials.
According to the type of primer solubility, there are:
- based on organic acids (alkyd resins, polyurethane, latex);
- water-dispersed, which can be diluted with water (acrylic, latex, silicate, silicone);
- mineral (based on lime, gypsum, cement).
By purpose they are:
- universal;
- specialized;
- antifungal;
- insulating;
- strengthening.
Consistency matters. Usually the transparent composition is more liquid. The white analogue has higher viscosity and density. Consistency determines penetrating ability.
Liquid transparent compounds strengthen the outer layer of the wall and bind dust. Among these varieties you can find solutions with special additives, through which alkalis can be extinguished. The price of such primers is reasonable.
Compared to denser analogues, their penetrating ability is 25% greater. The disadvantage of such a primer is the heterogeneity of application: when treating the surface, it is not visible which area is already covered with primer. As a result, the part with more soil reveals itself as glossy. Heterogeneity is dangerous because the adhesion when wallpapering will be different.
Thick primers, unlike liquid varieties, are able to correct the surface of the walls before wallpapering. They eliminate minor irregularities, have an antistatic effect, and quench alkalis, creating a smooth film. By filling micropores, they color the surface of the wall, so during the processing process the entire treated surface is visible.
Its penetrating ability is lower; this primer is good for walls with a uniform structure without visible defects. The smoothness created by this primer is suitable for plaster and thin wallpaper, as well as photo wallpaper. This primer is not suitable for liquid wallpaper.
What primer should be used for gypsum compounds?
To level walls and ceilings, a mineral-based primer is used.
Thus, in modern conditions there is a huge selection of both primers for drywall and for other various surfaces. If you are purchasing a primer specifically for drywall, be sure to read the instructions for use.
Drywall
Plasterboard ceilings
Suspended plasterboard ceilings
Solid suspended plasterboard ceilings
Wall cladding with plasterboard
Types of compositions
Impregnating compositions, first of all, are distinguished according to their purpose:
- For surfaces with a wood structure (chipboard, fiberboard, OSB, wood), liquids from organic solvents based on alkyd resins are suitable. They are often used to treat surfaces painted with oil paints.
- Universal impregnations are a water-soluble product based on silicone, silicate or acrylic. Such primers are applied to brickwork, concrete walls, plasterboard cladding, and wood surfaces.
- In construction, special coatings with cement and polyurethane, shellac or epoxy resins are least often used.
It is universal liquids that are more suitable for surface treatment before plastering. And coatings based on any solvents cannot be used to impregnate walls made of polyurethane foam or polystyrene foam. Each base uses its own type of primer. Based on their structure, vertical fences can be divided into wooden, mineral, hydrophobic, metal, and absorption bases, each of which should be studied separately in order to know which means are best suited for impregnation.
- Mineral. These walls are brick, concrete or plasterboard. To impregnate them you need to use universal products. For concrete bases, you can use the Betonkontakt solution, which increases the adhesion of concrete. Primer for brick walls is also suitable for cement surfaces. Deep penetration impregnations cannot be used in the case of dense bases - a polymer film forms on the surface due to the fact that the composition will not be able to penetrate deeper. This will cause the plaster to peel off. Typically, a deep penetration agent can penetrate the base to a depth of a couple of centimeters.
- Metal. It is better to choose special-purpose coatings. For example, a rust converter, which is often used on metals as a primer, is suitable. The liquid not only removes rust stains, but also ensures increased metal adhesion.
- Wooden. This is not only ordinary wood, but also a surface made of fiberboard, OSB, and chipboard. Here it is better to choose impregnations with fungicidal and fire-retardant additives, which will increase fire resistance and prevent the occurrence of fungal growths and mold in the wood under the plaster layer.
- Hydrophobic. Ceramic tiles, laminate and glass have a quality called hydrophobicity. It is better to choose a primer based on polymer resins if you need to treat walls with such a structure. Often this primer is used as preparatory layers before textured painting or decorative plaster.
- Absorption. Such surfaces include walls made of aerated concrete and foam blocks. Here, a layer of primer will also obviously not be superfluous; it will increase adhesion and prevent water from penetrating inside the walls. A durable waterproof film is formed on the surface of aerated concrete and foam concrete blocks.
The need to apply a primer
In the photo - the most popular tool for applying primer
A high-quality, correctly selected primer for plaster is necessary, and there are several obvious reasons for this, including:
- ensuring high adhesion of the base to applied finishing materials;
- ensuring the stability of the base to mechanical loads by filling micropores with an impregnating composition and strengthening the entire structure;
- ensuring the resistance of the base to the negative effects of environmental factors due to a dense polymerized film on the surface and, as a consequence, an increased degree of hydrophobicity.
It would seem that the composition of the plaster resembles putty. But there is a significant difference in the composition of the fillers and their granularity. As a result, the adhesion of the putty is much better, and therefore it can be applied in a thin layer and polished with sandpaper after drying.
Plaster mixtures do not have such advantages. While the plaster layer is wet it is viscous, but as it dries, the finishing material may peel off in certain areas.
The reason for these negative consequences is the intensive absorption of moisture by the base of the plaster mixture. As a result, those areas of the finishing material from which the moisture was removed most quickly do not have time to properly grasp and adhere to the base. This problem can be solved with a primer, which is available in a wide range in specialized construction stores.
A primer is no less necessary when finishing already plastered walls. For example, before subsequent painting or wallpapering with your own hands, the base, leveled with a layer of plaster or putty, must be strengthened and made more hydrophobic.
This is explained by the fact that most putties and plaster mixtures, after drying, do not represent a homogeneous coating with the same density over the entire surface. As a result, the paint will lie unevenly on such a base, and the wallpaper may come off as the glue is absorbed unevenly.
An effective solution to this problem will be to apply a primer layer, which forms a microfilm over the entire surface of the base with the same characteristics over the entire area.
Important: In order to achieve maximum quality of finishing work, a primer should be used both before and after plastering.
Choosing the optimal solution
In the photo - painting of pre-primed decorative plaster
As already mentioned, impregnating compositions on the market are presented in a wide range, and therefore you can choose the optimal solution for various surfaces.
For example, some soils, penetrating into the thickness of the base, fill the pores and have a strengthening effect. Other materials act differently and practically do not penetrate deep, forming a hydrophobic film on the outside. Another category of products performs a disinfecting, antiseptic function, which is also important when applying plasters.
The problem with using the above compounds is that they must be used in combination with other materials in order to achieve certain performance characteristics. On the other hand, there are universal primers that, when applied to the base to be plastered, perform several functions at once.
The use of universal compositions allows not only to save money that would have to be spent on purchasing several compositions, but also to reduce the time required for finishing work.
Parameters to consider when choosing soil
This is how a primer for gypsum plaster is applied to walls in a country house
Important: Not every primer is suitable for certain substrates. The quality of the finished result depends on how correctly the primer is selected before plastering.
In accordance with the type and characteristics of the base, the following categories of primer compositions are used:
- Strengthening compounds are used if the base to be plastered is unstable or loose with an excess of micropores;
- Deep penetration impregnations are relevant if the base has recently been plastered or if the surface is made of asbestos cement or materials of similar density;
- Anti-corrosion compounds are used if finishing materials are intended to be applied to substrates with metallic inclusions;
- Antiseptic impregnations are relevant when finishing old walls or when working on wooden bases;
- Primers with increased adhesion are used if the base is covered with difficult-to-remove contaminants, both organic and inorganic.
- Universal impregnations are used when some of the above conditions are typical for one type of surface.
After we have decided on the parameters according to which the primer for plaster is selected, we will consider the main types of compositions on the market.
Types of primers for plaster
In the photo - applying acrylic primer before painting
The entire range of primer compositions on the market can be divided into two main categories:
- strengthening;
- adhesive.
Both types of soil are sold both in the form of ready-made liquids and in the form of a dry mixture, which is diluted with organic solvents or water.
Both coatings can be applied using traditional painting tools, including rollers, brushes, sprayers, etc. Most often, the instructions on the package specifically indicate the type of tool that is appropriate to use.
Strengthening primers are products used for the initial treatment of the base. Therefore, such compositions are called the general term primers.
The main function of primers is to glue the structure of the top layer of the base into a homogeneous coating to a depth of 3 cm. Deep penetration primers enter the micropores of the plaster and base to a depth of 10 cm.
Of course, these are average values that may vary depending on the characteristics of the plaster layer and the type of base. The average primer consumption per 1 m2 of plaster is 50-120 grams. Deep penetration primers are used to prepare the base before applying tile adhesives or decorative plasters.
An adhesive primer for decorative plaster is used to improve the adhesion parameters between different layers of finishing materials.
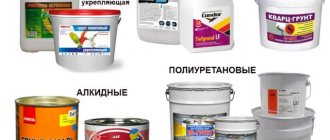
Based on the characteristics of the binding component, soils are divided into:
- alkyd;
- acrylic;
- mineral;
- polystyrene;
- phenolic.
Of course, the list of compositions does not end there, but when renovating residential premises, it is advisable to use only the first three categories.
Let's talk about each of them in more detail.
In the photo - alkyd primer-enamel
- Alkyd primer is used to treat a wide range of substrates, including wood, concrete, tile and even glass surfaces. Before applying a plaster layer or a layer of decorative finishing, the soil must dry for 10-15 hours.
The photo shows an acrylic primer, ready to use.
- Acrylic primer is a universal product, as it can be applied both to old and new plasters, as well as to brickwork, concrete, wood, etc. In addition, a primer for decorative plaster, made on the basis of acrylic copolymers, can be used for processing dry plasters based on gypsum plasterboard and particle boards.
Mineral primer for aerated concrete for plaster in standard packaging
- Mineral primer is used exclusively in construction and serves primarily to strengthen old plaster coatings and other porous and unstable surfaces. In addition, this impregnation has proven itself as a material for treating concrete, expanded clay concrete and gas silicate blocks, brickwork, etc. Soils are made on the basis of lime, gypsum, cement and a number of other materials of mineral origin.
Types of facade primers and their properties
Each variety has its own purpose. Therefore, it is recommended that you read the instructions before starting work and even before purchasing. The documents always describe with which a particular primer composition for exterior work is best combined when it gives the optimal result.
The composition of the following varieties has become widespread:
- Anti-corrosion;
- Microbicidal;
- Acrylic;
- Alkyd;
- Deep penetration. The technical level of strength is higher compared to analogues;
- Covering;
- Regular.
Each variety has its own purpose.
Composition of primer mixtures
When purchasing deep penetration facade primers, you cannot do without studying the packaging with the information provided on it. It contains not only instructions for use, but also a detailed description of technical characteristics. This applies to consumption and other similar information.
Facade primers are divided into varieties, including composition:
Two-component polyurethane. They are considered universal. Combined with concrete and plasters, and other surfaces of various types. They guarantee high properties for adhesion and strengthening of the existing base. Even when applied to wet surfaces, the protective properties are not reduced. This is an important characteristic;
Alkyd, synthetic origin. These are enamels and primer paints that are used to process only metal or wood. For ceramic tiles, this base is considered the best;
Acrylic primers for facades on plaster, with appropriate polymers as a base. They are also considered universal compounds. Include water-dispersible groups and deep penetration. Without toxic substances in the composition, with the ability to dry quickly. Dilution with water is required to achieve a suitable concentration. They differ in low consumption per 1 square meter. Particularly suitable if the base is brick;
Mineral. With a composition that includes gypsum or cement, lime. With a thick consistency that can smooth out any unevenness on the walls
When selecting, it is important to take into account the combination with certain materials. Quartz sand also requires this.
Nuances of work
Do I need to prime the walls before applying putty? This question is asked by many beginners who are faced with repair work for the first time. Of course, soil must be used, but the following nuances should also be taken into account:
- After cleaning the surface, 2-4 layers of primer should be applied to the wall. It should stop dusting, be smooth and have a uniform color.
- The solution must be applied in a thin layer in order to avoid the formation of drips.
- After the primer has dried, putty can be applied.
- When the putty layer has completely hardened, it is recommended to apply several more layers of finishing primer to make the surface more durable.
READ Plaster consumption per 1 m2
These rules apply to walls made of any materials. Before starting work, it is important to know whether the plaster needs to be primed before plastering the walls. The mixture is a fixative for any finishing layer, so it must be after each stage of work.
Puttying
When the walls are plastered, they must be puttied, be it external or internal surfaces. You need to select putty depending on the type of plaster or the type of building materials used to construct the building. In order for decorative plaster to be durable and hold firmly, you need to choose the right primer mixture, otherwise the layer of plaster will peel off completely or partially. To prevent this from happening, it is necessary not to use putty consisting of highly viscous substances, as well as those that do not absorb moisture well, for example, you should not use oil putty, glue, or primers based on alabaster.
How it works
Indeed, how exactly does the primer affect the properties of the coating?
Strengthening
When the surface is moistened, the main active component (this can be either acrylic resin or cement) along with water penetrates into its pores due to the capillary effect. When water evaporates, soil particles remain in the pores, penetrating the coating with unique strong threads stretching deep into the coating.
Adhesive
There are two possible ways here:
- Creation of a film with high adhesive properties on the surface.
- In an advanced version, this film includes a fine mineral filler, which will make the coating rough, thereby further increasing the adhesion of the plaster to the surface.
This is exactly what the “Betokontakt” primer from Knauf is: it is a familiar aqueous dispersion of acrylic resin with the addition of fine quartz sand and auxiliary polymers. The price of a 20-kilogram package of soil is approximately 1,700 rubles.
Knauf Betokontakt allows you to plaster even chipboard or oriented strand board.
Preparing concrete walls for plastering
The process of preparing interior concrete walls for plastering consists of the following steps:
- The old coating in the form of fragile plaster, whitewash, paint is removed (in which cases it is possible to apply plaster over old paint, we recommend reading here);
- Defects in concrete walls are determined. If there are nodules, they are cut down using a hammer and chisel. Massive chips and deep cavities are sealed with cement-sand mortar in a ratio of 1:3; if necessary, steel mesh is used for reinforcement;
- On smooth walls, notches are made using a hammer and chisel, the maximum notch spacing is 10 cm;
- If it is necessary to install hidden wiring, grooves are made for the wires;
- The concrete surface is cleaned. A brush and water are used to remove dust and dirt. The wall can be treated using compressed air or a strong jet of water, which will significantly speed up the cleaning process;
- A primer is applied to the wall surface.
Notches on a concrete wall
We'll talk more about the types of primers for concrete walls below.
Priming concrete walls before plastering
Priming of concrete walls is necessary for the following purposes:
- Reducing the absorption of water from the solution into the concrete base;
- Protecting a concrete wall from the formation of fungus and mold;
- Increasing the strength of the protective (surface) layer of concrete;
- Dust removal from the concrete surface. The primer binds dust particles and makes the base clean;
- Improving the adhesion of plaster mortar to a concrete base.
Applying primer to a concrete wall
Next, we will look at how to prime concrete walls before plastering:
- For smooth concrete surfaces, concrete contact primers are ideal. After application, the composition fills the pores in the concrete, and a rough layer with high adhesion is formed on the surface, facilitating good adhesion to future plaster. We recommend compositions from the following manufacturers: Feidel Betokontakt, Knauf Betokontakt, Prospector Beton-Kontakt.
- Old concrete surfaces can be strengthened using a deep penetration primer designed specifically for impregnating weak substrates. Such soil impregnates the top layer of concrete, thereby strengthening it and giving it the necessary strength. Among the manufacturers we recommend: Prospectors “Deep Penetration”, AquaNova “Nova”, Acrylic Optimist “Deep Penetration”.
Primer Prospectors "Deep Penetration"
To prepare porous concrete surfaces (aerated concrete, foam concrete), primers are needed that reduce the absorbency of the base, thereby preventing uneven setting of the solution. The following primers are perfect: Knauf Mittelgrund, Knauf Rotband Grund (for gypsum plasters), Ceresit ST 17, Toiler TR10.
When applying primer to the substrate, be sure to follow the manufacturer's instructions. As a rule, the primer must be shaken before application, and the application process itself must be carried out in several layers.
Installation of beacons and reinforcing mesh
If the old wall has differences of more than 10 mm, then it is necessary to install beacons before applying plaster. Beacons are needed for even application of plaster with an equal layer of thickness. It is better to use metal profiles as beacons.
Lighthouses on a concrete wall
If the thickness of the planned plaster is more than 20 mm, then it is necessary to additionally install a reinforcing mesh. The mesh is fastened to the wall using dowel nails.
Next, you need to prepare the solution in accordance with the manufacturer's instructions. To avoid the formation of lumps, add water to the dry mixture, and not vice versa.
Why do you need a primer when working with gypsum plaster?
Plastic gypsum plaster is widely used for leveling walls due to its ease of application. The following mixtures have worked well:
- Knauf Rotband (Knauf Rotband)
- Volma Layer
- Prospectors
- Unis Teplon
- Ceresit CT 35
- Weber.vetonit Pros
These compositions differ only in different additives. Each master chooses for himself the plaster with which it is more convenient to work. Volma Layer, for example, does not dry out a little longer than Rotband; with enough experience, it can be used to achieve an almost perfectly flat surface even without finishing.
So why not immediately put wallpaper on a leveled, dust-free wall or lay tiles without prior priming?
Believe me, there are always various roughnesses and dust particles on the surface of any wall! What kind of adhesion will such walls have with finishing materials? Will the plaster along with the heavy tiles fall off in the middle of the night? Neither wallpaper nor tile adhesive can replace a preliminary primer, which forms a single durable film that strengthens the surface and improves the adhesion of finishing materials to it.
Do not forget also that gypsum is afraid of exposure to moisture, which reduces strength and worsens thermal insulation properties. The primer penetrates deep into the porous structure of the gypsum layer. The resulting polymerized film not only prevents moisture from entering the plaster and the spread of mold, but also increases resistance to mechanical stress.
When choosing impregnations for walls, you should consider such important factors as:
- compatibility of the primer with finishing materials;
- features of the operation of the room (humidity, temperature conditions, etc.).
Before applying any type of primer, the surface must be degreased and cleaned.
No. 3. Properties and purpose of the primer
Depending on the room in which the primer will be used, compositions with specific properties can be selected for surface treatment:
deep penetration primer is an option for loose and insufficiently strong surfaces. The composition can perfectly strengthen such a wall and significantly reduce paint consumption. Often such compositions are used to impregnate a surface finished with plaster, but this does not prevent the use of a primer for application to drywall, brick, foam concrete and aerated concrete. If you need a reliable primer for wallpaper, especially for heavy types, then you can safely opt for such compositions. It is not recommended to use a deep penetration primer to treat surfaces with poor ability to absorb moisture;
antiseptic primer for wet rooms (bathroom and kitchen) contains special substances that prevent the appearance and development of fungus, has water-repellent properties and can even reduce the flammability of the base. Such compounds provide such high adhesion that the surface of the material and the finish adhere very tightly, and no microorganisms can penetrate into the joint
In the bathroom, it is recommended to apply three layers of primer;
anti-corrosion compounds are indispensable when processing metal surfaces, prevent the formation of rust, increase service life;
adhesive compounds and non-contact primers are used when it is important to achieve the maximum level of adhesion to a smooth and completely non-absorbent surface (concrete, previously painted walls). They contain sand or needle quartz particles that increase adhesion
Such primers can be used to treat the base before gluing heavy wallpaper.
Manufacturers must indicate on the packaging what type of surface the primer is intended for, where it is recommended for use, and what the approximate material consumption will be for different types of surface
Experts advise that when choosing a primer, pay attention to the products of those manufacturers whose finishing materials you use - as a rule, products from the same company go well together
Feidal :: primers - primer feidal tiefgrund lf for drywall
Purpose: Recommended for priming finely porous substrates with high absorption capacity and containing sand: any kind of plasters, gypsum and plasterboard boards, brick and asbestos cement, foam concrete, for strengthening slightly dirty, chalking, but firmly adhering coatings. For surface preparation before gluing ceramic tiles, painting, gluing wallpaper. Strengthens weak, loose and crumbling surfaces on the façade and indoors.
Properties:
- Binder – 100% fine acrylate “hydrosol”
- Impregnates and glues loose substrates to a depth of 10 cm
- Has high adhesive and penetrating ability
- Strengthens crumbling and loose surfaces, dries quickly
- Solvent free
- Significantly improves adhesion
- Vapor permeable - the treated surface breathes
- Ecologically complete product, odorless
- Can be diluted with water up to 25%
Film color: Colorless, transparent.
Gloss: Matte.
Binders: Fine acrylic binder “hydrosol”.
Specific gravity: 1.0 kg/l.
Dry matter percentage: 10%.
Surface preparation: The base must be clean, hard, dry and durable. Remove release agents such as chalk, lime, oil and flaking coatings thoroughly.
Application: Brush, roller, spray (also airless). If the base contains loose sand and has a very high moisture absorption capacity, then work according to the “wet on wet” principle. The 2nd layer of primer is applied immediately to the wet 1st layer. Do not allow excess soil on the surface, as the process of “glazing” occurs. When priming other substrates, dilute with water only as needed, but not more than 20-25%.
Be sure to do a test application of primer to the surface to determine the required degree of dilution, since the structure and absorbency of the substrates are different.
When processing plasterboard sheets, it is enough to apply 1 layer of primer. It is not recommended to use for priming oil-adhesive putties, as well as surfaces that do not absorb moisture.
Drying: After 1-2 hours you can paint at +25°C and 65% humidity.
Average consumption: 1 l to 10 sq. m. single-layer coating. The exact consumption is determined by a test coating. Depends on the absorbency and structure of the base.
Storage: In a tightly closed container at a temperature above 0° C in a tightly closed container. Do not freeze!
Shelf life: 2 years from the date of manufacture.
Safety precautions: Do not pour into sewers or water bodies, dispose of as household waste. In case of contact with eyes, rinse with water.
ENVIRONMENTALLY FRIENDLY PRODUCT WITH A NEUTRAL ODOR! DOES NOT CONTAIN SOLVENTS AND IS NOT FLAMMABLE!
There is a frost-resistant modification!
Interested? Leave a request - >
Packaging Price, rubles 5
10
399.00
794.00
Do I need to prime before painting?
The primer can be carried out with various compositions: paint, a ready-made primer preparation or a concentrate, which is diluted according to the instructions. Solutions are also marked relative to the surface to which they will be applied (wood, metal, plaster).
Water-based
Water-based emulsion is not the cheapest finishing material, so pre-priming the walls will significantly save on paint consumption.
The primer applied under water-based paint reduces the hygroscopicity of the base, which leads to a more uniform distribution of paint on the surface, increased strength of the coating, and increased wear life.
The water-based primer is applied with a brush, preferably in one layer, which should ideally cover all the unevenness of the wall, but not form uneven accumulations of soil. After the primer composition has completely dried, which takes 5-7 hours, water-based paint is applied in two layers.
Silicate
Silicate paints are sold dry; to paint, the mixture must be diluted with water and used as soon as possible, before the paint loses its properties. Therefore, a silicate-based preliminary primer is of great importance for the speed and quality of painting.
Special primer compositions can reduce the toxicity of alkali contained in silicate paints and strengthen mineral surfaces to extend the life of the paint to 10-15 years.
Acrylic
Priming before acrylic painting has an important feature: the composition must be applied to highly abrasive surfaces; from smooth surfaces it will gradually slide off even along with the paint.
Therefore, before applying primer, the surface of the wall must be treated with a stiff brush or coarse sandpaper to artificially create grooves and roughness.
In turn, the primer solution perfectly fixes the coating particles, leveling the adhesion and absorbency of the wall, which allows the acrylic paint to lay down in an even and durable layer.
Oily
Oil paint is one of the most highly adhesive, even without applying a preliminary primer layer. Priming increases the strength of the oil coating, making it smoother and less porous. However, often oil paint, applied without a primer, itself acts as an unsurpassed material for finishing work, as it adheres well to the surface.
When applying oil paint for the first time, the use of a primer solution is not necessary. For secondary paint, you should opt for a special “on top of the paint” composition, which will save the time required to remove the old layer.
To prime or not to prime. that is the question
Do I need to prime the walls before applying putty? Applying primer is a must for any repair that involves finishing walls. properly treated before finishing guarantees long-term preservation of an attractive appearance. The primer will be useful in the following cases:
- Regardless of the material from which the wall is made (brick, wood, plasterboard), it contains microcracks and irregularities. The primer smoothes them out. The result is a more even structure, onto which subsequent finishing fits much better.
- The composition of the primer mixture improves adhesion to the paint, so it looks good and does not crack even several years after application.
- When using primer, the level of putty consumption is significantly reduced.
- When the primer mixture hardens, it forms a film that prevents the appearance of various stains on the treated surface.
- It is much easier to apply and evenly distribute the putty onto the treated wall surface.
- The soil may contain a variety of additives that have antiseptic, antifungal, anti-mold and moisture-proof properties.
Do I need to prime the walls before finishing putty? Of course, the mixture has a lot of useful properties that will help preserve the appearance of the renovated room for many years.
Is it possible to putty walls on wet plaster?
putty
I don’t recommend it for raw Rotband.
The adhesion of the putty to the plaster
will not be good. If there are wet spots, this does not mean that the rest of the wall has dried well. On such a thick layer, Rotband should be given about 2-3 days until it dries completely.
Interesting materials:
How to make smooth sandstone? How to make concrete smooth? How to make flower pots from concrete? How to make cement pots with your own hands? How to make a flower pot from cement? How to make a pot? How to make blue hydrangea? How to make hydrangea red? How to draw boundaries of a land plot? How to engrave by hand?
No primer
On what surfaces when plastering can you do without preliminary priming?
The answer, in general, is quite obvious: durable and porous, providing good adhesion to the plaster. These surfaces can simply be moistened with water before plastering.
The instructions, however, apply primarily to cement and lime mixtures. If gypsum is used, a primer is still highly advisable, since this material itself has very moderate adhesion to most coatings.
Here are a few examples of surfaces that, when using cement plaster, can be made without any damage to strength.
- Shell rock masonry. Both the seams and the stones themselves provide excellent adhesion to the cement: their surface, when magnified, resembles a lunar landscape.
- Masonry made of ordinary bricks, made hollow (with partially hollow seams).
- The masonry is made of cinder blocks, which are again quite porous.
Priming the surface before laying tiles
Tiles are laid on different surfaces; this is a popular type of material that is distinguished by the variety of colors offered. The finish can last a long time, but the condition for such durability is the correct installation of the tiles. To increase bond strength and improve the quality of the repair, you should use a tile primer. At the same time, special attention should be paid to the choice in order to purchase the best option suitable for specific working conditions. The best way to prime the walls in the bathroom under tiles and in other rooms will be discussed below.
What is done before puttying?
First of all, it is necessary to remove the old finish from the walls in the form of wallpaper, paint, whitewash, dust, dirt and other things. Treat the walls with degreasing compounds, if necessary. It would be a good idea to perform antifungal treatment to avoid the appearance of fungus.
Interesting materials:
How to change font color in Outlook? How to measure the width of curtains? How to convert caps lock to regular font? How to cut cabbage into cubes? How to walk on a treadmill to lose weight? How to wash tulle well? How to store Btsaa? How to store contracts at the enterprise? How to store homemade coconut oil? How to store homemade apple marshmallow?