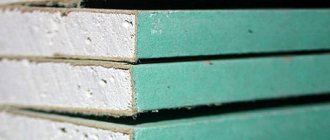
01/18/2017 Drywall is the most popular material for renovation of premises, used for covering walls, ceilings, and creating partitions. GVL 10, 12 mm (or drywall) can be mounted in different ways. Therefore, it is better to consider all the options in order to choose the most suitable one for each specific case. Plasterboard sheets are attached mainly using a frame profile structure. Sometimes special glue is used to fasten sheets, but fastening to a profile is more reliable.
This method also allows you to implement design ideas: arches, niches, figured elements. The type of frame will depend on the purpose of the entire structure and the materials that will be used for it. Fastening elements for them are selected taking into account the future load on the structure and the strength expected from it.
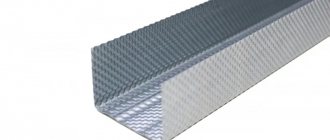
The metal frame for fastening GVL consists of guides, or starting, and load-bearing, or rack-mount elements. To choose the right materials for making a frame, you need to consider all their types.
Types of profiles
- CD - ceiling profile 60x27 (PP). It bears the main load and holds the weight of the finished structure. This profile has side partitions of increased rigidity. It is used for finishing walls and ceilings.
- Guide profile 27x28. This auxiliary profile is designed for fastening structural sheets. It sets the planes of future products. It is used both to connect the frame to surfaces and to connect different planes of the structure.
- UW - guide profile 50x40, 75x40, 100x40 (PN) is used to create partitions. The PN is mounted to the ceiling and floor adjacent to the wall.
- CW - rack profile 50x50, 75x50, 100x50 (PS), strengthens the frame of the partitions. It is installed vertically. GCRs are attached to it on both sides.
- Arched profile. These are special curved profiles of convex and concave shapes. This type of profile is used to create complex structures of smooth shapes, with all kinds of bends.
Metal profiles are mounted using additional fasteners:
- A two-level CD profile connector fastens perpendicular profiles of different levels. To install this part, it is given the shape of the letter “P”.
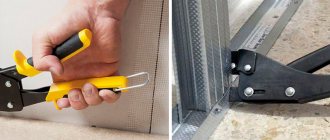
- A single-level connector, also called a “crab”, is used to connect crossbars of the same level using the criss-cross method. When installed in the profile, it snaps into place and is then secured with self-tapping screws. One connection may require 8 screws.
- Straight CD hangers are metal plates. When fastening, they are also given a “U” shape. They are used for suspended ceilings. The middle section of the plate is attached to the surface, and the profile is fixed using the curved edges.
- The anchor suspension is also designed for attaching the CD profile to the ceiling. It is used when the direct suspension is not long enough. A suspension of this type is inserted into the profile, and its rod is threaded through special holes in the spring. The rod can withstand up to 25 kg load.
- Extension for CD profile (longitudinal connector) is used to lengthen the supporting profile. It is connected to the profile with self-tapping screws.
- The corner connector is also used as a crab when creating a frame for suspended ceilings of the same level.
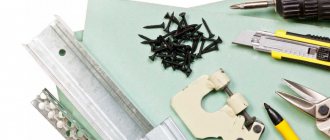
- The structure is attached to permanent surfaces, for example, ceilings and walls, with dowels, and using self-tapping screws of various types, plasterboard is fastened to metal slats.
General rules for installing a frame under gypsum boards
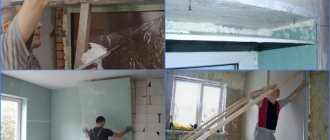
Before starting work, you need to create a diagram of the future structure, as well as calculate the required amount of materials. The parameters for attaching drywall depend on the purpose of the structure: applied or decorative. If you need to make a partition or sheathe a wall, and there will not be a large load on it, then additional reinforcement of the structure is not necessary. In this case, the fastening is performed on a simple frame. If you plan to hang furniture on the wall, then the thickness of the frame and the gypsum board sheet itself will necessarily increase. To improve heat and sound insulation, a layer of insulation is laid between the panels. With the help of such a partition you can hide all communications. To bring out sockets and switches, holes are cut in the drywall. Then the entire surface is puttied. If you plan to finish both the walls and the ceiling at once, then start with installing the ceiling.
Features of use
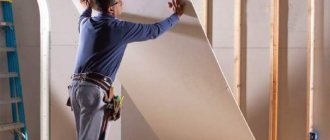
Plasterboard walls are very popular. There are many reasons for this. The material is easy to use, lasts a long time and allows you to create various designs. To fix drywall to the wall, two methods are used:
- On the frame.
- No frame.
What are the advantages of the wireframe method? The main one is the ability to lay insulation or hide communication nodes. Also, for the frame method, the walls do not need to be leveled. Drywall profiles are mounted in such a way that any differences or curvature of the walls will not be noticeable after covering. This is the ideal way to level your walls.
Thanks to the frame, it is possible to create any shape of walls. Arches, complex polygonal structures and wall recesses are a reality with a frame. The only nuances regarding the use of lathing: installing drywall on a wall with a profile is technically difficult, and also partially reduces the usable space inside the room. However, if the frame is properly secured, further wall covering will take a little time.
Calculation of the number of profiles for wall mounting of plasterboard
Wall plasterboard has a thickness of 12.5 mm. During operation, the wall is subjected to various loads, which can provoke deformation of the metal. The thickness of the profile metal, as well as its quantity, directly depends on the Estimated loads. It is important to take this into account when making calculations and choosing material for the construction of plasterboard walls.
If the loads on the frame are small, then it is possible to use a profile with a wall thickness of 0.4 mm. In another case, it is better to protect yourself by purchasing a more reliable reinforced profile with a thickness of 0.6 mm.
When installing a frame subject to heavy loads, it is recommended to reduce the pitch of the rack profile to 0.4 - 0.5 meters. For light frames, it is allowed to install elements at a distance of 0.6 meters. When calculating the number of profiles, the corresponding values must be taken.
Calculation of the guide profile for walls
The calculation of profiles for a frame for drywall begins with determining the number of guide elements (PN or UW profiles). Installation of this type of building material is carried out to the surfaces of the floor and ceiling. They should be located
as accurately as possible vertically, relative to each other. Subsequently, a rack profile will be installed in the groove of the profiles. Deviations will lead to the wall “pilling” towards or away from itself.
Calculation of the guide profile is simple. It is necessary to measure the length of the wall and multiply the result by two. If the frame is mounted on several walls, measurements are taken for each of them.
An additional guide profile may be required if there is a window opening on the wall. In this case, you need to add the length of the window to the calculated value, also multiplied by two (installation from below and above the opening).
Calculation of rack profile for walls
This calculation is more complicated. To avoid buying excess material and avoid shortages during construction, it is most correct to create a scaled drawing of the wall on a blank sheet of paper. Next, on the same scale, draw the location of the guide (CW) profile in the future frame
The location of the guide profile for wall mounting can be as follows:
- in the corners;
- every 40-60 cm (depending on the thickness and load-bearing capacity of the frame);
- above the doorway (above the lintel);
- on and under window openings to enhance rigidity.
To enhance the rigidity of the structure in the areas of door or window openings, it is allowed to install the rack profile in increments of 30 to 40 cm.
Don't forget about the jumpers. It is necessary to do it if the section of the wall is large and more than one sheet of plasterboard is required to cover it, as well as to strengthen the structure at the end connection of the profiles. The jumpers are made from the same CW profile. Typically, one jumper requires a length reserve. The calculation is carried out by adding two profile thicknesses to the distance between the posts.
Based on the finished template drawing, we calculate the number of whole metal profiles. We add 1-2 “for marriage”. An approximate diagram of a frame drawing for installing gypsum boards looks like this:
Conclusion
So we found out how to work with drywall at home. Be sure to watch the video in this article. If you have any questions regarding the installation of gypsum boards, you can contact me in the comments, and I will be happy to answer you.
Did you like the article? Subscribe to our Yandex.Zen channel
May 26, 2022
Plasterboard systems
If you want to express gratitude, add a clarification or objection, or ask the author something, add a comment or say thank you!
Calculation of a ceiling frame made of gypsum plasterboard
The ceiling frame is calculated in the same way as the wall frame. Namely, a scaled drawing with the location of each element is drawn on a blank sheet of paper.
The guide (PN) profile is attached to the wall around the perimeter of the room. Consequently, the length of all the walls will be the value that we take as the total length of the ceiling profile.
PN for ceilings = total length of walls
The ceiling profile is inserted into the groove of the ceiling profile. It is recommended to place it parallel to a short wall. The distance between each element is 40-90 cm, depending on the design load. A large step (90 cm) can be taken if the load on the ceiling does not exceed 0.15 Nm. In practice, you never know for sure whether such a load will be fair to your ceiling. Therefore, builders always play it safe and take a step of 40-60 cm, no more.
In increments of 40-60 cm, jumpers are attached to the ceiling profile - cut pieces from the same PP profile. Crabs are used for fastening. The number of crabs will be equal to the number of intersections of the PP profile with the jumpers.
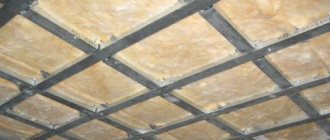
It is also important to calculate the suspensions. These are elements for attaching the ceiling profile to the ceiling. Typically, the suspension mounting step is 0.6 meters. When installing two-tier ceilings, this distance is reduced to make the structure more rigid. In general, the drawing should look something like this:
When the schematic diagram of the ceiling frame is transferred to paper, the required amount of all materials is calculated from the drawing. Then they are purchased and the most interesting process begins - assembly.
Photo
Curved ceiling frame
Fireplace frame
Curvilinear frame
Sheathed arched frame
Did the article help you?
Procedure for installing a ceiling frame
- A frame marking diagram is made. To do this, mark a level on the walls around the perimeter of the room. An even mark can be obtained using a laser or water level or a level. Then the UD wall profile is attached to the finished level. It is secured with dowels every 50 cm.
- Next, markings are made on the ceiling where the CD guides will be located. They are placed in increments of 40-60 cm in accordance with the length of the drywall so that the sheets are connected by joints on one profile. Suspensions are mounted along these lines, which should be fastened in increments of 30 cm to 1 meter. It is better to place the pendants not in one line, but in a checkerboard pattern.
- At this stage, profiles are mounted. For even horizontal fastening, a strong thread is pulled between opposite walls. The guides are aligned along the thread and screwed to the hangers. The edges of the guide profiles must be inserted into the UD wall supports. The joints are connected with self-tapping screws using CD connectors. The assembled frame is checked for the level and evenness of the structure. Then additional mounts for the chandelier or other elements are installed, and electrical wiring for lighting is installed.
- Now the sheets of drywall are attached to the metal with self-tapping screws. They are screwed in increments of 20 cm. The self-tapping screw is carefully deepened into the drywall, but not pressed too hard so that the holding capacity is preserved. It is necessary to ensure that all joints are on the profile and do not subsequently sag. It is very important during installation to leave a gap between the sheets of drywall from 3 mm to 7 mm. This will give the structure mobility, i.e. will allow it to expand and contract slightly with changes in humidity and temperature, without compromising its integrity.
- To enhance the rigidity of the frame of a two-level suspended ceiling, cross members are installed along the structure of CD profiles, maintaining a gap of 30 to 60 cm in increments of 10 cm. When connecting the elements in this way, a crab is used, which is installed on top of the connection.
- The final stage of work is to putty the seams using reinforced tape.
For clarity, we recommend watching a video of the installation of a frame for plasterboard ceilings:
Putty tools for working with drywall sheets
Tools designed for mixing and applying various putty mixtures used for gypsum plasterboard and gypsum plasterboard are usually made of stainless materials that can withstand corrosive processes. At the same time, the quality of finishing, first of all, depends on compliance with the technology for preparing the mixture.
Mixing the putty can be done using an electric drill or using a special mixer. All nozzles for mixing solutions have their own design features and purpose.
Nozzles for mixing the solution
The nozzle with a round blade is designed for working with dispersion paints and varnishes, sealants and adhesives.
A spiral nozzle with a ring will be needed for mixing filler mixtures, leveling materials and plaster.
The left-hand spiral nozzle, which has three branches, is primarily used for liquid mixtures characterized by a fairly low density.
Spiral nozzle with right-handed spiral, most suitable for heavy mixtures with a high degree of viscosity.
A screw nozzle with a ring is used for mixing liquid materials: primers, varnishes, adhesives and mixtures intended for spraying.
Width spatula 50 - 70 cm for processing seams
A spatula measuring 50 - 70 cm is ideal for sealing seams. They are convenient for embedding reinforcing tapes that are mounted on plasterboard seams, as well as applying putty mixtures along the seam. When installing cut edges, non-standard seams are often formed, for high-quality processing of which it makes sense to purchase a large spatula.
In addition, there are special tools designed to work with internal and external corners. These spatulas have special shapes.
Spatula with screwdriver
This device is used for puttying the joints of gypsum boards and the recesses of screws left over from cooking. At the same time, when filling the recesses from the screws, it is possible to quickly correct existing defects in the installation of plasterboard in those places where the heads of the screws protrude above the surface of the plasterboard sheet.
Wide spatula
For continuous puttying of plasterboard surfaces, wide spatulas with a size of 180 cm or more are used.
Falcon for putty
Also, during the puttying process, a metal shield will be useful, with the help of which it is convenient to bring ready-to-use putty material to the work site. This is a fairly light product, equipped with a perpendicular handle.
Procedure for installing a frame for a wall
- To sheath the wall, it also needs to be marked. To do this, draw lines for the UW guides, using a level. The width of the marking line is calculated based on the thickness of the profile and the thickness of the plasterboard sheet.
- Further along the wall, one of the guides is attached to the ceiling with dowels.
- Then, using a plumb line, the installation location of the second guide is determined on the floor. Two points are marked exactly under the ceiling guide and a line is drawn through them for the second guide profile.
- To install rack-mount CW, markings are also made in increments of 40 - 60 cm. Markings are applied on the ceiling guide and vertical lines are marked on the wall with a plumb line. The profiles should be positioned so that the joints of the plasterboard sheets are exactly in the middle.
- Along the vertical markings, straight 60x27 hangers are attached to the wall with dowels. Rack-mount CWs will be attached to them, the ends of which should be inserted into the guides. The step of fastening the suspensions along one line is 50-60 cm.
- Supporting profiles are mounted between the floor and ceiling guides. They are fastened to the guides using crabs. In addition, the supporting profiles are attached to the hangers. It is important to ensure that the position of the profile is strictly vertical.
- When the vertical sheathing is ready, cross members are installed to strengthen the structure. Their arrangement is similar to installation on the ceiling, but the gap between them is 60 cm.
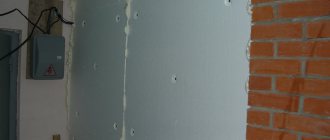
- Now the finished frame can be sheathed with plasterboard sheets, screwing them with self-tapping screws for plasterboard. The caps are deepened into the sheet by 4 mm. The installation step of the screws is about 10-30 cm. The sheets are attached along the profile from bottom to top and top to bottom. In order to give mobility to the structure, a gap of 1 cm is provided between the gypsum board and the floor and 0.5 cm between the gypsum board and the ceiling. The seams are puttied (we can recommend an excellent putty for joints, Knauf Fugen), and the gap from below is closed with a plinth.
- The walls are treated with putty only after the ceiling. First, using reinforcing mesh, the seams at the joints of the drywall are sealed and then the entire wall is puttied.
Bottom line
That's all! The installation of the plasterboard partition is complete. Let me add that in the places where furniture and interior items are planned to be hung in the partition, transverse inserts of profiles with embedded bars are made.
©Gipsokart.ru
Other articles in the section: Plasterboard partitions
- Tall plasterboard partitions
- How to make a doorway in a plasterboard partition
- Interior partition made of plasterboard with a door
- Installation of a plasterboard partition
- General information about plasterboard partitions
- DIY plasterboard partition
- Partition made of two layers of plasterboard: technology of covering 2 layers of plasterboard
- Rules for installing plasterboard partitions
- Profile for plasterboard partitions
- Calculation of a plasterboard partition