Decorative panels are used to frame the flooring around the perimeter of the room. The plinth can be made of wood, plastic, or MDF. It would seem that it could be difficult to install it. But difficulties arise due to the fact that the apartments in block houses have concrete walls. As you know, the optimal mounting option should be selected for such a surface. Therefore, in order to perform the installation correctly, you should know how to attach skirting boards to a concrete wall.
How to properly fasten skirting boards to a concrete wall: wooden, plastic, MDF
Decorative panels are used to frame the flooring around the perimeter of the room. The plinth can be made of wood, plastic, or MDF. It would seem that it could be difficult to install it. But difficulties arise due to the fact that the apartments in block houses have concrete walls. As you know, the optimal mounting option should be selected for such a surface. Therefore, in order to perform the installation correctly, you should know how to attach skirting boards to a concrete wall.
Conclusion
Knowing how to fasten different skirting boards to a concrete wall in different ways - using self-tapping screws, glue and clips, you will be able to do this work yourself. The installation procedure of the panels is not difficult, but, as with any work, attention and skills are required.
Having different options for fastening panels, it will be easier to choose the most suitable option for the final stage of floor finishing. Only careful preparation and the correct method of fastening guarantee quick installation, and the purchase of additional material to redo the work is eliminated.
Source
Features of the material
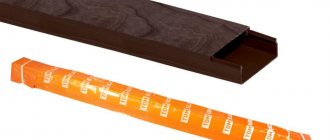
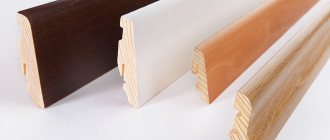
The process of attaching the plinth begins with the choice of material, which is selected individually for each situation. With the advent of new technologies, concrete plinths or wood products are practically not used. Although wooden floors and parquet look great in “company” with wooden trim. Skirting boards with holes for hiding cables, for carpet, standard, plastic - this is not the entire list of decorative profiles. The following types exist:
- Wooden is suitable for dry rooms. Installation takes place on a wooden surface or parquet.
- Plastic plinth is suitable for self-leveling floors, laminate and linoleum surfaces; it is not recommended for use on wooden surfaces. Suitable for rooms with high humidity, they come in a variety of colors. They are fragile and require additional fastening. The advantage of plastic finishing is that there is no need to file down the corners of the connection; installation speed is doubled. All necessary fasteners and special connections are included in the finishing profile kit.
- Wood-fiber panels are made from MDF panels; their strength exceeds that of wood, and their appearance is similar to laminated panels.
- Metal ones are suitable for rooms with high humidity and have a long service life. Made from stainless steel and non-ferrous metals.
- Polyurethane lightweight, flexible finishing profiles. Not afraid of scratches, impacts, damage.
- Laminate finishing elements do not require additional fittings.
All products differ from each other, so to make the right choice, follow simple rules:
- the color of the floor, walls, doors must match the baseboards;
- The finishing material must be combined with the characteristics of the room.
Return to contents
Using glue
Attaching the decorative strip to the concrete surface with glue is the easiest method you can use.
The ease and speed of the process sets glue fastening apart from other types. The material is fixed with “liquid nails” or connecting glue. To perform work on a smooth surface, without errors, a connecting mixture, hermetic composition, a ruler, and a spatula are sufficient. When the wall does not have a smooth surface, the walls will first need to be adjusted and the errors repaired.
The place where the plank is attached to the wall should be marked. It is difficult to control the force at which the glue is firmly held on the wall, so for convenience, the plank is cut into equal elements. The inside of the parts is filled with a paste-like hermetic mixture (glue), the layer of which is leveled with a spatula.
The decorative strip is brought to the concrete and pressed down firmly. How to ensure a tight fit of the baseboard? You can secure the ends of the panel with self-tapping screws, if the plinth is wooden - with studs, if this is not possible, press the material to the wall with heavy devices. This type of fastening has its disadvantages:
- It is not possible to reuse the plinth; it is attached only once;
- exceptionally smooth surface;
- Apply the glue carefully so as not to smear the surface.
Return to contents
Installation methods
So, you have chosen the main material, now you can tell us how to attach the plinth to a concrete wall. There are several ways - let's talk about each one in order.
Installation of plastic skirting boards with cable duct
The good thing about these products is that they are easy to join along the length and at the corners. For this, there are additional elements that are selected by color and profile. The plinth is cut at a right angle before joining.
To install products with a cable channel, you will need self-tapping screws and plastic dowels.
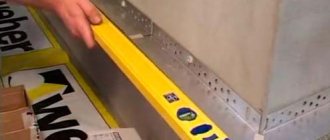
How to attach a plastic skirting board to a concrete wall is shown below.
Clip mounting
This installation method can be used for both plastic and wooden planks.
Each manufacturer has its own form of clips, but they all have the same fastening principle:
- Places for installing clips on the walls are marked. The distance between them is usually about half a meter. But there may be other requirements, which the instructions will tell you about.
- Next, as in the previous case, holes are drilled at the marking points, dowels are inserted into them and the clips are secured with self-tapping screws.
- After laying the cable, the plinth snaps onto the clips. If necessary, it can be easily removed.
Installation of wooden skirting boards
Products made of wood and MDF often have to be fastened in an open way, by drilling or punching through them. In addition to dowels, in this case, finishing nails with a small, almost invisible head are sometimes used.
The installation principle is the same: marking, installing dowels into holes in the concrete wall, screwing.
Note. If you decide to nail the baseboards, instead of plastic dowels, insert wooden plugs into the holes.
However, there are some differences you need to be aware of:
- To make accurate markings, you need to drill the baseboards and screw self-tapping screws into them so that only their tips stick out from the back side. Then place the products against the wall and turn the screws a little more so that marks remain on it. These will be the marks for future holes.
- They do the same with nails, punching them right through the planks.
- If the products are veneered, it is necessary to make a neat countersink for the screws according to the size of the heads. Otherwise, when screwing in, they may damage the top layer.
- If the plinth needs to be joined along the length, it is better to saw off the joining parts not perpendicular to the outside, but at an angle. This way the junction will be less noticeable.
- First, cover all corners around the perimeter of the room, then straight sections. This will help you complete the job more accurately and accurately.
- To trim products for joining in corners, use a miter box. This is the most responsible and difficult part of the work.
Advice. To learn how to make external and internal corners with your own hands as accurately as possible, buy the most inexpensive product and practice on it.
- If the heads of the self-tapping screws stand out against the background of wooden baseboards, they can be puttied by choosing putty to match the tone of the outer covering. Or install special decorative plugs.
Preparatory work
Before starting installation, you should pay attention to the following nuances:
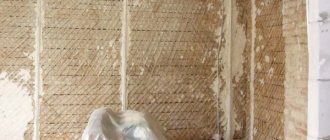
1. The wall must be smooth and even - this will prevent the installation of the baseboard from being crooked with gaps.
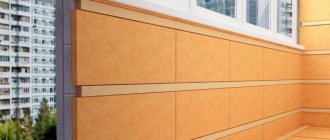
2. The first stage is preparing the walls. They are first leveled with plaster, then sanded. It is recommended to use slats made of polyvinyl chloride; they are characterized by greater ductility, ease of installation, and convenient location to the floor. The disadvantage of such slats is the need for a perfectly flat surface without waves or transitions. Otherwise, cracks and gaps may form.
Skirting mounting diagram
3. An important step is the selection of fillets. It should not have chips, cracks, scratches or other defects. You can hide the wires if the fillet has internal grooves. It is also necessary to stock up on auxiliary parts such as connectors, external and internal corners, and plugs.
4. There is a large selection of fillets for carpeting on the building materials market. The strip itself has grooves for the carpet, so it can be laid after the final completion of the work. This will allow the material not to get dirty and lose its attractiveness and presentability.
5. Models made of polyvinyl chloride are well suited for linoleum and self-leveling floors. Thanks to butt connectors, anyone can attach a plinth to a concrete wall, since it does not need to be cut or adjusted to size.
Before starting work, you need to stock up on the required number of slats and tools. The installer will have to use the following tools:
- drill;
- a screwdriver with various attachments;
- grinder;
- with a hacksaw.
Be sure to have a tape measure, scissors, screwdriver, and construction knife on hand.
Organizational matters
First of all, you need to plan your actions.
What is the best way to attach the plinth?
Clamp for fastening slats.
- If the floors are wooden - traditional planks, parquet, made of solid or parquet boards, and the walls are concrete, it is better to fix the baseboard to them. Driving screws or nails into concrete walls will be much more difficult.
- The opposite rule also applies: if the floors are concrete or screeded, and the walls are wooden, fixing the baseboards to the wood is much easier.
Note! Before attaching the plinth to a concrete wall, consider what it is lined with. If it is leveled with gypsum board, plaster, or soft stone, then the skirting boards can only be secured with special finishing nails (yellow) with miniature heads. Ordinary screws, dowels and nails will not hold securely in such a base.
- It is also possible to attach plastic skirting boards to a concrete wall by gluing them to “liquid nails”. However, here it is worth considering that it will not be possible to remove the strips later.
- Another modern method is to fix the slats with special clips (clasps). However, if you do not have experience working with such fasteners, it is better not to take on the job.
Wood, plastic or MDF
Now the choice of baseboard material is quite extensive. You can choose natural wood, plastic or MDF:
- If the floors are assembled with your own hands from piece, panel parquet, solid, parquet, tongue-and-groove boards, then a wooden plinth will harmonize with them.
- When the floor covering is self-leveling floors, ceramic tiles, laminate, carpet, linoleum, it is best to use plastic or MDF baseboards.
The decorative profile can be fixed to a concrete wall in several ways:
- self-tapping screws with plastic dowels;
- gluing to surface;
- mounting fasteners.
Wooden plinths are attached to concrete with nails, and instead of dowels, inserts are used - plugs made of the same wood. Instead of nails, you can use a special tool - a miniature hairpin.
Fasteners
There are decorative panels with a special type of fastening - metal clips. This type of fastening is not included in the product package, so it must be purchased separately. The following algorithm is performed for installation:
- Places for fastening outlets are marked. The distance between the elements is set within 50 cm, it may be different - the specifics are reflected in the user instructions.
- Drilling holes. Plastic dowels are mounted in them, to which fasteners are attached with self-tapping screws.
- Installation of baseboards. This is done after “masking” the wires by simply snapping them into place. If the need arises, the decorative panel can be easily dismantled.
Fastening with glue
A method of installing skirting boards, which is distinguished by its ease and high installation speed. To do this, buy connecting glue - “liquid nails”. Places for installation are marked on the concrete surface of the supporting structure. Since it is difficult to manually apply force to securely fasten the decorative element, the plank is cut into 3 equal parts. The inner part is treated with glue, it is leveled with a spatula. Next, a fragment of the plinth is brought to the wall and pressed down. To secure the panel tightly, the ends of the decorative means are mounted to the surface with self-tapping screws or studs and pressed down with heavy objects.
Skirting board care
The difference between floor profiles lies in shape, size, and materials. On the building materials market you can often find wooden, veneered, plastic, metal, and rubber models. Their cleaning depends on the parameters of the product.
Oil or polyurethane paint is often used to paint wooden planks. To avoid damaging it, wipe the structure with a soft sponge using washing gel or universal spray. To prevent drips, spray the product not on the panel, but on a rag. Stubborn stains can be removed with the rough side of a sponge if it does not scratch the surface.
Metal panels are not susceptible to mechanical damage, but you should not use sandpaper or metal scrapers. The main purpose of caring for such a plinth is to eliminate dust and bring the structure to a shine.
Vinyl or rubber panels are systematically polished using special products. Otherwise, the baseboards will become dusty and dirty. You can remove dirt with a wax cleanser. After a few minutes, wipe the bar with a brush and a wet sponge.
Before washing the panels with a new product, you need to test it on a small area. It is better to start the procedure with soft liquids, systematically wiping off dirt with a wet cloth. It is necessary to begin thorough removal of dirt monthly. After using powerful chemicals, the baseboards should be wiped with a wet cloth - this will prevent the formation of drips and stains.
What should I attach the bar to?
First of all, you need to solve several organizational issues:
- If your floor is wooden, that is, traditionally plank or parquet, and the wall consists of concrete, then it is better to attach the baseboards to the horizontal plane.
- There is also the opposite rule: if the floor is concrete or screeded, and the walls are made of wood, it is better to attach the baseboards to the wall.
Important! Before attaching a plinth to a concrete wall, consider what the cladding is made of. If it was leveled with gypsum board, soft stone, or plaster, the baseboards will have to be secured using special yellow finishing nails (they have miniature heads). It is better not to use screws, dowels and nails, as they will not hold the plank securely.
- You can glue the plinth to a concrete wall using “liquid nails.” However, it is worth taking into account that it will be very difficult to remove the slats later.
- You can also secure the slats with special clips (or clamps). Please note that if you have not worked with such material before, then it is better not to take on the work.
Accessories
When installing a plinth, you will definitely need a set of components. It includes plugs, various connecting parts, corners for indoor and outdoor installation. They come in a variety of shapes, sizes and colors. Without any of these details, the appearance of your floor will be unfinished.
In order for the corner joints on the floor to have a beautiful appearance, you need to attach the corners. The internal corner should be fixed in those places where the wall connection goes inward. If the wall connection goes outward, then the corner should be fixed to the outside.
To decorate the edge of the strip near the doorway, caps are used. They are left-handed and right-handed. You will have to purchase them separately, choosing in advance the color that matches the bar, and adjusting them to size yourself.
All short-sized planks are connected to each other using special connecting elements. Small plastic parts with grooves aesthetically cover the parts connected together. Additional materials include specially designed fasteners that secure the baseboard to the floor and wall.
Mounting features
Depending on the material from which the plinth is made, one or more of the described methods for installing the specified elements is used.
Installation of plastic plinth
Such elements can be installed with glue, with special clips or with self-tapping screws. When installing with glue, there is no dust; before attaching the floor plastic plinth, you need to clearly measure them, keep in mind that they are glued once, and they cannot be dismantled.
It is necessary to dose the glue correctly and try not to smear the floor covering.
If you want to securely fasten, use self-tapping screws . Although this is a lengthy process, it is the most reliable.
First, holes are made in the plank at a distance of 50-60 cm, then it is placed against the wall and the places for the dowels are marked. In the marked places, holes are made into which dowels are inserted, after which a strip is applied and secured with self-tapping screws.
If the strips do not have a cable channel, then the caps of the screws are closed with special plugs, which the craftsmen recommend gluing, and if there is a cable channel, then they will be closed with a special strip.
Plastic plinth can be attached to the floor using special clips .
This installation method allows you to dismantle the baseboard, but when using it, the walls must be perfectly flat, and this is not always the case.
Do-it-yourself installation of plastic skirting boards, step-by-step instructions:
- Mounting points are marked on the wall;
- holes are made in the baseboard;
- insert dowels and, using self-tapping screws, attach special clips, the distance between which is 40-50 cm;
- Now all that remains is to apply the plinth and with the help of light blows with your fist, it is fixed.
Wooden
Installation of wooden plinths is more difficult than plastic ones, since there are no special corners. The corners are butted together and in order to cut the baseboard correctly, you will need a miter box. It's rare that a room has a 90-degree angle, so the adjustment of the planks is usually done locally, and done by hand.
Installation is carried out using self-tapping screws, with a distance between them of 70-100 mm. After marking, screw the screws into the plank so that they appear slightly on the other side, then place the plank against the wall and mark the holes for the dowels. Drill holes, insert dowels and fix the bar.
Installation on finishing nails is carried out using the same technology, but instead of plastic dowels, wooden pins are used. This method allows you to make the attachment points invisible, but it is not suitable for uneven and loose walls .
MDF skirting boards
Depending on whether you plan to remove the plinth after a while or not, you choose the method of its installation. MDF skirting boards are most often installed with glue , but in this case, the walls must be perfectly smooth.
You can fasten such elements using self-tapping screws or clips; the technology for performing the work is the same as in the previous versions.
If you do the installation incorrectly, you can damage both the plank itself and its fastening, so the work should be done carefully and slowly.
Pre-installation work
Fastening the plinth will depend primarily on the quality of the wall. It will fit perfectly on a smooth and even wall without gaps. The installation itself will be quite simple. If the wall is uneven, it will be difficult to position the rail in the desired position, so the process itself will take a longer time. Before attaching the baseboard, it is important to prepare the walls. As a rule, their plane is leveled with a layer of plaster.
PVC slats are more flexible than other types of slats. It is easier to work with, and its position relative to the floor is much easier to select. Unfortunately, the PVC lath fits perfectly only on the surface without any changes.
If there are any, then large gaps between the floor and the plank will be visually visible. Before installation, it is important to select the correct fillet. It must be free of defects, cracks, scratches and chips. If there is a need to hide wires, then fillets with internal grooves are suitable.
You should purchase auxiliary parts from a hardware store: connectors, external corners and internal plugs. It is important that they match the fillets in color.
Purchase corners and caps immediately with baseboards
There are plastic fillets on sale that are designed specifically for carpet. The strip itself has a groove for covering, so the carpet should be covered after all construction work has been completed. This will prevent the coating from getting dirty and maintain the original appearance of the material.
PVC skirting boards harmonize perfectly with linoleum and self-leveling floors. Anyone can install a plastic skirting board on a wall. It does not need to be sawed down and adjusted to the desired size; it is joined with connectors.
Before purchasing plastic skirting boards, you should calculate the required number of slats. As a rule, the length of each is 3 m. During the installation process, unforeseen situations occur when the material breaks or is rejected, so you should purchase slats with a small margin.
How can you fix a plastic floor plinth and what is needed for this?
Installation of floor plinths, in most cases, is not particularly difficult and is possible without experience in this kind of work. The only thing to remember is that there is no universal method. It all depends on the fastening system of a particular skirting board.
Video - how to attach a plastic floor plinth to a concrete wall:
Perhaps only one thing is common to all: the necessary components are never sold in the same package with a decorative strip. The rationality of this approach is obvious, because only one factor - the non-standard geometry of the premises - in the case of a basic set of fittings, will cause cost overruns.
Tools
So, for high-quality installation of plastic skirting boards, you need to have on hand:
- Square - it doesn’t matter whether it’s a construction square, a calibration square, or a carpentry square. Emphasis on the ability to control the right angle between planes.
- Perforator - monolithic, panel and brick walls will not allow you to work productively without the use of powerful equipment.
- Screwdriver – preference for cordless models.
- Hacksaw – fine tooth and wide blade are the main selection criteria in a particular case. Despite the fact that plastic is malleable to any sharp knife, it is best to work with the specified tool - an even cut ensures tight contact of the fastened elements throughout the joint.
- The miter box is a guarantee that the cutting angle will not go beyond the required degree. The plinth with a cable channel is cut only perpendicularly, at a right angle to the base. The connelled profile in the corners is not connected by additional elements, so you will need to make a cut at the corner.
- Hammer, screwdriver, measuring tape.
- A simple pencil - for a light baseboard. It is more convenient to mark dark details with a thin black marker.
Things to remember
There were no significant differences in the principles of fastening PVC systems to walls. In any case, the plinth must be installed without distortions. Only the materials used for installation differ (described above).
Plastic skirting boards are not attached to the floor. This is partly due to the design of the molding (a kind of “foolproofing”). Even if we assume the possibility of a non-standard placement of the strip, this is where it all ends - the fittings assume an exclusively wall location.
Some difficulties arise when going around radius walls with plastic skirting boards, but by alternating small sections of strip and connecting elements you can adequately get out of the most difficult situation.
There is an opinion about the advisability of using thermal blowers when working with PVC systems in difficult areas. However, we should not forget that identical temperature effects on plastic of different thicknesses can produce different results. And the thickness of the plinth planes varies over the entire width, only based on this, it is extremely difficult to predict the final result under the influence of high temperatures.
Varieties
In the process of manufacturing skirting boards, various materials are used, depending on this, the skirting boards can be:
- wooden
- plastic
- metal
- from MDF
If repairs are carried out in an apartment or private house, then wooden or plastic skirting boards are used for the work. MDF skirting boards are a rarer element, while metal skirting boards are more suitable for industrial premises.
- To make wooden plinths, wood of any species is used, this fact affects the cost of the material. The wood used in production is oak, alder or larch. The main area of application is edging floors made of parquet, laminate or wooden boards. Manufacturers present their products in several versions, in the form of a triangular or figured shape. The only drawback of such products is the use of special tools, a saw or a hacksaw, to cut off the desired fragment.
Wooden plinth
- MDF products are made from compressed wood fibers covered with veneer. The external characteristics are excellent; it is very difficult to visually distinguish a wooden plinth from MDF products. As for the strength characteristics, this material is noticeably inferior to its analogue. But you can’t do without advantages; it’s an affordable price that attracts most consumers.
MDF products
- Plastic plinth is a priority material for modern renovations. Unlike previous options, it has multiple advantages: it is resistant to humidity and ultraviolet rays; has many color options, which allows you to choose the most suitable color to match the floor covering.
Plastic skirting board
What tools and supplies will be needed?
Naturally, you need to have a well-equipped set of tools in your home - they will come in handy in many situations. But if we take specifically the installation of this floor element, then at a minimum you should imagine in advance what will definitely be required during its installation:
maximum length of underfloor heating pipe 16mm per circuit
Even before purchasing, you need to calculate not only the amount of plinth, but also take care of how to attach it correctly. Depending on the mounting option, you may need:
Note! As a rule, manufacturers sell skirting boards of a standard length - 2.5 m. If the room has walls with large dimensions, then the skirting board will have to be “extended”, and for this you will need connectors. You need to try to make calculations in such a way that the connections are hidden behind a sofa, closet, covered by a door, etc.
Preparation
Much attention must be paid to the preparation stage. Due to the fact that the plastic skirting board is installed on decorated surfaces, the installation site is already ready for work. But you need to select the necessary components:
On a note! Installation of each additional part occurs at a certain stage of installation. It is important to calculate their location in advance and take into account that they take up several millimeters.
Before attaching plastic skirting boards to the surface, you should also prepare the tools necessary for the job. An individual set is selected for each specific situation.