Hi all! Agree that mirrors are an integral attribute in every home. They are needed so that a person has the opportunity to look at himself, evaluate his appearance, and perform certain care procedures. Therefore, a logical question arises about how to glue the mirror and what materials are best to use for this.
It is important to understand that a lot depends on the specific situation, the location of the pasting, the characteristics of the surface, the parameters of the mirror product itself and other nuances. Therefore, it is impossible to say that the approach is exactly the same when a mirror is mounted to a cabinet door, just to a wall or to tiles in the bathroom.
For brick, concrete, plastic, tile, wood and other surfaces, installation requires a certain technology and the use of appropriate materials. What exactly is suitable for glass should be considered using specific examples.
Adhesives and adhesives for mirrors
To glue a mirror, you need to select reliable and proven adhesives that can primarily withstand the product’s own weight. It is also worth considering temperature changes and humidity. Mirrors are a functional and aesthetic decorative element. Therefore, they are present in any home with rare exceptions.
When buying a mirror surface, the master is faced with the question of mounting it on the wall, furniture or door. There are several mounting options. Construction stores offer the buyer a wide range of adhesive mixtures for work. However, it makes sense to talk about the most popular ones.
There is no need to be afraid of such a method as gluing; in many cases this is the best choice for many reasons.
Soudal glue
Soudal mirror adhesive is one of the popular adhesives that can withstand prolonged exposure to moisture. It is made on the basis of synthetic rubber. Used for decorative finishing of mirror surfaces in rooms with high humidity: bathrooms, kitchens, swimming pools.
Advantages of Soudal glue:
- Resistant to moisture.
- High adhesion to most surfaces.
Before gluing the mirror to the wall in the bathroom, you need to read the instructions on the packaging of the product. When installing, keep in mind that this adhesive contains a solvent.
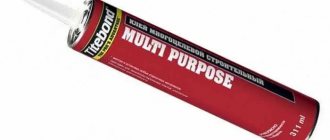
Tytan glue
You can glue a mirror in the bathroom using Tytan glue. This is a specialized adhesive composition, which is a mixture of rubber and synthetic resins.
Advantages:
- Possibility of gluing glass plates to surfaces made of different materials. It can be concrete, metal, ceramic tiles, wood, drywall.
- High strength index.
- Elastic seam, adhesive mass fills all voids.
- Resistance to prolonged exposure to moisture.
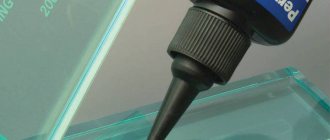
Before applying Titan glue, it is necessary to degrease the working area. The easiest way to apply it is with a special gun.
Loclite glue
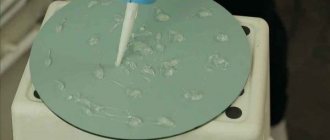
To glue the mirror to the tile, you can use two-component Loclite adhesive. It is a mixture of acrylic ester and activator. This American brand is considered effective and reliable in the market among its competitors. When using it, you need to connect the components with identical parts. Apply evenly to the surfaces to be bonded.
Tile adhesive
You can try gluing the mirror in the bathroom using tile adhesive. This method is considered unusual, even original. When choosing a dry mixture, it is important to read the recommendations indicated on the packaging. If it does not indicate that the glue is not suitable for gluing mirrors, then it can be used.
To make the connection reliable, it is necessary to perform work according to a certain scheme. The decorative layer may need to be removed.
There are step-by-step instructions for this:
- Preliminarily mark the place where the mirror plate will be located.
- Remove the old tile, being careful not to destroy the surface underneath.
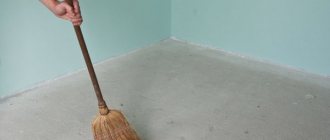
- Clear the wall. Knock off the old mortar.
- Prime the surfaces.
- Attach a horizontal bar to the bottom of the marked outline. Install a metal border on top of it.
- Attach another horizontal bar to the top.
- Install side curbs.
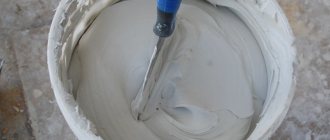
- Mix the dry mixture with water using a mixer. Apply tile adhesive to the free area of the wall with a spatula in an even layer.
- Slowly glue the bottom edge of the mirror plate to the glue. Place plastic crosses around the edges.
- Gently press the glass onto all surfaces.
Press the plate with your palms for 15-20 minutes so that the glue has time to set. Ultimately, wait for the tile adhesive to dry completely. The time period is indicated on the packaging. Remove the crosses and rub the seams.
Mounting double-sided tape
You can glue the mirror to different surfaces using mounting tape. With its help, you can fix the mirror plate on the wall without affecting the facing material.
It is a double-sided adhesive tape that needs to be secured to the back of the mirror plate. Next, you need to lift it to the required distance from the floor, set it level, lean it against the wall, press it with your palms, and hold it there for 5 minutes. It is necessary to clean the working surface from dust in advance and degrease it with alcohol.
Mounting tape is not suitable for large reflective panels. It won't support their weight.
Special compounds and liquid nails
If you have no experience in such a matter as attaching a mirror to a wall, then a hardware store can recommend liquid nails. This is another option that is safe for facing materials and provides reliable fastening. It is a special glue that firmly holds any objects together on vertical planes.
Installation:
- Using liquid nails, stick the metal profile to the wall along the contour of the glass.
- Fix plasterboard with increased water resistance on top of the profiles.
- Attach the mirror object to the prepared surface with liquid nails. It is enough to apply the adhesive mass along the contour in dots.
Liquid nails can withstand greater loads than mounting tape.
Basic requirements for glue
When choosing a composition that meets all the requirements, even from the most famous manufacturer, you must carefully ensure that the product is intended not just for ordinary glass, but specifically for mirrors.
In fact, some of the substances may contain ingredients and additives that can destroy the amalgam (reflective back layer), which will subsequently lead to stains on the mirror product. The gluing solution should not contain various acids and alkalis.
IMPORTANT! It is not recommended to use universal products, which can also harm the amalgam. The fact is that many manufacturing companies, in an effort to reduce the price, add chemical components to the composition that harm the reflective base.
Also, when selecting, the components used in preparing the glue and the characteristics of the room where the art will live are very important.
Since significant changes in temperature can cause glass sizes to change, so for bathrooms it is better to use products that can withstand high humidity and be resistant to cold and warm air. If the elasticity is weak, after drying, a hard substrate forms on the base, which is why the material may crack.
Required characteristics for the product:
- absence of toxins, acids and alkalis in the substance;
- formation of a high-quality seam that is resistant to moisture;
- ease of use and ease of application;
- high reliable strength;
- high percentage of adhesion;
- fast hardening;
- colorlessness;
- elasticity;
- availability.
REMEMBER! Using a product with a poor quality composition may lead to negative results. At best, dull stains will form that spoil the appearance; at worst, the product may be destroyed.
Mechanical fastening method
If the master could not find something to glue the mirror to the wall, he can use hardware. To do this, you need to select fasteners depending on the weight of the glass plate. This type of installation is suitable for fixing large mirrors.
Procedure:
- Make holes in the wall using a hammer drill or drill, depending on the surface material.
- Hammer in the dowels.
- The screws on both sides must be equipped with rubber gaskets so as not to damage the mirror surface. Screw them through the prepared holes.
If the glass does not have mounting holes, you can make them yourself.
To do this, you need to perform a number of actions:
- Use a sharp object to mark the centers for future holes.
- Using a diamond drill, start drilling. Allow the drill to cool frequently to prevent the glass from breaking.
- Using fine sandpaper, sand the edges of the holes.
It is important to perform all movements carefully, without pressure, so as not to damage the integrity of the plate.
How to glue a mirror on a mirror
Sometimes situations arise when you need to connect two mirror surfaces to each other. This is an unusual gluing method that requires the purchase of special glue for mirrors. You can glue mirrors with their edges to increase the size of the reflective surface or glue them with their surfaces facing each other. The first option is acceptable for connecting small glasses, since fastening the edges is considered less reliable.
How to glue a mirror to a wall
Once it has become known whether it is possible to glue the mirror to the wall, it is necessary to begin work.
To do this, there is the following step-by-step instructions:
- Prepare the surface for gluing. Clean from debris, degrease with medical alcohol or gasoline.
- Transfer the dimensions of the mirror to the wall. It is necessary to mark the dimensions with a marker so that you can see where to lean the plate.
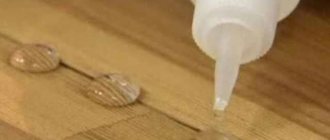
- Apply glue to the back side of the mirror surface in dots along the contour. There should be approximately 2-3 cm of allowance left from the edges. Form a grid of glue on the central part of the product.
- Attach borders made of metal profiles along the edges of the frame marked on the wall.
- Install tiled crosses between the borders and the glass plate. Additionally, you can apply mirror glue to the wall.
- Carefully lean the mirror against the wall starting from the bottom mark. The movements must be carried out smoothly and the pressure must be controlled.
- The technician will have about 5 minutes to adjust the glass surface. After this, the glue will harden.
After the main adhesive mass has hardened, the borders are removed and the crosses are removed. The seams along the contour are filled with silicone or acrylic sealant.
For wallpaper
When gluing a mirror product to a wall with wallpaper, some problems may arise. If you lean the reflective plate against it over its entire area, it may not be in tight contact with the wall. Because of this, the integrity of the connection will be compromised, and the glue will not be able to firmly connect the materials. One option for creating a strong bond is to prepare the base.
Step-by-step instruction:
- From a sheet of DPV, cut out a rectangle with dimensions not exceeding the reflective surface. This can be done using a hand saw or jigsaw.
- To fix the fiberboard on the wall, you need to mark the places for fastening elements on it and accurately transfer them to the wall. Drill holes in the wall using a hammer drill or a drill in the fiberboard.
- Using dowels and screws, secure the sheet material made of wood fibers to the wall, while recessing the caps.
- Apply glue to the wood along the contour, departing 2 cm from the edges.
- Slowly place the glass piece against the prepared base. Hold for about 15 minutes with your palms, pressing lightly.
The heavier the mirror weighs, the more glue and fastenings for the fiberboard will be needed.
Concrete wall
You can attach a reflective surface to a concrete wall using tile mortar or special glue. Step-by-step instructions have been provided above. It is important to prime the concrete surface in advance to increase the quality of adhesion. A good solution is acrylic primer. It is better not to soak it with universal concrete contact; the adhesive composition may not withstand the weight of the mirror and peel off.
For paint
To attach a mirror to a painted surface using special glue, preparation is necessary. It consists of removing the decorative layer, cleaning and degreasing the working surface. Priming with a deep penetration compound is necessary, or a primer with increased adhesive characteristics is recommended.
What is a mirror
Have you ever asked yourself this question? After all, every day we look at the surface in which we are reflected. How is it created and what does it consist of?
I propose to make a small digression from the topic and understand the features of making mirrors.
In the production of mirrors, sheet glass is used. It is made by mixing sand, limestone, soda and other components. It is extremely important that a minimum amount of iron salt is used in the mixture used, otherwise the product will have an off-color color.
Having mixed all the components into a single mass, it is first boiled and then fired. Then the sheet is formed, polished and cut with diamond rollers. Next, a special metal coating is applied to the manufactured glass on one side. This is what allows you to create the reflection effect. A varnish coating is used for additional protection.
There are several nuances regarding what you should pay attention to when choosing mirrors for your home. Namely:
[adv1]
- glass thickness;
- quality of back side processing;
- uniformity of metal spraying;
- fact of absence of stains;
- no defects;
- degree of distortion;
- product shape;
- mirror dimensions, etc.
All these parameters will allow you to choose the best option for the product, which then all you have to do is hang it in the room.
Here we come to the main question. Next, we will discuss how to properly fix the glass on the surface with which it can be glued, depending on a particular situation.
How to glue a mirror in the bathroom
Knowing what kind of glue to use to glue the mirror on the walls, you need to talk about the features of working in the bathroom. Constant exposure to moisture and changing temperatures entails rapid destruction of adhesive joints. The adhesive mass must be resistant to humidity and not afraid of temperature changes.
On tiles
Mirrors in the bathroom are somewhat more difficult to glue than in other rooms. This is due to the classic covering of most bathrooms - tiles. Features are associated with the last stage of the work - filling the seams with sealant.
Step-by-step instruction:
- Apply glue to the back side of the reflective plate. Leave about 2 centimeters from the edge. Fill the center with a lattice of adhesive mass.
- Place the mirror against the wall, starting from the bottom.
- Make a support in advance so that the product remains suspended without falling.
When the glue dries, you need to seal the seams with sealant. Acrylic is used for this.
Possible problems when gluing car mirrors
Often, when independently installing a torn mirror, a car enthusiast is faced with a number of troubles, which it is better to know about in advance.
Poor quality glue
A low-quality composition has poor adhesion to smooth substrates, and therefore is not able to hold them in the desired position for a long time. In addition, second-grade adhesives quickly crack under stress and vibration, as a result of which the mirror can fall off while driving.
Cold surfaces
If the work is carried out in winter, it is worth warming up the parts to be glued in advance, for example, using a regular hair dryer. This technique will help increase the adhesion of materials and extend the service life of the seam.
Violation of technology
If the work is done incorrectly, the mirror will not be attached to the glass securely enough. Most often, beginners ignore degreasing the base, sanding it with sandpaper, and completely removing the old adhesive. All these violations entail a decrease in the quality of the adhesive joint.
Start of use too quickly
Before using the machine, you need to wait the time specified by the glue manufacturer before its final polymerization. If the seam is subjected to vibration and stress at an earlier time, the mirror may become detached.
How to glue a mirror to a closet
One of the most popular questions that owners of apartments and private houses ask during renovations is how to glue a mirror to a cabinet door. Initially, you need to think about what will be used for gluing. Having decided what to use to glue the mirror to the cabinet, you can begin further work.
Experienced craftsmen recommend using mounting tape to avoid damaging the front surface of the furniture. In this case, the tape is easier to remove later, although it will be a hassle. If glue is used, traces will remain if you want to dismantle it.
Step-by-step instruction:
- Mark the dimensions of the glass on the cabinet door. A black marker is suitable for this. You can remove the door from its hinges in advance to make it easier to work with. Wipe the surface with a cloth moistened with medical alcohol.
- Cut several small strips of tape and place them along the contour of the mirror plate, at a distance of about 30 cm from each other.
- Additionally, apply mirror glue to its back.
- Remove the protective layer from the mounting tape and lean the glass against the prepared cabinet door.
Quickly adjust the position of the mirror product using the marks. Knowing how to attach a mirror to a closet, you can decorate the interior and make the furniture more varied and functional.
Rating of adhesives for mirrors
When choosing which glue to glue the mirror with, they are guided by the special packaging markings. You cannot take a standard one, even one intended for repair or construction. It is created specifically for fragile products in order to ensure maximum adhesion to the wall and prevent corrosion of materials, the appearance of an uneven seam or the rapid fall of an element.
The VyborExpert.ru team evaluated the range from different manufacturers to choose the best. The rating includes products that received high ratings from experts and users based on the following characteristics:
- List of components;
- Water resistance;
- Frost resistance;
- Full fixation time;
- Smell (pungent, mild);
- Clutch reliability.
Feedback from users, craftsmen and experts was taken into account, which made it possible to select the TOP 8 from a large list.
To metal
Before gluing the mirror to the metal, you will have to make the right choice of adhesive from several types.
The most effective include:
- High temperature silicone. Withstands sudden changes in temperature (not only above zero), prolonged exposure to oils and washing liquids.
- Moment Crystal. An effective adhesive that returns to its original state after deformation.
- Epoxy adhesive. Two-component substances that are used to combine different or one property of materials. By mixing the two components, you can get an adhesive mass that hardens under the influence of room temperature.
- After choosing an adhesive, you can begin gluing the mirror onto a metal surface.
Step-by-step instruction:
- Degrease the metal using a solvent or medical alcohol, clean it from dirt, rust, and plaque.
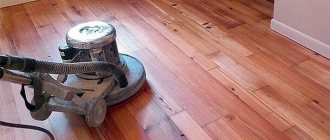
- Clean decorative coatings with a grinder or grinder.
- Apply glue to the back of the reflective plate.
- Heat the glass evenly with a hair dryer to 30 degrees. It is important to slowly increase the temperature so that the mirror surface does not crack.
- Place the plate on a metal surface and hold for 5-10 minutes.
For reliability, you should pay attention to pre-treatment with epoxy primer. It will protect the metal from corrosion and provide better adhesion.
Thanks to additional heating, a more reliable connection and faster setting are obtained. The entire technology for working with cold welding can be read here.
What is the best glue for mirrors?
The Top 8 team of VyborExpert.Ru reduces the list of products to a minimum. We will help you quickly determine which product to prefer when working with mirror surfaces. To do this, we name the strongest aspects of each product from a huge list of offers from foreign and domestic manufacturers:
- Point 93 – economical, colorless, odorless composition, dispenser, low price, fastening to any surface;
- Tytan – low price, high quality, strong hold, economical consumption, convenient tube with dispenser;
- Master Klein 3554370 – transparent hypoallergenic composition, odorless, strong fixation, fastening to any surface, leaves no marks, sets quickly;
- 1 New MA-010 – instant effect, compact tube, dispenser for application, gentle composition for fixing any surfaces.
- Astrohim AC – 9100 – strong adhesion, practical packaging, minimal volume, dispenser, versatility.
A detailed analysis of the strengths of the rating from a team of experts will allow you to choose “liquid nails” for attaching mirrors and other materials. The list includes both professional construction compounds and proposals used for everyday needs and quick fixation of small automotive parts.
On laminated chipboard or chipboard
To stick a mirror on laminated chipboard or chipboard, you can use mounting tape or liquid nails. The principle of operation is the same as with other surfaces. It is better to leave the glued structure overnight under a light load to create a stronger connection.
When it became clear how to glue a mirror to a cabinet, tile, metal, wood, concrete, or to walls with wallpaper, it was easy to carry out repair work yourself and decorate the interior. Pay enough attention to the choice of glue and follow the detailed instructions. You can't skimp on fasteners when it comes to large mirror plates.
Preparation for work
After peeling off the mirror, traces of old glue may remain on the surface. They need to be wiped off with automotive solvent or other suitable substance, or carefully cut off with a razor. Next, as preparation, the gluing area is carefully rubbed with fine sandpaper to make it rougher. It is enough to achieve some clouding of the base, and the level of adhesion will significantly improve.
Also, the base should be cleaned of any dirt, dried, and then marked with a pencil in order to avoid mistakes during work. Most often, this place is located exactly in the center of the windshield. If the fallen bracket has torn out the top layer of glass, the mirror will have to be attached slightly to the side. Immediately before work, the glass and the base of the mirror should be treated with acetone, and then wiped dry with a clean cloth.
What are the advantages of do-it-yourself mirror restoration?
There are several simple ways that anyone can do.
Not everyone immediately decides to restore a mirror with their own hands. This most often occurs due to ignorance of all the advantages of this process. But independent mirror restoration has a lot of positive aspects that can encourage you to carry it out. These include such aspects as:
- In small towns, or even villages, you can rarely find a master who can properly repair a mirror. Not everyone can restore amalgam. Decorating small flaws yourself is much easier than looking for a specialist restorer of this profile.
- Repairing damage to a cracked mirror is not a cheap pleasure. Most often, such a procedure will cost more than buying 3 new mirrors. And decorating with your own hands involves spending only on a minimum set, which often consists of one stencil.
- If a crack on a wooden surface can be easily covered with wax and this does not require special skills, then restoring glass is a completely different matter. Therefore, again, it is much easier to repair the crack with an interesting pattern that would match the interior. This definitely doesn’t require any special skills or knowledge, just paint and desire.
- It's no secret that a small scratch can turn into a big chip. This most often happens due to the transportation of the mirror to the workshop. And when the piece of furniture has already been delivered, it turns out that it cannot be restored. It is for this reason that it is better to leave the structure in its original place and take advantage of interesting ideas for independent restoration.
Even a slight blow is enough for a crack to appear on the surface of the mirror.
How to choose glue for glass
Glass has low adhesion ability. Therefore, joining such surfaces is difficult. The fragility of the material further complicates the task. To glue glass objects, you need a special substance that has certain qualities:
- High adhesion for connecting objects that experience significant mechanical stress in everyday life.
- Transparency so that the resulting joint becomes invisible. When connecting small parts, this quality is even more important than strength.
- Ability to dry in a short time.
- Increased thickness so that the final joint becomes elastic.
- Ability to withstand significant temperatures, as well as frost and heat.
- The ability to repel moisture when in a humid environment or when using products in atmospheric conditions.
- Environmentally friendly and safe for nature.
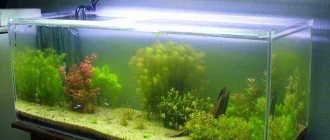
It is optimal to choose transparent products for work. They can easily neatly connect small parts of the decor. It is also worth considering the physical parameters: transparent compounds are suitable for combining smooth objects, but if the surface is corrugated, a stronger formula will be required. When it is necessary to connect parts of an aquarium, choose a product that does not contain antibacterial components and will not harm the fish. Durable compounds are chosen to connect painted surfaces.
Solution 1: Gluing
This repair method is quite simple. It will require a special glue, we use dichloroethane, it is the most affordable and glues ABS plastic perfectly. You will also need a brush, preferably a synthetic one. It is convenient because after the first use, the glued hardened hairs can be trimmed, and the rest of them can be heated, the hairs will fluff up, and the brush will still serve you.
So, take a brush, moisten it in dichloroethane, apply it to the parts or parts to be glued - first on one, then on the other. It is better to put the composition in two layers, since the first, preliminary one, will begin to actively corrode the plastic. We apply the parts to each other, press and wait. Dichloroethane takes quite a long time to dry, up to six hours. With patience, we get the whole part!
Surface preparation
Before gluing glass to glass or other material, the surfaces are cleaned of dust and dirt and degreased. Suitable products for this purpose include acetone, white spirit, medical alcohol, kerosene or solvent. You can remove grease from surfaces with special Bohle construction products.
Important! Household chemicals for cleaning glass or plumbing are not suitable for degreasing.
It is important to follow safety rules when cleaning the surface. To avoid poisoning by toxic fumes, work is carried out in a ventilated area. Rubber gloves are worn to protect hands. This precaution will protect the glass parts from sebum.
Then the parts to be connected are heated to remove condensation. It is optimal to heat the surfaces 30 degrees above room temperature. You can easily do this yourself with a regular hairdryer.
Method 1: Repair using a hair dryer and a wand
We remove the hair dryer from the station. We set the temperature required for soldering ABS plastic to 300 °C. As the work progresses, the temperature should be adjusted if the plastic melts too much or, conversely, not enough.
We heat the rod with a hairdryer so that it becomes soft and almost begins to melt, and we do the same with the damaged area on the part. The mating part must be well heated, otherwise the adhesion will be poor and the resulting connection will be fragile. If the plastic of the part being repaired swells, it means the process is going correctly.
The nuances of mounting large mirrors on the wall
It is advisable to attach large mirrors to the surface using hardware or decorative screws. After all, only they can withstand such a huge weight. Scotch tape and glue will not be reliable here.
Before installing a large mirror sheet, it is important that the wall is level and prepared. To do this, it is checked for differences, leveled, if necessary, and primed. Next, the wall is marked so that the fastenings are installed proportionally. Some craftsmen make a hidden stand from a wooden or metal block so that the mirror has additional support.
It is advisable to attach large mirrors to the surface using hardware or decorative screws.
Why does the mirror fall off?
It also happens that after a while the mirror begins to fall off. If the mirror falls off, it means that one of the above rules was not followed. Below are useful tips and recommendations that can prevent negative results:
- It is reasonable to apply the activator, which is based on acetone (a chemical compound of salt and copper), on the glass, while covering the base of the bracket with adhesive.
- Complete hardening of the glue takes a long time, so it is extremely important to fix the part throughout the entire period. Masking tape helps with this. It also doesn’t hurt to additionally support the glass with something soft. A stick with a sponge tied to the end will do. This way you can easily avoid possible damage.
- The glue has a specific pungent odor. Prolonged contact with it can lead to dizziness. Therefore, in order for the smell to disappear faster, it is recommended to ventilate the interior well after all operations.
Gluing glass to metal
In this case, the technology for connecting surfaces differs from the previous version. To combine items with different properties, VERIFIX MV 750 or B 682-0 are suitable. They are characterized by high viscosity, so they are suitable for working with tempered, reinforced or ordinary glass.
Surface preparation is no different from the previous version. They are also cleared of paint, washed, dried and degreased. Then clear glass glue is applied to both surfaces to be joined. They are pressed tightly and pressed down. After this, the joint area is irradiated with an ultraviolet lamp for 20 seconds. After waiting a few minutes, ultraviolet irradiation is repeated. Now the exposure time is 5 minutes.
Installation of mirrors in frame
Most often, the mirror with the frame already comes with all the necessary fasteners, but even if they are missing, you can independently purchase hinges at any specialized store, which will be fixed to the self-tapping screws.
Products that are too massive are installed using metal plates - they make the fastening more reliable. Otherwise, framed mirrors are hung in the same way as paintings - a nail is driven into the wall or a hook is screwed in, on which the frame is then hung.
Mirror in frame
Making glue at home
Special means for gluing glass surfaces are not always available. In this case, homemade mixtures will help:
- The simplest glue is made from a mixture of equal amounts of ash and bone glue. Before using this product, the parts must be warmed up.
- The glass parts are connected with a mixture of 1 part casein glue and 10 parts silicate glue.
- If you need to repair a small glass, garlic juice can replace regular glue.
- To join glass and wood, a mixture of wood glue and ash is used.
Large glass parts are glued together with a product that consists of the following components:
- 1 part beeswax;
- 5 parts drying oil;
- 10 parts rosin;
- 5 parts chalk;
- 2.5 parts cement.
First, combine all the components except cement and heat to a boil. After this, the heating is turned off and the mass is cooled to +50 degrees. Then cement is added to the total mass and mixed well.