Epoxy floors – to be or not to be!
Epoxy flooring for a service station
It is difficult to find better floors than epoxy. They contain ideal proportions of hardeners and epoxy resins, which when combined form a durable and monolithic coating. This floor has a large number of positive technical characteristics:
- Wear-resistant.
- Lasting.
- Tolerant to temperature changes.
- There are no seams.
- Easy cleaning.
- Resistant to aggressive chemicals.
- Wide range of designs and so on.
In a medical facility
In view of all this, this floor is very popular in a variety of rooms, including residential apartments. To be objective, we should not forget about some of its disadvantages:
- The pouring process involves a large amount of work, and the material used must be of high quality.
- If the technology is not followed, the coating may delaminate.
- It will take a lot of effort to remove some of the old and damaged epoxy flooring.
Considering all these nuances, you must make a personal decision whether or not to have epoxy floors in your home.
How to calculate quantity
How to produce epoxy resin flooring calculator for 1 square meter? On average (depending on the composition of the mixture) per square meter. m. you need to pour 1 liter of solution with a layer thickness of one millimeter.
For industrial epoxy floors, mixtures can be used that contain substances that increase its weight. Then the consumption will be 1.5-2 liters per 1 sq. m. When purchasing, it is worth checking the density of the composition.
For industrial epoxy floors, mixtures can be used that contain substances that increase its weight.
How to achieve high-quality coverage
The surface needs careful preparation.
To achieve the highest quality result, it is extremely important to carry out a number of preparatory work:
- Preparing the base.
- Filling the base layer of coating.
- Laying a decorative layer.
- Finishing layer.
If you follow the technology at each of the listed stages, you can make an epoxy floor yourself and of high quality. Proper preparation of tools also plays an important role.
Epoxy resin - what is it?
Self-leveling epoxy flooring consists of two main components:
- hardener;
- epoxy resin.
A two-component floor may contain various additives, for example:
- color pigments. They give the desired shade to the emulsion;
- additives for uniform distribution over the floor surface;
- fillers.
You can mix the hardener for epoxy resin with your own hands. However, the proportion must be observed: approximately 100-150 g of hardener are needed per 1 kg of resin. Do not use electrical appliances, as this can lead to foaming or heating of the mixture.
Thanks to this technology, floors are smooth, seamless and absolutely level.
Necessary tool for the job
Tools for pouring epoxy flooring
For work you will need:
- Several rollers covered with padding polyester.
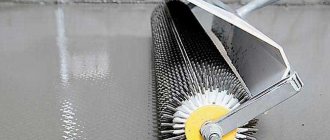
- Needle aeration roller.
- 2–3 spatulas 600 mm wide.
- Mixer for mixing.
- For organic-soluble materials, a special mixer is required, which is equipped with a function for adjusting speed and reverse.
- Raklya.
- Paintshoes.
- Special vacuum cleaner.
- Respiratory protection.
To remove all possible contaminants, each metal element should be soaked in a solvent before starting work. This also applies to new purchased instruments.
Selection of decorative material for self-leveling flooring
A pattern for a decorative self-leveling floor can be created in several ways. The choice of a specific option will directly affect the cost of coverage.
- On the base prepared for the final protective and decorative layer, stones, shells, coins, thin cuts of wood trunks, dried and straightened autumn leaves and any other elements from which it is possible to create a design can be attached. When choosing this method of decoration, you need to take into account that the larger the items chosen, the thicker the filling layer will have to be made.
The image for a decorative self-leveling floor can be either photographic or drawn
- The second option is to apply the design with acrylic paints directly onto the prepared base using a stencil method. Anyone can do this kind of decoration. The main thing is to find a suitable ornament, transfer it to thick paper or cardboard and make a stencil, through the hole of which paint is applied to the frozen base layer.
- The third option is to create an image based on hand painting. However, only gifted people can do this on their own, and the artist’s work will be very expensive.
Decorative backing for the finishing transparent layer
- The fourth method is to fix a printed image before pouring the finishing layer. Decorative backing can be ordered from a self-leveling coating company. Such canvases consist of three layers - the base, the graphic design itself and the protective film.
- The fifth method gives the effect that many homeowners would like to get - this is the use of a pattern printed on vinyl film or on a banner canvas. When choosing this decoration option, you must carefully study the instructions provided by the manufacturer. It must indicate which materials can be used in combination with the bulk mixture, and which are unacceptable for use. All materials must be perfectly compatible with each other.
Due to the fact that the self-leveling floor requires a very long service life, amounting to many decades, the design for it must be chosen very carefully. It is important that it does not become so intrusively unpleasant over time that you want to cover it with ordinary linoleum with a calm ornament. Moreover, designer fashion does not stand still - today a creative drawing or photo is considered the best solution, but tomorrow, with the advent of new developments, it will only evoke negative feelings. In addition, the color scheme and image of the flooring must be in harmony with the rest of the room’s design.
Self-leveling floor covering with ornamental underlay
The best option has always been considered “classic”, made in neutral, calm shades. With this design, when carrying out the next renovation, it will not be so difficult to choose the right color for wallpaper, textiles and furniture.
It is unlikely that you should get carried away with volumetric bright images in living rooms - they can soon become intrusive. It’s better to “give them” the hallway, kitchen, bathroom, toilet.
If you want to experiment and use an expressive design in bright colors, then this can be done in small rooms of the apartment - in the bathroom or kitchen. For example, designs that imitate an aquatic environment are suitable for the bathroom, and floral options for the kitchen. In the hallway you can choose more restrained images that are suitable for the overall design.
Thorough preparation is the key to success!
Concrete screed is the best and most reliable base for an epoxy floor. According to theory, the composition can be poured onto a ceramic or wooden base, but this will require extremely complex preparation. Moreover, the service life of such a coating will be much shorter. For this reason, it is best to use a concrete floor as a base. This is time-tested!
Structure
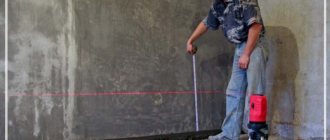
The floor surface must be smooth and dry. For every two meters, horizontal deviations of only up to two millimeters are allowed.
This can be achieved using self-leveling mixtures. The room humidity should be no more than four percent. Neglecting these tips is unacceptable, since epoxy flooring does not have vapor permeability properties. If moisture gets on the underlying floor, the poured layer of epoxy flooring will gradually deteriorate.
Installing an epoxy floor with a decorative layer
Checking the humidity level is easy. To do this, cover the floor with plastic wrap and leave it for two days. If no condensation forms on the film during this period, it means the room is dry and you can start working.
If the screed is fresh, it acquires absolute strength after one month. If you have to work on an old screed, then a number of preparatory work will be required. For example, remove dirt, grease, paint stains and other possible contaminants. Afterwards, it is necessary to level out cracks, chips and level the surface as much as possible. To fix the old base, buy epoxy paint and apply it evenly to the floor surface. Place a layer of waterproofing along each wall. Use a vacuum cleaner to remove all dust from the surface. Only after this can a layer of primer be applied.
Properties, positive and negative points
Epoxy self-leveling flooring is not that new. It just began to be used not so long ago - 10-15 years ago. It’s worth saying right away that before hardening, epoxy resin releases toxic substances. Therefore, you need to work in a respirator. Just a “ventilated room” will not provide the required level of safety - you can get poisoned. So if you are going to pour epoxy floors yourself, stock up on protective equipment.
Even if you are making an epoxy floor only for yourself, and will not do it professionally, you need protective equipment. The main thing is a respirator and a protective suit
pros
Why is it still used? After all, it’s expensive and unsafe... But because the properties of epoxy self-leveling flooring are ideal for some industries or situations:
- Very “sanitary” coating. Doesn't absorb or absorb anything. Resistant to oils, chemicals, paints. Everything spilled on the surface remains. Due to this property, it is always easy to wash/clean. Therefore, it is often used in industries where hygiene is very important.
Epoxy resin flooring is not perfect, but it is hygienic. In the bathroom, shower, toilet, hallway and kitchen - this is perhaps the best option - Dense, smooth, durable. The surface is smooth and hard. There may be problems with household use, since the surface is slippery when wet. There are non-slip variations with quartz sand, but they are good for industrial premises, garages, etc. They are not used at home because, well, they don’t look “homey” at all, and they are difficult to clean. There are also those in which dullness and some roughness are achieved by adding special substances. A small layer of matte resin forms on the surface. But under significant load, it can wear out, which looks unsightly. In principle, it is almost impossible to erase epoxy resin in the house. And for production, such coverage requires updating.
- Epoxy flooring feels a little “softer” than tile. Due to its greater elasticity, it absorbs shock loads better. But if you drop something really heavy, it may chip.
The positive aspects include the seamlessness of the coating. You can also have the degree of gloss that you need. In some interiors, such a floor is simply a godsend. And it is difficult to replace it with something else.
Minuses
The disadvantages of acrylic self-leveling floors include high requirements for the base (more details below). Another minus is that the epoxy self-leveling floor is not as wear-resistant as we would like. Wheeled chairs will leave marks on it. It also gets scratched by high-heeled shoes. Where they walk more, changes will be clearly visible - less shine, more scratches. The appearance is restored by sanding, but with a coating thickness of several millimeters, you can’t sand it much.
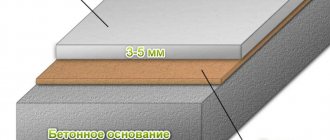
Epoxy coating is the sequential application of polymer-based materials to a concrete base.
For longer service without changing the appearance, it is recommended to apply two layers of polymer (polyurethane) varnish over the epoxy coating. Polyurethane is much stronger and scratches less often. Why not use a self-leveling polyurethane compound then? But because it turns out to be almost twice as expensive.
Epoxy resin flooring is repairable. Yes, chips and dents can be filled. But the “repair zone” will be visible. For industrial premises this is not a problem. This is not very good for offices and apartments/houses.
Another disadvantage emerges from its advantage: complete impermeability to any substances. That is, the epoxy self-leveling floor does not conduct water and its vapors. If it is poured onto a concrete slab in ground floors, moisture entering through imperfect insulation can tear off the polymer layer from the base.
Is it possible to make a self-leveling epoxy floor yourself? Yes. Buying it is not a problem, and no special equipment is required for application. But you need a flat, dry concrete surface and knowledge of some of the features of the process
All these shortcomings would be more or less tolerable even for use in private houses and apartments. But the high price neutralizes all the advantages. For the same price you can make more practical coatings. But it is, of course, up to you to decide. From an aesthetic point of view, it is difficult to find a replacement. It is difficult to make an absolutely smooth surface, shiny or not, by other means. An alternative is to pour a self-leveling cement floor and cover it with polymer (even epoxy or polyurethane) paint. Costs are lower, the effect is the same. It’s still difficult to come up with other options.
Process started
Floor primer
The primer is applied in two layers. The second - after the first has completely dried. Islands of gloss should not appear on the surface of the primer, otherwise this will lead to contamination. If such a place appears, it should be cleaned and primed again. In some areas, the primer may be more absorbent, so re-priming will be necessary. After applying the second layer, the surface is covered with quartz sand, which is removed after a day.
Quartz sand for flooring
Wide range of designs
After applying each coat, the rollers should be thoroughly washed.
Base layer
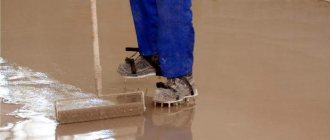
The primed surface dries after 24 hours. Now it's time to apply the base coat. To do this, use a squeegee or spatula to evenly stretch the composition in strips. To move on the poured surface, you must use only paint shoes. In this case, shuffling movements should not be allowed. Using an aeration roller, air is removed from the composition. You can step on the floor exactly after two days. A decorative layer can be placed under this coating.
Epoxy floor installation
Although epoxy floors do not shrink, you should fill the shrink joints along the walls with caulk.
Filling the floor with your own hands
Floor decoration can be done in different ways. The easiest way is to pour special “chips” onto the base layer before it completely hardens. Also, after curing, the base is painted with acrylic paints. Hand painting will be the most original and unusual option for decorating the fill. Another way to give the floor decorative properties is to order a banner or sticker from a printing house, onto which any images can be applied. Typically stickers are made from vinyl. Modern 3D printing looks especially beautiful.
There are certain requirements that the premises must meet:
- temperature +5...+25 degrees (the same indicator should be at the base on which the compound will be poured);
- composition temperature +15…+25 degrees;
- air humidity no more than 80%;
- base moisture is less than 4% (for the Betolast mixture - up to 12%).
Surface preparation
The most reliable base for epoxy is a concrete floor. But, if necessary, you can pour the mixture onto other substrates, even onto tiles. Problems can arise only with wooden bases, because over time they become deformed.
It is important that the floor covering is dry and fairly level. The permissible deviation from the horizontal is no more than 2 mm for every 2 meters. Self-leveling mixtures can cover the floor with serious deviations from this norm. Floor humidity is determined as follows: a polyethylene film measuring 1*1 m is glued to the floor with tape and left for 48 hours. If there is not a large amount of moisture under the film, the floor can be considered dry and ready for pouring. It is better to leave a fresh concrete screed for 4 weeks, during which time its humidity will return to normal.
All dirt, dust, grease, and paint must be completely removed from any coating. Cracks should be repaired, as should chips and other defects. You can also strengthen the base with a layer of epoxy paint. It is recommended to stick waterproofing along the walls. The floor is vacuumed 2 hours before work begins.
Priming and puttying
The primer is mixed in a separate container. Its components are connected to each other and mixed at a speed of 500 rpm, first in the forward direction, then in the reverse direction. The result should be a homogeneous mixture. Next, let the primer sit for 3 minutes to release air bubbles. The soil must be completely worked out within 40 minutes, after which its properties are lost.
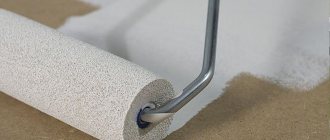
The primer is poured onto the floor like a snake and spread with a synthetic padding roller. Additional portions of the product are poured onto areas that strongly absorb liquid. Polymerization lasts a day. Then you can start puttingtying chips, cracks, and all recesses. This is done with special putties mixed with quartz sand (1:3). After the putty has hardened, another layer of primer is applied. All subsequent stages begin within a day.
Filling the Base Layer
This layer is intended to completely smooth out all irregularities and rub out pores. Layer thickness is about 1.5 mm. Paint shoes are put on your feet in advance and you walk in them very carefully. The composition is prepared as indicated in the instructions. It is poured onto the floor at the rate of 300-400 g/sq.m. m. Distribute the composition on the base, and after 20 minutes, scatter fine quartz sand (about 1.5 kg per 1 sq. m).
20 hours after the final polymerization of the mass, remove the remaining sand with a hard plastic brush, and apply another layer with approximately the same amount of epoxy. Spread it with a rubber spatula or squeegee. Particular attention is paid to corners and areas near walls. After 15 hours you can apply decor.
Filling the finishing layer
The final stage requires special care in the work. Epoxy is prepared in a similar way; it is poured onto the floor in wide strips. Consumption – from 1 kg/sq. m. Distribute the composition with a squeegee, and after 15 minutes roll it with a needle roller. The self-leveling floor is left to harden for 24 hours, but loads on it are allowed only after 6 days. After this period, you can apply a layer of epoxy varnish, but this is an optional step.
The technology of work is very labor-intensive, it is recommended to watch the thematic video:
Selection of possible designs
Self-leveling floor with a decorative layer
Decorating an epoxy floor can be done in different ways. For example, decorative tips are poured onto a floor that has not yet hardened. In addition, after the floor has dried, the surface can be painted with acrylic paints. For an apartment, hand painting would be an ideal option. For example, you can order a banner network from a printing house. Any digital coating with the necessary resolution will be applied to it. A cheaper option would be to apply a graphic image, which is done using vinyl stencils. Well, if you want to create chic floors, then you can print a 3D image using special microlenses. You can order them from an advertising agency or a printing company. When the decorative layer is fixed, the finishing layer of coating is applied. Often the final glossy layer distorts the image. Therefore, you can use polyurethane matte varnish.
Types of coatings
Depending on operational needs, epoxy self-leveling floors can be of different types.
- Thin layer. To fill in this case, one layer with a thickness of no more than 1 mm is required. Although such a surface seems unreliable, it is nevertheless excellent for constant walking on it. It also has good resistance to mechanical and chemical influences.
- Thick layer. This option can be made from one layer more than 1 mm thick or from several thin layers. This surface is more durable and the likelihood of abrasion is low. In view of this, thick-layer self-leveling epoxy floors are used in residential premises.
- Quartz coating. It is very similar to a thick-layer coating, the only difference being that quartz sand is added to the bottom layer. This contributes to better adhesion of the layers, making the floors durable and resistant to mechanical stress. It is used in the arrangement of residential premises. You can also decorate such floors, which will allow you to fit them into the overall interior design.
- Epoxy industrial coatings. The name itself indicates that such floors are used in the construction of industrial buildings. This coating can withstand enormous mechanical and chemical loads.
Photo
Epoxy floor in the bathroom
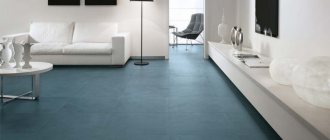
Dark self-leveling floor in the living room
Striped floor
With the image of fish
Water pattern
Elegant decor in a classic style
Black and white pattern
With a fine black and white pattern on a gray background
With the image of flowers
Self-leveling floor with images of leaves and pebbles
Epoxy self-leveling floor dark
Bulk 3D
Saving Tips
Filling a floor with epoxy resin will not cost much if you do it yourself. Using quartz for decoration will be cheaper than a three-dimensional image. Industrial epoxy floors can be designed in one color scheme. Two- or three-component compounds are more expensive than classic epoxy floors.
Industrial epoxy floors can be designed in one color scheme.
How to fill a decorative floor with a pattern yourself
Tools and devices for work
If you plan to fill the decorative floor yourself, you need to take care of the necessary tools and devices for ease of work.
- To prepare two-component mixtures, you will need a construction mixer, which can be an electric drill with an appropriate attachment.
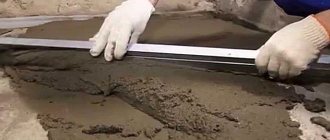
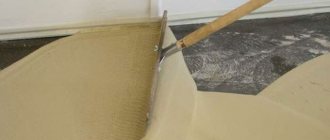
- A squeegee is a tool similar in appearance to a wide notched trowel, but differs in the presence of a long handle and the ability to adjust the gap, which determines the thickness of the fill layer. A squeegee is used to distribute and level the mixture over the surface of the base.
Specific tools for working with self-leveling polymer floors
- The needle roller is also involved in distributing the composition over the surface. It is used for rolling the poured floor - this helps to free the distributed composition from air bubbles.
- Rollers with fur attachments, with a pile of no more than 12÷15 mm, are used for rolling the primer mixture over the surface.
- Soft brushes 120÷150 mm wide for distributing compounds in hard-to-reach areas. You will need several of these, since epoxy compounds make them literally disposable.
- Spatulas width from 100 to 400 mm. You cannot do without this tool when performing any work related to the application and distribution of building compounds. For example, it is not always and not always convenient to work with a squeegee, and then a spatula of the size required for a particular case comes into the process.
- Paint shoes are a kind of studded sandals that allow the master to easily reach any place on an already filled surface without causing damage to it. The marks left by the thorns on the poured compound heal on their own.
- Container for soaking and cleaning tools.
- A vacuum cleaner, preferably a construction one, is necessary, since before each stage of work a thorough cleaning of the surface is required.
- Work clothes, rubber gloves, devices for respiratory protection - this can be a mask or a respirator.
- Polyethylene film to protect the walls and floor of the room where the compositions will be mixed.
- Food stretch film. Some builders wrap this material on clothes (sleeves, trouser legs) or shoes to protect against epoxy mixtures, which cannot be washed or cleaned after hardening.
- Wide masking tape is useful for protecting the lower part of the walls of the room where the self-leveling floor is being installed from mixtures.
The process of pouring a floor with a pattern - step by step
Due to the fact that each manufacturer has certain requirements for the base on which the decorative coating will be poured, before starting work, you must carefully study the instructions. Thus, some compositions can be laid on a base with any moisture content, while others can only be laid on a thoroughly dried surface. The durability of the decorative floor will depend on this factor, so the manufacturer’s recommendations should not be ignored.
| Illustration | Brief description of the operations performed |
| So, before starting work, the moisture content of the concrete base is controlled using a moisture meter. Most often, the manufacturer specifies a maximum threshold that does not exceed 4%. If the floors have been leveled recently, then at least 21 days must pass from the moment the screed was installed. If you pour the composition onto an undried surface, then after it hardens the coating may begin to peel off. Of course, not everyone has a moisture meter. You can also get by with the “folk” method of checking - spread a square sheet of polyethylene (approximately 1000x1000 mm) on a concrete floor and stick it around the edges with tape. If the next day drops of condensation or evaporation are visible on the film, then the base has not yet dried to the required conditions. | |
| If the humidity meets the requirements, you can begin to work. The first step is grinding the concrete base. This process is necessary to open the pores of concrete for better penetration of the primer composition into them. Professional craftsmen carry out this work using a special grinding machine. | |
| If you will be installing the self-leveling floor yourself, then you can use a hand-held sander for sanding, installing an abrasive attachment on it - a “cup”. | |
| After grinding, the surface must be thoroughly cleaned of concrete dust with the utmost care. For this purpose, an industrial or regular powerful vacuum cleaner is used. In any case, cleaning must be done several times, and special attention must be paid to the corners and joints of vertical and horizontal surfaces. | |
| Next comes mixing the two-component primer mixture. When performing this process, it is very important to comply with the proportions specified by the material manufacturer, otherwise the soil will not have all the declared qualities. Mixing is done using an electric drill, on which a special mixer attachment is pre-installed. | |
| The next stage of work is applying a primer mixture to the sanded and dust-free concrete. To do this, the primer is usually poured onto the base in a small puddle, and then distributed over it using a wide spatula or a roller with a fur attachment. | |
| The work must be done carefully, trying not to touch the lower part of the walls. The best option would be to temporarily seal this area of the vertical surface with masking tape, which is removed only upon completion of the work. | |
| All of the above work can be done in one day. The primed surface is left to dry for a day - during this time the composition will penetrate into the pores and strengthen the structure of the concrete. In addition, after this layer dries, surface flaws - unevenness and cracks - will clearly appear. | |
| On the second day, when the primer has absorbed and dried, the base is inspected to identify irregularities and damage. | |
| The next step is to repair the detected defects. For this purpose, a special two-component repair mixture is usually used, which is mixed identically to the primer. In order to repair individual damage, the composition is applied only to the necessary areas. As an alternative to a special repair compound, many craftsmen use a primer or base filling compound, mixing it with pure quartz sand to the desired consistency. | |
| If it is necessary to correct the evenness of the floor, then the repair solution is applied to the entire surface and distributed using a squeegee or wide spatula, and then passed over the floor with a needle roller. If a material of the same color is used for priming and repair, then the master must be very careful and ensure that the entire mixture is distributed in an even layer over the entire surface. | |
| Depending on the choice of composition for repairing the floor, it may be white, gray or brown. The repaired surface is left to dry for another day. | |
| When the repair composition has dried, the surface must be sanded, freeing it from small irregularities and hardenings, which can interfere with good adhesion of the layers. The work can be done manually, using a grater or a grinding machine with an abrasive attachment installed on it. After sanding, the floors must be cleaned of any dust that has formed. First use a vacuum cleaner and then a damp cloth for cleaning. Wet cleaning must be done several times. There should not be any, even small debris, hair on the surface, as well as other fragments that could interfere with high-quality filling. | |
| For the next stage of work, you need to put paint shoes on your feet, and in order not to completely ruin your work shoes, it is recommended to wrap them with stretch film. Paint shoes will allow you to move freely over the entire surface of the floor, including those areas where the composition has already been spilled. | |
| Now you can start mixing the mixture for the bedding layer. In this case, it is necessary to strictly observe all proportions established by the manufacturer, indicated on the packaging or in the attached instructions. | |
| The finished mixture is poured onto the base in puddles and a squeegee is evenly distributed over the surface. Distribution and leveling are carried out with smooth movements. | |
| After the floor area is covered with the composition distributed over the surface, it must be rolled with a needle roller. This will provide additional distribution - self-leveling of the layer, and the release of possible air bubbles. The work is carried out in the same order until the entire surface of the floor is completely covered with this underlying layer. | |
| Already a day after pouring the bedding layer, you can begin working on the floor pattern. The first thing to do is to try on the canvas in the place where it will be fixed. If the drawing is placed on two or more canvases, then they must first be combined in the area where they will be fixed. | |
| You must proceed in the same way if you choose a canvas with a 3D pattern. After trying on the material at its future location, if necessary, excess areas are marked, for example, under a wall projection, and carefully cut off. | |
| Next, the most labor-intensive process begins. The printed canvas must be separated from the backing, which is intended to temporarily protect the adhesive layer. The backing is removed gradually as the film (canvas) with the pattern is glued to the floor surface. In this case, the canvas is smoothed with a special plastic spatula so that there are no air bubbles left underneath, which can blur the decorative effect or simply weaken the finishing surface. | |
| Each craftsman has his own secrets that simplify the separation of the decorative film from the backing, as well as the smoothing of its folds when gluing. For example, to make the film easier to separate from the substrate, it is sometimes heated to a warm state using a regular hairdryer. For better smoothing and removal of air bubbles from under the film, the surface of the film or floor is sprayed with water from a spray bottle. For comparison, a tinting film is glued to glass in approximately the same way. | |
| When the pattern is fixed to the floor surface, the top transparent protective film is removed from it. | |
| In the case when the design is not applied to the general film sheet, but is made using the “pull-out” technique, that is, by cutting out various ornaments from paper of different colors, then each of the elements will have to be adjusted separately, after removing the top protective film. Here it is necessary to clarify that there are different options for installing patterns, so each of them comes with instructions, which must be followed when laying it on the floors. If the decor is made to order, the contractor must provide the product with his own recommendations. | |
| The next step is to prepare the composition for the finishing transparent layer. It is also mixed from two components taken in the proportions specified by the manufacturer. It is recommended to leave the prepared mixture for two to three minutes (so that the air bubbles formed during mixing rise), and only after this can you begin to pour the last, top layer of the self-leveling floor. | |
| The mixture is poured onto both the drawing and the rest of the floor area in puddles, and then evenly distributed over the entire surface of the squeegee. | |
| After 5-10 minutes, depending on the chosen material, the applied layer must be rolled with a needle roller. | |
| If during kneading the finishing mixture turns milky white, don’t be alarmed. After drying and complete polymerization, it should become transparent. The result of the work done is presented in the illustration. |
* * * * * * *
So, from the information presented above it is clearly seen that if you wish and follow all the recommendations of the self-leveling floor manufacturer, it is quite possible to do the work yourself. Moreover, it does not require a complex or irreplaceable tool. By arranging the coating yourself, you can save a significant amount. And this is especially important when funds for repairs are limited. True, when performing such work you will have to mobilize all your accuracy and attention, since it will be extremely difficult to correct the mistakes made.
At the end of the publication, for greater clarity of information, there is a video about pouring a 3D floor with a photo drawing.
