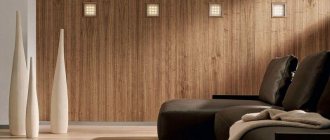
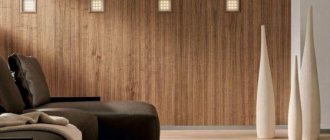
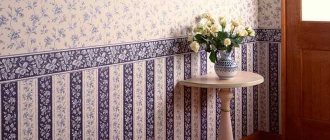
Throughout the history of mankind, there was a tree next to it, which man used to build housing and for its decoration. It has a unique texture, the pattern of which does not tire the eye. When the boards are placed horizontally, their lines make the room visually wider, and when placed vertically, they make the room taller. However, natural wood cladding may not always be an affordable option for a family's budget. As in other similar cases, imitation became a way out of the difficulty. Decorative plaster imitating wood indoors and also on the facade of a house can imitate wooden cladding of a large area or individual decorative panels. This is done in different ways.
Types and applications
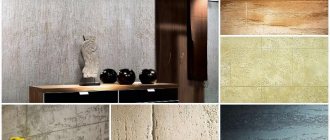
Using decorative plaster, you can achieve various effects related to texture:
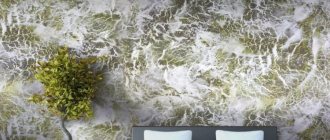
- tree bark,
- surfaces eaten away by woodworms,
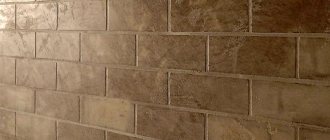
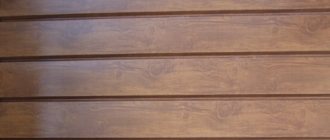
- boards laid closely
- wooden panels,
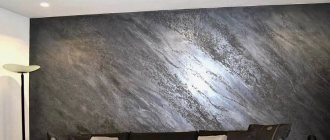
- cross cut.
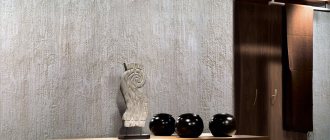
Textured wood-look plaster requires compositions that do not contain fibers or large inclusions. These are mostly smooth mixtures. Decorative plaster is made from mixtures with fine filler, looking like tree bark. The exception was structural bark beetle plaster with granules from 2 mm.
Wood-like plaster finishing is used in interiors in the form of wooden panels in the hallway, corridor or in other rooms. Such coverings look great on loggias and balconies, in the decoration of facades or small architectural forms (gazebos, walls, etc.), fences and even paths. Surfaces that imitate bark or wood cuts look advantageous in various interior styles.
Before working on the wall, practice on sheets of plasterboard, fiberboard or plywood.
The imitation wood made by professionals is very close in texture to natural wood. In fact, decorative wood-look plaster can be successfully done with your own hands and by those who are still new to the plaster business. It's all about the desire to learn, practice and the desire to achieve high quality.
Imitation of wood using polymer clay
Polymer clay is a moderately soft plastic material based on polyvinyl chloride, which polymerizes at temperatures from 100 to 130 ° C, losing its plastic properties. This material is very similar to plasticine. You can buy it in small bars, and the number of shades is simply huge. In addition, it is worth noting that the price of this material is more than affordable.
The procedure for working with polymer clay is as follows:
- take out of the package several bars of polymer clay that match the color
- cut equal pieces of equal size from each
- each piece of clay must be thoroughly kneaded, and a sausage must be rolled out of each of them
- Cut the resulting sausage into several small slices. Mix all the resulting cuts together in a chaotic manner and arrange them in small piles of 4-5 pieces.
Carefully mold individual pieces of each pile together until several balls of uniform color are formed. Roll out all the resulting balls into thin plates no more than 2 mm thick and stack them in random order.- Trim the edges of the resulting stack evenly and cut it in half. Next, place the two halves on top of each other and roll. To get the design that suits you best, you must choose the number of cutting, folding and rolling operations yourself
then the layered block of polymer clay is cut into a large number of strips 2-3 mm thick, and connected to each other- All strips are laid out with the cuts facing up and rolled out until the same thickness is obtained and an imitation of the desired wood surface texture is achieved.
The main advantage of this method is the fact that such an imitation of a wooden beam or a longitudinal section of natural wood makes it possible to obtain the desired color and internal texture of the material without additional application of paint.
What's so good about this finish?
The main advantages of this type of finishing (compared to natural wood) are lower cost and greater durability. Decorative plaster for wood:
- doesn't rot
- withstands temperature fluctuations,
- resistant to precipitation,
- does not burn,
- can be renewed by coloring,
- hides minor flaws,
- "breathes"
- environmentally friendly
Wood surface imitation technique
They work by mentally dividing the surface into small sections: the solution hardens quickly, and so that it does not have time to set, the wall is treated in parts.
- The finished plaster is applied using a metal spatula or trowel, and the thickness of the layer is evened out with it.
- Brush over a smooth surface with a clothes brush; the bristles will leave tiny grooves imitating wood fibers. Movements should be light, do not put pressure on the brush. The direction of the grooves can be strictly vertical or with slight bends. During the process, the solution will stick to the bristles; you need to wash it off with water, otherwise the stuck mass will leave large damage the next time it comes into contact with the wall.
- Next, using a wide plastic spatula, give the surface the structure of wood: move the tools from top to bottom, leaving smooth wavy lines. Using a small spatula without notches, placing it at a slight angle to the wall, draw knots in a circular motion. When the relief is created, lightly smooth the surface with a wide metal spatula without pressure and move on to the next section.
- After the entire wall is covered with plaster, leave it until completely dry. Then it is rubbed with sandpaper to remove excess solution and smooth out roughness.
Materials used and preparation for application
Compositions on various bases can be used as textured wood-look plaster: acrylic, mineral, silicone. These are mainly smooth mixtures or with fine-grained filler, for example, decorative plaster Marmorino tree bark. To obtain the bark beetle effect, structural compositions are used. Often, decorative plaster imitating wood is done by home owners with their own hands, and from materials made independently. For example, they can imitate wood even using ordinary putty.
The work does not require colored mixtures, since the coatings, after completing the formation of the texture, are painted and protected with wax or varnish. As a result, decorative plaster is obtained to resemble valuable or aged wood, as needed in a particular interior.
Achieving an antique plaster effect has become increasingly popular lately.
This type of finishing can hide minor flaws and flaws in the base surface. However, in all other respects it requires the same preparation of the base as other types of coatings. Only in this case can a long, multi-year service life be achieved.
Prepared base:
- cleared of remnants of the previous finish,
- if necessary, leveled and repaired,
- removes stains and traces of grease,
- primed,
- dried thoroughly.
If the surface of the base does not hold the coating well (for example, paint or foam), be sure to install a reinforcing mesh.
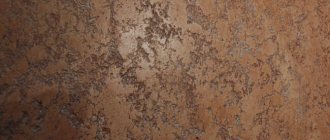
How to make such a finish with your own hands?
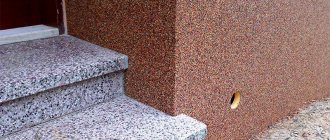
Natural wood is often used for decoration, but its price is very high, so most people prefer to imitate natural patterns. The choice in many cases falls on imitation oak bark. It is most suitable for finishing building facades, decorating ceilings and walls indoors.
In addition to the beautiful effect, the cladding reliably protects surfaces from the influence of aggressive environmental factors and mechanical influences. The coating easily hides minor defects and microcracks. The pattern is obtained with grooves and roughness; it can be formed vertical, horizontal or circular.
To make decorative plaster imitating oak bark, take into account the material consumption:
- fine fraction - 2.5 kg/sq. m;
- average - 3 kg/sq. m;
- large – 3.5 kg/sq. m.
The composition should include marble chips, acrylic binder, pigments, and chemical modifiers.
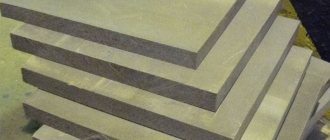
The mixture fits perfectly on:
- concrete walls;
- gypsum panels;
- lime plaster;
- Fiberboard, chipboard, DSP and ACL.
Important:
Plaster imitating oak bark does not adhere well to wood bases and unprimed metal.
Technology and application methods + video
Bark of tree
As an example of how decorative plaster with the effect of wood bark is made, let’s take a finish made from the least expensive materials.
- The working solution is prepared from gypsum plaster. The purchased dry mixture is diluted in water.
- The solution is applied to the prepared base using a trowel in an even layer of 2-3 mm.
- The initial relief is immediately applied with a roller moistened with water.
- When (after 20-30 minutes) the surface of the plaster dries a little and does not sag when pressed lightly, it is moistened with a spray bottle and the protrusions begin to be smoothed. This is done with a spatula so that after it passes between the smooth areas, ruts remain - deepening cracks in the bark. After each long smoothing movement of the spatula, wipe it with a damp cloth so that the lumps of solution remaining on it do not spoil the surface.
- The surfaces are allowed to dry completely (usually a day). After drying, small flaws that can be scratched are removed with a spatula.
Wax is usually used for the protective layer of decorative plasters. In this case, it can be replaced with non-woven glue mixed with water-soluble acrylic varnish. The glue is diluted, brought to readiness, and mixed with varnish in a ratio of 1:0.5. Then the selected color is added and after stirring, the “budget wax” can be used. It is applied with a trowel. With this application, all the depressions are filled and the surface is smoothed. Excess is removed with a damp sponge, and the surface is smoothed again with a trowel. This type of finish can be varied in various ways, for example, you can apply a little paint of a different tone with a sponge.
Textured imitation of tree bark using the Papier-mâché technique. Master class methodological development on the topic
Textured imitation of tree bark using the Papier-mâché technique.
Master class
I would like to bring to your attention an unusual technique for decorating the group’s interior. I will share how to create a textured imitation of tree bark, so often used in modern design. I'll show you how to make an imitation of tree bark.
We need very few materials:
-PVA glue.
-Paper kitchen towels, coarse toilet paper or medical non-woven bandage.
-Acrylic paints, or simple gouache in the desired shades.
-The glue brush must be flat and made of dense bristles.
-Scissors
-Water
I used the ventilation pipe in the reception area as a base. Using this technique, I also decorated the kindergarten corridor. You can take anything, any dense surface. Let's get started, I guess.
1. Select a base: in our case, this is the wall of the kindergarten corridor (the fruit garden will be located there) and the ventilation pipe in the reception area (which will become a birch tree). We draw a tree on the wall with a simple pencil. We glue the branches to the pipe using masking tape. The first layer is to glue paper or our bandage onto the base and generously coat it with glue. Glue it so that the paper or fabric does not lie evenly. Leave to dry (about half an hour)
2. We tear paper or fabric into strips of arbitrary shape and size (but not very wide and not very narrow), uneven edges are welcome, but within reason. Apply the first strip. Using glue and a brush, we smooth our strip to the base. We're not stingy with glue, but we don't need to empty the whole bottle. Determine by eye that the entire strip is moistened with glue but does not “float” in it. Using a brush, we move our strip so that it forms a small “wrinkle”. This “wrinkle” can be made anywhere, it all depends on how you move the strip of bandage or paper. Below, slightly overlapping, glue the second strip and form a “wrinkle” in the same way. By analogy, we move from top to bottom and from left to right, filling the entire surface of our base with “wrinkles”.
3. As soon as the entire surface of our base is covered with “wrinkles,” we leave this matter to dry for a day. After our workpiece has completely dried, we need to prime it with any soil solution. You can start painting. Apply the base color as the first layer. Without waiting for the first layer to dry, we immediately apply the second, darker one, I have burnt umber and just white in the version with birch. If we paint the first layer very carefully - every fold, then we apply the second layer “Russian style” - on top, purely for the sake of appearance that it is painted here. The bottom layer should be transparent in places.
4. Again, without waiting for the second layer to dry, apply the third shadow on our bark. We do this with black paint. Due to the fact that the underlying layer is wet, we will achieve a smooth transition of shades. We paint in places, I painted the largest folds and indentations.
5. At the very end, with a dry brush slightly moistened with paint, we go over the necessary places - I went over the protrusions on the bark, this will give even more volume to your tree. As soon as the painting is finished, we leave our bark to dry for a day, after which it needs to be varnished. After drying, acrylic paint darkens a little, and gouache, on the contrary, becomes lighter; take this property into account when choosing shades for painting, so that in the end the bark does not turn out completely dark or dull.
6. In conclusion, we draw the crown of the fruit trees, glue the fruits, previously cut in half, leaves from any material, in our case it is purchased artificial foliage. We attach foamiran leaves, made independently in advance, to birch trees using wire; you can use any other material.
As a result, the texture of the bark turned out to be very pleasant to the touch, a little silky, I really liked the end result, the desired effect was achieved. Good luck in your creative endeavors.
Coloring
Of course, creating texture is the most labor-intensive task in wood finishing. However, painting the plaster is the final stage of finishing. Therefore it must also be of high quality.
Before painting, a primer is applied to the surface with a brush along the wood lines, colored in the desired tone. The dye used is water-soluble.
The best way to convey the richness and depth of the natural color of wood is with translucent compounds, applying layer after layer of compounds of different shades. To obtain a budget coloring composition, you need to mix sequentially (with stirring after adding each next component) the following components:
- a little primer
- color scheme of the desired tone,
- white water-based paint,
- some dry wallpaper glue.
The mixture is applied with a brush, following along the fibers. Excess mixture is removed with a rubber spatula. After this base layer has dried, you can apply a composition with a different shade. The paint for subsequent layers is made without wallpaper glue and primer - only water-based emulsion with dye.
There are many options for coloring and coloring compositions. Here, as they say, dare and create. Just try it first on “experienced plots”.
Advice from the experts
Experts advise adhering to the following tips:
- Decorative plaster with the effect of tree bark must be applied with a special brush, the size of which depends on the relief. The tool must follow the grain. Excess released mass should be removed with a spatula with a rubberized base.
- Graters and spatulas, curved rods, and many other devices for obtaining wood structure can be purchased at any hardware store.
- When working, you need to use high-quality tools, clean containers, rollers, and brushes. Otherwise, foreign particles will get into the general composition and become fixed on the surface.
- The plaster mixture can be of any composition: cement-sand, cement-lime, gypsum, acrylic or silicone.
Decorative plaster “bark” is used in the interior of residential and non-residential premises. This coating also looks great on the facade of the building. It’s easy to create beauty if you have a high-quality composition and available tools.
When and how to mulch with tree bark
The best time for mulching is spring or autumn. In the spring, you can do this only after the soil has warmed up (as a rule, this moment coincides with the appearance of the first weeds). But it is better to mulch the soil no earlier than May.
Before mulching, it is necessary to add fertilizer to the soil, because in the future it will be more difficult to do this. After removing weeds and last year's leaves, surface loosening and watering the soil, the ground around the plants is covered with an even layer of tree bark. The thickness of the mulch can be from 3 to 7 cm (depending on the type of soil and lighting of the area). You can mulch the soil in the flower garden and vegetable garden only after all the plants sown in open ground have sprouted. In the fall, you can renew the top layer of mulch.
Experienced gardeners recommend moving tree bark mulch away from the tree trunk in the spring, this allows the soil at the roots to warm up.
When mulching, it is important to ensure that the mulch layer does not lie close to the plants. Since tree bark only reduces the number of weeds, but, unfortunately, does not get rid of them completely, some gardeners hide a layer of geotextile or seedless grass clippings under a layer of mulch.
- How to use weeds after weeding
Destroying weeds takes a lot of effort and time, and in return often rewards us with pain in the muscles and lower back. Therefore, I want my efforts not to be in vain. In this material we will tell you how to use weeds for good.
When watering mulched flower beds and beds, it should be taken into account that medium and fine tree bark absorbs some of the moisture, which means that the plants will get less of it.