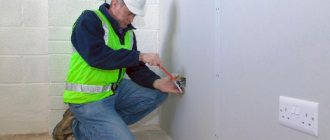
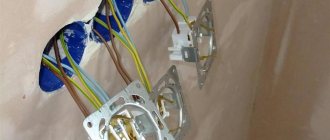
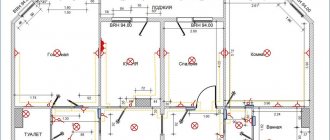
Installing the entire electrical wiring of a house or apartment is an extremely responsible matter, requiring certain knowledge and experience in performing such work. Therefore, such large-scale events are most often entrusted to electrical specialists. But some problems that arise, for example, during cosmetic repairs or simply during the operation of electrical equipment, can be solved on your own. Such accessible operations include connecting stationary lighting fixtures, installing new or replacing faulty sockets and switches.
How to connect an outlet
In this publication we will focus our attention on sockets - they are the ones we deal with most often. The saturation of everyday life with useful electrical appliances is constantly growing, and new equipment often requires new connection points. In addition, any socket does not last forever, it is designed for a certain number of plug connections. And sooner or later it exhausts its resource, begins to spark, become loose, and sometimes completely crumbles into dust. And simply when carrying out cosmetic repairs, owners often want to replace all sockets and switches with new ones that best suit the style of the chosen finish.
So, he is considering the question of how to connect the outlet on his own, without calling a technician.
Installation in plasterboard
Marking and cutting holes for sockets
Installing power points in drywall is both hidden and exposed wiring. The wires are invisible to the eye, as in hidden electrical wiring, but they are not located inside the wall and can be reached, as in open installation. The work requires professional tools and steel wire.
How to make several outlets from one:
- Removing the socket and socket box from the wall.
- Thread the steel wire through the hole in the direction of installing the new power point. This is done in order to make sure that a corrugated pipe with a cable can be installed between the profile and the wall.
- Drilling a place for a new socket box.
- You need to twist the rope to the wire and pull it back out.
- Using a rope, a corrugated pipe is pulled between two sockets.
- Wires are pulled into the corrugation.
The final step is to connect the electrical wires.
Caliper location
The next question is how to correctly position the socket support inside the socket box - with the terminals down or up.
Some are guided by the inscriptions on the case. They should be legible and not upside down.
On the one hand, this is quite logical. But in reality, there is not much difference. This is not reflected in any way in the regulatory documents.
Therefore, mount it in the way that is convenient for you. For example, focus on the incoming cable.
Is it possible to connect an outlet to the switch?
Imagine the situation: you have renovated your premises, all the electrical wiring is walled up in the walls, and there are no backup boxes or socket boxes. An outlet needs to be installed in one of the rooms. Placing it next to the distribution box is irrational, the location is too high. But I don’t want to lay open wiring (especially, ditch the wall).
There is a switch in a convenient location that clearly has voltage. How to make a socket from a switch if it is possible to aesthetically place them next to each other?
To answer this question, let’s remember: what types of lighting schemes with switches are there?
Classic connection: tap from the distribution box.
The neutral conductor is inserted into the lamp from the box. In the box itself, a break in the phase cable is organized (it is opened using a switch), then the phase enters the lamp along the same path as the zero.
With this scheme, only the phase conductor is present in the body (installation box) of the switch. It will not be possible to organize a closed electrical circuit to connect an additional electrical appliance (via an outlet). You can use the phase from the switch, but you still have to lead the zero from the distribution box, which makes the idea pointless.
Conclusion: With this type of lighting arrangement, it is impossible to connect the socket to the switch.
The switch is located between the power source and the lighting fixture.
This scheme is less common, but in some rooms it is used. If at the design stage it was decided not to use distribution boxes in the lighting network, you are in luck. The switch wiring box contains both neutral and phase wires.
The sequence of work is as follows:
- We dismantle the existing switch without touching the installation box.
- We determine the routes for laying the input and output cables. If you have a diagram and plan for the electrical supply of the room, this is not difficult to do.
- Carefully drill a hole for the socket box.
- We install terminal blocks in the switch box and connect the socket according to the following diagram:
Safety regulations:
Since the current wiring is intended for lighting, most likely the cable cross-section is no more than 1.5 mm². The maximum possible load for such a cable (provided that it is copper): 3.3 kW. That is, not very powerful electrical appliances can be plugged into this outlet. The maximum is a vacuum cleaner. Well, phone chargers, a power supply for a router or an antenna amplifier - no problem.
Features of daisy chain connection
Daisy chain connection is applicable both to individual sockets and to a group of them in one block. An example of the latter connection is shown in Figure 2.
Figure 2. Daisy chain connection of sockets of one block
When constructing the “loop” part of the socket system, in addition to a certain level of aesthetic indicators, it is necessary to ensure:
- protection against overloads of loop cables;
- required level of operational reliability.
Overload protection, which is a guarantee against cable fire, is provided at the network planning stage and regarding the linear part of the wiring is achieved:
- choosing the appropriate cross-section of the current-carrying cable cores (it is best for this to take a cable with cores with a cross-section of 2.5 mm2);
- using cables from trusted manufacturers who do not underestimate the cross-section of the core relative to the value indicated on the product labeling.
These measures are complemented by the correct selection of the circuit breaker threshold.
Figure 3. Options for daisy chain connection of sockets (top - correct, bottom - incorrect). The grounding wire is not shown
The required level of operational reliability of the formed loop is achieved by the fact that the sockets cannot be connected by wire in series, i.e. as shown in bottom Figure 3.
The only acceptable way to connect to the loop is only using taps (Figure 3 above). At the same time, this approach is guaranteed to maintain the continuity of grounding circuits.
The circuit below in Figure 3 is operational in normal mode. However, in it, when the contact of one of the sockets burns out, those following it along the loop are de-energized due to a broken circuit.
Connecting sockets with a cable. Features of connecting sockets with a cable
Schemes for connecting sockets with a cable
Connect sockets with a cable in several ways;
— radial connection or star connection is used when installing electrical wiring in houses and apartments. With this type of installation of sockets, each socket is connected to the distribution box or electrical panel with a separate line and they are installed in one place, side by side.
This method is characterized by great reliability and safety, but due to the need for additional cables, it is considered the most expensive. The strobe for this method of parallel connection can be made one wide for all dogs. If the sockets are intended for heavy loads, then this installation method is necessary;
— a ring connection diagram involves connecting sockets on both sides, that is, on a ring. This type of connection increases the reliability, safety and efficiency of electrical wiring. But in our country this method is practically not used, although it is quite popular abroad;
- connecting sockets with a cable (in parallel) is done in order to reduce cable costs, but in this case the reliability and safety of the electrical wiring is reduced. With this connection option, it is necessary to ensure that the total power of the loads of the socket outlets does not exceed the permissible cable current.
Connecting sockets with a cable
For daisy chain connections, it is necessary to ensure that the total power of the socket loop loads does not exceed the permissible cable current. Here, the permissible load per socket is lower than that of a single socket with a separate line or a socket connected using a radial method.
Features of installing sockets with a cable
Connecting sockets with a cable has its pros and cons. The downside is that if a wire breaks in a group, subsequent sockets will not work. With fewer sockets in a group, their reliability increases. The only advantage can be considered the savings and ease of installation of electrical wiring.
Connecting sockets with a cable without breaking the grounding by soldering
The connection of sockets with a cable according to the PUE must be without breaking the PE conductor. Grounding is connected to the terminals of the PE socket only by a branch. This is due to the fact that if the grounding conductor breaks, the socket is left without protective grounding. The power of a group of sockets should not be more than 3 kW and is connected to a 16 A circuit breaker. If the load of the group exceeds 3 kW, then it is necessary to run a separate line to each socket.
The procedure for installing branches in a socket box
Often they connect a group of sockets to one three-core cable and connect them with a cable, that is, in parallel. With a parallel connection, the requirement for continuity of protective grounding is not met. Connecting two PE conductors with a loop on one terminal reduces the reliability of the contact.
A cable connects all three conductors in each socket (phase, neutral and ground). Connection with a loop is done in the case of light consumer loads and under normal operating conditions. A cable is also used if it is necessary to quickly add sockets.
Connecting sockets with a cable without breaking the PE protective grounding using the crimping method
When connecting with a cable, to increase the reliability of contact, the ends of the wires must be bent under the ring and soldered. It is advisable that the terminal have a rectangular washer to ensure tight contact. However, the correct connection of the PE grounding conductor must be without a break and have a branch.
The ends of the grounding wire are connected by crimping to the branch terminal. After crimping, the sleeve is insulated with a special cap. This grounding connection is made for each socket in the socket box. Crimping is considered the most reliable connection and ensures continuity of the ground wire.
The tap reduces the load on the terminal. Some experts recommend using a tap-and-crimp connection, not only for grounding, but also for the phase and neutral conductors. There is enough space for laying branches and crimping in modern socket boxes. They make a daisy chain connection when adding one or two sockets, with minor repair work.
Safety precautions at work
The safety rules are as follows:
- All work related to voltage sources is carried out only when the line is completely de-energized. Initially, we carry out all the preparatory activities, selecting the grooves, mounting holes and laying the wires.
- Each wire that is supposed to be connected must be checked whether it is phase or zero, regardless of the insulation marking. The tool that will be used for work must have insulated handles.
- If it is necessary to extend the wire, you should avoid twisting the wires and use special quick-release terminals.
- To install the socket box, you need to ensure that the wire is not damaged.
- When working with a specialized power tool, use only one that is suitable for the rated power and amperage.
Compliance with all electrical safety requirements and installation rules will allow you to protect yourself from undesirable consequences and problems associated with damage to electrical wiring, sockets, and switches. And such harmful consequences as fire of elements if installed incorrectly.
{SOURCE}
What is needed to switch the circuit?
Electrical wiring can be open or hidden. In this article we will consider the connection of sockets and switches made according to the second option, when all electrical switching is hidden under a layer of plaster. Hidden design is the most common type of electrical wiring; open wiring is usually used as a temporary option.
Preparing the walls
Before connecting a socket and switch in the room, you need to prepare holes in the wall for their installation and grooves in which the wires will be laid. There should be three holes in total - for the junction box and for the connected switching devices.
It’s better to draw an approximate drawing on a piece of paper in advance, where exactly you plan to connect the switch and socket, and what route the wires will take to these places.
The hole for the distribution box is made, as a rule, under the ceiling, 10-15 cm lower. Holes for switching devices are made at the site of their planned installation. It is better to install the socket at a distance of 30 cm from the clean floor, where household appliances will be connected to it. It is advisable to install the switch at the entrance to the room at the level of an adult’s lowered hand - about 90 cm from the clean floor. These works are performed with an electric drill with a special bit for brick or concrete, a hammer drill with a Pobedit drill, an impact drill or an angle grinder.
When installing gates, consider several important rules:
- They can only be horizontal or vertical; no tilting is allowed.
- The entire path of the groove from the distribution box to the installation sites of the socket and switch must pass with a minimum number of turns.
- Vertical grooves cannot be brought closer to window and door openings less than 10 cm, and to gas pipes - less than 40 cm.
To install the grooves, you can use a hammer and chisel, a hammer drill, a grinder or a special tool - a wall cutter.
When all the holes and grooves are ready, thoroughly clean them of dust using a vacuum cleaner.
Installation elements and tools
To perform the electrical part of the work you will need the following materials and tools:
- distribution (socket) box, in which all wires are connected;
- two plastic or polypropylene mounting boxes (socket boxes), they are needed in order to securely fasten the switching devices in the wall openings;
- indoor socket;
- indoor switch with one key;
- lighting fixture;
- set of screwdrivers (flat and Phillips);
- knife or stripper for removing insulation from conductors;
- pliers with insulated handles;
- clamps or insulating tape;
- indicator screwdriver.
To switch the entire electrical circuit, you will also need a two-core wire. Nowadays, electrical goods stores offer a huge assortment of wires and cables, so immediately buy one so that each core has its own colored insulation, for example, red and blue. This will make it easier to switch the circuit; you won’t have to look for phase and zero with instruments, you’ll just need to connect wires of the same color.
In order to fix the wires laid in the grooves, you will also need alabaster and a spatula.
Open and closed wiring
The difference between the methods is noticeable to the naked eye. The closed wiring is located inside the wall, for which grooves (grooves) are punched or cut into it, in which the connecting wire is hidden under a layer of putty. Open wiring is laid along the surface of the wall, on which it is held in special fasteners or laid in plastic guides - cable channels.
Accordingly, if you can see the wires that fit into the outlet, then the wiring is of an open type. Otherwise, closed wiring is used, for the installation of which the walls were cut.
These two methods of connecting an outlet can be combined with each other - if the old points are connected in a closed way, then nothing prevents you from connecting a new one in an open way. There is only one choice - in wooden houses the socket can be connected exclusively in an open way, just like all other electrical wiring.
Open wiring - advantages and disadvantages
An analogy with the most common extension cord (surge protector), which is essentially an additional branch of the electrical network, but is connected not to a junction box, but to an outlet, will help you understand why open wiring is good.
Advantages:
- You don't have to cut the wall to install a new outlet. This is especially true for those premises that have already been renovated.
- Installation does not require tools such as a wall chaser or a hammer drill.
- In the event of a breakdown, you don’t have to open the wall - all the wiring is in front of your eyes.
- Installation speed. Even after all the work has been completed, adding another point to the existing wiring is a matter of several minutes.
- If desired, you can quickly completely change the wiring - ideal for temporary connection schemes.
Flaws:
- There is a high probability of external influence on the wiring - children, pets, you can simply accidentally hook it. This disadvantage is mitigated by laying wires in cable channels.
- Exposed wires spoil the entire interior of the room. True, it all depends on the design abilities of the owner of the room - cable channels will fit perfectly into modern design solutions, and if the room is made in a retro style, then special wires and other accessories are produced for this.
- The need to purchase special fasteners, even if cable ducts are not used - in wooden houses, open wiring should be laid at a distance of 0.5-1 cm from the wall surface. Wires are often laid inside iron pipes - all these requirements are aimed at increasing the safety of using open electrical wiring.
As a result, this connection method justifies itself if for some reason there is no point in laying the wires to the outlet inside the wall. Besides the fact that the wiring will be visible, there will be no differences in the operation of the outlet.
Pros and cons of this connection method
There is only one advantage and it is always visible - ease of use, because you no longer have to fiddle with carriers, trip over wires or worry that the tee will loosen the contacts of the socket and fall out of it.
In order to fully evaluate the possible shortcomings, you need to disassemble the device and see what wire is connected to it - most often it is wiring with a cross-section of 1.5 or 2.5 square millimeters. Such a cable will easily support the connection of one household device with a power of about 2 kW and, with some stretch, a couple of such devices. What saves sockets and wires is that several powerful devices are connected to one of them quite rarely - basically it is one device of 1-2 kW and several weaker ones.
Before you install an outlet or several from an existing one, you must take into account that each subsequent one is a connection of wires, which is an additional resistance to electric current. Even if you connect one powerful device, but to the last socket, there is a possibility that the previous contacts will heat up. The nature of electric current is such that it has a vibration effect on the wiring, as a result of which the contacts inevitably weaken over time. According to the rules, all electrical contacts in enterprises must undergo an annual inspection and tightening of bolted connections.
On the other hand, in living rooms the most powerful device is usually an electric heater - if it is not homemade, with contacts made unknown, then two sockets connected in series and their wiring can easily withstand it.
The third question is the kitchen - this is where the most powerful devices are usually assembled in terms of electricity consumption: dishwasher, microwave, electric oven, oven, electric kettle, toaster and others that “eat” from 1.5 kW. “Hanging” them on one wire is strictly not recommended, unless it is the weakest of them, for example, a microwave oven paired with a kettle or toaster.
Conclusion
We have considered almost all possible options that you may encounter when installing and repairing sockets. But some “mega-specialists” forget the PUE standards given in clauses 1.1.27 and 1.1.28, which say that all electrical installations must have the most simple and clear diagram possible.
Because of this, incidents are possible. Therefore, when installing your electrical network, “you shouldn’t reinvent the wheel,” but do everything according to the rules. This will save not only a lot of nerves and strength for those who will be doing the repairs, but also possibly their lives.
Should I wire the socket from the socket or not?
The option of installing an additional outlet will help get rid of quarrels between family members who require electrical points to turn on various household appliances.
This problem arises especially acutely in the kitchen with the purchase of new equipment - a blender, mini-processor, yogurt maker, bread maker, multicooker and other appliances.
It turns out that the existing sockets can no longer cope with their responsibilities - their number is physically insufficient to meet the needs of all households. On our website there is a whole article dedicated to the selection and placement of kitchen outlets.
Therefore, it would be advisable to decide to install an additional outlet from an existing one.
A technically equipped kitchen needs a sufficient number of electrical connection points. This should be remembered at the stage of drawing up an interior design project for the future premises.
But here you may encounter a real problem - it is not always possible to complete such a task. There are a number of restrictions when it is categorically impossible to carry out such a modernization of the existing electrical network:
- if you need an outlet for an electric stove;
- when you decided to connect a boiler with the washing machine;
- if the total power of the devices is more than 2.2 kW.
In houses or apartments where the owners purchased a new electric stove to replace the old gas stove, a new outlet will be required to connect it. In such a situation, it is impossible to wire another one from a regular outlet to turn on this powerful device.
Here you will need to install a separate branch from the distribution box, or even better, from the panel. Yes, and a residual current device for powerful equipment needs to be installed. In order to learn about the rules for connecting an outlet for an electric stove, we recommend reading this material.
Another unfortunate example is when the bathroom only has an outlet for the washing machine. But over time we purchased a boiler. Read on to learn how to properly position and connect sockets in the bathroom.
These devices cannot be plugged into one double socket at the same time - the wiring may burn out. It will always be problematic to control the order in which the boiler and washing machine are turned on.
The result of a network overvoltage can be disastrous - it’s good when the problem was discovered in time or the circuit breaker tripped and a fire was avoided
It is also necessary, even before starting work on installing another outlet, to calculate the expected power of the devices that will simultaneously be included in the new block of outlets.
Often they plan to upgrade the connection point to the electrical network, which is fed by a wire with a cross-section of 1.5-2.5 mm2. Therefore, the total power of the devices can be slightly more than 2 kW.
You cannot turn on a dishwasher, an oven and a heater, or a boiler and a washing machine at the same time in such neighboring sockets, powered from one core.
At what height should sockets be installed?
The installation height of sockets is determined based on purely practical considerations. It is necessary to take into account user convenience, the length of the power cable for heavy devices (refrigerator, washing machine) and safety. Sockets break down from time to time and need to be replaced or repaired. When preparing installation, you should remember this.
The distance to the sockets from the floor is usually from 30 to 80 cm. When installing at a low height, you should take care of the safety of children by choosing devices with special curtains. The upper point of the outlet location is not determined by the standards.
But you need to know that there should be at least 15 cm from the floor slab to the socket, and at least 10 cm from the edge of the window opening. A socket block installed away from the window is better protected from temperature changes, from water, dust and other atmospheric factors.
Turn off the electricity
De-energize the room using a switch in the electrical panel on the landing or in the apartment. To do this, the handles of the machines need to be moved down - the indicators on them will change from red to green or from one to zero. Circuit breakers are not always labeled, so be sure to check that the power is actually off.
The flags are cocked and the red indicator is visible - the machine is on / ac220.ru
If the apartment has a distribution board with several circuit breakers, turn off only those that protect the outlets. This way you can work under light and comply with safety measures.
Combined method
In some cases, it is necessary to simultaneously increase the capacity and voltage of the battery. For this, two combined connection methods are used:
- First, several batteries are connected in series. In this way, the required operating voltage is achieved. At the second stage, parallel switching of several batteries obtained by connecting batteries in series is carried out. Several series circuits are created to achieve the required capacity.
- The second method involves parallel switching batteries with the required capacity, after which they are connected in series to achieve the required current.
The combined method is used extremely rarely, as it involves the use of several power sources
When choosing the most suitable batteries, attention is paid to their technical condition, capacity and voltage of the generated current.
How to properly connect an outlet - detailed instructions
For single and double sockets this is not difficult to do (installing such sockets involves drilling one hole in the wall), but installing a triple socket will be more difficult. It is necessary to accurately mark the centers of the sockets, taking into account the distance between them.
If it is necessary to lay wiring in a new location, straight lines (horizontal and vertical) are drawn on the wall. Curvilinear and oblique routes are not allowed: this will make it difficult to find the location of damage and repair the wiring in the future.
Required tools and materials
To work in a house with brick and concrete walls, you must have at your disposal:
- perforator;
- a special attachment – a crown with a diameter of 70 mm with carbide cutters;
- voltage indicator;
- chisel;
- hammer;
- straight and figured screwdriver;
- narrow and medium spatulas.
To carry out electrical wiring, it is necessary to replace the old aluminum cable with a new copper cable. The core insulation is double, the cross-section (for the socket group) is 2.5 mm². It is recommended to use cable type GDP-2×2.5 or GDP-3×2.5. In addition, you will need socket boxes (plastic cups with a diameter of 67 mm), alabaster for fixing them and sockets. The latter are chosen according to personal preferences and the color of the front panel: it can be combined with the color of the finishing material for the walls.
Wall chipping
In order not to make wide grooves and avoid cleaning up large amounts of construction waste, you can use the following method when grating walls.
It is convenient for laying single cables, which most often has to be done when installing sockets. It is necessary to use a grinder to make a cut of the required depth. In this case, during the cutting process, the “diamond” wheel should be given wave-like movements: this will slightly widen the groove. In the places where the cut turns (that is, in the corners), widen the groove with a chisel and hammer.
A flat three- or two-core cable of the GDP type fits well into a groove made in this way due to its flat cross-section. At the same time, there is practically no need to “freeze” it with alabaster solution: the cable will stick well to the wall. After laying it, the wall is leveled with gypsum mortar using a medium-width spatula.
Before starting electrical installation work, use the switch located in the switchboard to turn off the power supply. You need to check for voltage at the terminals.
How to connect a grounded outlet
To avoid problems, you must first make the correct wiring connections in the installation box. It should be remembered that the phase wire (usually the insulation color is brown, black or red) must be connected to the twisted phase wires. It is determined by a voltage indicator. Neutral wire (blue, white) - with neutral, “ground” (yellow, yellow-green) - with grounded wire.
Now about how to connect a grounded outlet. An error can be life-threatening: connecting the phase wire to the ground terminal will lead to voltage appearing on the body of the household appliance. To avoid this, you need to know the location of the socket terminals. "Ground" is connected to the central terminal. The remaining two terminals have a phase wire and a neutral wire (they can be swapped).
Grounding is necessary for safety: it will prevent electric shock to a person if current leaks into the housing of household appliances. Therefore, the “ground” core of the cable connected to the socket must be connected at the other end to the “ground” cores of the cables laid from the switchboard at the entrance.
How to connect a double socket
There are no special differences in the installation of such an outlet, since it will also have three terminals, like a single one. The only difference is the orientation of the housing and the plug holes. Those installed vertically may differ in appearance from those installed horizontally. The installation method does not affect anything and is chosen based on personal wishes.
The socket is fixed in the socket box, “frozen” using alabaster (applied with a spatula), and then its front panel is installed.
«>
Not yet!
How to choose the right method
It all depends on the amount you can afford to spend, the power of the device that will be connected to this outlet, as well as the presence or absence of decoration on the walls (the desire and ability to ruin it).
In any case, the most reliable way to connect any outlet is a separate (parallel) connection directly to the main panel or distribution box in the room (if the cable cross-section allows). If the outlet is planned only for connecting a TV or similar not very powerful devices, then a daisy chain connection is also quite suitable.
If you plan to install wiring in a new house or modernize (replace) an old one in an apartment, then first of all you need to, without undue modesty, imagine what electrical appliances you would like to have - what can be connected to the network in principle. Based on this, it is already possible to calculate the required cross-section of wires and the method of connecting them.
The method of installing the outlet depends on the type of wiring, of which there are only two:
Open
In the case of installing a socket for hidden wiring, a hole is punched in the wall, a socket box is installed, into which the socket itself is then installed.
When installing a receptacle for open wiring, the process becomes much simpler since the receptacle is installed directly on the wall. Older models of sockets may require a wooden cover to increase the safety of their operation, but modern sockets do not need this either.
How to properly install and connect the socket?
The first thing you need to do before installation is to choose the right location for the future electrical point.
Depending on the rooms in which the sockets are installed, certain distances must be maintained:
In living rooms - at a distance of 20-30 cm from the floor
In apartments where there are children - above their height or special pads should be used
In kitchens - at a distance of 1.3 meters from the floor
From gas pipes and electrical appliances - at a distance of at least 50 cm
In bathrooms and showers - 1 m from the floor
You will find some more rules in the picture below.
Having figured out the installation location, you can begin to prepare a place in the wall for installing the outlet.
Preparing the hole for the socket
In order to install a socket in a concrete wall you will need:
Hammer
Diamond crown
Installation box
Plaster mortar
If the socket will be installed in a plasterboard partition, then instead of a hammer drill, you can use a conventional drill and a crown designed specifically for plasterboard.
In this case, we will consider installing a socket in a concrete wall. In order to make a hole in such a wall, you must first make markings. To do this, take a socket box, trace its contours with a pencil, and then apply a crown to it.
After this, the hole is cut to the required depth, equal to the size of the socket box, and using a chisel and hammer, the stone is knocked out and removed from the recess.
Then a groove is drilled from the finished hole for the wiring. The socket box may have a hole for cable entry, or it may not, and then you will have to break it out yourself.
After preparing the groove, you can lay a cable into it and install a socket box; to do this, the hole must be cleared of debris, small pebbles and dust. Then a primer is applied and a plaster solution is laid, which will securely secure the installation box.
When the box is installed in the hole, it will also need to be coated with plaster along the edge.
Connecting the socket
After the plaster solution has dried and been sanded, you can connect the wires to the outlet. In order to do this correctly, you need to understand its structure.
On the socket block you can see 3 contacts: 2 of them are for connecting phase and neutral, and the third is for grounding.
They are connected according to this scheme:
Important! Before you start connecting the wires, you must turn off the power to the apartment. You can check the absence of voltage in the outlet using a special device - a multimeter.
Having figured out where each wire will be connected, you need to strip the ends of the wires and connect them to the contacts of the socket. The connection is made using a spring or screw clamp. After this, you can twist the excess wires and carefully place them in the box.
Final stage
Once connected, all that remains is to attach the block to the wall and complete the process. The block is attached either with screws or with screws. And after attaching the socket, you need to install the plastic cover, that’s it - the installation of the socket is completed.
Correct connection of sockets with a cable
All sockets located on the same electrical group have the same connection diagram - parallel. But you can “parallel” sockets in different ways: connect them in junction boxes (twisting, terminals, soldering) - 1. or connect them to each other at the terminals, bypassing these boxes (connection with a cable) - 2.
Which socket connection to choose. By connecting sockets with a cable, you can significantly save on material - wires, boxes and, accordingly, significantly reduce labor costs. However, currently in the Electrical Installation Rules (PUE) there is a clear and unambiguous prohibition on breaking the PE conductor (“ground”).
If you are changing the electrical wiring in your apartment (house), there is nothing particularly to be afraid of - after all, you do not need to officially put the facility into operation, but you must agree, it is better to sleep peacefully, knowing that the electrical wiring of your home is in order and meets all regulatory electrical safety requirements.
How to properly connect sockets with a cable. without violating the PUE? There is an alternative: the figure shows a method for connecting sockets in this way. The method is quite old, but proven, and for reliability it is better not to limit yourself to the “ground” wire, but to leave the current-carrying wires – phase and neutral – unbroken.
With this connection of sockets, the load on the terminals of the first socket where the power “comes” will be limited only by the power of the household electrical appliances included in it. This method of connecting sockets extends their service life and, most importantly, keeps the PE conductor (“ground”) intact.
Copyright 2010-2016 When using site materials, an active link to remont220.ru is required
The site uses cookies. By continuing to browse the site, you agree to the use of cookies.
Is it possible to connect sockets in series?
Connecting sockets in series mode has a number of disadvantages and limitations. In a large room and a significant number of powerful electrical appliances, this method cannot be used - the load is too high. It is better to parallel the sockets or use the ring type. The recommended quantity per chain is 5-6 pieces.
Another disadvantage is the uneven distribution of voltage at power points. Each outlet accounts for a portion of the total electrical flow. Therefore, serial connections are not used in residential and industrial premises. But you can use it in Christmas tree garlands and others.
Choosing the appropriate wiring method
Table of ratio of core cross-section to current loads
All methods of obtaining power from an outlet for another outlet can be divided into several groups. According to the method of fastening - inside the wall, outside or from the outside of the main power point with the wires leading out. Further work is carried out in a similar way.
Key operating points:
- Cable thickness. The cross-section of the child outlet should not be less than the parent one.
- Design decision. Directly depends on the interior of the room and does not affect the technical characteristics.
- Connection procedure. Household appliances may have two or three contacts. In the first case, these are phase and neutral wires, which are connected to different contacts. With a three-wire connection, grounding is added. It is connected to a mounting bolt on the device body.
- Grounding. If the main outlet has it, subsequent power points should also have it. According to the requirements of the PUE, the cable must be solid.
Compliance with safety precautions when installing sockets
Work with electricity is classified as dangerous. Even low voltage leads to burns, injuries and other unpleasant consequences. Compliance with safety precautions:
- de-energize the room in which the work is being carried out;
- check the area before starting with a special device (you can plug the device into the network);
- use rubber gloves and equipment with rubberized handles;
- when “increasing” the length, it is not enough to twist the wires; soldering is required;
- contact with connected bare cables is not allowed;
- the excess should not “stick out” - it is shortened and placed in the wall;
- check whether the devices are suitable for the current and voltage levels used.
Types and installation of boxes for internal sockets.
A completely different installation principle is used for internal sockets. When attaching them, a box must be used. This is a special cylindrical box into which the body of the socket itself is placed.
Previously, metal boxes were used. A recess was made in the wall at the point where the electrical wiring was output; if the wall was tiled, the tile was cut or a hole of the required diameter was drilled. A box was mounted into it using alabaster and contact wires were brought out. Only then, a means of connecting end consumers or a switch for connecting voltage to the chandelier was attached to the box.
Nowadays, with the advent of plastic in widespread use, boxes began to be made from it. In such a box, the socket is held well both with the help of spacer legs and screwed with screws. Another advantage of such a box is its budget price.
If there is a need to install several sockets, the boxes are easily connected to each other into a block.
Depending on the material of the walls in which it is planned to mount the installation box, boxes of various modifications are also produced.
Ordinary boxes are used for installation, for example, in brick walls. To do this, use a crown to drill a hole at the location of the electrical wiring outlet and the future outlet or switch. Already in this hole, using alabaster, a box is fixed flush with the surface of the wall into which the wiring is routed.
If you plan to mount the box into a plasterboard wall, then you need to use a special box “with ears” as in the photo below.
We drill a hole with a diameter of 68 mm in the drywall. and insert the box into it. By tightening the screws, the tabs on the back of the drywall press the box and secure it firmly in place. The free space between the plasterboard and the wall must be at least 45 mm so that the box is completely recessed and flush with the outer surface of the plasterboard.
Please note: modern sockets sold in stores are almost all designed for plastic installation boxes with an internal diameter of 65 mm. and are not always suitable for metal (old) boxes
The inner diameter of the metal box is 68 mm. The extension of the legs of modern sockets is not enough to secure the housing in the old box. Therefore, when buying a socket in a store, check whether it is suitable for old boxes.
Mixed connection and grounding in series connection
If you decide to use a series connection of sockets, you can strengthen the overall design by using a mixed method. The essence of the method is as follows:
- A central cable is connected to the distribution box from the common panel board.
- In the preliminary wiring plan, the most distant point of access to power is selected.
- The selected outlet is connected from the distribution box cable.
- The rest are powered from this device.
This method increases the reliability of the network. If an outlet fails, the others continue to work. Disabling the entire system is possible only in the event of a malfunction of the main cable, twisted in the junction box.
Grounding is a must. With a serial connection, if a wire burns out at one point, the rest are left without protection. The optimal way to connect sockets to each other for grounding is mixed. The main cable is fixed under the ceiling, then branches are made for each access point.
This technique has disadvantages - the large length of the wires used, the need to install several junction boxes (for each branch). To know for sure whether high-power devices can be connected to the network, it is necessary to calculate the voltage before the cable wiring stage. An accurate calculation will help you choose how to connect the sockets in the end - in series, parallel or mixed.
Check the wires
Inspect the inside of the outlet to see if it has two or three wires. In old houses there are most often two of them - phase and zero. In modern apartments, grounding is added to the latter.
YouTube channel “Electrician in the house”
By color or using an indicator screwdriver, determine which wire is phase and which is neutral. To do this, take the screwdriver by the handle so that your thumb rests on the metal circle at its top. Then touch the tip of the screwdriver to the socket contacts one by one. The one on which the indicator lights up will be the phase, the second will be zero.
Appearance of typical wires for sockets: triple - with grounding, double - without / remotvet.ru
When there are three wires, they must be connected strictly in accordance with the markings. The purpose is easy to determine by color:
- earth (PE or Protective Earth) - yellow-green or yellow;
- zero (N or NULL) - blue;
- phase (L or Lead) - brown, red or white.
Types of devices and their features
There are quite a lot of varieties of plug sockets and blocks. Each type has its own design features and purpose.
- Hidden devices are mounted directly into the wall - in special socket boxes.
- Open devices are produced for those apartments where the electrical wiring is not hidden in the wall.
- Retractable socket blocks are mounted in a table or other furniture. Their convenience lies in the fact that after use, the devices can be easily hidden from prying eyes and playful children’s hands.
The devices differ in the method of clamping the contacts. It comes in screw and spring types. In the first case, the conductor is fixed with a screw, in the second - with a spring. The latter are more reliable, but they are not so easy to find on sale. The devices are fixed to the walls in three ways - claws with jagged edges, self-tapping screws or a special plate - a support that facilitates both installation and dismantling of the socket.
In addition to conventional, inexpensive devices, there are models equipped with grounding contacts. These petals are located in the upper and lower parts, and a grounding wire is attached to them. To ensure safety, sockets are equipped with curtains or protective covers.
Main popular types
These include:
- type “C”, it has 2 contacts - phase and zero, usually purchased if intended for low or medium power equipment;
- type “F”, in addition to the traditional pair, is equipped with one more contact - a grounding one; these sockets are becoming more popular, since a grounding loop has become the norm for apartments in new buildings;
- Type “E”, which differs from the previous one only in the shape of the grounding contact, is a pin, the same as the elements of the socket plug.
The last type is less common than the others, since it is less convenient to use: turning the plug 180° with such a socket is impossible.
The security of the case is the next difference between the models. The degree of security is indicated by the IP index and a two-digit number following these letters. The first number indicates the class of protection against dust and solids, the second - against moisture.
- For ordinary living rooms, IP22 or IP33 class models are sufficient.
- It is recommended to buy IP43 for children, as these sockets are equipped with covers/curtains that block the sockets when the equipment is not in use.
- IP44 is the minimum required for bathrooms, kitchens, and baths. Not only strong humidity, but also splashes of water can pose a threat. They are suitable for installation in basements without heating.
Installing an outlet on an open balcony is a sufficient reason to purchase a product with a higher degree of protection, this is at least IP55.
Connecting the socket to the electrical network.
All preparatory operations have been completed and our new outlet can be installed and connected.
Remove the top cover by unscrewing the bolts from the front side;
We relax the contacts into which the power wires will be inserted so that the distance between the pressing jaw and the stop is greater than the diameter of the contact wire and it can be freely inserted to a depth of 5-10 mm.
We clean the ends of the power wires brought into the box. We orient the ends of the wires so that they fall into the contact points of the housing and bend them in the form of a springy snake (as in the photo below). This type of bend makes it possible to remove the housing from the wall to tighten the bolts securing the wires to the housing and eliminate sharp bends in the wire when inserting it into the box;
Tighten the bolts securing the wires in the housing sockets.
It is necessary to tighten it very tightly, since when connecting a powerful consumer (for example, a 2 kW heater) and poor contact, the connection point will begin to heat up. This will lead to melting of the wires, plastic housing, and ultimately failure of the entire structure and wiring.
What to do if the ends of the wires leading into the box are short and do not allow connecting an outlet?
In this case, there are several ways out of this situation:
The best, but also the most difficult way is to lengthen the wires by soldering the required length of wire onto them and insulating the soldering area. This method is suitable if you have all the necessary accessories (soldering iron, solder, etc.) for soldering, if the wiring is copper and the length of the supply wire allows this to be done.
If the wire breaks off right under the body of the box, you can carefully open the place where the wiring is sealed in the wall and carry out the extension soldering procedure where it is convenient. Of course, the aesthetic appearance of the wall will be ruined and you will have to plaster this place a little, but still, the loss of appearance will be minimal compared to replacing the entire wire from the junction box to the outlet.
If the electrical wiring is aluminum, and it most often breaks, the soldering method will be unacceptable.
In this case, if the length of the broken end allows, you can use a terminal. On one side we insert the stripped broken end of the wire into it, on the other, a stripped piece of extension wire and tightly tighten the contact points.
Of course, this method creates an additional contact point where heating is possible, which creates a certain risk. Otherwise, you will have to replace the entire supply wire from the junction box to the wiring outlet from the wall.
It is strictly not recommended to make connections on terminals and twists in the wall, with further puttying and walling up of wires.
This was a small digression, but let's move on to further installation. We have connected the wires and now we need to install the socket in its place in the box.
Stripping length
When stripping the outer sheath of the cable, there is no need to try to remove it to the maximum depth, i.e. all the way to the wall of the socket.
Always try to leave a few millimeters. This way, the core insulation will be protected from chafing or crushing by the sharp edges of the socket box.
It is very convenient to do this on a round NYM cable using a special Jokari puller.
Make a circular cut, and then immediately a longitudinal one. After which, even in cramped conditions, the shell is easily pulled out.
With flat cables of the VVG brand and an electrician's knife with a heel, such a trick will not be possible.
And if it is a GOST cable, and not a TU cable, then even more so.
As a rule, a knife with a heel cuts the outer insulation right up to the wall of the socket box.
That is why many electricians like the NYM cable brand and not the VVG cable brand. Because of the convenience of cutting and ease of working with it.
Although each brand has both its advantages and disadvantages.
By the way, in rare cases you can also find a VVG cable with a round cross-section.
How much insulation should be removed from the core itself before inserting it into the contact? Much, of course, depends on the brand of the outlet.
Some models even have a template that is very easy to navigate.
But usually, the exposed part of the core should not exceed 8-10mm.
The length of the wires protruding from the socket box is selected based on:
- ease of installation
- socket depth
You must understand that the length that you leave will be useful in the future for convenient dismantling, pulling out and carrying out some kind of revision work. Or even replacing the socket with a different model.
As a rule, leave a length equal to the width of 3-4 fingers.
Installing a wall socket
What you need:
- socket
- electrical wires (you should choose a cross-section of at least 2 sq. mm.)
- socket box
So, after choosing a location for the outlet and turning off the current, we proceed directly to installation:
- We place the distance from the floor 30–100 cm. Mark the installation location with a pencil. We calculate the distance from the distribution board to the designated location and determine how many meters of wiring are needed.
- We install a special attachment in the drill chuck for drilling holes, corresponding to the type of wall and work with electrical fittings.
- Turn on the drill, if necessary, take an extension cord that is suitable in power for the electric drill you are using.
- Put on protection (goggles and, if possible, a respirator) and drill the required hole in the wall.
- Make a groove for the electrical wire. Use a grinder with a suitable disc or make a groove using a chisel and hammer.
- Then the socket box (through which the wiring is pulled out) is installed and fixed in the finished hole.
The first part of the work is completed.
Connection
Open the junction box. Then the electrical wire is connected using terminal clamps.
It is not recommended to use the wire twisting method. There are quite a few convenient small terminals on the market, designed for any wire cross-section. Better take them - safe and secure.
Modern methods of connecting wires using terminals and terminal blocks:
Connection methods using terminals
So,
- Remove the cover from the outlet. Loosen or remove the screws that will clamp the wires. Insert the ends of the wire (after stripping them in advance) and fasten tightly with the screws.
- The screws of the installed legs are loosened and brought together to the body of the socket, which is inserted and secured (in the process of tightening the screws) into the socket box. The legs, spreading to the sides, are fixed to the socket and hold the structure in the wall.
- It is recommended to ensure that all wiring is connected.
Turn on the power and test the operation.
Problems on parallel connection of conductors with solutions
Formulas used in the lessons “Problems on parallel connection of conductors”
Problem No. 1. Two conductors with a resistance of 200 Ohms and 300 Ohms are connected in parallel. Determine the total resistance of the circuit section.
Problem No. 2. Two resistors are connected in parallel. The current in the first resistor is 0.5 A, in the second - 1 A. The resistance of the first resistor is 18 Ohms. Determine the current strength throughout the entire circuit and the resistance of the second resistor.
Problem No. 3. Two lamps are connected in parallel. The voltage on the first lamp is 220 V, the current in it is 0.5 A. The current in the circuit is 2.6 A. Determine the current in the second lamp and the resistance of each lamp.
Task No. 4. Determine the readings of the ammeter and voltmeter if a current of 0.1 A flows through a conductor with resistance R1. Neglect the resistance of the ammeter and supply wires. Assume that the resistance of the voltmeter is much greater than the resistance of the conductors under consideration.
Problem No. 5. Three electric lamps are connected in parallel in the battery circuit. Draw a circuit for turning on two switches so that one controls two lamps at the same time, and the other controls one third lamp.
Answer:
Problem No. 6. The lamps and ammeter are turned on as shown in the figure. How many times do the ammeter readings differ between open and closed switches? The lamp resistances are the same. The voltage is maintained constant.
Problem No. 7. The voltage in the network is 120 V. The resistance of each of the two electric lamps connected to this network is 240 Ohms. Determine the current in each lamp when they are connected in series and in parallel.
Problem No. 8. Two electric lamps are connected in parallel at a voltage of 220 V. Determine the current strength in each lamp and in the supply circuit if the resistance of one lamp is 1000 Ohms and the other is 488 Ohms.
Problem No. 9. Two identical lamps are connected to the circuit. When the rheostat slider is positioned at point B, ammeter A1 shows a current of 0.4 A. What do ammeters A and A2 show? Will the ammeter readings change when the slider moves to point A?
Problem No. 10. OGE Two series-connected resistors were connected to a network with a voltage of U = 24 V. In this case, the current strength was I1 = 0.6 A. When the resistors were connected in parallel, the total current strength became equal to I2 = 3.2 A. Determine the resistance of the resistors.
Problem No. 11. Unified State Examination A milliammeter, designed to measure currents up to IA = 25 mA, having an internal resistance of RA = 10 Ohms, must be used as an ammeter to measure currents up to I = 5 A. What resistance should the shunt have?
This is a summary on the topic “Tasks on Parallel Connection of Conductors.” Choose what to do next:
- Go to topic: PROBLEMS on the work of electric current
- View the summary on the topic Connecting conductors
- Return to the list of Physics notes.
- Test your knowledge of Physics.
Construction and components
To thoroughly understand how to properly install a new outlet at home, you need to study a little about its components. All sockets are sold already assembled. Therefore, when installing it, you will have to unscrew everything yourself.
The main components of the socket are the base, the conductive part, and the decorative front panel. The base is made of ceramic or high-quality plastic. All elements are attached to it - conductive parts and the front cover.
Ceramic bases are considered more reliable, but they require particularly careful installation, because if damaged, you will have to buy a new socket.
The decorative overlay is designed to hide all working elements. It serves as a reliable insulator of the working part from external influences. Some models provide the ability to simply replace this part of the outlet.
Getting to know the internal structure of the outlet will help you better understand the process of connecting it correctly.
The working part of the socket consists of spring contacts and terminals to which electrical wires are connected. One of the important contacts is the grounding one.
The conductive elements are made of brass or bronze. The latter are better, but are extremely rare. Therefore, you should choose options made from tinned brass - they are more reliable than conventional brass, are better soldered and last longer.
Designer sockets allow you to make the interior of your home unforgettable. Their unusual performance adds its own flavor
Arrangement
The opening type involves laying on the floor, walls or ceilings. You can also carefully place everything in boxes, pipes and under baseboards. A large number of sockets can be fixed with a single cable in parallel or with an asterisk through the distribution box. It depends on how much cable you are going to use, as well as on the power of all electrical appliances in your home.
Household sockets
Sockets are electrical installation products and are one of the key elements of the household electrical network. There are many types of sockets on the electrical market. Built-in or surface-mounted power sockets with two or more sockets are sold. In addition, products can be equipped with additional functionality, for example, backlighting, moisture-proof covers, a shutdown timer, etc.
Typically, power sockets have in their design:
- block - it contains power contacts, a protective housing and fastenings for installation in a socket box (if the socket is built-in);
- contacts - special metal clamps for connecting the power cable from the inside and the plug from the load from the outside;
- protective casing - a decorative cover with holes for a plug and grounding contacts (or without grounding).
Almost all modern sockets have contacts for three wires: phase, neutral and ground. Since some household appliances now provide grounding conductors. However, such popular electrical equipment as, for example, a home phone, a laptop, a Wi-Fi router, a TV, a set-top box, a Christmas tree garland, as well as chargers for phones, tablets, photo and video equipment, an electric razor, a dental electric panel and a robot vacuum cleaner do not have grounding contacts, since their cases are completely plastic.
