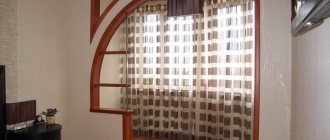
Quite often, property owners set themselves the task of redeveloping their space. Few people are satisfied with the amount of usable space in the apartment, but even in this case, you can make your stay more comfortable by delimiting the territory and making it more functional. For these purposes, different materials can be used, but not all of them meet the requirements of low cost, ease of processing and installation, and lightness. A chipboard partition meets these parameters, so a home master can consider the technology for its arrangement.
Types of partitions
Chipboard partitions are available in several types. Classification is carried out according to appearance and design features. Such walls can be:
- transparent;
- deaf;
- with blinds.
The first ones involve the presence of glass, which is combined with chipboard. The second ones are the most common, as they can provide both noise reduction and complete insulation. But if you want the chipboard partition to allow you to adjust the degree of openness, you can supplement it with blinds.
Attention! Such walls can also be divided into separate types according to their purpose. They can be installed in a living space or delimit the area in a public bathroom.
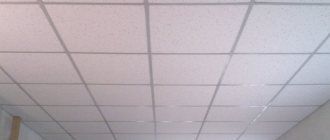
Chipboard can also be offered for sale in a laminated version. Therefore, laminated chipboard partitions are a separate type. Their advantage is that they do not require finishing cladding. Plumbing partitions made of laminated chipboard are installed in public toilets and can be made from sheets of different thicknesses.
The most common example of such structures are partitions made of chipboard of the PF-16 economy series. They have a 2mm end edge and the door profile is usually made from anodized aluminum. Adjustable legs serve as accessories. An additional bonus is a handle with a busy indicator.
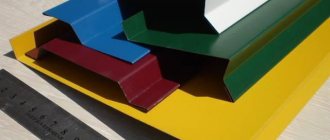
Such designs have reliable fittings, are easy to install and have a warranty from the manufacturer. The aluminum profile for partitions, which underlies the door leaf, can be painted in almost any color. The most common options are:
- beige;
- white;
- grey.
Nuances
To buy high-quality material for installing a partition, you need to conduct a visual inspection of it. If there is an unpleasant odor from the material, this indicates the presence of formaldehyde in the composition, which is harmful to humans.
The material should not have an unpleasant odor
We inspect the laminated board for the presence of peeling, scratches, chips in the corners and over the entire area, and non-laminated material for the presence of paraffin and oil stains, swelling, and mechanical damage.
Pros and cons of chipboard
Laminated chipboard partitions have a smooth surface and do not need to be finished after construction, which allows the consumer to save money. But this advantage is not the only one that this design can boast of. An additional advantage is durability. It is impossible not to highlight environmental safety. If you follow the installation technology, there will be no gaps or cracks between the elements, which provides better sound insulation.
It is possible to install such a wall even between rooms with different temperature conditions. Another advantage of chipboard is its moisture resistance. When purchasing, you need to pay attention to whether the material has these properties. If the characteristic is present, the partition can be used under difficult conditions.
Attention! If you plan to finish a chipboard partition with your own hands after installing it, it is better to purchase a non-laminated panel, which is excellent for painting, wallpapering and plastering.
Partitions made from chipboard are superior to structures made from other materials in terms of a combination of factors due to the fact that they are cheap, easy to install and do not place additional load on the floors. The material is universal, because you can match it with any finishing options for adjacent walls and pieces of furniture. Transportation and loading, as well as unloading will be facilitated, since the material has little weight. Its service life is 10 years without the need for repairs or upgrades. The appearance of the walls is quite attractive. The fabrics are resistant to fungus, mold and rot.
Wood-based partitions, of course, have their drawbacks. Among the first and foremost, we should highlight the presence of formaldehyde resins in the composition, which are released into the air in small quantities. Difficulty may also arise at the stage when the master wants to give the partition a curved shape.
Chipboard is difficult to process. Therefore, it is better to abandon the idea of profile milling. In order to take advantage of the environmental friendliness of wood raw materials, it is better to purchase a canvas that is covered with a sealed veneer or film. When building a chipboard wall with your own hands, you should remember that it is not very suitable for hanging heavy objects. It is better not to drive screws and nails into the structure, as they will not hold well there. You should not put excessive stress on such a partition, because it can become fragile. If you plan to hang heavy objects on the wall, it is better to replace chipboard with natural wood.
Wood
Throughout history, the most popular material in manufacturing has been wood and its analogues in the form of fiberboard, chipboard and plywood of various thicknesses. This is a very versatile method that allows you to make slide walls of any complexity. Wood goes well with other materials, such as glossy and frosted glass, chrome surfaces, metal, gold-plated and silver-plated frames. This material looks great in both modern designs and classic and vintage styles. Wood and fiberboard can be given almost any texture and color. You can do this even without professional machines - with your own hands. The tree also looks great if it is sheathed with plasterboard inserts. In this option, the rear panels are not installed, or they are fixed in the form of a decorative element. You can make a slide wall with your own hands in an unusual style. You can harmoniously dispose of the abundance of cabinet shelves by building a whole labyrinth out of them. The design looks very cozy. Wood is the most pliable option for making a wall with your own hands.
The lower base most often consists of cabinets.
Characteristics of chipboard
One of the important characteristics is the presence of formaldehyde. For residential use, choose sheets marked E-1, which contain the least amount of this substance. As for the assortment, the material is manufactured in three grades, the last of which is a production defect. Even if the canvas belongs to the first grade, small chips, inclusions of shavings and bark, as well as other defects can be seen on its surface. The material can be classified into a certain moisture resistance class. The sheets have increased and normal moisture-repellent abilities. If you need dense material, you should be guided by more impressive figures within 800 kg/m3.
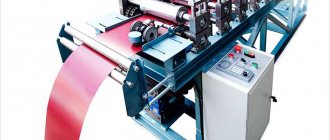
Features of manufacturing laminated chipboard
Laminated chipboard is a ready-to-use chipboard covered with a layer of laminate. It is this that is the basis of the decorative individuality of the panel. To personalize the panel use:
- Painting in all colors and shades of the rainbow.
- Texturing (imitation of wood texture, unevenness of the wood plane).
In addition to its decorative function, the laminate also performs a protective function, limiting the impact of the atmosphere on the chipboard fibers.
Chemical and physical effects on wood shavings make it possible to achieve excellent properties of laminated chipboard (laminated chipboard), skillfully used for the manufacture of office partitions:
- Moisture resistance.
- Ease of processing (sizing).
- Color variety.
- Durability and operational reliability.
- Long service life.
- Thermal resistance (temperature fluctuations do not destroy the structure of the slab and do not cause deformation).
- Comparative availability.
- Environmental Safety.
These properties of laminated chipboard are very useful in an office environment, which directly influenced the fairly large popularity of this material in the construction of indoor partitions, both solid stationary and lightweight mobile partitions.
DIY partition installation
Do-it-yourself chipboard partitions are installed on a frame made of timber or aluminum profile. Load-bearing elements are located between the walls, floor and ceiling. Thermal tape is placed under the frame elements.
Vertical posts are fixed at the top and bottom with corners. Do-it-yourself installation of a partition involves independent selection of the pitch between the racks. The distances will be determined by the width of the sheet. The edges should fall on the central part of the vertical load-bearing element.
Partitions made from chipboard of the PF-16 economy series are installed on site. They can have completely different sizes to suit the dimensions of the room. Additional accessories include hinges with an automatic closure made of stainless steel. The designs of the PF-16 economy series have ball locks. Products can have an individual design and fully comply with sanitary standards.
Materials and tools
For work, it is better to choose a 10 mm sheet, which is well suited in terms of strength and will not cause cost overruns. In addition to this, the master will need:
- wooden beam;
- insulation if necessary;
- thermal insulation tape;
- metal corners;
- mechanical fastener.
It is most convenient to drive self-tapping screws with a screwdriver. You will also need:
- hammer;
- plumb line;
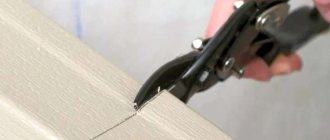
- hand saw;
- pencil;
- drill;
- Bulgarian;
- roulette.
The position of all elements, components and sheet material must be checked with a building level. Instead of a hand saw for wood, you can use a metal tool. But it is permissible to replace a pencil with chalk.
Preparation of material for the frame
The frame can be created from wooden beams. The following varieties are suitable for a high-quality base:
- pine;
- ash;
- maple.
Coniferous species are recommended because they have a high resin content, which inhibits decay processes and virtually eliminates the impact of rodents and insects on the material.
The dimensions of the bars must be selected taking into account the dimensions of the wall. It is best to use bars with a cross section of 60 x 80 mm.
Attention! If you want to make the partition more reliable, it is best to install bars with a more impressive section of 450 x 100 mm at the top and bottom.
The wood must be well dried, which takes up to 7 days. After this, the material is treated with an antiseptic. Additionally, you can apply a layer of drying oil. It is heated in a water bath. This way it penetrates better into the structure. Drying oil is applied especially carefully to the ends. For a more effective result, you can lower the beam into a container with an antiseptic.
Marking before installing a chipboard partition
Markings need to exist on all surfaces to which the partition will adjoin. If you do not plan to extend the wall to the ceiling, there is no need to mirror the line there. A line is drawn on the floor along which the future wall will run. This marking is not the edge of the partition, but the line of attachment of the frame element. If a doorway is expected, its location should be shown at this stage.
Surface preparation
During the marking process, you also need to pay attention to the condition of the floor, walls, and ceiling. All bases must be level, and if a block is applied, the gap should not exceed 0.5 mm. If this value is greater, the beam may bend when fastening it. The surface boundaries are treated with a primer with antiseptic properties.
Frame making
The frame must be installed from the ceiling. If the ceiling is wooden, you can use wood screws. But when the base is brick or concrete, the beam is fixed to the ceiling with a wedge anchor. In order to increase the strength of the structure, the guides are installed in smaller increments.
When you are confident in the reliability of the plaster layer, dowels can be replaced with wooden pegs. They are driven into the surface and treated with alabaster on top. Then you can screw in the screw. At the final stage of constructing the frame, the timber is attached to the wall. This will allow the materials on the floor and ceiling to be tied into a single whole. As a result, a frame should be formed.
Attention! Metal corners are installed at angles that should be 90˚. This will make the frame even more reliable.
Guides and racks made of timber can be reinforced with nails if the walls are wooden. Screws are used instead. When the walls are stone, dowels should be used. The racks are secured to the guides; the same screws or nails should be used. Everything will depend on the material of the main wall. The beads that will act as guides should be fixed at the top and bottom in increments of 1 m. There should be no less than three fasteners per bar.
Frame installation
The rack bars should be strengthened between the guides. The step between them will be 60 cm. The vertical joints of the canvases should fall on the profiles.
The frame can also be metal. It consists of guides that run along the ceiling and floor. Rack profiles will make up the internal filling. The distance between them usually reaches 60 cm, but can be less. Connections between rack and horizontal profiles are carried out using crabs. The remaining elements are fixed to each other with bugs.
Chipboard installation
The frame is covered with chipboard sheets using profiles or self-tapping screws. If the sheets are large, it is best to use aluminum profiles. When oriented vertically, it is necessary to start from the corner. The sheets are connected to each other with a special strip. If it becomes necessary to dismantle, this can be done without damaging the surface of the material. If it is necessary to fasten the panels together, you can use connecting profiles. An alternative solution is eccentrics and ties.
Drywall
Suitable for façade views. The most economical and pliable material. Drywall slides do not stand out from the overall mass of the wall, being its continuation. Suitable for minimalist design. Combines with large glass planes. The wall can take on almost any design, so electronic devices of different sizes can be built into it. In this type of construction, the most important thing is the correct design of the frame. The entire array rests on it, so the frame must be strong and reliable in structure. It is necessary to draw accurate drawings of the location of the slats and frame profiles. The disadvantages of this option are the fragility of the material. The installation must be approached very carefully.
It is important to understand that the lower tier is a place accessible to children and pets.
Bathroom partitions
Such designs differ only in the base of the frame and the moisture-repellent characteristics of the particle board. It can be based on an aluminum profile, which can be lined with chipboard. Such designs can be classified according to:
- material of manufacture;
- designs;
- degree of transparency;
- type of operation;
- installation method.
If the partition is located inside the bathroom, it can be made transformable or mobile. But if the structure must have good sound insulation, it should be made multilayer, adding a noise reduction layer to the frame. Sometimes partitions in bathrooms are used only to zone a large space.
Designing a sketch from scratch
Has the same meaning as a drawing of a building in architecture. Calculation and arrangement of the exact dimensions of the structure will affect the amount of purchased wood, the compatibility of different parts of the wall, its durability and resistance to mechanical deformation. The drawing should be drawn up taking into account the maximum use of the material, because every centimeter of unused wood is money thrown away. Also, a correctly drawn up drawing in advance, which takes into account all the little details and nuances, will save you from the need to redo or finish it during installation. It is necessary to carefully measure the dimensions and calculate the area of the required material. If you doubt your paper design abilities, it is better to entrust this task to knowledgeable people, because the drawing is the basis of the entire product.
The upper area is usually occupied by mezzanines and cornices, which serve as conductors of lighting.
Important! When measuring, it is necessary to take into account not only length, width and height. A very important parameter is thickness. If you forget about it, you will get a lot of problems with “inconsistency” of drawings.
Speakers or suspended video equipment are sometimes built into the upper tier.
Useful tips
- Since chipboard is based on natural raw materials, the material can be used for living space, but it is not recommended to cover children’s structures with such a material, because formaldehyde resins are used in its production. They can have a negative impact on health.
- The partition can perform another functional role - to hide communications. Therefore, after cladding the structure on one side, securing chipboard sheets there, you need to lay all the wires, insulation (if provided), and then begin finishing the second side.
- Before proceeding with the installation of a wooden frame, its elements should be treated with fire retardants and moisture-repellent compounds, which will extend the life of the entire structure.
- If you want to save money, then it is best to use a frame-panel structure as the basis of the partition. To install it, use a beam with a cross section of 50 x 100 mm. The bottom connection will be a horizontal harness, which ensures reliability and stability.
- To soundproof or create a temperature barrier, it is better to lay polystyrene foam or mineral wool in the frame. The thickness of these materials should be at least 50 mm. To prevent exposure to moisture vapor, the insulation sheets are sealed on both sides.
Before starting work, each consumer usually tries to calculate how much money he will need. If you build a frame-panel partition and cover it with chipboard sheets, then for each square meter of such a wall you will have to pay 100 rubles.
"Masonry"
The most expensive but durable method. These options are used in homes. Both sandstone and granite are used. Most often, they create a frame base, and then cover it with plasterboard.
The material can be used either from your own production or purchased.
A do-it-yourself slide wall is best made from wood. The variety of this material will allow your imagination to truly unfold, and the many ways to process it guarantee you a quick and high-quality result.
The middle part usually houses racks, display cases, cabinets, shelves for dishes, books, and jewelry.
The wall manufacturing process includes:
- Creating a sketch.
- Calculation and purchase of materials and components.
- Preparation of electrical wiring behind the façade of the future wall.
- Assembly of the entire structure.
We wish you fruitful work!
By following the list step by step, you can bring to life a product of any style, reproducing all the planned details.
In general, walls can hide behind a simple device many interesting and varied mechanisms that simplify life and storage of things.
Examples of living room walls
The walls in the living room differ in appearance, internal content and spaciousness. When choosing or designing them, it is necessary to take into account the concept of interior style and be guided not only by practical and functional considerations, but also by the aesthetic component of the issue.
There are examples of ready-made ideas for decorating walls in the living room that will help you choose the best option.
Walls and slides with an interesting design: photo
Furniture with a unique design is perfect for extraordinary people and modern interiors, where interesting decor, asymmetrical lines and other atypical elements are found.
How much does it cost: average prices
Price indicators for installing partitions in an apartment fluctuate in very wide ranges and will depend primarily on whether the installation will be carried out in an old or new building. The first option is much more expensive, at least 120-150%, since it requires additional dismantling of the old structure, cleaning the room and erecting a new interior wall.
In addition, the final price depends on the type of wall material and its characteristics. Imported materials are more expensive, but their service life and quality of work are higher. In general, by type of material, the average cost per 10 m2 of partition can be presented in the following table.
| Partition type | Partition material | Amount of material per 10 m2 | Unit cost of material | Cost of material 10 m2 | Cost of work in the old fund 10 m2 | Cost of work in a new building 10 m2 |
| KNAUF GKL | 13.0 sheet | 260,0 | 3464,00 | 16200 | 13200 | |
| Drywall on frame | Knauf profile PN 50-40 | 2.0 pcs. | 225 | 517,0 | ||
| KNAUF-profile PS 50-50 | 7 pcs. | 213 | 1427,00 | |||
| Self-tapping screw TN 25 | 140 pcs. | 0,6 | 84 | |||
| Self-tapping screw TN 35 | 300 pcs. | 0,8 | 240 | |||
| Putty KNAUF | 15 kg. | 16,- | 241,0 | |||
| Dowel K 6/35 | 16 pcs. | 1,2 | 19,0 | |||
| Sealing tape | 12 m/p | 7,60 | 91,- | |||
| KNAUF primer | 2 l | 66 | 132 | |||
| Minplates | 17 pcs. | 76 | 1285,0 | |||
| Cost of work 10 m2 | 16200 | 13200 | ||||
| Cost of material 10 m2 | 7502 | 7502 | ||||
| Total | 23702 | 20702 | ||||
| Aerated concrete without armored belt | Aerated concrete block 600x250x100 mm | 67 pcs. | 68 | 4556 | 9200 | 5700 |
| Mounting adhesive VOLMA BLOK | 28 kg. | 8 | 224 | |||
| Grid map 50x50x2000 | 2 pcs. | 100 | 200 | |||
| Plaster KNAUF | 6 pcs. | 355 | 2130 | |||
| 30 kg | ||||||
| primer Knauf Mittelgrund | 2 l | 178 | 356 | |||
| Lighthouse galvanized 3 m | 6 pcs. | 42 | 252 | |||
| Straight suspension | 12 pcs. | 23 | 276 | |||
| 60x30x125 mm | ||||||
| Construction foam | 1 PC. | 336 | 336 | |||
| Cost of work 10 m2 | 9200 | 5700 | ||||
| Cost of material 10 m2 | 8330 | 8330 | ||||
| Total | 17530 | 14030 | ||||
| tongue-and-groove | Regular tongue-and-groove 667x500x80 mm | 30 pcs. | 174 | 5220 | 8400 | 5200 |
| Masonry glue | 15 kg. | 11 | 165 | |||
| Straight suspension | 8 pcs. | 23 | 184 | |||
| 60x30x125 mm | ||||||
| Primer | 2 l | 66 | 132 | |||
| Cost of work 10 m2 | 8400 | 5200 | ||||
| Cost of material 10 m2 | 5701 | 5701 | ||||
| Total | 14101 | 10901 | ||||
| Solid brick | Solid brick M 150 25×12.5×6.5 cm | 512 pcs. | 14 | 7168 | 11400 | 7900 |
| Plaster dry mixture M 150 | 403 kg. | 4 | 1612 | |||
| Grid map 50x50x2000 | 3.5 pcs. | 100 | 350 | |||
| Primer | 3 l | 66 | 198 | |||
| Straight suspension | 18 pcs. | 23 | 414 | |||
| 60x30x125 mm | ||||||
| Lighthouse galvanized 6 mm | 6 pcs. | 42 | 252 | |||
| Plaster 30 kg | 9 pcs. | 355 | 3195 | |||
| Cost of work 10 m2 | 11400 | 7900 | ||||
| Cost of material 10 m2 | 13189 | 13189 | ||||
| Total | 24589 | 21089 |