Choosing a place
Before you engage in actual construction, you need to choose the place where you will put your shower. It must meet several requirements in order for the new structure to perform all the required functions.
- Sunny side. One of the most common mistakes of those who are in a hurry to start assembling a structure as soon as possible. They put it in a place where the sun doesn't shine. In the case of a shower without plumbing, our tank will serve as a solar-powered heater. The thermally conductive material from which the tank will be made heats up along with its contents (water), and gives you the opportunity to wash yourself with fairly warm or even hot water. Choose a sunny place, not shaded by a fence, garage, barn, or any other building. Otherwise, the shower will simply lose all its meaning - washing with cold water is not the most pleasant experience.
- Position on the ground. Our future building is connected with water, so it needs to go somewhere. The easiest way to drain will be on a flat surface or (even better) on a hill. But putting the shower in a low place is a very bad idea, since with constant use the water will literally accumulate under your feet. As a result, there will be dampness, mold, and many other troubles.
- Close to home. Also, do not forget about convenience. If you plan to use the shower not only on a hot day, but also when it’s already evening outside, then it will be quite unpleasant to run through the entire garden to a warm house. We advise you to choose the optimal place in the open space (so that the sun heats the water tank), but not too far from home - so that you have time to get there in the evening and not catch a cold.
Draining water in an outdoor shower
Wastewater disposal is organized in various ways. The choice of option depends on the design of the pan, the volume of water consumed and the permeability of the soil. The simplest drain for water is a shallow drainage in the form of a hole filled with broken bricks, stones, gravel, and crushed stone. It is effective if the soil is sandy and easily absorbs moisture. A wooden grate is installed on top.
Clay soils are poorly permeable. Water flows through them with difficulty. Often with such soils there is a high level of groundwater, and there is no point in digging a deep hole - it will be constantly filled.
In this case, it is better to dig an empty container next to the shower and put a gutter or pipe there. You can arrange a drainage groove somewhere to the side, then the water will not stagnate directly under the shower.
If the floors are concreted, you need to make a slight slope towards the drainage funnel or pipe. The second end of the drain is discharged into a drainage hole, well or ditch.
Communications
Now our shower is ready, it remains to talk a little about laying communications: ventilation, water, etc.
Ventilation. Due to the constant humidity in the booth, condensation may occur on the walls and ceiling, as well as unpleasant odors. To avoid this and ensure normal air circulation, you can make a hole in the ceiling or below in the walls. And so that dust and dirt do not get into the booth through it and everything looks beautiful, you can buy a special decorative grille in the store (see photo below).
Light. The use of light in a summer shower is undesirable - after all, this is a place with constant high humidity and flows of water. In addition to the possibility of short circuits and other life-threatening things, such lamps will not last long due to the same conditions in the shower. The best option for the summer would be to make a small window in the door. Don't forget that the glass for the window should be frosted.
When using the shower at other times of the year, you can purchase special waterproof LED Velcro flashlights in the store. Together with street light, they will provide a completely acceptable level of illumination.
Drain. In the summer, the use of the shower will be significantly increased, since it is especially cool to rinse off after a hard day in the garden in a summer shower
That is why it is very important to build a competent drainage system. Ideally, it is necessary to combine the sewage system from the house with the pipeline from the shower, but this is not always possible
If the shower is located on a hill, water may flow into the drainage located below (see photo). Do not forget that in this case the size of the drainage embankment must be at least 2 cubic meters, otherwise the drainage will not be enough.
In some sources you can find instructions for installing a drain from a summer shower over a septic tank. This design is considered erroneous and life-threatening. Firstly, if the calculations are incorrect (and an error is always possible, especially when making all the elements yourself), the shower stall may simply collapse due to the abundance of water. Secondly, over time, the system stops working as well as before, and an unpleasant odor may appear.
Even ideal systems can sometimes fail due to a sudden rise in groundwater, changes in climate conditions, and others. If you notice an unpleasant odor or stagnant water, do not be lazy and check what could be the matter. Redoing everything again will be much more expensive than repairing it in time.
Summarizing
Having decided to build a shower stall yourself, you should start by developing a construction plan and drawing a sketch, starting from the dimensions of the installation site. We do not forget about utilities and the supply of pipes with hot and cold water, and we also observe the correct slopes of the sewer pipes that carry out the runoff.
For pipes at “50”, the minimum slope is 3 cm per 1 linear meter. We make corners at 90-degree turns not with one bend, but with two 45-degree bends.
When making a choice in favor of a homemade concrete pallet, we remember about high-quality waterproofing of this part and all abutments.
Water that gets into the cracks when using the shower can cause leaks and unpleasant odors in the bathroom.
If a ready-made plastic or metal factory pallet is used, then so that it does not “play” under your feet, when installing it, the voids are filled with polyurethane foam to form a fairly flat surface.
The main thing when building a homemade shower stall is to calculate everything correctly, estimate your budget, your strengths and skills, make at least the simplest drawing and study the experience of those who have already walked this path!
Source
Varieties of summer shower for a summer residence with your own hands
The simplest designs of a summer shower were erected on six hundred square meters by our grandparents. Today, when new technologies and materials have appeared, and even the dachas themselves have surpassed the status of tiny panel houses, the appearance of shower cabins has also changed. If you really want to, you can go for a major summer shower for a heated dacha, on a solid foundation and with a large shower stall. You can limit yourself to a light frame option, using improvised means.
Already in early spring, you can start planning the construction of a shower so that it will be ready for the warm spring and hot summer
And yet, which design option is preferable if you are planning to build an outdoor shower yourself. The choice depends on three main factors:
financial opportunities
Beautiful shower with decorative pebble walls
Interesting summer shower in the form of a surfboard
- construction skills
- dacha status
If you want to save money or realize your creative ideas, then build a summer shower in your country house with your own hands
Summer shower in modern style
The simplest summer shower in the country can be assembled from metal pipes, a bathroom curtain and a plastic barrel.
The stationary option involves the construction of a solid shower cabin made of wood, with the construction of a drain and connection to the water supply. You can assemble a shower from a wooden frame covered with film. In addition, the shower can be freestanding or attached to the house. And there are a lot of options here too.
Depending on your wishes and capabilities, you can build either a simple or complex shower option
Small homemade summer shower
The simplest structure connected to the house looks like this: a water pipe installed on part of a brick wall, a wooden tray with a drain, and the top of the shower is made of a metal arc attached to the wall and covered with a bathroom curtain.
The simplest design of a summer shower connected to the house
If you take the shower to the corner of the house, then all that remains is to build two walls and close the stall from prying eyes.
When designing handmade shower stalls, be guided by your own preferences and the materials you have.
Wooden summer shower
Open summer shower
Summer shower in classic style
Choosing a place for a shower
It is difficult to describe all the advantages of building a summer shower at the dacha. But the main ones are still:
- ease of construction;
- small financial injection;
- simplicity and ease of use;
- savings, because you don’t need to heat the water;
- the satisfaction of pleasant hot water at any time.
But for the shower to be truly practical, you need to choose the right location. In this case, it is worth taking into account all the features of the structure. The place should be as flat as possible or even slightly elevated, then the water will drain easily and quickly. But areas in a hole or lowland should be avoided. Placing it in such a place will only create water stagnation. Especially during rainfall. And the stock will be much more difficult to register.
The ideal option would be a site in an open area, which is well illuminated by the sun's rays. It’s better to create a shower a little further away from other buildings. This way, the barrel of water will quickly warm up under the sun, and you will have warm water for much longer. This condition is not important if you are building a shower with a device for heating water.
But, nevertheless, your shower should not be located too far from your home. After all, after swimming, you need to find yourself in a warm room as quickly as possible.
Shower on site
Before building the shower itself, consider the water flow. The best option is to discharge the water into a special septic tank or septic tank. It is also worth considering how the water tank will be filled. It is ideal to provide water supply automatically.
How to heat water for a shower in a bathhouse
You can heat water for a shower either using electric heaters - a flow-through or storage water heater, a “wet” heating element, or using a remote tank and a heat exchanger in a wood-burning stove.
A flowing water heater for a shower in a bathhouse is a pleasure that is not available to everyone. And it’s not about the price, but about the requirements that this equipment places on both the water supply and the electrical network. An instantaneous water heater operates at a certain cold water pressure. This problem can be solved by installing a pump (its capacity must be at least 8 liters/min). But in any case, the water will only be heated if electricity is available, and there will be no supply of warm water - this is a running water heater, after all. In addition, only a heater with a power of no more than 8 kW is connected to the 220V network, which will provide warm water to only one water collection point. If you need to have two hot water taps, you will need a device with a power of 13 kW, and it is powered from a 380 V network. Even if you are satisfied with an eight-kilowatt instantaneous water heater for a shower, then when you turn it on, there will most likely be a significant drop in the voltage in the network: in suburban networks this is not uncommon, but the neighbors are unlikely to be happy with such a turn.
Water heater for shower. Connection diagram
Storage water heaters for showers are more economical. The power they consume is usually 2-3 kW, depending on the volume of the drive, but it is difficult to find a capacity of more than 150 liters. Moreover, such a tank is already of decent size, although there are storage tanks of different shapes - horizontal and vertical cylinders, there are also rectangular ones - it’s easier to find a place for them, but you still have to worry about installing it. A good option is to install a heater in the attic.
There is another simple way to organize hot water in a bathhouse: a heating element is installed in the water tank; in the simplest case, a boiler is lowered. There is an outlet from the tank either to the mixer or directly to the shower head with a tap or mixer. When directly connecting a warm water tank to a shower head, you need to consider a temperature control system so as not to get burned by overly hot water.
These are, in general, all the options for an “electric” shower for a bath. Read more about how to choose a water heater for a bath here.
Scheme of arranging a shower in a bathhouse or sauna
This scheme, with some modifications, will work when using a remote water tank, the water in which is heated from a heat exchanger in a metal or brick oven, and with a tank on a pipe (installed at a sufficient height). In general, the scheme is good. Instead of a hand pump, you can install an electric one, but then the circuit will only work if there is a power supply.
We have chosen a way to heat the water, but now we need cold and hot water to be supplied to the mixers. If the hot water tank is not high, pumps are provided in the system to increase the water pressure to ensure the required pressure. Shower pumps can be of several types:
- Small pumping stations are a more expensive option. But they have automatic protection that will monitor the pressure in the system (it will turn off if there is a problem in the electrical network, etc.).
- Boost pumps. They also turn on automatically when the pressure in the system decreases, but the type of pump and its characteristics must be selected separately for each water supply system. Their disadvantage is that if there is no pressure accumulator in the system, when the pump is turned on/off, the water pressure noticeably “jumps”.
- Garden pumps. The cheapest option, but they do not have any automation, therefore, you need to turn them on/off manually.
If possible, it is easier to install a tank for cold and hot water in the bathhouse on the second floor or in the attic and not bother with pumps, which are not at all easy to select for hot water.
Option to install a water tank at a height higher than the ceiling height
Why do you need a summer shower for your dacha?
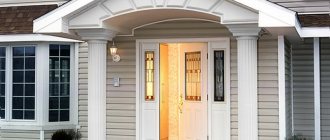
A dacha is a place where some people go to relax and enjoy nature, while others go to work on the land, producing vegetables and fruits with their own hands. No matter how comfortable you make your country house, the feeling after taking a nice cool shower, almost in the middle of a natural oasis, cannot be compared with anything. A summer shower for a dacha is extremely refreshing in the summer heat. This option for pleasant cooling of the body is much cheaper than a swimming pool or pond. In addition, there is not always room for them, and as for the pool, it also requires regular maintenance.
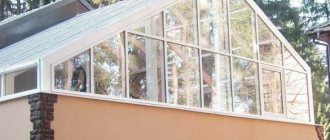
Glazed veranda with bath and shower
Pay attention to the door folding mechanism - this veranda can be made completely open
Practical, modern and beautiful plastic lining
This is also an excellent option if there is no hot water supply, or indeed water in the house. In this case, only with the help of a summer shower can you provide yourself with almost ideal conditions even in a dacha, which is very far from “civilization.”
The second life of a surfboard: a popular DIY mosaic project
A combination of natural and synthetic materials in a luxury shower near a Mediterranean-style country house
About water supply
Water is supplied to the shower storage tank from various sources located at a distance. Such sources are:
- Centralized water supply.
In rare cases, summer cottages are connected to a centralized water supply, so this source is rarely used.
- Water well.
For reliable water supply to a summer cottage, a well is installed.
When water is used only in summer, then one submersible pump with a capacity of 1 m3 of water per hour is sufficient. For year-round use of the well, the arrangement includes the installation of a deep-well pump and a hydraulic accumulator, which ensures constant pressure in the network.
Using 20 mm metal-plastic or polypropylene pipes, the water supply source is connected to the shower storage tank. Such pipes have advantages: durability, lack of corrosion, easy installation, and the ability to put away for the winter.
Where to put the shower
If the shower cabin is attached to the house, complex calculations for its installation will not be required. Naturally, it is placed on the back wall, not far from the entrance to the house. For ease of use, it is advisable to lay a plastic path to the shower.
An outdoor shower tied to the house is easy to build
Outdoor shower attached to the sauna
If you are planning to install a summer shower in your dacha with your own hands in a free-standing version, you should choose the right place. Several important conditions must be met that will affect the accessibility, convenience and practicality of the design.
For a summer shower in the country in a free-standing version, you need to choose the right place
To prevent the water from the shower head from making you want to rush into the house and wrap yourself in a warm blanket, choose a place in the sun. On an area exposed to sunlight, the water in the barrel will heat up naturally.
Summer shower should be located in the sun
Checking the terrain. It is advisable that it be slightly inclined, this will simplify the outflow of water from the shower.
For the convenience of laying the water supply and a short transition, we place a shower stall not far from the house.
The surface on which the outdoor shower is located must be sloped
For ease of laying the water supply, it is better to build a summer shower near the house
We check the wind rose and choose a place in a part of the dacha that is not blown by all the winds.
Summer shower near the pool
Construction
After preparing all the necessary materials and tools, you can proceed directly to the installation. We provide you with step-by-step instructions on how to make a summer shower with your own hands without running water with a water tank, as well as a photo for each step.
About the foundation. We need a foundation so that the entire structure stands firmly on the ground and does not “move” anywhere due to the slightest deformation. Don't rely on your eye - it often fails, and the consequences can be very sad. You can use a tape measure, or you can simply drive in pegs at the corners and stretch a thread to lay out an even foundation. The thickness of the foundation must also be calculated based on the selected material. If it is a heavy brick or even a cinder block, it is necessary to lay out at least 30 cm of the base. If it is a frame made of light iron profiles, and the cladding is made of wood, then 20 cm will be enough. If you want to carry out proper drainage from the shower, create the necessary communications before pouring the foundation. To do this, wrap the iron pipe with roofing felt and lay it in the places where the pipes will be located later. Later you will have a finished hole. If you want to create a more reliable structure, you need to raise the foundation above ground level by 15-20 cm. It is necessary to lay the foundation using a level or checking with a laser tape measure, since an absolutely flat surface of the foundation will greatly influence the quality of the shower in the future.
We assemble the frame. Usually the frame is assembled from metal pipes. Length - from 1.5 to 2.5 meters, diameter - more than 11 cm. In the case of a summer shower, it would be better to use a frame with a foundation created according to the pile type. The main frame is driven into the foundation so that there is more than 10 centimeters in the ground. Then you can pour the foundation and wait for it to set. If, after pouring the foundation, the frame is askew or you notice an obvious “jamb”, hurry to correct it before the foundation sets. Otherwise, the whole structure will look ugly, and you will also get a certain angle of inclination, which will lead to a lot of problems.
After this, it is necessary to fasten all the frame elements together without haste. We take all the necessary elements and fasten them together with bolts, screws - as convenient
It is important to maintain strict geometry, since at the top we will have a heavy tank of water.
Tank lining and installation. We sheathe the structure with the selected material in accordance with the instructions (above)
After covering, you can begin installing the tank. If the tank is assembled yourself, it is important to consider several points before installation. Firstly, the outlet for the watering can hose must be above head level, otherwise there may not be enough pressure. You also need to install the faucet and nozzle, then put the tank on top and secure it tightly.
In addition to painting it black to improve heating, you can also wrap the tank with film to create a greenhouse effect. You can also wrap foil around the northern part of the tank.
Drawing
Before purchasing materials, it is important to calculate all the parameters of the shower so that you do not have a lot of unused wood, metal, bolts, etc.
- Height and width. The standard height of the booth itself is 2-2.5 meters, but if there are very tall people in your family, you need to add another 15-20 cm to their height and you will get the required parameter. The length is also calculated from the height, the standard is 1.95-2 meters. Standard width is 1.5 meters.
- Additional calculations. Do not forget that it is also worth considering some elements of the interior. Shelves for bath accessories, hooks for clothes, a handle for the door - all this takes up space. That is why it is best to sketch a drawing. If you have the skills, do it yourself; if not, find photos of a suitable option on the Internet and rewrite the parameters. Or use special programs.
Regarding the water tank
You can buy a water tank or build it yourself. Each of the materials and options has its own pros and cons.
- Plastic. Plastic shower tanks are sold at any hardware store, are inexpensive, and are quite easy to install. On the downside, as the saying goes, “the miser pays twice.” Many reviews indicate that low-quality plastic tanks made in China can easily deform under the influence of sunlight, burst and become completely unusable. Therefore, if you take a plastic tank, then only a high-quality one, preferably made in Russia or abroad.
- Metal. Metal water tanks are also available for sale. These can be either lightweight options made from a thin sheet of stainless steel, or more durable ones made from steel. However, they are expensive, and if you have direct hands, you can make a much higher quality and durable option yourself. The design of the tank is quite simple - it is a metal bath with a central drain, at the end of which in the future there will be a tap. The walls and “ceiling” should not be too thick (so that the sun has time to heat the water), but not too thin (so that the tank does not turn out to be flimsy). This tank cooks in about 30-40 minutes.
You can also easily use some kind of metal barrel as a future tank, having previously cleaned it and washed it of dirt and sediment. If you decide to make the tank yourself, after all the welding and cleaning work, do not forget to paint it black. As you know, black surfaces heat up much faster than those painted in a different color.
The volume of the tank must be calculated based on the needs of the family. 40-50 liters is enough for one or two people. If 3-4 people want to rinse off in the evening, then it’s worth looking at a tank with a volume of more than 150 liters. Also, do not forget to compare the dimensions of the tank with the approximate dimensions of your future shower.
Homemade shower options
Before we talk about the options for homemade shower stalls in private homes, let’s take a closer look at why factory models do not always satisfy consumers and do not justify the investment in them.
I managed to buy a shower stall. I paid 40 thousand rubles for it. It seems that at first both my wife and I liked everything. And then it started! At first the watering can stopped holding, then the doors began to creak. When taking a shower, water hitting the door joint flowed out, and I had to coat this unit with sealant. After some time, the support bearings fell off, and there are no spare ones anywhere. Well, at the end of the day the pan burst. With a light heart, I threw it away, and I don’t want to take the factory ones anymore. My brother did everything right. The shower area is finished with good ceramic tiles, a high-quality faucet is installed, and to prevent splashes from flying out, there is a hinged door made of tempered glass. It turned out to be no cheaper than store-bought, but it looks great, no plastic, forever!
The issue of price and quality are one of the main motivators that guide home craftsmen when thinking about how to build a shower stall on their own. After all, it’s a shame to pay a lot of money and not be sure that the device will last five years. There are high-level products on the market from famous manufacturers, the characteristics and service life of which cannot be doubted, but the cost of such equipment is off the charts.
Therefore, thrifty owners prefer to do everything themselves. Building a shower room is not always cheaper than buying a mid-priced product, but there is no doubt about the quality of the product, as well as its components. After all, you do it for yourself.
If you show your imagination, you can make a shower cabin with your own hands, which in its characteristics will not be inferior to many industrial designs, and in design will leave them far behind.
Before starting work, the main thing is to decide on the functionality of the structure, its appearance and, of course, its dimensions.
Experience shows that shower stalls measuring 800x800 mm are too small. They are cramped and uncomfortable to wash in. 900x900 mm is already better, but the optimal size is 1000x1000 mm.
There are also cases when a booth needs to be installed in a narrow nook in a small apartment. You can’t put a regular one there, and buying equipment of non-standard sizes, with unequal sides, or made to order is too expensive. The solution is to set up a makeshift booth.
To simplify and reduce the cost of the task, you can buy a pallet and, based on this “base,” build a shower stall with your own hands, using ready-made walls and a door.
Or take a more difficult path, which opens up wide scope for creativity - build a completely homemade shower cabin using materials from the construction market.
In this option, the base (pallet) is purchased or made of concrete, and the walls are made of polycarbonate mounted, as an option, on a metal frame.
Plastic panels are also used for the construction of shower stalls.
Moisture-resistant plasterboard, from which the walls of the booth are made, which are then covered with ceramic tiles or mosaics.
Moreover, multi-colored and textured glass blocks allow you to give the shower stall or washing area the most intricate design in the form of curved walls.
Another advantage of glass blocks is the presence of decorative series, in which inside the block there are various elements in the form of starfish, shells, butterflies, etc.
I think that a homemade shower cabin always looks better than a factory-made plastic one. You just need to do everything efficiently so as not to flood yourself or your neighbors. We made this version of the booth, as in the photo below. In my opinion, it looks much better than store-bought.
Calculating shower parameters
The following parameters for a summer shower for a summer cottage are considered standard:
- from 2 to 3 m height;
- about 1.90 m length;
- 1.40 m width.
Do not forget that the building itself should be quite spacious so that you feel comfortable staying in it. In addition, you need to allocate a separate space for personal belongings and bath accessories. This requires a minimum of 0.4-0.6 m.
Of course, the size can be very varied and depends on everyone's needs. When you have decided on the values, it is worth creating a drawing. You can draw it yourself or look for a ready-made suitable option on the Internet.
Drawing of a traditional simple shower
The given parameters are quite comfortable, since the total area of the shower will be 2 x 1.5 m (taking into account the thickness of the walls). If you use regular-sized wooden planks as building material, you will have virtually no waste left.
Construction of a major shower
A capital shower can be sheathed and insulated so you can bathe until late autumn.
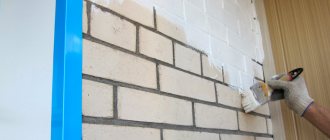
If you plan to do a major building with your own hands, then you will need to dig the foundation, first apply markings, drive pegs in the corners and pull the cord. If you plan to build a building from cinder blocks or bricks, you will need to dig a foundation 30 cm deep. The formwork will allow you to raise the foundation of the building above the ground by 10-15 cm. Now you can proceed directly to laying the walls. For this, it is best to use sand-lime brick. You can take a regular one, but then you will need to additionally plaster the walls. The masonry needed to build shower walls must be half a brick. Installation of floors and roofs. The main rule for a shower roof: it should not be too heavy, but at the same time it should be strong enough, because it will also have to bear the weight of the container with water. We lay a layer of waterproofing on pre-installed wooden blocks embedded in the walls, and lay slate on top of it. Slate, in this case, is nailed to the bars, the base of the roof, using special nails. You also need to remember that the roof needs to be placed on a slope. This is necessary to ensure that water drains from the roof during precipitation. We install the tank. No special devices are required for its installation. A few clamps are enough for the tank itself and an ergonomically shaped lining for a more even distribution of weight on the slate roof
When choosing a tank, pay attention to those models that are sold in construction stores. Professionals advise choosing a plastic container with a volume of 200 liters
It has a flat and low shape; it is this detail that greatly simplifies the process of installing the tank on the roof. Remember that you will need to make a small hole in the roof or wall to run the pipe from the tank to the shower head. Finishing work. The first step in interior finishing of a shower should be waterproofing, which is installed on the floor, the bottom of the walls and between the joints where the floor and wall touch. This is done to prevent the destructive effects of moisture on the foundation and the lower part of the masonry. It is noteworthy that hot compounds such as bitumen are used for waterproofing. After this, you need to make a screed on the floor and always at an angle. Windows and doors are installed in accordance with the usual pattern. Well, the material for decorative finishing is chosen based on personal preferences. But it must be moisture resistant.
Approximate cost estimates for the construction of a major brick shower.
In order to build a capital shower, you will need the following consumables and tools:
- sand-lime brick;
- crushed stone;
- cement;
- sand;
- materials for covering: wooden logs, slate, waterproofing;
- shower tank with a capacity of 200 l;
- faucet and shower head;
- pipes for draining excess water;
- door and window;
- shovel;
- polyurethane foam;
- varnish and paint;
- Nails and screws.
Shower stall and drain
There are many options for a shower stall: from the simplest pipe built into the walls, along which a waterproof curtain “rides” on rings, to a super-modern (or not super) shower stall. What types of shower cabins there are, read here. From experience we can say that if a cabin is installed in a bathhouse, then it is the most primitive one - walls, a door and a tray, and in principle nothing more is needed. This is an option for those who do not want to bother with waterproofing adjacent walls and like quick solutions.
Bath shower with titanium
In general, if the layout does not provide for a separate small room for the shower, you can fence off part of the washing compartment where the drainage system should be organized. If there is no drain, you will have to arrange one.
If you plan to install a pan, it requires a separate concrete base with a connected drain pipe. The base is needed so that the plastic of the tray does not “walk” under the weight of a person, since most bath showers contain plastic products - they are inexpensive and, if installed correctly, are quite durable, and the plastic bends under the weight of even a not very large person.
If a tray is not provided and the floor is wooden, you need to protect it from water. To do this, galvanized metal is laid in the area where the shower stall will be installed, and the joints of the sheets are carefully sealed with silicone sealant (for example, Ceresit CS 25). Screed reinforcement is laid on the metal with a slope towards the drain, everything is filled with cement mortar. Floor tiles are laid on the fresh mortar (while maintaining the slope), and its joints are also well coated with silicone. Instead of galvanized metal, you can use modern films for waterproofing. In this case they must be reinforced.
Shower drain
If the walls in the shower stall are wooden, they need protection from water. You can protect them with ceramic tiles, plastic panels, or simply lay sheets of plastic of a suitable size, sealing the joints with the same silicone. Under any type of finish, it is also advisable to lay a layer of waterproofing. In the simplest case, it is a plastic film that is attached to the walls using staples from a construction stapler or strips and nails, and it is advisable to seal the resulting holes with reinforced tape.
Plastic shower panelsPlastic shower panels are a budget option for protecting walls in a shower stall; anyone can handle the installation. At the first stage, metal profiles are attached to the walls, from which the frame-sheathing of the walls is assembled. Plastic panels are attached to the profiles with self-tapping screws with a wide head, which are connected to one another using a lock. The connection is sealed (you just need to be careful not to damage the rather fragile edges of the locks). In the external and internal corners, special corners are used, which are sold in the same place as the panels; baseboards are reinforced at the top and bottom. Indeed, there is nothing complicated, but the appearance is like that of a monolithic wall and the protection from water is almost 100%.
The general principles of how to make a shower in a bathhouse are outlined, but how to do it is up to everyone to decide for themselves. There are simply a lot of options here, because you can simply hang a bucket shower and tip it over, or build a full-fledged shower stall with automatic hot water supply. Below are real photos of the shower in the bathhouse. Maybe you'll find an idea for yourself...
Homemade shower
Sprinkler + shower
Hot tub plus shower
Shower using an electric boiler
Lightweight shower cabin design
For a simple device, the easiest way is to install a stand-up shower or a walk-in shower against the wall and hang a curtain. The solution is simple, cheap and quickly implemented. But this design is not very convenient and impractical.
A compromise option would be to install a light shower stall. It consists of a water tank, a fence and a tray. Before you make a shower in your dacha with your own hands, you need to familiarize yourself with some of the features of its installation.
- The tank can be metal or plastic, but if it is installed on the roof of the cabin, it should not be too heavy. You can purchase a special container, or make a tank yourself from any suitable container in which a watering can with a shut-off valve is mounted. It is best to purchase a plastic flat tank specifically designed for this purpose. This tank has compact dimensions, and the water in it quickly heats up from the sun.
- The fence is designed to protect from wind and prying eyes. The cabin consists of a frame, which serves as a supporting structure, and a fence that performs a protective function. The frame can be made of wood or a metal profile. And the fencing for the light cabin is made of tarpaulin, metal sheets, wood, polycarbonate or other suitable material.
Use wooden flooring as a pallet, or buy a ready-made shower tray. It needs to be used at some elevation. Another option is to install paving slabs under the booth and along the road to it. For this structural element, the main task is the unhindered drainage of water.
It is important to equip the cabin with a device for storing cleaning supplies and hooks for clothes
Tips for installing and using a cabin in a private home
some problems may arise during operation :
- Water supply - it can be solved simply by installing an artesian well , it is advisable to do it in a heated room so that a plug of ice does not form in the trunk.
- In winter , the sewer and water supply systems can freeze - to do this, all pipes must first be insulated . You can dig them shallow into the ground and install not only insulation with insulating materials, but also install a special heating cable.
- Sewage system - an autonomous septic tank .
Sheathing materials
We’ll talk about materials for the frame a little later, but now we’ll try to figure out cheap cladding options for our shower. It could be:
- Metal. Profiled sheet or other type of metal sheathing. Such material will make it possible to avoid many problems and will last for many years. However, this is the most expensive cladding option.
- Tree. A much more economical option. If you are not a fighter for the beauty of the structure, you can even use those boards that are just lying around, idle. In this case, you will have to spend virtually no money on cladding. The disadvantage of this option is the wood’s susceptibility to fungus and mold. Since water will constantly be pouring onto the boards, the risk of mold stains becomes very high. To avoid this, before covering the cabin, treat the boards with special impregnations and varnishes.
- PVC film. Perhaps the cheapest option we have presented. The film is inexpensive, you can even buy a special one. Next, you need to adjust it to the size of your shower and either build some kind of “box”, or simply hang it like curtains. In this case, you also don’t have to spend money on a door or similar device - you just need to unzip (or open, if there are curtains on the shower) the stall, rinse off, and close it again.
Types of summer shower
- Shower stand - is a stand with a height slightly larger than human height. Such equipment can be purchased ready-made or made with your own hands.
- Toptun shower - has the form of a specially designed mat, from which two flexible hoses extend, one is lowered into a container of water, and the second is equipped with a watering can. A person stomps on the mat and thereby transfers water from the container to the watering can.
- The shower panel is an easily removable structure that can be installed anywhere where there is a water supply.
- A shower cabin is a small architectural structure designed to perform water procedures.