In this article we will look at the basic methods of creating a perfectly flat floor in an apartment. Preparatory and key stages are presented. I will explain which materials are most effective.
If you need to renovate your apartment with high quality and in a modern way, then you cannot do without replacing the flooring. In terms of price it is more profitable. And the appearance of the new coating is quite attractive.
Have questions ? Call!
Don't start renovating until you read this.
What floor to install in an apartment Warm floor in an apartment: a modern choice How to change floors in Khrushchev, Stalin, Brezhnevka
A perfectly flat floor - why is it needed?
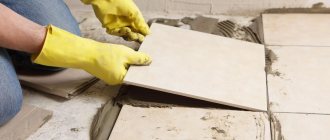
Even in a new building, there are differences in the floors. They can reach 10 cm. Today, panel slabs are laid so that the ceiling between floors with its smooth surface is directed towards the ceiling, and its lumpy surface towards the floor. And on this side, without screeds, you can only lay linoleum. The parquet will be constantly deformed.
Thus, we fill the floor according to two main reasons:
- Laying flooring.
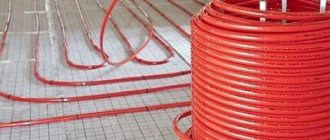
- Construction of a floor with water or electric heating.
- Other floor insulation.
For your information
To get a perfectly even coating, we use cement filling. This operation is also called screeding. It is necessary before laying the topcoat. In this regard, many owners have a question about how to properly fill the floors in the apartment. This technology is not anything overly complicated. The main thing is to perform all operations correctly and step by step.
Advice from professionals
Which method is best for heated floors and why?
For heated floors, a wet or semi-dry screed is best suited. This is due to the design of the heated floor. In order for the surface to be heated evenly, the thickness of the screed under the heated floor should be 4-6 cm, then the finishing coating is laid. To prevent heat from the heated floor from going down, the wires are laid on foil and insulation 2 cm thick. The German standard recommends insulation from 7.8 cm to 10.8 cm. Plywood, plasterboard, and OSB are poor heat conductors, so they are not used for installing heated floors.
Which method is suitable for leveling a concrete floor in a garage?
The garage floor will be durable, resistant to aggressive environments and durable. It is best to use a wet, semi-dry screed to level the floor.
How to level a concrete floor and improve sound insulation and/or thermal insulation
Sound insulation and thermal insulation of floors is improved during the leveling stage. With a dry screed, insulation is laid between the beams; wet and semi-dry screeds are carried out over the insulation. Self-leveling floors and leveling with glue are carried out without insulation or sound insulation.
At what stage should communications be laid?
All communications are laid before the floors are poured. If the thickness of the fill allows, then the communications are laid out on the floor; if not, then they are laid in grooves.
Mortars for perfect pouring - building mixtures or concrete? Choice
In modern conditions, pouring a floor screed with your own hands is quite feasible. And there is a large assortment of various Russian and foreign levelers on sale. These are innovative tools.
Their main specificity is that they are poured without much work with beacons and guides.
We breed them competently, using strict technology. They are affected by gravity and tension. And they are evenly distributed over the entire working surface. Cover all uneven areas and bumps. This is the easiest way to fill the floors to obtain an even, seamless and shiny finish.
There is also a classic - the use of cement compositions. They cost less. But the filling technology is more complicated. What to choose and how to fill the floors in the premises, each owner decides for himself, based on his budget, goals and scope of work.
What is a mechanized or semi-dry screed?
This technique is distinguished by the possibility of automation, as well as different maturation times. The following materials and devices are required for implementation: the mixture itself (sand, fiberglass, etc.), waterproofing material and damper tape.
Mechanized floor screed allows you to process about 250 square meters per day
Installation of the floor using this technology will take about 12 hours.
How does the screed happen?
- Initially, you will need to prepare the base for the screed, mark the floor, and apply tape. They install special “beacons” and perform isolation. This stage is similar to that for a wet screed.
- Next, the mixture is prepared in a pneumatic compressor. This solution will be mixed automatically.
- Since screed using the semi-dry method is made from a material with a loose structure, the amount of water in which is not so large, a pneumatic blower and beacons are used, after which leveling and compaction are performed.
- The next step is drying. Before finishing, you need to wait a day, during which the screed will dry. You cannot walk on it before this moment.
- Finishing is done using a special grouting machine.
As a result, we get a high-quality screed that can withstand significant mechanical loads and has good sound insulation properties, and not much time will be spent.
After a certain period of “maturation”, the flooring can be laid
Preparation steps before making a poured floor
For preparatory and main work we use the following arsenal:
- Reiki. They are necessary for beacons.
- Metal brush.
- Container for working personnel.
- Roller for priming.
- Sidewalk scraper.
- A small brush for applying primer to hard-to-reach or small areas.
- Putty knife.
- Needle type roller.
- Drill with a nozzle for mixing the solution.
- Primer.
You can fill the floors in your apartment correctly if you act strictly step by step. And the stages of work are as follows:
- Surface preparation. Removing old coating, cleaning from dust and dirt.
- Padding.
- Waterproofing.
- Thermal insulation.
- Checking horizontality.
Next comes the screed itself. Then we wait for the surface to dry and lay the base coating.
Have questions ? Call!
Preparing the base - leveling and waterproofing
It is necessary to fill the floors in the apartment step by step. This is the most important condition for obtaining the proper result.
The first step is preparing the base. We remove the old coating. We carry out a thorough cleaning. We eliminate dust and dirt. We use a vacuum cleaner. Degrease the surface with a simple soap mixture.
If you need to fill the floor in a room that does not have a threshold, we create one. For this we use slats. This prevents the leveling agent from leaking into adjacent rooms.
Important
Before the pouring process, it is important to remove outdated baseboards. And we must glue the wall-floor joints. There is a good tool for this - damper tape.
Next, the floor in the room is covered with a primer. Thanks to it, the floor adheres better to the base. Apply at least two layers of primer. Apply the second layer only after the first layer has completely dried. Priming continues while it is still absorbed by the base.
.
The primer enhances the strength of the surface and its adhesion to future materials.
When we work with classics (concrete-sand composition), we use a universal primer. In rooms of modest size, we apply it with a brush. In large rooms - a roller.
Before starting other work, the primer dries for about two hours.
The main work starts one day after this operation.
At this stage the level. We walk around the room with him. And we make horizontal marks on the walls. We will rely on them during the pouring process.
Filling the floor screed yourself
- The screed is far from monolithic. Therefore, in order not to lose all the prepared material (after all, it dries quickly), try to fill it in one go. It’s great if you lay a net on the floor before work.
- The solution expands on all sides as it dries. In large areas this is especially noticeable. Therefore, place a strip of elastic material under the screed along the walls. This material, for example, can be a damper tape.
- The solution dries faster than it sets, since all the moisture from it goes down. To avoid this, pre-prime the floor and wet the base before screeding. To prevent moisture from evaporating, the very next morning after pouring, wet the screed and cover it with film. If the screed is thicker than four centimeters, then you can also lay the film under it.
Modern screed services from professionals are one of the most profitable and practical solutions on the modern market.
Concrete floor reinforcement
How to fill the floor in an apartment with a reinforced screed? This issue is especially relevant when working on the ground. His solution is the use of reinforcement. We use one of these options:
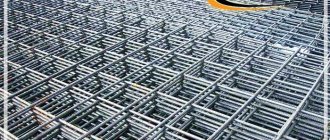
- Special steel mesh.
- Fibrin. It is fibrous plastic or metal. We add it to the working solution.
At the reinforcement stage, we install wiring and install heating technologies.
Nuances of floor structure reinforcement
We reinforce the concrete floor in the house so that the structure receives powerful protection from mechanical stress and strong vibrations. This also significantly increases the service life of the floor.
Motives for floor reinforcement:
- Laying a floating screed according to the project.
- Construction of a floor on the ground.
- Compliance with certain building regulations in underfloor heating technologies.
- The floor is used for industrial purposes and is subject to enormous loads.
- The height of the concrete layer exceeds 5 cm.
If the floor structures are subject to serious loads, we give preference to metal reinforcement.
The rod diameter is affected by operating conditions and loads. Usually it is 0.6 - 1.2 cm. Cell parameters: 1 x 1 x 2 x 2 cm.
To fasten the mesh we use welding or binding wire. We often use ready-made meshes in our work. They are based on VR-1 wire and d 2-6 mm. The cell parameters are in the range 5 x 5 - 2 x 2 cm.
When reinforcing using this method, we fill the floor in the apartment in stages and follow the following order:
- The position of the mesh is in the very thickness of the concrete. This way the steel is protected from corrosion.
- Thoroughly clean the base from debris and dirt.
- Repairing cracks (if any). Their dust removal. Padding.
- Priming the base in 2-3 cycles.
- Waterproofing and sound insulation are installed.
- Marking is made and a level is applied.
- The mesh is placed on stands. This is how the material ends up in the thick of the concrete. We keep the overlap in one cell.
- Connecting butt sections using tying wire.
- Beacons are attached to the reinforcing layer. This cannot be done without metal U-like profiles.
- The train is placed between the lighthouses. It is leveled by the rule.
- After the concrete has cured, the guides are removed. The existing voids are filled with the mixture.
- A protective film is spread over the screed. Lasts 5-7 days.
For your information
We use fiber material for surfaces located in alkaline environments, where temperature parameters do not exceed 200 degrees.
You might be interested
What floor to install in an apartment Warm floor in an apartment: a modern choice How to change floors in Khrushchev, Stalin, Brezhnevka
Types and features of screeds
In the modern industry of finishing residential and public premises, there are several types of screeds, which differ in the design algorithm, functional and technical parameters and materials. The most popular types of screeds are the following technological solutions:
- Wet. It is considered the oldest and most common method of leveling a floor structure. It is a cement-sand mortar of increased mobility, which is laid on top of the floor slab along the beacons until the required level is reached.
Wet screed
To obtain sufficient strength and reduce the risk of shrinkage cracks during hardening, the thickness of such a screed should be at least 40 - 50 mm. To obtain even greater strength, a metal masonry or road mesh 3 - 4 VR1 with a cell of 50 x 50 - 100 x 100 mm is placed in the mortar layer.
Reinforcement of the structure with masonry mesh
Reinforcement of the structure with road mesh
This screed is characterized by increased waterproofing properties, with a sufficient degree of mobility it has a self-leveling property, and the material in liquid form does not require compaction and penetrates into all hard-to-reach places.
Mixture mobility
The disadvantages of such structures include increased labor costs during installation, a high risk of shrinkage cracks, as well as the need for a long wait for the material to harden and dry after its installation.
Shrinkage cracks on the surface
- Semi-dry. A special type of screed, the solution for which contains a minimum of water. It is mixed using a special device, after which it is supplied through a hose with a pump to the installation site.
Semi-dry screed
The device requires a vibrating lath, hardening and hardening occurs within 15 - 24 hours after pouring, and does not give in to shrinkage cracks during hardening. The hardened structure has an increased porosity coefficient, which guarantees excellent heat and sound insulation properties, but at the same time reduces the ability to retain moisture on the surface.
The process of installing a semi-dry screed
With the correct installation technology, the hardened surface does not require modification or installation of a self-leveling floor.
Ready-made interior design
- Dry. The technology of the device is in many ways similar to the previous one, with the only difference being that there is no water in the composition.
Dry design
A mixture of expanded clay, expanded vermiculite or foamed materials of natural origin is placed on the floor using a laser level in such a way that you can walk on it immediately after installing the screed.
Backfill
Leveling is done by laying a rigid sheet of gypsum fiber materials or asbestos cement on top of the bulk layer.
Arrangement of floor elements
After laying the sheets, the surface is a flat plane, on top of which any type of finishing coating can be installed.
Finished surface
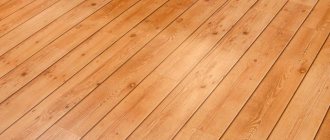
When choosing the type of screed, it is necessary to take into account the operational features of the room. If the subfloor is installed in a damp room, then it is better to replace the dry composition with a classic one to achieve increased waterproofing properties. To install a plank floor, on the contrary, you should use a semi-dry or dry screed, since a breathable surface will prevent the boards from rotting.
Creation of formwork. Working with Guides
We lay the concrete floor in parts - cards. These are rectangular areas. Their parameters are determined by two factors:
- Total surface area.
- Possibility of filling the composition in one working cycle.
We place formwork along the perimeter of these areas to mark the finished floor. It is created from a 5 x 10 cm board. We pre-drill holes in the boards for reinforcing pins with a distance of 50 cm. We apply the formwork lines to the seam pattern.
We fill the floor in a new house along the guides. We can use them as:
- metal profiles,
- steel corners 5 x 5 x 0.3 cm,
- profile pipe 4 x 2 x 0.2 cm.
We mount the guides by welding to reinforcement posts with a diameter of 1.2 cm. To control the evenness, we use an optical level.
All areas where the surface is adjacent to the load-bearing components are covered with Izolon with a density of 4 mm. This is a damper tape based on polyethylene foam.
So we fill the floor in parts. Just before filling, we treat all profiles with engine oil. And we moisten the rough base with water.
Have questions ? Call!
Installation of beacons
An important point during preparation is the installation of beacons. It is almost impossible to level the floor without them.
Beacons are rigid metal guides, and you can also use a profile for installing drywall as beacons. Wood is absolutely not suitable as beacons, since it absorbs water when it dries.
The beacons are placed parallel to each other at a distance slightly less than the length of the rule that you will use to screed the mortar.
The first beacon is placed at a distance of 20-30 cm from the wall in small piles of cement. The next one is parallel to the first one, the height is adjusted using a level or a simple level.
The remaining beacons are installed in the same way.
The solution with beacons must be allowed to harden, usually 12 hours is enough.
The second method of installing beacons from a profile without mortar on dowels with self-tapping screws. To do this, mark the lines where it is necessary to install the beacons and drive in dowels with self-tapping screws in increments of about 80 cm.
The height of the screws is adjusted using a laser level. The profile is laid on the self-tapping screws and as the pouring progresses, they can be easily moved along the screws.
Laying waterproofing
How to fill the floor in an apartment yourself if there are significant gaps in the base? The areas where walls meet floors are considered particularly vulnerable. Areas near communications are also considered weak. Here we lay waterproofing.
To do this, we use the following types of water protection:
- Films and rolls. These are the most common types. These are polymer membranes consisting of many layers. They also have thermal insulating properties.
- Liquid. These are great pore filling products. It turns out a thin water-repellent film
- Mastics. These are adhesive plaster mixtures. Their bases are polymers, resins, liquid rubber. The mastic forms a powerful waterproof layer.
- Powders. They use plasticizers and binders. They need to be diluted with water according to the instructions.
Surface level and placement of beacons
Many owners are interested in how to fill the floor in an apartment efficiently and evenly? To do this, be sure to determine the level of the screed and install beacons (special slats).
Using a level, check the evenness of the base. We indicate the level of the intended coverage on the walls.
From plastered areas, remove the plaster 0.25 cm above this line. Using these notations we identify the highest point of the surface. This is a guarantee of proper filling.
Here the working algorithm is:
- We measure 1 m up the wall, counting from the door threshold. We draw a line.
- We draw a line around the perimeter of the room. We maintain its parallelism using a level.
- The second parallel is drawn at a distance of 1 m under the control symbol.
- We drive nails into the corners of the room on the bottom line and stretch the wire.
Thanks to the marks on the load-bearing components, it is easier to place beacons in a new apartment. The distances between beacons correspond to the length of the rule. We apply the rule to level the mixture.
The final result depends on the placement of the slats. After all the work, the slats are removed. They leave recesses that can easily be filled with the same solution that was used for the screed.
With guidelines it is much easier to fill the screed. And so we get the necessary flat surface. We install beacons even for work on a small area.
Bedding question
Before you make the working composition and pour it onto the required area, you need to make a bedding. This is the so-called pillow. It consists of three layers.
- The initial one is gravel. Density: 5 -10 cm. Water it with water and tamp it down. To control the thickness of the layer, be sure to drive pegs directly into the soil. We put them by level. Having slept and compacted this layer, we take them out.
- The second one is sandy. Density -10 cm. We also adjust the thickness with pegs. We water the sand and compact it using a vibrating plate.
- Shchebnevy. Thickness – 10 cm. We carefully level it and make it denser. There should be no sharp edges on the surface. Suitable crushed stone has a fraction of 4-5 cm. After compaction, sprinkle it a little with sand and tamp it again.
Horizontal level adjustable
Video guide for installing beacons
Tools required for screed installation
The screed installation occurs in 3 main stages, each of which requires special tools and consumables. In order for the screed to be installed with the highest possible quality, you need to stock up on the following sets of equipment:
- Marking the future plane in front of the screed device:
- A laser or water level, the technical characteristics of which will ensure correct marking in one step across the entire area of the room.
Laser level
- Aluminum or galvanized perforated slats for installing beacons, the top edge of which will correspond to the surface of the future screed.
Lighthouse slats
- Alabaster or dry mixture in the amount of 1 - 2 bags, to be able to prepare a rigid solution that allows you to fix the beacons to the floor slab.
Dry mixture in a bag
- Nylon rope or lace for tension along the wall, showing the mark of the top of the future screed.
Nylon lace
- If necessary, marks are made on the wall using a construction pencil.
Construction pencil
- To calculate the volume of the screed, before purchasing the building mixture, you will need a laser tape measure and a ruler.
Laser roulette
- Equipment for preparing cement-sand screed mortar:
- It should be noted that installing a screed is a large amount of work. If a subfloor with a thickness of only 60 mm is installed in a room of 20 m2, you will need 1.2 m3 of mortar, which will take at least 22 - 25 bags of dry mixture. Thus, the best solution would be to rent or purchase a special automated mixer that can simultaneously prepare up to 100 - 200 liters of solution.
Solution mixer
- If it is impossible to rent special equipment, a metal trough with a volume of at least 200 liters will be required for kneading.
Metal trough
- Mixing the solution can be done using a shovel, trowels, or using a mixer attachment on a powerful drill.
Master OK
- To move the finished mixture to the installation level, you will need a two-handed stretcher, one-wheeled construction wheelbarrows, or galvanized steel buckets.
Construction stretchers
- The finished solution is transferred into a transport container using a shovel with a wide working blade.
Galvanized bucket
- Tool for finishing the surface after laying the mixture.
- Distribution of the freshly laid mixture over the area of the room is carried out using shovels.
- Primary smoothing is carried out with a standard aluminum rule, 1, 1.5 or 2 meters long, depending on the floor surface area and the distance between the beacons.
Aluminum rule
- Local modification of the surface, distribution of solid and liquid layers in the thickness of the screed is carried out using a trowel.
Plastic graters for leveling
The tool used to install the screed must be in good working order, sharpened, and free from defects on the working surface. When using previously used equipment, the old building material must be removed. The tool needed to make a wet screed with your own hands is described above.
Creation of the working staff
This composition is not difficult to create. We dilute it in water strictly according to the instructions. Mix using a drill with a special attachment. This way we get a homogeneous composition.
A simple recipe for preparing a sand-cement mixture is as follows:
- 4 shares of perlite are used. Pour 2 parts of water on them.
- Add water and cement one part at a time to the solution. Mix.
- Add two parts of sand and 10 parts of water.
- Mix the mixture until it reaches a plastic consistency.
This option is good for use in a new private home. It is also often used on the lower floors of buildings with many floors. In an apartment it is also justified if a small layer of fill is created.
Pouring process
How to fill the surface of an existing base more efficiently? If all measures for leveling have already been provided, then the process should be completed in one day. This is the key to uniform composition.
Filling begins from the far corner of the room. To level the layer, apply the rule. We evenly distribute the material within the boundaries of the fixed beacons.
Using a needle roller, remove air from the mixture. This way we exclude the occurrence of internal voids in it. Then we level the screed completely. We repeat the operations until the base is completely filled.
If you have some misunderstandings, you can watch a video of how to pour a floor screed with your own hands.
Cost of repair work
If you do not have free time to level the floor yourself, then the work can be entrusted to repair teams, whose advertisements abound on the Internet. Specialists can do not only leveling, but also provide other repair services. But all this will have to be paid for. Of course, the cost of the work depends on the skill level of the master and the city in which the work is performed (prices for leveling in Moscow are much higher than in other cities).
Cost of floor leveling
Let's consider the average cost of work per 1 sq. m. So, the asking price:
- installation of plywood sheets on a base made of wood – 110-130 rubles;
- leveling with self-leveling floor – 150-180 rubles;
- dry screed – 400-500 rubles;
- leveling the floor with joists – 520-600 rubles;
- cement floor screed with installation of beacons - 600-650 rubles.
Leveling the floor: before and after
Leveling the floor yourself is a difficult job that requires patience and care. Therefore, if you doubt your abilities and are not sure that the leveling will be done efficiently, it is better to entrust the work to qualified specialists. Of course, you will have to pay a lot for their services, especially if the room is large, but the result is worth it.
Using the mixture to level the floor
Prices for self-leveling floors "Starateli"
self-leveling floors prospectors
Floor work
How to pour concrete floors and when should it be done? It is important to know one specific thing here - bedding is not required.
First we study the floor slab. If there are cracks or chips on it, we fill them with a repair compound.
When working with wooden floors, we also repair them if necessary.
We provide any overlap with waterproofing - thick (200-300 microns) polyethylene film.
Next we arrange thermal insulation. Suitable for these purposes: basalt wool. expanded polystyrene or polyurethane foam.
We put up beacons, fill the composition with a density of 10 cm. Further actions are identical to those for working with a floor on the ground. If there are any incomprehensible moments, you can watch a video of how floors in an apartment are poured over the ceilings.
Why do you need a screed?
A floor screed is a leveling layer of rigid materials for finishing a horizontal surface, laid on top of the floor slab. This structural element smoothes out surface defects of the supporting structure and also performs the following important functions:
- When installing a screed, it is possible to lay a layer of waterproofing, which eliminates the risk of moisture penetration into adjacent vertical rooms. Also, water repellents can be added to the structure itself, which will reduce porosity and increase the waterproofing characteristics of the material.
Laying waterproofing
- When making a screed, it is allowed to install a heat and sound insulating layer made of an effective low-compressible material - usually expanded clay or extruded polystyrene foam.
Laying thermal insulation
Laying sound insulation
- When reinforcing the screed with a cement-sand mixture, its strength increases, shrinkage cracks are eliminated, and the operational load on the floor surface is evenly transferred to the floor slab.
Screed reinforcement
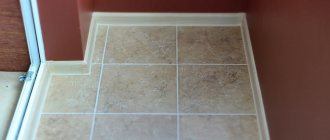
- The screed allows you to achieve the desired floor level, as well as differences in heights where necessary. This property is indispensable when a finished floor of different materials is laid in one large room (for example, a combination of tiles and laminate), as well as when installing a floor in a bathroom so that excess water does not penetrate into adjacent rooms.
Bringing the subfloor to the desired level
- If it is necessary to drain water, or if there are structural requirements for the room, a screed can be used to achieve a slope of the surface. This is especially true for shower spaces, utility or washing areas, when a drain is installed in the floor of the room to drain water.
Setting the subfloor slope
- One of the main advantages of a floor screed device is the ability to mask communications - heating pipes, water supply, electrical cables, as well as underfloor heating structures. These elements are laid on top of the floor slab in compliance with the technology, after which they are filled with screed.
Masking of utilities in the body of the screed
Thus, floor screed is an important structural element that must be installed in each room at the rough finishing stage, along with plastering walls and installing utilities.
Choosing a filling composition
The choice of screeding agent is a very important issue. And when deciding how and what to fill the floor in a new apartment, consider the following factors:
- The cement-sand composition sets within an hour. After which it is problematic to level it. Here you need to work in a duet. One creates a mixture. The second one is to fill it and level it.
- Ready-made formulations have a more liquid consistency. They spread out, aligning horizontally. This results in a smoother surface.
- Concrete finally hardens in 4 weeks. And the composition in a couple of days.
After filling and leveling, protect the surface from the following influences:
- temperature jumps,
- ultraviolet,
- air flows.
We cover it with film. This prevents the appearance of cracks in it.
To find out whether the screed is ready, we can use a special support component. If the screed has hardened thoroughly, remove the guide rails. We fill the voids with the composition.
We grind the concrete floor. After this operation, the floor covering can be installed on the base.
Floors filled with leveling mixtures can be loaded within 6-12 hours.
The type of flooring planned dictates certain conditions. After installing the screed, some defects and sagging can be ignored if ceramic tiles are laid.
Advice
If you are planning laminate, parquet or linoleum, we use mixtures with a self-leveling effect. This way the surface will be perfectly smooth with a mirror reflection.
We prepare the mixtures strictly according to the instructions, pour them onto the floor. For leveling we use a special brush.
Then we treat the surface using a needle roller. This is a measure to eliminate air bubbles.
But even though the base is considered ready, I do not recommend placing furniture on it. This can be done in 5-7 days.
Working with wooden floors
When you need to remove wooden floors in a house and install concrete surfaces, you need to follow the following algorithm:
- Dismantling old floors.
- Leveling the site.
- Making a pillow.
- Installation of insulation.
- Creating the composition and filling.
How to remove wooden floors and then pour screed, we consider in detail according to the indicated stages.
- We dismantle old floors using a crowbar. We follow safety precautions.
- Clean the surface of debris. Level the soil with a shovel.
- Making a pillow. We use crushed stone with a fraction of 2-4 cm. We form a layer of 5 cm. We compact it.
To compensate for the thermal expansion of the entire screed, we equip the perimeter of the room with foam sheets. Polystyrene foam is also a permanent formwork here. The thickness of one sheet is 20-50 cm.
The crushed stone layer is covered with a sand layer with a density of 10 cm.
- We organize insulation using extruded polystyrene foam with a thickness of at least 5 cm. Sheet parameters: 120 x 60 cm.
When laying, their locks are fastened, creating a monolithic surface. This material is moisture resistant, so we do not waterproof it.
Sheets are laid using a level. Add sand in the required areas. Again, check the evenness of the sheet positions.
- We work in two cycles. We put up formwork from boards. The composition elements and their proportions are as follows:
- cement: 1 share,
- sand: 2 shares,
— granite screening: 3 shares.
If all the elements are dry, the granite screenings are sent first into the concrete mixer, followed by sand, and cement last. Mix everything thoroughly. Then add water.
If the sand is wet, pour water into the bucket to fill half its volume. Next comes cement. Mix it thoroughly. Add sand, then sifting. Finally, add water to obtain the mixture of the required consistency.
The mixture is neither liquid nor very thick.
Apply the resulting composition and level it using the rule. The density of the screed is 4-5 cm.
After pouring, the composition needs two days to harden.
Then we prepare the second half of the room. Operations are identical
We align the fresh screed in density with the previous screed
After complete pouring, the concrete hardens for 2 days. Then you get this result:
For your information
The screed will be completely strengthened in a month. During this period, we water it twice a day from a watering can. On the created base you can install warm floors or floor coverings.
Professional recommendations
To make it easier to unload concrete from a concrete mixer, make a small chute. It will not only direct the material to the right place, but will also protect the mechanism from contamination. When unloading the mass from the mixer, do not place the chute on the mesh; the concrete will press it to the base. Place a piece of brick under the gutter, and raise the mesh in this place with small stones. In this position, the concrete will not violate the required distance between the mesh and the base.
Example of a small wooden gutter
If the pouring takes several days, then before resuming it, seal the joints of the old concrete with a cement-sand mortar approximately 1 cm thick. Otherwise, the hardened old concrete will interfere with the leveling of the new one, and depressions will appear on the joint line, which will have to be leveled later.
Concrete floor screed
The reinforcing mesh must be torn off from the base, otherwise it will not work. This can be done using concrete; at the same time, by the way, the stability of the lighthouses will increase. Throw a shovel or two of concrete onto each vertical post of the beacon. The quantity depends on the height of the poured layer. Then pull the reinforcing mesh up several times. Due to such actions, the mass will sink under the reinforcing mesh and lift it above the base. In this position, the concrete can completely harden, this will not have a negative impact on the final quality of the pour. The net will always be raised and its correct position will not change during walking. It is not profitable to use special plastic stands to raise the mesh. Thin wire bends a lot, you need a large number of stands. Their total price may exceed the cost of the reinforcing mesh. In addition, it takes a long time to install stands, and during work they may fall spontaneously. To correct them, you again have to waste time.
How to make a concrete screed with reinforcing mesh
For a thin screed, the concrete must be mobile, according to the existing consistency classification, approximately class P4. Not liquid, but mobile. It is much easier to work with, as a rule, there is no need to use an electric vibrator to remove air pockets. To improve the physical properties, plasticizers can be added to concrete.
Mobility of concrete
If the thickness of the concrete screed is within 5–7 cm, raise the reinforcing mesh above the base by only a few centimeters. If it is placed in the middle of the pour, then there will be no effect of strengthening the concrete in bending; the reinforcement will only work in tension. But floor coverings do not experience such loads.
When pouring concrete, do not forget to leave technological openings for laying utility networks. You can use pieces of plastic pipes or make wooden boxes from any scrap lumber.
How to quickly make a concrete floor with dropouts
How to make a lightweight concrete screed with polystyrene foam
Nuances of self-leveling floor
Self-leveling floor - also known as liquid floor - is a special composition. It is created on the basis of polymer elements. Before it hardens, it is a very liquid product. It is very easy to pour directly onto the prepared base. The liquid is quickly and without our intervention evenly distributed throughout the entire base, covering any defects.
There are these types of self-leveling floors:
- Cement-acrylic.
- Polyurethane.
- Epoxy.
The cement-acrylic type is usually used in industrial facilities.
The advantages of this type:
- Powerful resistance to moisture and wear.
- Acceptable price.
- No preparatory operations are required before pouring.
- Service life – 30 years.
- The presence of cracks does not affect the integrity of the surface in any way.
Minuses:
- Huge labor costs.
- The coating has no elasticity.
Polyurethane types
We use them more in residential premises. Their advantages:
- Powerful resistance to moisture.
- Good elasticity.
- Solid resistance to heavy loads and wear.
- Fast hardening.
- Service life – 40 years.
- Antimicrobial action.
Minuses:
- Dangerous odor before complete hardening - risk of poisoning.
- A significant expense is a huge financial outlay.
Alignment methods
There are several ways:
- Dry screed.
- Self-leveling floors.
- Screed (wet or semi-dry).
- Glue.
Which option to choose depends on the degree of unevenness of the base, the strength of the floor, operating conditions, economic indicators, and other factors.
Below we will look in detail at how to level a concrete floor using each of these methods.
Dry screed
To level a concrete floor, various sheet materials are used.
Drywall
Drywall is used if the base is flat, without flaws, permissible deviations are up to 4 mm when checked with a 2-meter lath.
What you will need
For leveling, a sheet of 1500*800*12.5 mm, weight 18 kg, for example, is suitable. It is important to note that:
- each sheet is marked;
- there are no swellings on the plane;
- the paper does not peel off from the plaster;
- the edges are smooth.
Rice.
2. GOST R 51829-2001 regulates the standards of plasterboard sheets, permissible deviations (in mm). When the humidity is more than 80% in the room, moisture-resistant plasterboard is used. Additionally, you will need a damper tape, an aluminum profile, waterproofing, self-tapping screws, and expanded clay.
To install drywall, the following tools are required:
- hammer drill for mounting the frame;
- screwdriver for self-tapping screws;
- vacuum cleaner;
- profile cutting machine;
- level.
How to do it
Installation is carried out in the following sequence:
- Thorough cleaning of dust and dirt is carried out.
- For waterproofing, a film with a density of at least 150 g/sq.m. is laid.
- A damper tape is laid around the perimeter.
- An aluminum profile for drywall is installed.
- Expanded clay is poured between the profile and leveled with a long lath.
- Drywall sheets are screwed to the profile with self-tapping screws.
As a final finish, porcelain stoneware, laminate, parquet boards, and block parquet can be laid on plasterboard. It is not recommended to lay carpet or linoleum, as it can be damaged by heels or a heavy object.
Price
The cost of a gypsum board structure starts from 1000 rubles per sq.m: the price of work is from 350 rubles, the price of materials is from 650 rubles.
Advantages and disadvantages
The advantages of this method include:
- easy to install yourself;
- no need to cut grooves for laying communications;
- absence of dirt, dust;
- simplicity and speed of installation;
- good sound and heat insulation qualities
Design disadvantages:
- sensitivity to mechanical stress;
- You cannot install heated floors;
- when humidity is more than 60%, mold may form;
- not suitable if you plan to install heavy partitions in the future.
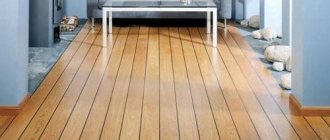
Plywood
To finish a floor leveled with plywood, parquet, parquet boards, and laminate are used. Carpet or linoleum flooring is undesirable because... There may be differences in the area of the joints. Tiling is also not suitable due to the possible springing of the base; it will move away from the plywood.
What you will need
Rice.
3. Plywood for leveling a concrete floor If the base is almost flat (difference 2-3 mm), then the plywood is simply glued on. To do this, glue is applied to the base using a comb spatula. The choice of adhesive compositions depends on the type of finishing coating and the characteristics of the room itself. The plywood is additionally fixed with dowels 5-6 cm long. If necessary, the sheets are sanded.
Important! For residential and office premises, use FK grade plywood; it does not contain phenol-formaldehyde.
The thickness of the sheets should be from 10-12 mm. Humidity 12.5%. You can use unsanded plywood for leveling under any surfaces except parquet. Only sheets sanded on one front side are suitable for it.
In addition to glue, timber (joists) are used to level a concrete floor using plywood. According to SNiP 3.04.01 87 (SP 71.13330.2017), dry timber measuring 80mm * 40mm is used to install the logs. The timber must be treated with bioprotection.
To work you will need self-tapping screws, adjustable supports, insulation, joists, and the following tool:
- perforator;
- screwdriver;
- cutting machine;
- Sander;
- jigsaw
How to do it
First, the timber is installed, then the plywood is attached to it. Logs are used both adjustable and non-adjustable. For minor curvatures, non-adjustable bases are installed. Suitable anchor bolts for fastening. Insulation is installed inside. The plywood is attached with self-tapping screws.
Adjustable joists are convenient because by raising or lowering the supports, you can perfectly level the rough foundation.
Holes are pre-drilled in the joists into which stand-up bolts are installed. The beam is set to the required height, and the horizon is controlled using a level. As adjustable supports, you can use a ready-made support or metal studs.
After installing the adjustable supports, the plywood is then secured using the same technology as on non-adjustable joists.
Price
Leveling cost (sq.m):
- for glue from 850 rub. (material 350 rubles, work - 500 rubles);
- on logs from 1200 rub. (material - 550 rubles, work - 650 rubles);
- on adjustable logs - 1450 rub. (material - 600 rubles, work 850 rubles).
Advantages and disadvantages
Advantages of leveling with plywood:
- it is possible to carry out the installation yourself;
- absence of dirt and dust;
- good sound and heat insulation.
Minuses:
- Do not use high humidity;
- in case of non-compliance with technology or the use of low-quality
- plywood may cause creaking and sagging;
- sensitivity to temperature changes;
- differences may occur at the joints.
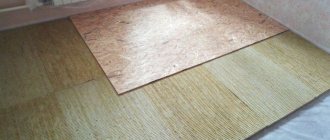
OSB (OSB)
Rice. 4. OSB sheet material for leveling the floor
What you will need
OSB-3 is mainly used for work. This is a durable slab that can withstand loads from furniture, human walking, and equipment. When purchasing material please note:
- are there any swellings along the plane of the product;
- is there a certificate of conformity?
To work you will need:
- perforator;
- screwdriver;
- Sander;
- jigsaw
The standard slab size is 2440*1220 mm. The thickness of the slab when laying on glue should be 10 mm, when using logs - from 18 mm. You need to understand that the larger the step, the thicker the slab is needed.
How to do it
The technology for installing the slab is the same as plywood: with glue and with joists. To attach OSB to the base, only rubber glue is used, and additionally fixed with driven dowels. The joints between the plates are sanded. The table below shows the comparative characteristics of plywood and OSB.
Price
Cost of leveling OSB from 950 rubles/sq.m: from 450 rubles; material, work from 500 rubles.
Advantages and disadvantages
This coating due to the homogeneity of the structure:
- does not deform during operation;
- characterized by high strength characteristics and elasticity of the material;
- has a wider range of applications for finishing: tiles, laminate, carpet, parquet, linoleum.
Minuses:
- cannot be used in high humidity
- Phenol is used in the production of the board (such material must be used with caution, be sure to check the “ECO” or “Green” labeling).
Self-leveling and self-leveling floors
With differences of less than 30 mm, it can be done with self-leveling compounds. They are based on cement or gypsum with fine filler and special additives. Depending on the additives, they are distinguished: polyurethane, epoxy, cement-acrylic, epoxy-polyurethane. Self-leveling screed is performed when:
- a flat, smooth surface is required;
- the concrete base needs to be protected from dust;
- finishing coating - thin linoleum or quartz vinyl.
What you will need
Rice.
5. Self-leveling mixtures for concrete floors Self-leveling and self-leveling floors are sold in dry form. When combined with water, a solution is obtained that is distributed over the entire area of the room.
To complete the leveling work you will need:
- large capacity;
- needle roller;
- mixer with whisk for mixing;
- wide spatula;
- roller for applying primer;
- needle shoes for air removal.
How to do it
Technology of filling with self-leveling mixtures:
- prime the concrete surface;
- install beacons;
- secure a damper tape around the perimeter;
- prepare the solution, pour it (standard thickness 2-4mm);
- spread the composition with a wide spatula;
- remove air with a needle roller;
- After 40-50 minutes, remove the beacons and fill the voids with solution.
If color pigments are added to the composition, a final coat is not required. When preparing the mixture for leveling a concrete floor, it is necessary to follow the technology. Otherwise, the coating will crack.
Price
Such leveling costs from 2,000 rubles per sq.m. to 9,000 rubles per sq.m. The cost of compositions without color additives starts from 1000 rubles per sq.m.
Advantages and disadvantages
Advantages of surfaces leveled with self-leveling mixtures:
- resistance to temperature changes;
- minimal shrinkage during hardening;
- rapid strength gain;
- Any design solution can be implemented.
Negative qualities:
- difficulty of dismantling;
- impossibility of creating a slope;
- fragility.
Screed
There are two types of screed: wet and semi-dry.
Wet screed
The screed device is regulated by clause 5.1 of SNiP 2.03.13-88 dated 01/01/1989. If all conditions are met, the finished coating will not shrink, will be strong, free of voids and durable. But finishing begins after gaining strength - at least after 21 days. It is used as tiles, self-leveling floors, linoleum, laminate, and parquet.
What you will need
Material for mortar: sand, cement and water. To prepare it (grade 200), you need to mix 1 part M400 cement and 2.5 parts sand. When independently preparing a solution of the desired brand, it is necessary to strictly observe the proportions of these components.
The amount of water depends on the moisture content of the sand, but on average 170 liters are needed per 1m3. If the proportions are not observed, shrinkage cracks and voids may appear after drying. To increase the strength and plasticity of the solution, various plasticizers and fiberglass are used.
Now a ready-made mixture for leveling concrete floors is sold on the market. In the factory-prepared dry mixture, the proportions of all components are strictly maintained. The cost of such mixtures is from 130 rubles per 25 kg. They are used for screeds with a layer thickness of 5 to 50 mm. Manufactured for use in dry and damp areas. Ready-mix concrete is easy to use. To prepare the solution, only water is added.
Interested in learning more about ready-mix concrete with expanded polystyrene for leveling various surfaces? Read our article “Polystyrene concrete screed”.
Tools you will also need:
- capacity;
- hydraulic level;
- rule;
- hand mixer.
To thoroughly mix the solution, use a concrete mixer instead of a hand mixer. For volumes of 5 m3 or more, you can order delivery of the solution from the concrete plant.
How to do it
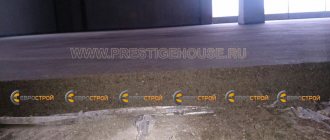
Rice.
6. Leveling using the wet screed method - distributing the solution over the beacons. For leveling you need:
- set the level;
- prime the surface to improve adhesion;
- if necessary, perform waterproofing and thermal insulation of the base;
- install the beacons at the level and firmly fasten them to the floor;
- dilute the solution or deliver it from the concrete site and fill it along the beacons;
- using the rule, distribute the material between the beacons.
Filling is carried out within one day throughout the entire room.
For the strength of the coating, mesh reinforcement is performed in the lower third of the thickness. If the layer is 3-4 cm, then reinforcement is not required. When the layer is more than 8 cm, fine crushed stone is used as filler.
Price
The cost of a wet screed will be at least 640 rubles per sq.m and above: work from 320 rubles, material from 320 rubles. The cost of reinforcement is 250 rubles, labor from 100 rubles, material – from 150 rubles. The cost of waterproofing is from 300 rubles: work – from 100 rubles, material – from 200 rubles. The cost of filling expanded clay is 400 rubles, labor - from 100 rubles, material - from 300 rubles.
Advantages and disadvantages
Positive properties of wet screed:
- the ability to do it yourself;
- a minimum set of tools for work;
- possibility of laying communications in concrete.
The disadvantages of wet screed include:
- long period of setting and strength gain;
- heavy weight;
- a lot of excess fluid;
- a large amount of dirt, dust;
- labor intensity of work;
- shrinkage.
Semi-dry screed
The classic cement-sand mixture is the basis of a semi-dry screed solution. Fiber fiber (a special polymer composition) is added to it to reduce the proportions of water, which makes it semi-dry. It is suitable for leveling cast-in-place concrete, industrial reinforced concrete slab, basic cement screed before laying tiles/carpet/laminate and any other finishing.
What you will need
The solution for semi-dry screed is prepared in exactly the same way as for wet screed (you need to mix 1 part M400 cement and 2.5 parts sand), only 120 liters of water are added per 1 m3. The tools you will need are a pneumatic blower, a grinder, and a rule.
Rice. 7. The cost of a pneumatic blower is from 800,000 rubles, and the price of a grinding machine is from 48,000 rubles.
How to do it
The semi-dry screed solution is prepared in a pneumatic blower. Cement, sand, water are mixed. To increase the strength and ductility of the screed, fiber fiber and plasticizers are added to the solution. The finished solution is supplied through hoses to the work site.
When installing a semi-dry screed, it is recommended to provide additional insulation with rigid heat-insulating materials. After all preparations for leveling have been completed, the solution is supplied. As a rule, the mixture is evenly distributed among the beacons. The next stage of semi-dry mechanized screed is grinding.
To prevent cracking, expansion joints are cut. To walk on semi-dry screed, builders use special shoes. Finishing can begin 4 days after pouring. Any finish can be laid on the finished base: tiles, laminate, parquet or even self-leveling floors.
Price
The cost of semi-dry screed is from 350 rubles per sq.m. for materials, from 550 rubles per sq.m. when ordering a service, from - 750 rubles per sq.m. when working independently and renting equipment.
Advantages and disadvantages
Advantages of this floor:
- high speed of work (workers can fill up to 250 sq.m of floor per shift);
- a small amount of water in the solution eliminates surface porosity and the formation of voids;
- uniform distribution of loads due to rapid hardening of the screed;
- resistance to mechanical stress;
- smooth surface that does not require additional processing;
- dries quickly and is not afraid of moisture;
- within the same room you can perform screeds of different levels and different geometries.
The disadvantages of this alignment method include:
- high cost of equipment;
- the difficulty of carrying out work on your own.
You can read more about all types of screeds in this article.
Leveling the floor with glue
This method is used for:
- strengthening the subfloor, which has small potholes, cracks, and peelings;
- editing the screed after removing the beacons;
- dust removal of the base;
- elimination of irregularities up to 5 mm.
The surface is leveled with glue first, before laying the tiles or directly during cladding with porcelain stoneware (only for floor unevenness up to 4 mm). This leveling method does not require complex tools and mechanisms.
Material and tools
Rice.
8. Leveling the floor with glue To carry out the work you need:
- tile adhesive;
- large capacity;
- mixer with attachment;
- Master OK;
- The rules are long and short.
How to do it
Before starting work with adhesives:
- all irregularities are cleaned off with a spatula or a hand grinder;
- the base is primed;
- The highest point is determined with a 2-meter rod.
Next, the adhesive composition is mixed, the consistency is more liquid than for laying tiles. The solution is poured and distributed over the floor using a rule. This is the first layer. After drying, a second layer is applied perpendicular to the first.
Price
The cost of leveling with glue is from 750 rubles per sq.m.
Advantages and disadvantages
The advantages of this method include:
- ease of work;
- speed, no need to wait for the soil to dry;
- strength;
- durability;
- no shrinkage.
The disadvantages include the ability to correct unevenness only up to 5 mm.
Epoxy look
It allows you to achieve masterpiece design results. Its advantages:
- Resistance to mechanical damage.
- Easy to clean.
- Transparency. You can arrange a composition under such a floor, then fill everything with the composition. Details on how to fill such a liquid floor in this video:
A must read
What floor to install in an apartment Warm floor in an apartment: a modern choice How to change floors in Khrushchev, Stalin, Brezhnevka
Leveling the solution
- When all differences have been eliminated on the base (rough foundation), measures must be taken to ensure that the future screed does not crack. This can be done quite simply - install beacons. Once they are installed, give them time to dry.
- Next, knead the solution, pour the prepared mixture onto the floor, and level it using a trowel. The rule will help you pull off the leftovers. The main thing is that the solution has the correct consistency. Under no circumstances should it be liquid. If it is thick, then it will definitely not sag during drying. However, the solution should not be too thick either. In this case, simply moisten the top layer with water. When leveling the screed yourself, move back and forth. The opposite is the sharp side of the rule. The formation of a screed four to six centimeters thick occurs in this way.
The thin screed should fit tightly to the base. In this case, you should not skimp on the tile mixture. To make the solution stronger, it must be mixed with PVA emulsion or tile mixture. The larger the screed layer, the more mixture you will need. If the layer of mortar should be very thin, then PolaRemont.ru recommends using one tile mixture. We recommend reading the article on preparing the subfloor for screed.